Windows Phone 7 app: Adding “portrait”/“landscape” modes to Chronometer
This one is a short update to the Windows 7 Phone application that I have been building and blogging about – you can find the starting of the series here.
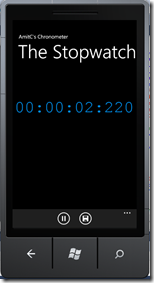
The application that we have built, so far, does not respond to flipping the phone on to it’s side. For example, below are two views of the phone held upright and on its side respectively
While this behavior may be fine for some applications, for our application, the display is hard to read when the phone is turned on its side, and I would really like the display to always be “upright” irrespective of whether the phone is held upright or flipped on it side.
This is easy to do!
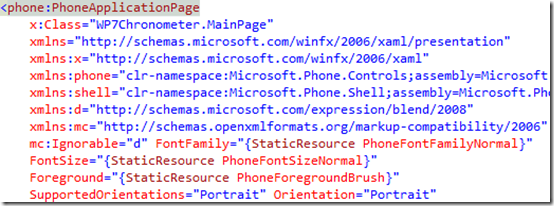
You can find the default settings for the “orientation” for the application in the default XAML file for the application. I am including below this part of the XAML for the PhoneApplication page
Notice the last line above. It essentially says that the “Orientation” to start with will be in “Portrait” mode, and the “Supported Orientation” is also “Portrait” only. It is this setting which is making the application behave as shown above.
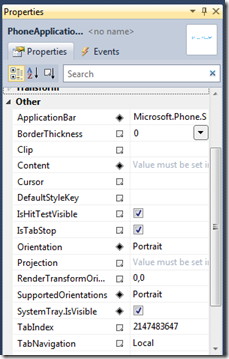
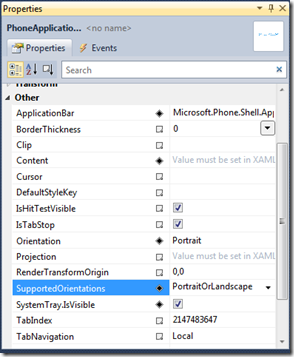
You can also notice this setting in the properties window for the PhoneApplicationPage object – see this in the image on the left below – notice the values of the “Orientation” and “SupportedOrientations” properties. To support both portrait and landscape orientations, all you need to do is change the value of the “SupportedOrientations” property to “PortraitOrLandscape” – see the image on the right below.
As you change the above property, note that the XAML file automatically changed to reflect the change.
That’s all!
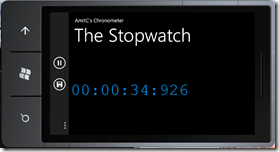
We can now build the application, run it, and we can now see the following results when the phone is flipped on its side.
Notice, how the button icons in the application bar also change to match the corresponding orientation.
I should also call out that, you can just as well change these properties in the code. For example, you can achieve the same result by leaving the default properties (and hence the XAML) unchanged, but add the following line in the code behind file, during application initialization.
This of course gives you full flexibility in controlling this property however you want to!
That’s all for this night! I have a few other things to add to this application, related to the “Save” button I have introduced but haven’t coded to. This will allow me to play with a few more controls and also experiment with how data/state can be persisted across sessions of the application. I hope to get to those soon.
Cheers!
Comments
- Anonymous
October 16, 2011
The comment has been removed
