How to use managed identities with Azure services to connect to Azure Cosmos DB for NoSQL
APPLIES TO: ![]() NoSQL
NoSQL

Diagram of the sequence of the deployment guide including these locations, in order: Overview, Concepts, Prepare, Role-based access control, Network, and Reference. The 'Prepare' location is currently highlighted.
This article reviews the steps required to create managed identities to use with a deployed application connected to Azure Cosmos DB for NoSQL.
Managed identities are one of many types of identity resources in Microsoft Entra ID for applications to use when connecting to services that support Microsoft Entra authentication. Managed identities can be used in lieu of traditional resource-owned credentials like keys. In Azure, managed identities provide a way for your applications to obtain a Microsoft Entra token to authenticate to Azure services without you needing to write a large amount of authentication code.
You can use Microsoft Entra to authenticate to Azure services including, but not limited to:
- Azure SQL
- Azure AI
- Azure Cosmos DB
- Azure Storage
- Azure Event Hubs
- Azure Container Registry
You can use managed identities to represent the principal that authenticates to an Azure service from other Azure services including, but not limited to:
- Azure Kubernetes Service
- Azure Container Apps
- Azure Virtual Machines
- Azure Functions
- Azure App Service
- Azure Spring Apps
- Azure Service Fabric
Managed identities enable multiple secure scenarios where various Azure services can connect to each other. Some examples include:
- Creating a system-assigned managed identity for an application in Azure Spring Apps to connect to and query an Azure SQL account
- Using a single user-assigned managed identity with both Azure Kubernetes Service and Azure Functions to issue requests to an Azure AI account
- Using a managed identity for an Azure Cosmos DB account to store keys in Azure Key Vault
For more information, see managed identities for Azure resources.
Prerequisites
- An Azure account with an active subscription. Create an account for free.
Use the Bash environment in Azure Cloud Shell. For more information, see Quickstart for Bash in Azure Cloud Shell.

If you prefer to run CLI reference commands locally, install the Azure CLI. If you're running on Windows or macOS, consider running Azure CLI in a Docker container. For more information, see How to run the Azure CLI in a Docker container.
If you're using a local installation, sign in to the Azure CLI by using the az login command. To finish the authentication process, follow the steps displayed in your terminal. For other sign-in options, see Sign in with the Azure CLI.
When you're prompted, install the Azure CLI extension on first use. For more information about extensions, see Use extensions with the Azure CLI.
Run az version to find the version and dependent libraries that are installed. To upgrade to the latest version, run az upgrade.
- If you choose to use Azure PowerShell locally:
- Install the latest version of the Az PowerShell module.
- Connect to your Azure account using the Connect-AzAccount cmdlet.
- If you choose to use Azure Cloud Shell:
- See Overview of Azure Cloud Shell for more information.
Create an Azure service with a system-assigned managed identity
Create a new Azure service with a system-assigned managed identity. This section creates an Azure Container Instances resource.
Use
az container createto create a new container instance. Configure the account to use a system-assigned managed identity by using theassign-identityparameter.az container create \ --resource-group "<name-of-existing-resource-group>" \ --name "<name-of-new-container>" \ --image mcr.microsoft.com/dotnet/samples:aspnetapp-chiseled \ --cpu 1 \ --memory 2 \ --assign-identityGet the details for the system-assigned managed identity using
az container showand a JMESPath query.az container show \ --resource-group "<name-of-existing-resource-group>" \ --name "<name-of-existing-container>" \ --query "identity"Review the output from the command. It should include the unique identifiers for the identity and tenant.
{
  "principalId": "bbbbbbbb-1111-2222-3333-cccccccccccc",
  "tenantId": "aaaabbbb-0000-cccc-1111-dddd2222eeee",
  "type": "SystemAssigned",
  "userAssignedIdentities": null
}
Create a new Bicep file to define a new container instance. Name the file container-instance.bicep. Set these properties for the container instance:
Value nameUse a parameter named instanceNamelocationSet to resource group's location identity.typeSystemAssignedproperties.osTypeLinuxproperties.containers[0].nameaspnet-sampleproperties.containers[0].properties.imagemcr.microsoft.com/dotnet/samples:aspnetapp-chiseledproperties.containers[0].properties.resources.requests.cpu1properties.containers[0].properties.resources.requests.memoryInGB2metadata description = 'Create Azure Container Instance resource with system-assigned managed identity.' @description('Name of the Azure Container Instances resource.') param instanceName string resource instance 'Microsoft.ContainerInstance/containerGroups@2023-05-01' = { name: instanceName location: resourceGroup().location identity: { type: 'SystemAssigned' } properties: { osType: 'Linux' containers: [ { name: 'aspnet-sample' properties: { image: 'mcr.microsoft.com/dotnet/samples:aspnetapp-chiseled' resources: { requests: { cpu: 1 memoryInGB: 2 } } } } ] } } output systemAssignedIdentity object = instance.identityCreate a new Bicep parameters file named container-instance.
bicepparam. In this parameters file, create a unique name for your container instance using theinstanceNameparameter.using './container-instance.bicep' param instanceName = '<name-of-new-container-instance>'Deploy the Bicep template using
az deployment group create. Specify the name of the Bicep template, parameters file, and Azure resource group.az deployment group create \ --resource-group "<name-of-existing-resource-group>" \ --parameters "container-instance.bicepparam" \ --template-file "container-instance.bicep"Review the output from the deployment. The output contains the identity object from the container instance in the
properties.outputs.systemAssignedIdentity.valueproperty.{ "principalId": "bbbbbbbb-1111-2222-3333-cccccccccccc", "tenantId": "aaaabbbb-0000-cccc-1111-dddd2222eeee", "type": "SystemAssigned" }
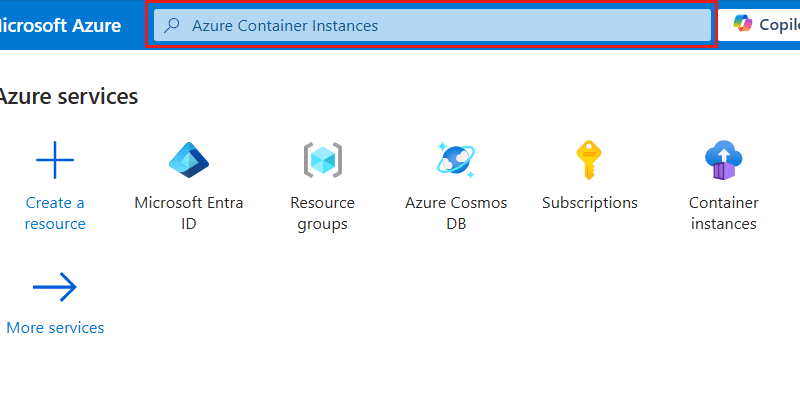
Sign in to the Azure portal (https://portal.azure.com).
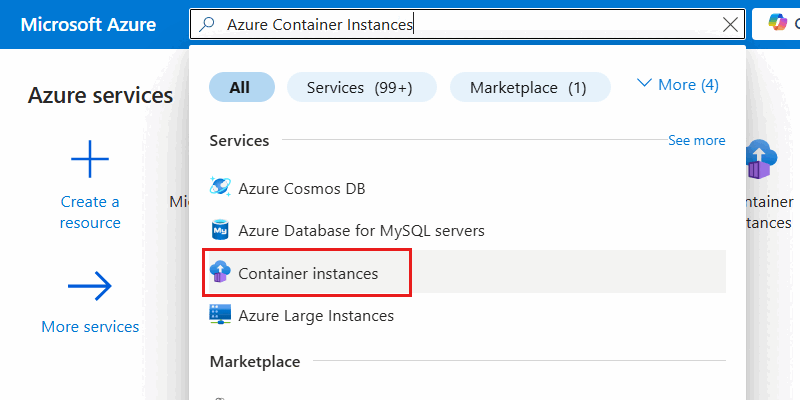
Enter Azure Container Instances in the global search bar.
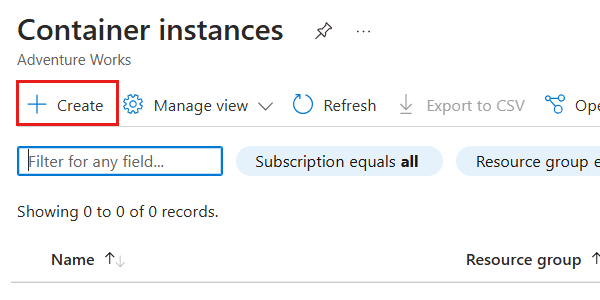
Within Services, select Container instances.
In the Container instances pane, select Create.
Within the Basics pane, configure the following options, and then select Review + create:
Value Subscription Select your Azure subscription Resource Group Create a new resource group or select an existing resource group Container name Provide a globally unique name Region Select a supported Azure region for your subscription 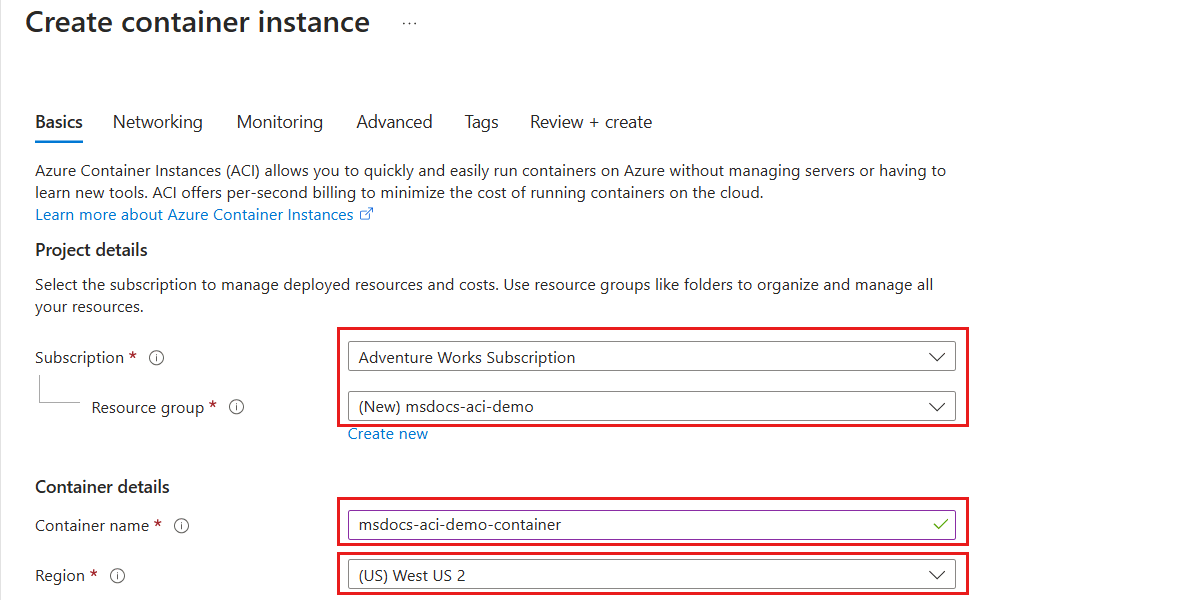
Tip
You can leave any unspecified options to their default values.
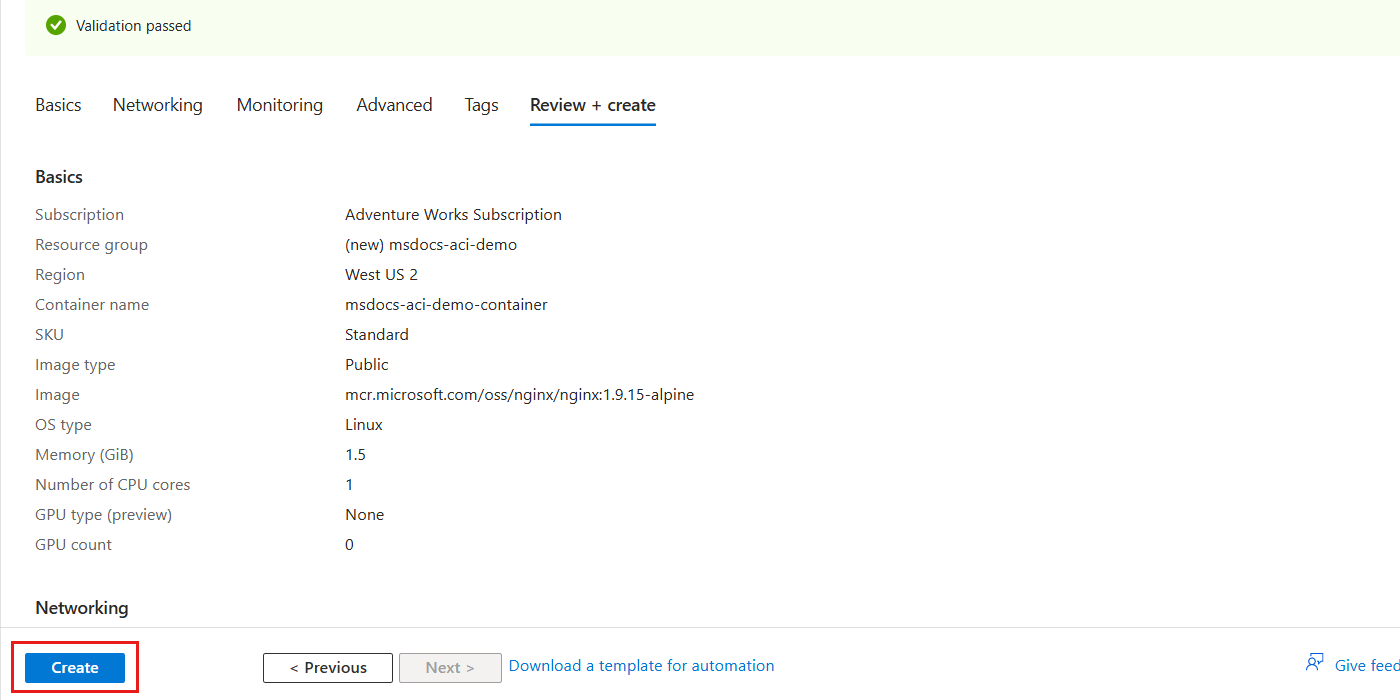
On the Review + create pane, wait for validation of your account to finish successfully, and then select Create.
The portal automatically navigates to the Deployment pane. Wait for the deployment to complete.
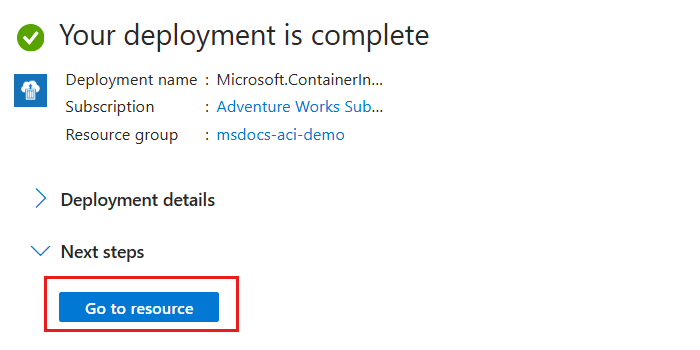
Once the deployment is complete, select Go to resource to navigate to the new Azure Container Instances resource.
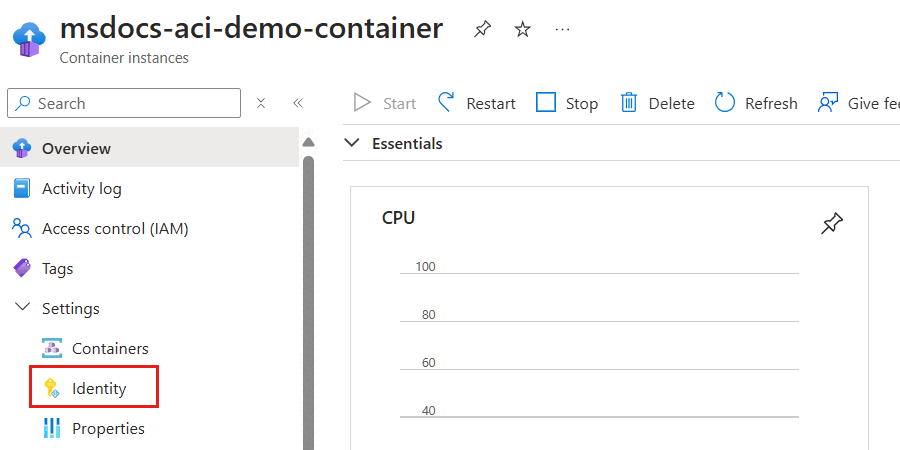
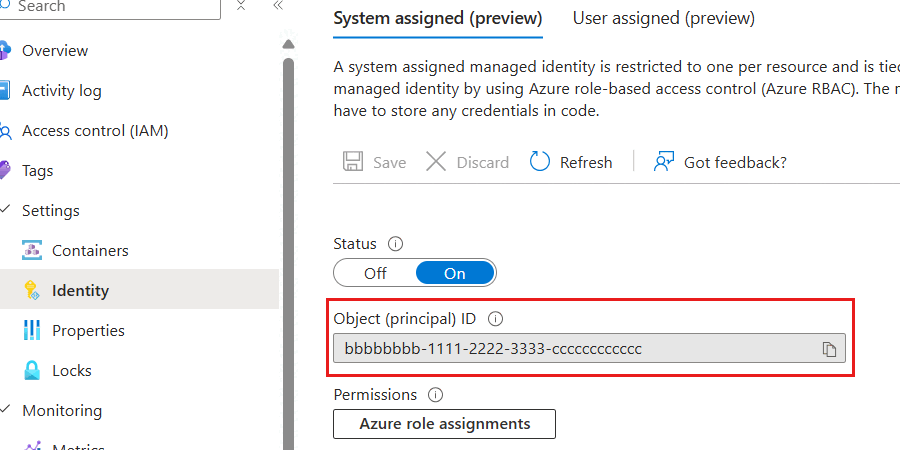
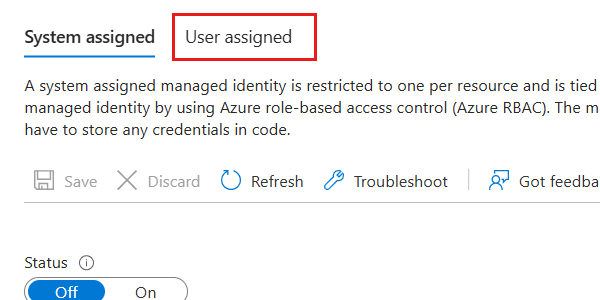
Within the pane for the new container instance, select Identity inside the Settings section of the service menu.
In the Identity pane, enable the system-assigned managed identity by setting the Status option to On. Then, select Save and resolve any prompts to commit the change.
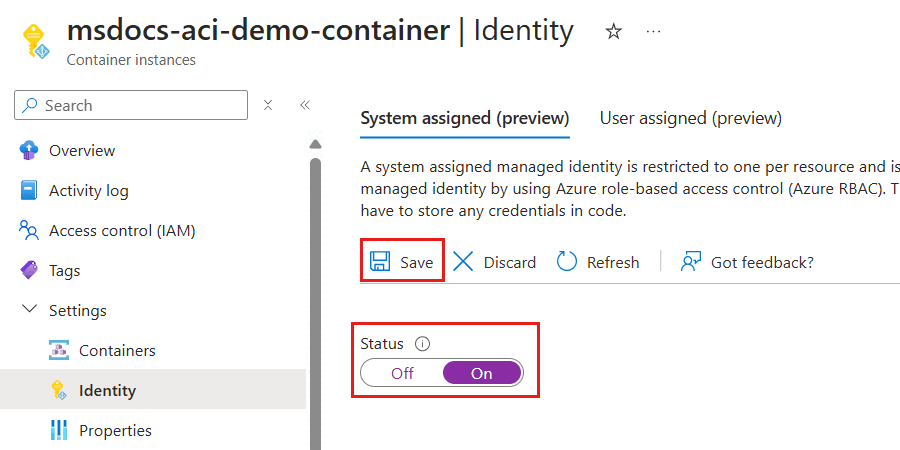
Once the system-assigned managed identity is ready, review the value of the Object (principal) ID property. This property's value is the unique identifier for the identity.
Tip
In this example screenshot, the unique identifier for the system-assigned managed identity is
bbbbbbbb-1111-2222-3333-cccccccccccc.

Create an object representing a container using
New-AzContainerInstanceObjectand store it in a variable named$container. Then, use that container object to create a new container instance withNew-AzContainerGroup. Configure the account to use a system-assigned managed identity by setting theIdentityTypeparameter toSystemAssigned.$parameters = @{ Name = "aspnet-sample" Image = "mcr.microsoft.com/dotnet/samples:aspnetapp-chiseled" RequestCpu = 1 RequestMemoryInGb = 2 } $container = New-AzContainerInstanceObject @parameters $parameters = @{ ResourceGroupName = "<name-of-existing-resource-group>" Name = "<name-of-new-container>" Container = $container OsType = "Linux" Location = "<azure-region>" IdentityType = "SystemAssigned" } New-AzContainerGroup @parametersGet the details for the system-assigned managed identity using
Get-AzContainerGroupandFormat-Listselecting only theIdentityproperty.$parameters = @{ ResourceGroupName = "<name-of-existing-resource-group>" Name = "<name-of-existing-container>" } Get-AzContainerGroup @parameters | Format-List IdentityReview the output from the command. It should include the unique identifiers for the identity and tenant.
Identity : {
             "principalId": "bbbbbbbb-1111-2222-3333-cccccccccccc",
             "tenantId": "aaaabbbb-0000-cccc-1111-dddd2222eeee",
             "type": "SystemAssigned"
           }
Create a user-assigned managed identity
Create a user-assigned managed identity that can be used with one or more Azure services in a portable manner.
Use
az identity createto create a new user-assigned managed identity in your Azure resource group.az identity create \ --resource-group "<name-of-existing-resource-group>" \ --name "<name-of-new-managed-identity>"Get the list of user-assigned managed identities in your resource group using
az identity listaz identity list \ --resource-group "<name-of-existing-resource-group>"Review the output from the command. Record the value of the
idfield as this fully qualified resource identifier is used to assign the user-assigned managed identity to your Azure resource.{ "clientId": "11112222-bbbb-3333-cccc-4444dddd5555", "id": "/subscriptions/aaaa0a0a-bb1b-cc2c-dd3d-eeeeee4e4e4e/resourcegroups/msdocs-identity-example/providers/Microsoft.ManagedIdentity/userAssignedIdentities/msdocs-identity-example-user-assigned", "location": "<azure-location>", "name": "msdocs-identity-example-user-assigned", "principalId": "cccccccc-dddd-eeee-3333-444444444444", "resourceGroup": "msdocs-identity-example", "systemData": null, "tags": {}, "tenantId": "aaaabbbb-0000-cccc-1111-dddd2222eeee", "type": "Microsoft.ManagedIdentity/userAssignedIdentities" }Note
In this example, the
idvalue would be/subscriptions/aaaa0a0a-bb1b-cc2c-dd3d-eeeeee4e4e4e/resourcegroups/msdocs-identity-example/providers/Microsoft.ManagedIdentity/userAssignedIdentities/msdocs-identity-example-user-assigned. This example uses fictitious data and your identifier would be distinct from this example.
Create a Bicep file to define a user-assigned managed identity and name the file user-assigned-managed-identity.bicep. Set these minimal properties:
Value nameUse an optional parameter named identityNameand generate a unique default valuelocationSet to resource group's location metadata description = 'Create a user-assigned managed identity.' param identityName string = uniqueString(subscription().id, resourceGroup().id) resource identity 'Microsoft.ManagedIdentity/userAssignedIdentities@2023-01-31' = { name: identityName location: resourceGroup().location } output id string = identity.id output name string = identity.nameDeploy the Bicep template using
az deployment group create. Specify the name of the Bicep template and Azure resource group.az deployment group create \ --resource-group "<name-of-existing-resource-group>" \ --template-file "user-assigned-managed-identity.bicep"Review the output from the deployment. The output contains the unique identifier of the managed identity in the
properties.outputs.name.valueproperty. Record this value as it is required to use when creating a new Azure resource later in this guide.{ "type": "String", "value": "msdocs-identity-example-user-assigned" }Note
In this example, the
name.valuewould bemsdocs-identity-example-user-assigned. This example uses fictitious data and your identifier would be distinct from this example.
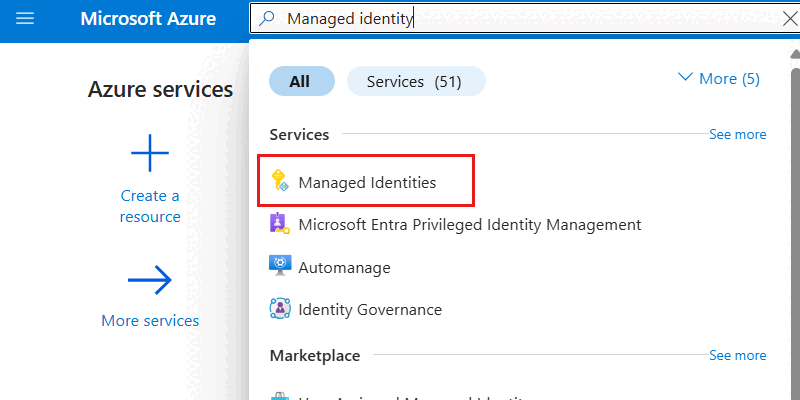
Enter Managed identity in the global search bar.
Within Services, select Managed identities.
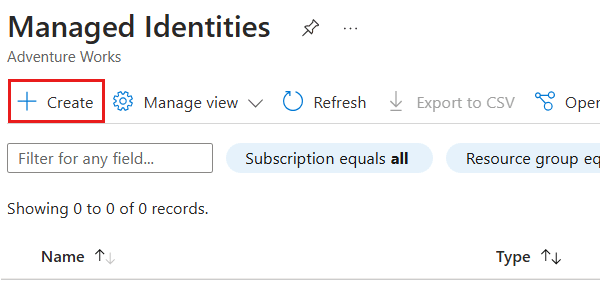
In the Container instances pane, select Create.
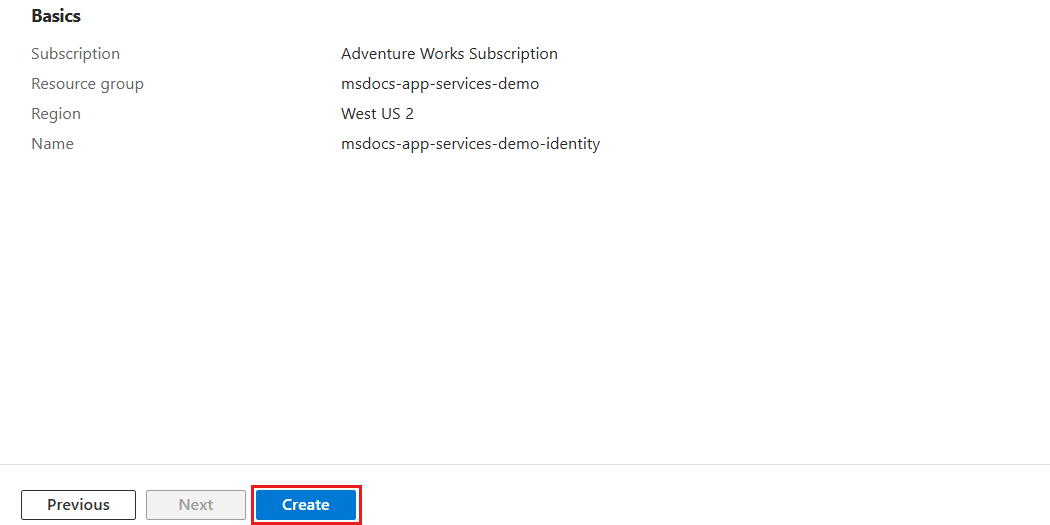
Within the Basics pane, configure the following options, and then select Review + create:
Value Subscription Select your Azure subscription Resource Group Create a new resource group or select an existing resource group Region Select a supported Azure region for your subscription Name Provide a globally unique name 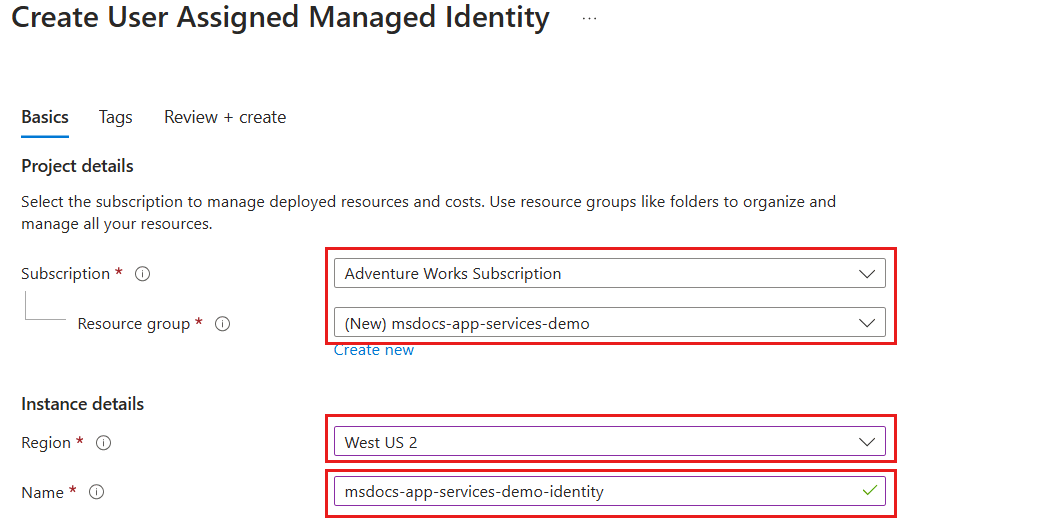
On the Review + create pane, wait for validation of your account to finish successfully, and then select Create.
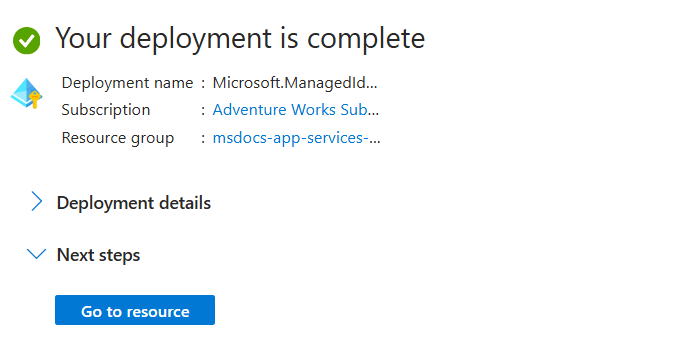
The portal automatically navigates to the Deployment pane. Wait for the deployment to complete.
Wait for the deployment of the managed identity to complete.
Create a new user-assigned managed identity using
New-AzUserAssignedIdentityin your Azure resource group.$parameters = @{ ResourceGroupName = "<name-of-existing-resource-group>" Name = "<name-of-new-managed-identity>" Location = "<azure-region>" } New-AzUserAssignedIdentity @parametersUse
Get-AzUserAssignedIdentityto get a list of user-assigned managed identities in your resource group.$parameters = @{ ResourceGroupName = "<name-of-existing-resource-group>" } Get-AzUserAssignedIdentity @parameters | Format-List Name, IdReview the output from the command. Record the value of the
Idfield as this fully qualified resource identifier is used to assign the user-assigned managed identity to your Azure resource.Name : msdocs-identity-example-user-assigned Id : /subscriptions/aaaa0a0a-bb1b-cc2c-dd3d-eeeeee4e4e4e/resourcegroups/msdocs-identity-example/providers/Microsoft.ManagedIdentity/userAssignedIdentities/msdocs-identity-example-user-assignedNote
In this example, the
Idvalue would be/subscriptions/aaaa0a0a-bb1b-cc2c-dd3d-eeeeee4e4e4e/resourcegroups/msdocs-identity-example/providers/Microsoft.ManagedIdentity/userAssignedIdentities/msdocs-identity-example-user-assigned. This example uses fictitious data and your identifier would be distinct from this example.
Create an Azure service with a user-assigned managed identity
Assign the previously created user-assigned managed identity to a new Azure host service. This section creates an Azure App Services web app resource.
Create a new app service plan using
az appservice plan create.az appservice plan create \ --resource-group "<name-of-existing-resource-group>" \ --name "<name-of-new-plan>"Assign the user-assigned managed identity to a new web app with
az webapp create. Use theidfield recorded earlier in this guide as the value of thessign-identityparameter.az webapp create \ --resource-group "<name-of-existing-resource-group>" \ --name "<name-of-existing-web-app>" \ --plan "<name-of-existing-plan>" \ --assign-identity "<resource-id-recorded-earlier>"Get the details for all identities assigned to this account using
az webapp showand a JMESPath query.az webapp show \ --resource-group "<name-of-existing-resource-group>" \ --name "<name-of-existing-account>" \ --query "identity"Review the output from the command. It should include both the user-assigned managed identity.
{
  "principalId": null,
  "tenantId": null,
  "type": "UserAssigned",
  "userAssignedIdentities": {
    "/subscriptions/aaaa0a0a-bb1b-cc2c-dd3d-eeeeee4e4e4e/resourcegroups/msdocs-identity-example/providers/Microsoft.ManagedIdentity/userAssignedIdentities/msdocs-identity-example-user-assigned": {
      "clientId": "11112222-bbbb-3333-cccc-4444dddd5555",
      "principalId": "cccccccc-dddd-eeee-3333-444444444444"
    }
  }
}
Create another Bicep file named app-service-web-app.bicep and define an Azure App Service plan and web app. Set these properties for those resources:
Resource Value nameExisting managed identity Use a parameter named identityNamenameApp service plan Use a parameter named planNamelocationApp service plan Set to resource group's location nameWeb app Use a parameter named webAppNamelocationWeb app Set to resource group's location identity.typeUserAssignedidentity.userAssignedIdentities.{identity.id}{}properties.serverFarmIdplan.idmetadata description = 'Creates an Azure App Service plan and web app with a user-assigned managed identity.' @description('The name of the app service plan.') param planName string @description('The name of the web app.') param webAppName string @description('The name of the user-assigned managed identity.') param identityName string resource identity 'Microsoft.ManagedIdentity/userAssignedIdentities@2023-01-31' existing = { name: identityName } resource plan 'Microsoft.Web/serverfarms@2023-12-01' = { name: planName location: resourceGroup().location } resource webApp 'Microsoft.Web/sites@2023-12-01' = { name: webAppName location: resourceGroup().location identity: { type: 'UserAssigned' userAssignedIdentities: { '${identity.id}': {} } } properties: { serverFarmId: plan.id } } output userAssignedIdentity object = webApp.identityCreate a Bicep parameters file named app-service-web-app.
bicepparam. In this parameters file, create a unique name for your web app and plan using theplanNameandwebAppNameparameters respectively. Then, provide the name of the user-assigned managed identity as the value of theidentityNameparameter.using './app-service-web-app.bicep' param planName = '<name-of-new-app-service-plan>' param webAppName = '<name-of-new-web-app>' param identityName = '<name-of-existing-managed-identity>'Deploy the Bicep template using
az deployment group create. Specify the name of the Bicep template, parameters file, and Azure resource group.az deployment group create \ --resource-group "<name-of-existing-resource-group>" \ --parameters "app-service-web-app.bicepparam" \ --template-file "app-service-web-app.bicep"Review the output from the deployment. The output contains the identity object from the container instance in the
properties.outputs.userAssignedIdentity.valueproperty.{ "type": "UserAssigned", "userAssignedIdentities": { "/subscriptions/aaaa0a0a-bb1b-cc2c-dd3d-eeeeee4e4e4e/resourcegroups/msdocs-identity-example/providers/Microsoft.ManagedIdentity/userAssignedIdentities/msdocs-identity-example-user-assigned": { "clientId": "11112222-bbbb-3333-cccc-4444dddd5555", "principalId": "cccccccc-dddd-eeee-3333-444444444444" } } }
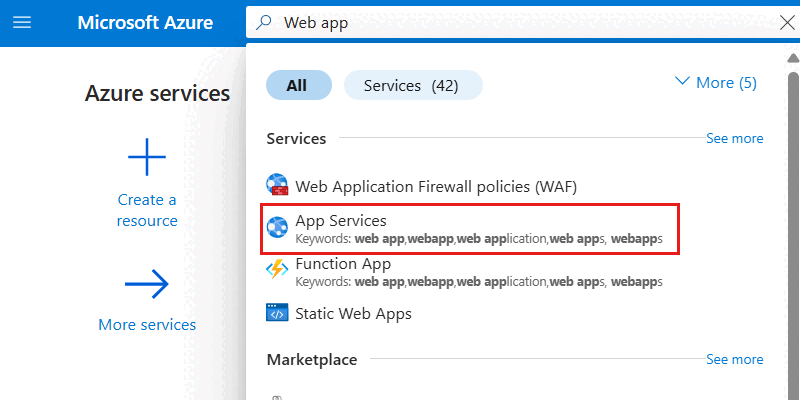
Enter Web app in the global search bar.
Within Services, select App Services.
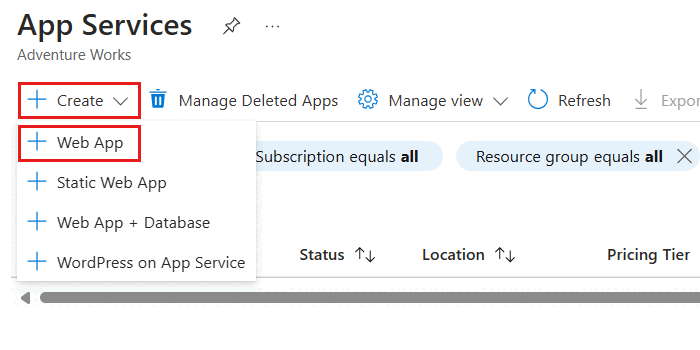
In the App Services pane, select Create, and then Web App.
Within the Basics pane, configure the following options, and then select Review + create:
Value Subscription Select your Azure subscription Resource Group Create a new resource group or select an existing resource group Name Provide a globally unique name Plan Create a new plan or select an existing plan 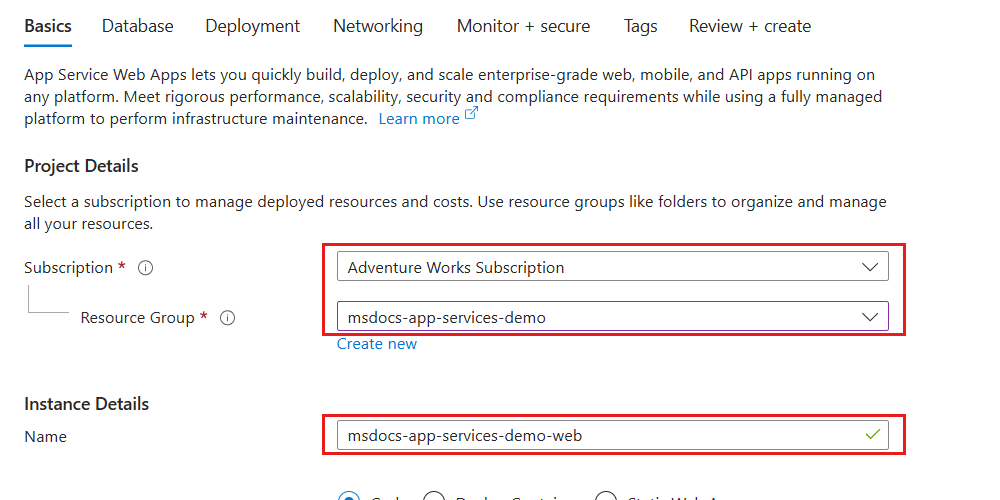
On the Review + create pane, wait for validation of your account to finish successfully, and then select Create.
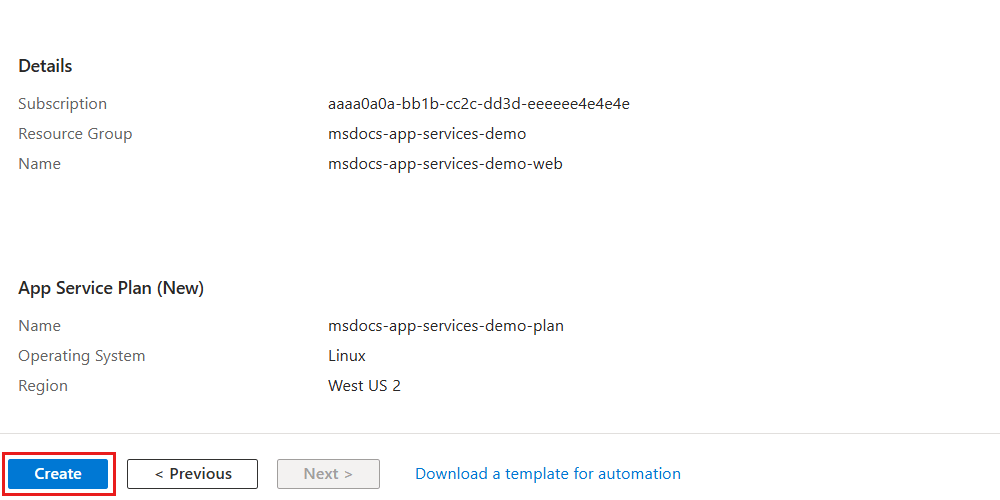
The portal automatically navigates to the Deployment pane. Wait for the deployment to complete.
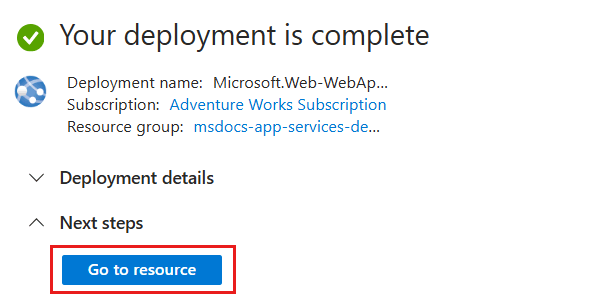
Once the deployment is complete, select Go to resource to navigate to the new Azure Container Instances resource.
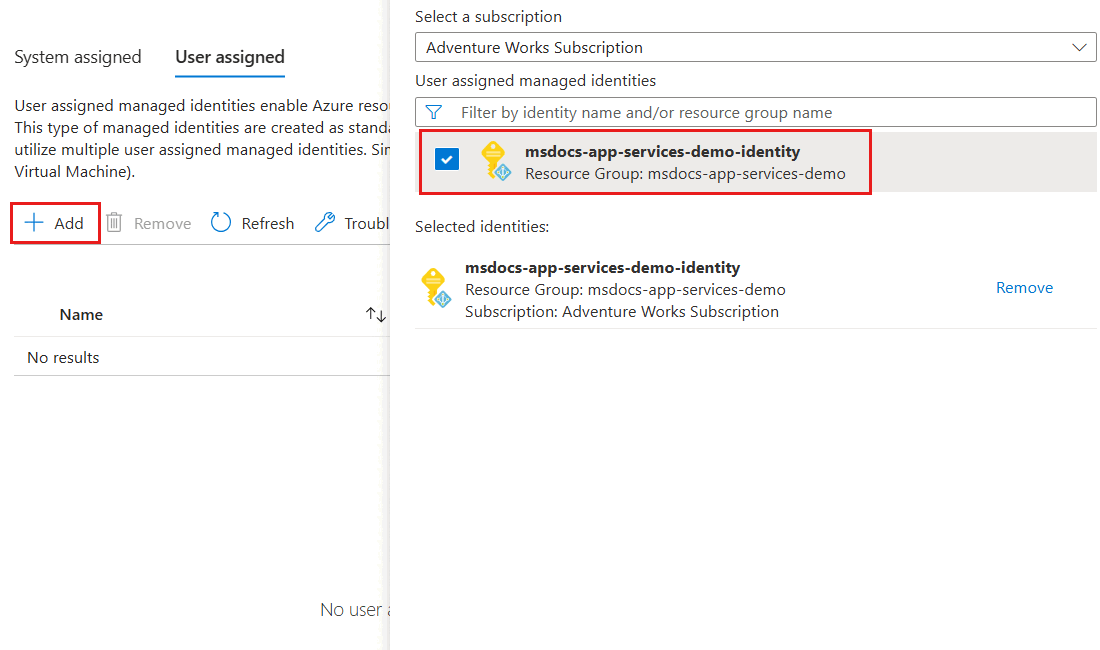
Within the pane for the new container instance, select Identity inside the Settings section of the service menu.
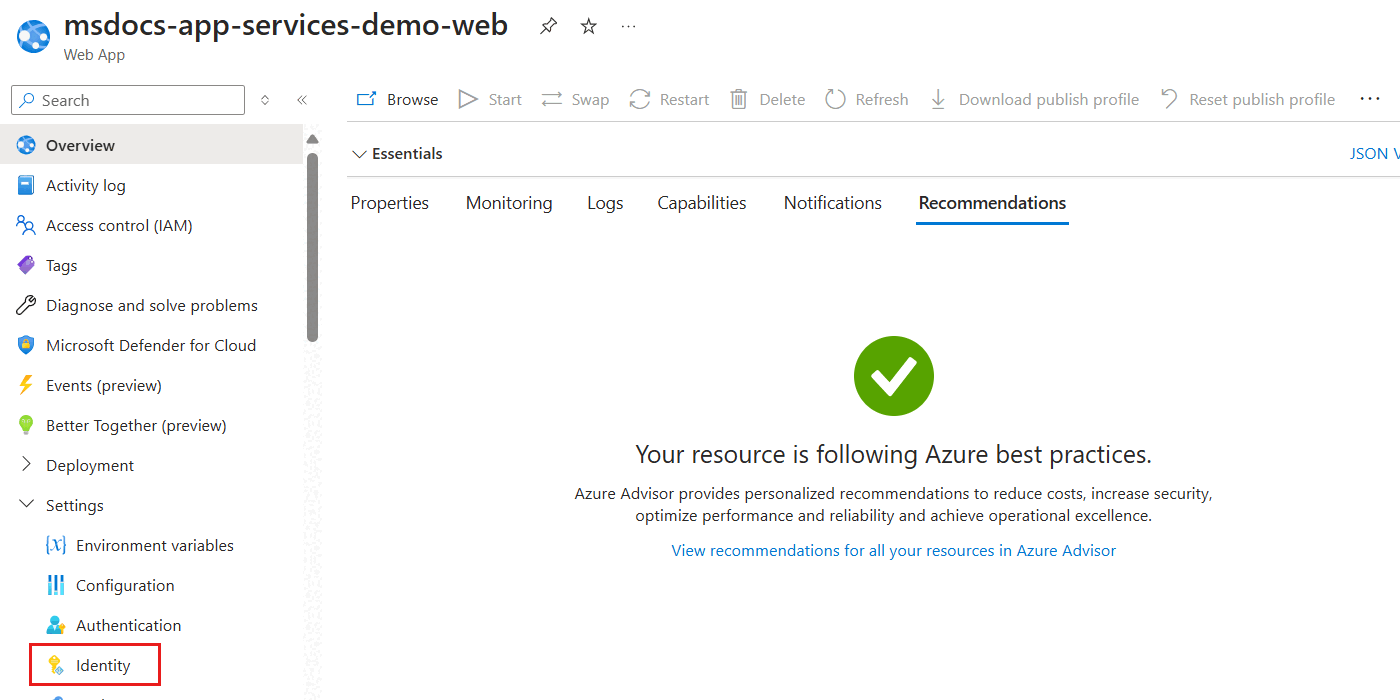
In the Identity pane, select the User assigned option.
Select Add to open a dialog to assign existing user-assigned managed identities. In the dialog, select your existing user-assigned managed identity and then select Add.
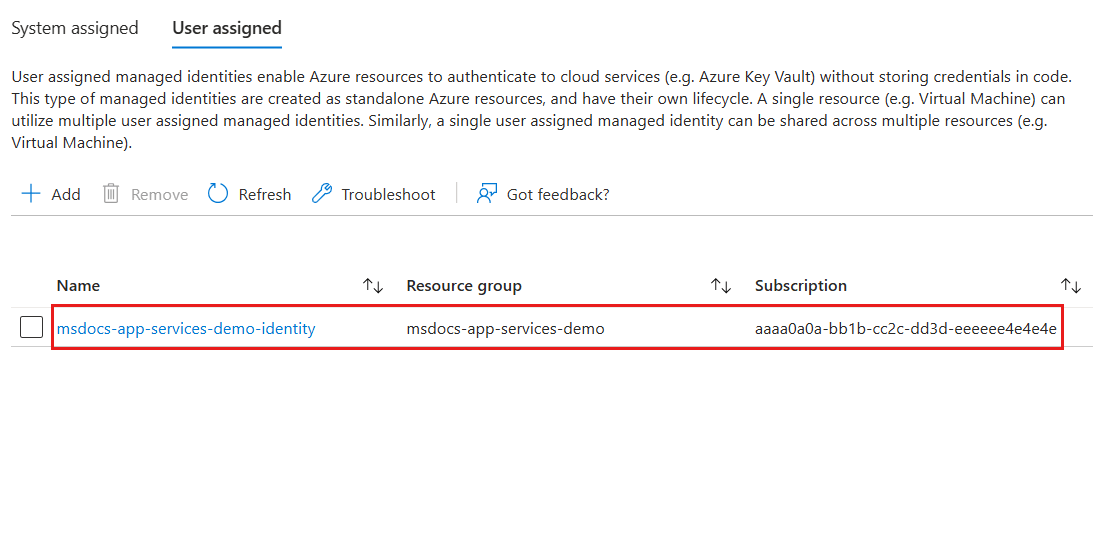
Finally, review the list of user-assigned managed identities associated with your web app. It should include the identity's name, resource group name, and subscription identifier.
Use
New-AzWebAppto create a new Azure App Service web app.$parameters = @{ ResourceGroupName = "<name-of-existing-resource-group>" Name = "<name-of-new-web-app>" Location = "<azure-region>" } New-AzWebApp @parametersPatch the newly created web app to set the
identity.typeproperty toUserAssignedand add your existing user-assigned managed identity to theidentity.userAssignedIdentitiesproperty. To accomplish this task, first provide theidfield recorded earlier in this guide as the value of theidentityIdshell variable. Then, construct a payload object and convert it to JSON. Finally, useInvoke-AzRestMethodwith thePATCHHTTP verb to update the existing web app.$identityId = "<resource-id-recorded-earlier>" $payload = @{ identity = @{ type = "UserAssigned" userAssignedIdentities = @{ "$identityId" = @{} } } } | ConvertTo-Json -Depth 3 $parameters = @{ ResourceGroupName = "<name-of-existing-resource-group>" Name = "<name-of-existing-web-app>" ResourceProviderName = 'Microsoft.Web' ResourceType = 'sites' ApiVersion = '2023-12-01' Method = 'PATCH' Payload = $payload } Invoke-AzRestMethod @parametersGet the details for all identities assigned to the web app using
Get-AzWebApp,Select-Object, andConvertTo-Jsonselecting only theIdentityproperty.$parameters = @{ ResourceGroupName = "<name-of-existing-resource-group>" Name = "<name-of-existing-web-app>" } Get-AzWebApp @parameters | Select-Object Identity | ConvertTo-Json -Depth 3Review the output from the command. It should include the unique identifiers for the identity and tenant.
{
  "Identity": {
    "Type": "UserAssigned",
    "TenantId": null,
    "PrincipalId": null,
    "UserAssignedIdentities": {
      "/subscriptions/aaaa0a0a-bb1b-cc2c-dd3d-eeeeee4e4e4e/resourcegroups/msdocs-identity-example/providers/Microsoft.ManagedIdentity/userAssignedIdentities/msdocs-identity-example-user-assigned": {
        "PrincipalId": "cccccccc-dddd-eeee-3333-444444444444",
        "ClientId": "11112222-bbbb-3333-cccc-4444dddd5555"
      }
    }
  }
}