Learn how to read the line items in your Partner Center reconciliation files
Appropriate roles: Billing admin
Download reconciliation files from Partner Center to view charges for each billing period. Check charges for each customer's subscriptions and events affecting them, like adding licenses mid-term. For invoice details, see Read your bill.
Understand reconciliation file fields
Here are the reconciliation files and what they show:
| Reconciliation file field | Includes |
|---|---|
| Legacy license-based | Costs and quantities of legacy Office and Dynamics products for a billing period |
| Legacy usage-based | Costs and usage of legacy Azure products for a billing period |
| New commerce daily rated usage | Daily usage and charges for new commerce (Azure plan) usage-based products for a billing period |
| New commerce invoice reconciliation | Aggregated costs, quantities, and usage for all new commerce products for a billing period |
Understand charge types in reconciliation data
Learn about the different types of charges in reconciliation data in the ChargeType attribute.
Fix formatting issues
Reconciliation line items might have formatting issues if the en-us locale isn't used.
To address the formatting issues, follow these steps:
- Open the reconciliation file (in .csv format) in Microsoft Excel.
- Select the first column in the file.
- Open the "Convert Text to Columns Wizard".
- Select Data on the ribbon, then select Text to Columns.
- Choose Delimited file type, then select Next.
- Check Comma as the delimiter (if Tab is already selected, you can leave this option selected) then select Next.
- Choose Date:MDY for the column data format, then select Next.
- Select Text for all amount columns, then select Finish.
Download reconciliation files programmatically
Reconciliation files can be large and are sometimes difficult to download from the portal. To download large reconciliation files programmatically, use Get invoice line items.
Where do I download the file asynchronously?
To improve the download experience and boost efficiency, the Partner Center now processes new commerce reconciliation files asynchronously. To download a file:
Sign in to Partner Center and select the Billing workspace.
Go to the Billing overview (NCE) task menu > Billing | Billing Overview (NCE) page and choose the year > select the invoice number > find the reconciliation file on the side panel > select Download report.
Look for a notification at the top of the page indicating that your file is being processed. This file should be available shortly on the Reports (NCE) page, depending on the volume of data.
Monitor your download's progress on the Reports (NCE) page using the status column of the request line item.
Check already downloaded reports before submitting a new request to save time and prevent duplication.
Status meanings:
- Queued: Request submitted
- Processing: Data collection in progress
- Completed: Report ready for download
- Failed: Error in generating the report
- No data found: No relevant data available for the report
If your file exceeds the row limit in Excel
If you can't open your .csv file in Microsoft Excel because it exceeds Excel's row limit, you have these options to open the file:
Open a reconciliation file in Excel Power Query
Download the reconciliation file from Partner Center.
Open a new blank workbook in Microsoft Excel.
Navigate to Data tab, then select Get Data > From File > From Text/CSV, and import the .csv (Comma-Separated Values) reconciliation file.
After a while, you can see a window with the file preview.
In that window, select the Load dropdown menu > Load To.

In the Import Data dialog box, select the options as indicated in the following screenshot.

Select OK to start the loading process. Wait until it's complete.
See the file name and number of rows on the right side. Double-click this area to open the Power Query Editor.
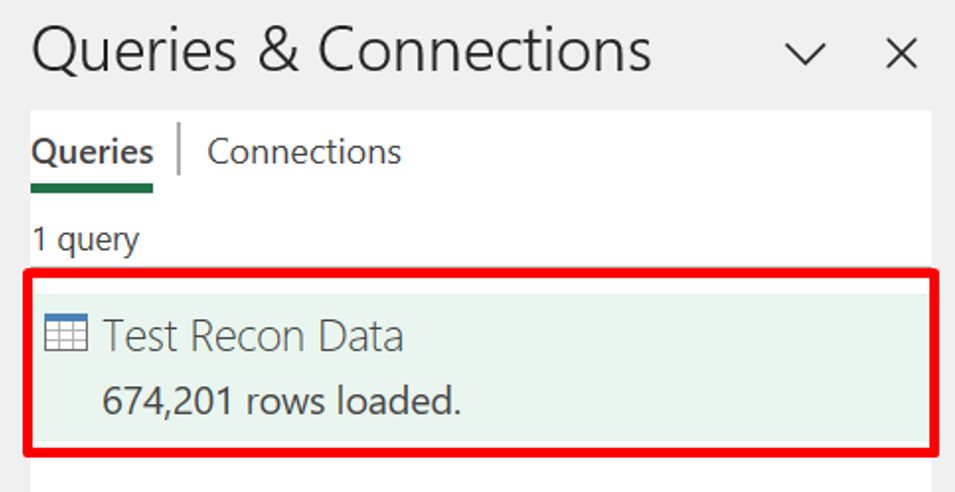
As you scroll down, you see that new rows are added dynamically.
Tip
Fix data loading problems caused by line breaks:
- Go to the "Advanced Editor" under "Home" tab.
- Find the Csv.Document function.
- Update the "QuoteStyle" value to "QuoteStyle.csv."
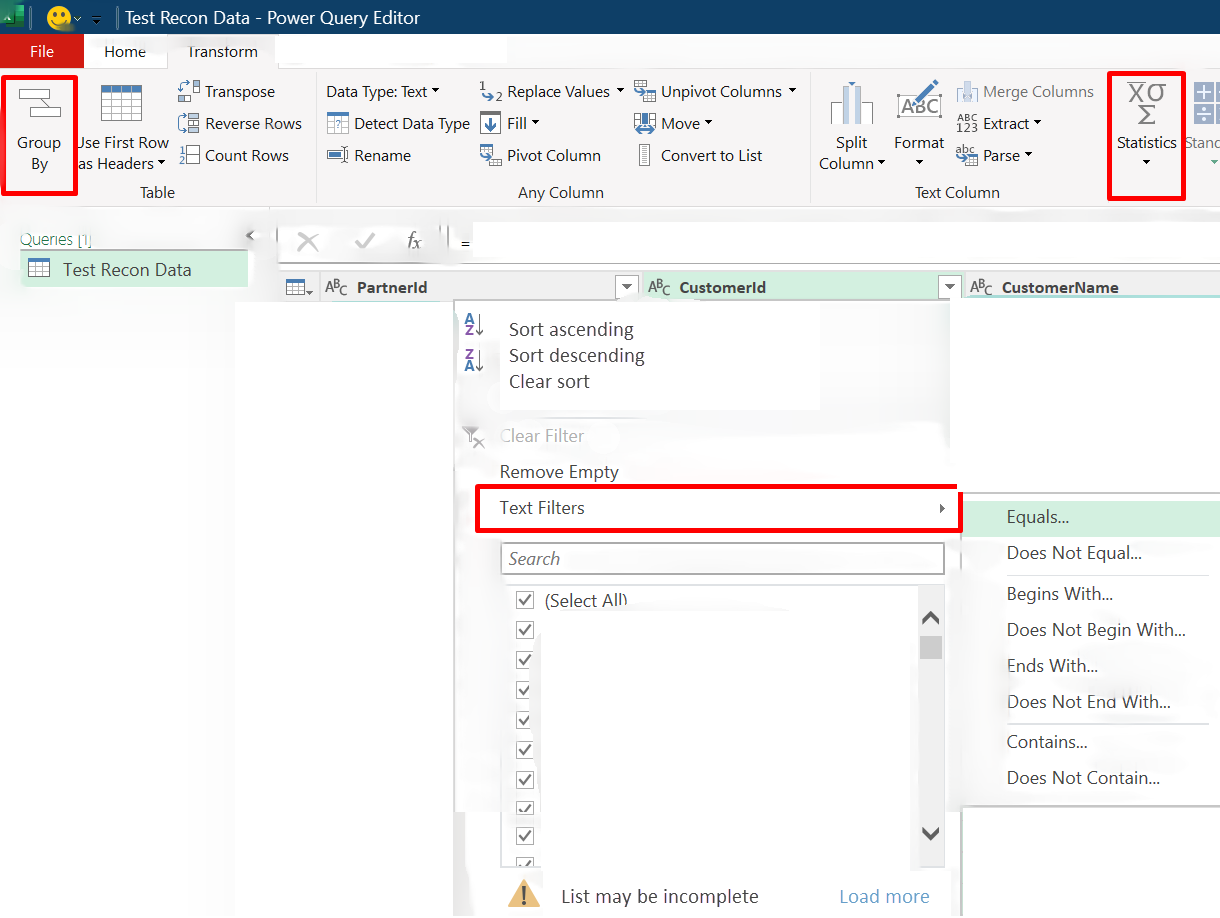
To search for specific line item, use the filter option as shown in the screenshot. Additionally, aggregate line items or perform calculations with the "Group By" or "Statistics" features.
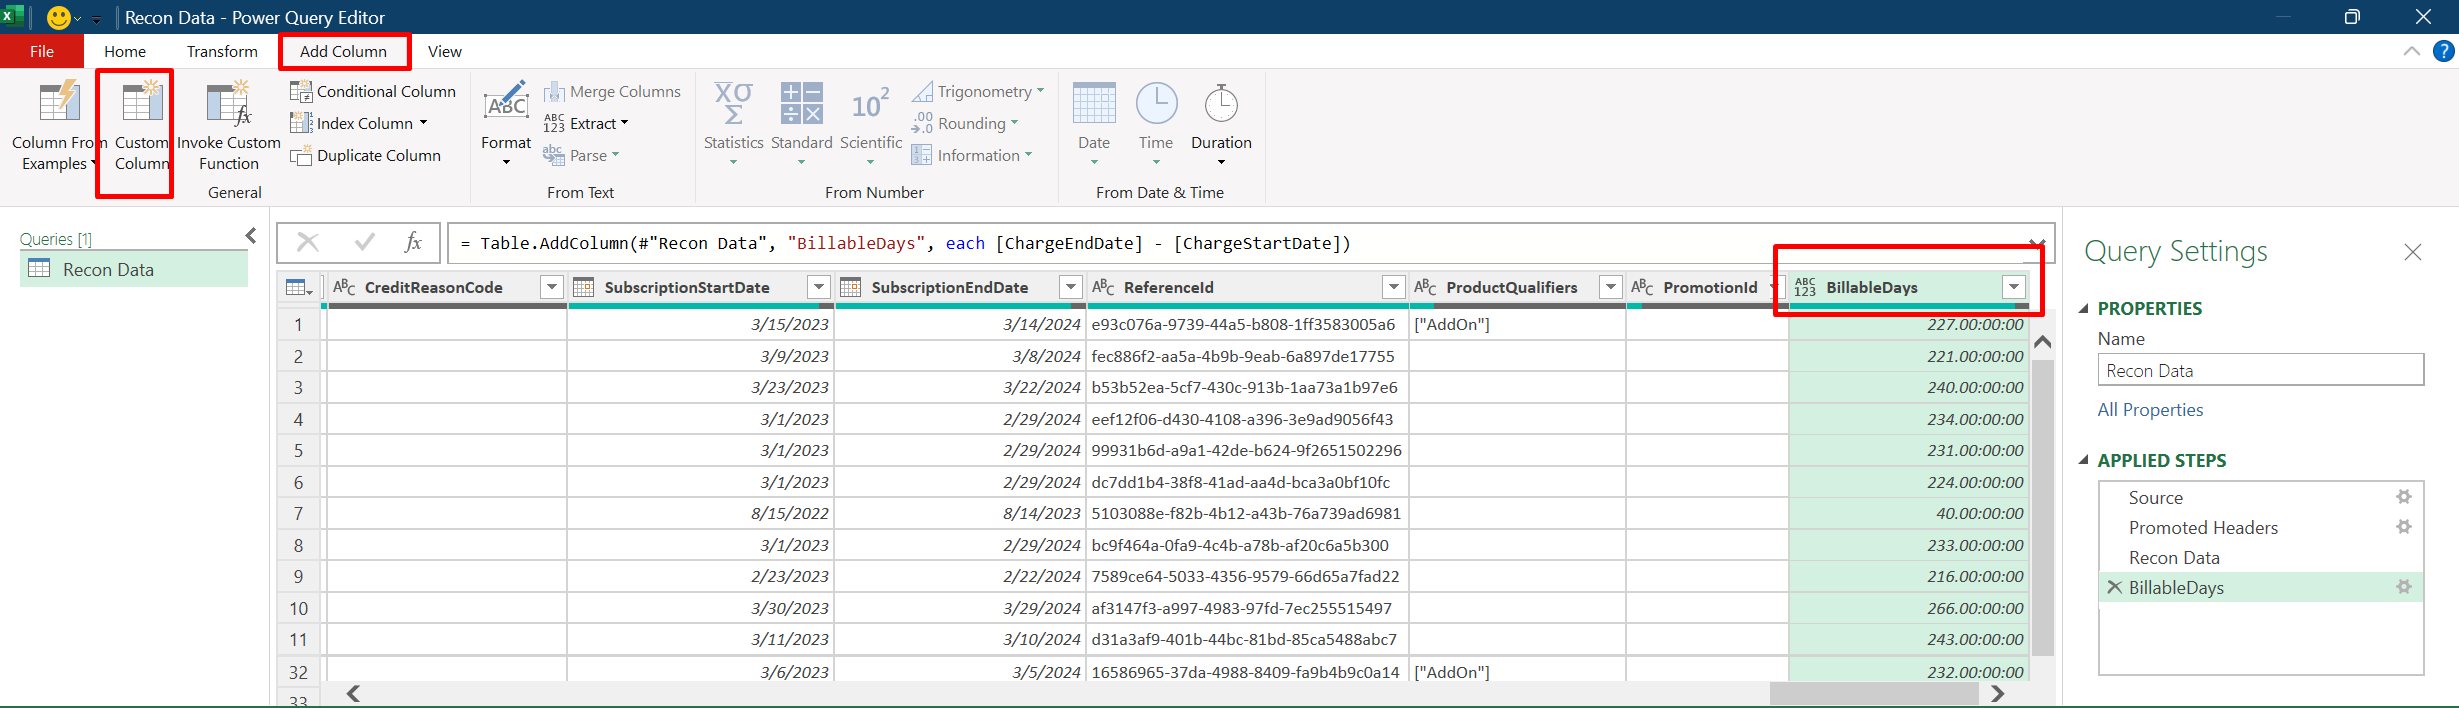
For instance, to find the number of billable days in the charge cycle, use the Custom Column feature to calculate the duration between the charge start and end dates. Power Query also provides a range of features for different computations.
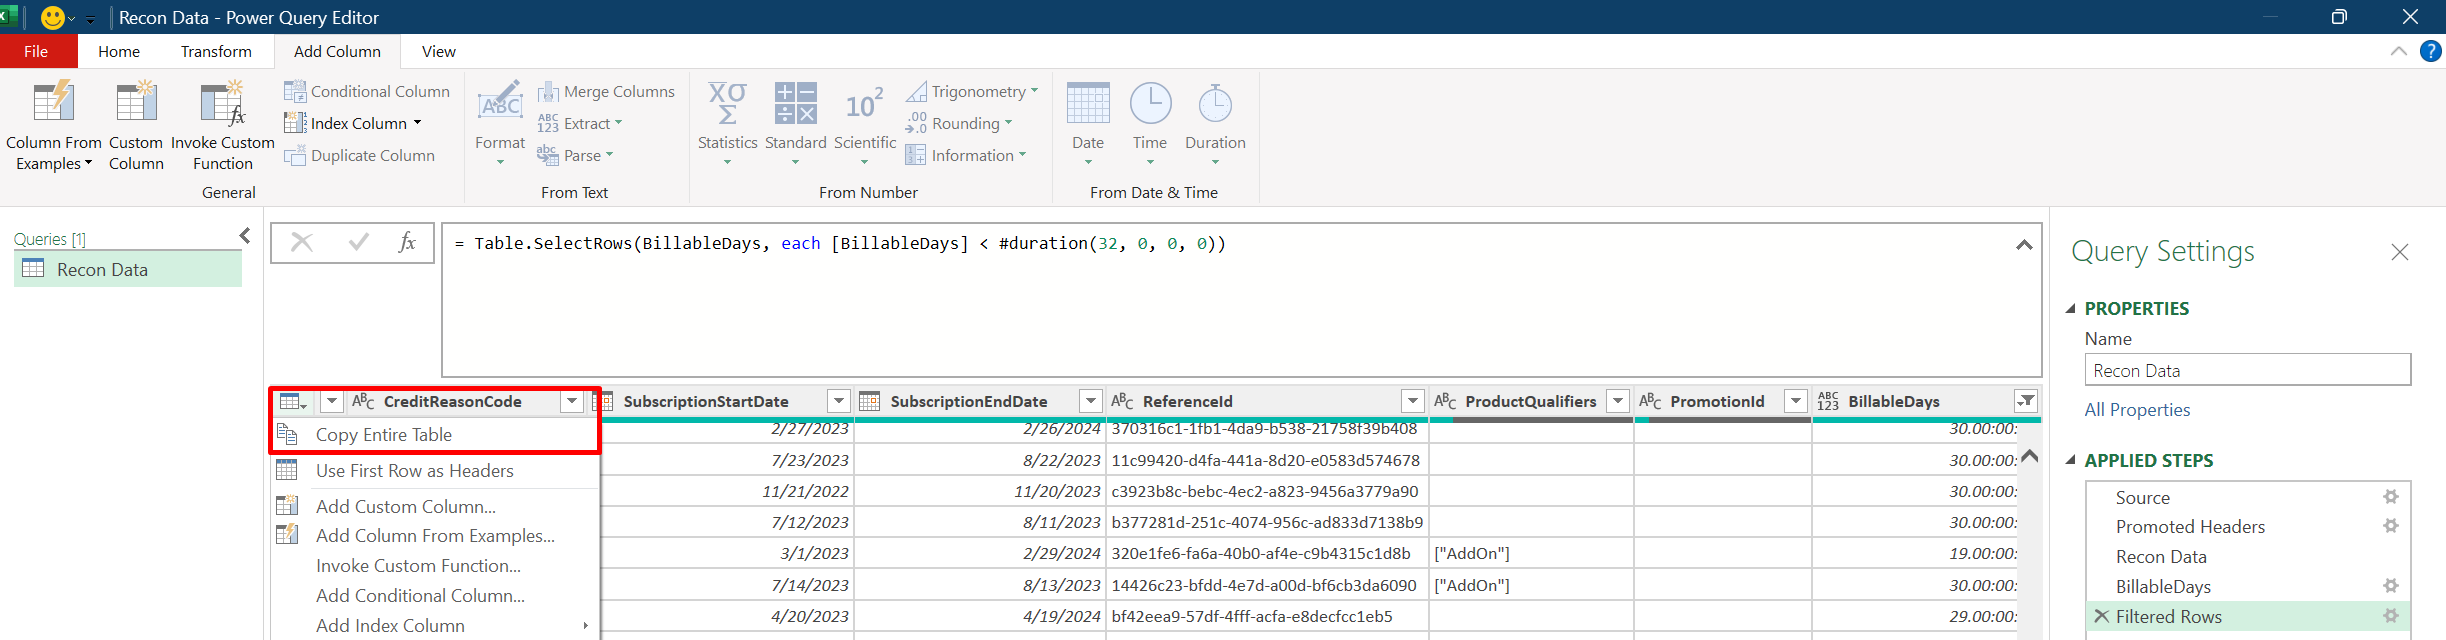
After applying the required filters in the Power Query, transfer the data to Excel by following these steps.


Open a reconciliation file in Power BI
To open a reconciliation file in Power BI:
- Download the reconciliation file as you normally would.
- Download, install, and open an instance of Microsoft Power BI.
- Select Get data on the Power BI Home tab.
- Choose Text/CSV from the list of Common data sources.
- Open your reconciliation file when prompted.
Negative amount displayed
Some reconciliation line items show negative charges for the following reasons:
- To reflect changes in your subscription due to cancellations, upgrades, or license modifications.
- To account for credits received from service level agreement (SLA) violations, Azure platform migration, or price adjustments.
Understand these negative amounts by referring to the ChargeType attribute in the reconciliation line items.
How is the total cost calculated for new commerce license-based purchases?
To accurately calculate costs, always use the EffectiveUnitPrice, not the UnitPrice. The following factors influence the EffectiveUnitPrice:
Promotions, tiered pricing, and adjustments such as partner earned credit.
The number of days billed, counted from when a billing event occurs until the end of the charge cycle.
During the billing term, the subscription's UnitPrice remains constant. If you notice UnitPrice variance in the reconciliation data, rest assured that it doesn't affect the actual cost.
To ensure accurate billing and customer invoicing, use EffectiveUnitPrice.
Why does my invoice reconciliation data show a recurring charge for a product without daily charges?
For certain products, such as Azure savings plans or reservations, a fixed price is billed monthly, annually, or as a one-time payment for a specified limit. Here's a clearer breakdown:
Key points to understand
Fixed price commitment: The recurring charge on your invoice reflects the fixed price you agreed to pay, regardless of usage. This agreement ensures you have access to the product within the agreed limit without daily charges.
No extra charges until limit exceeded: You only incur more costs once your usage surpasses the set limit and the pay-as-you-go rate applies.
Visible recurring charges: Even if you don't use the product, the recurring charge for Azure savings plans or reservations still appears on your invoice data. Extra charges apply only when usage exceeds the agreed limit.
To effectively monitor your costs, make sure to regularly review how your Azure reservation or savings plan is linked to your Azure subscription. This proactive approach can help you manage your expenses efficiently and ensure you're only paying for what you use above your agreed limits.
To review the costs, check how an Azure reservation or savings plan is linked to an Azure subscription.
How do you find the Azure subscription ID for a product?
To find out your Azure subscription ID for each Azure resource, follow these steps:
Tip
To easily identify products purchased through different or the same Azure subscriptions, consider using resource groups or tags. This approach ensures clarity by linking each product with its respective subscription, even when subscriptions have identical names. It enhances management process, simplifies tracking and reporting, and boosts operational efficiency.
Pay-as-you-go resource
- To identify your Azure subscription, first find the
SubscriptionIdon your invoice reconciliation line item. Then, match it with theSubscriptionIdon your daily rated usage line item. TheEntitlementIdfrom the same line of your daily rated usage is your Azure subscription ID.
Azure reservation
- To identify your Azure subscription for an Azure reservation, find the
ReservationOrderIdon your invoice reconciliation line item. Link it with theAdditionalInfoon the daily rated usage line item. TheEntitlementIdfrom the same line of your daily rated usage is your Azure subscription ID.
Azure savings plan
- To identify your Azure subscription for an Azure savings plan, connect the
ReservationOrderIdon your invoice reconciliation line item with theBenefitOrderIdon the daily rated usage line item. TheEntitlementIdfrom the same line of your daily rated usage is your Azure subscription ID.
How to identify Azure credits in invoice reconciliation and daily rated usage data
Understanding how to track Azure credits is essential for effective reconciliation and credit management of Azure products. Here's how you can find these credits in both invoice reconciliation and daily rated usage data.
Invoice reconciliation
To identify the credits:
Use the
ChargeTypefield and filter the "customerCredit" line items. TheCreditReasonCodespecifies the type of credit.Look for
SubtotalandTotalfields showing negative amounts for these line items.For accuracy, group line items by these fields:
ProductId,SKUId,AvailabilityId,OrderDate, and eitherCustomerNameorCustomerId. Then, sum theTotalto determine the credit amount.Ensure the
BillableQuantityis the same for both charge and credit line items.
Daily rated usage
To filter and find credit amounts:
Use the
CustomerId,CreditType, and 100 for theCreditPercentagevalue to filter the line items.Sum the
BillingPreTaxTotalof these line items to find the credit amount.
Note
Some Azure credits might not appear in the daily rated usage data. Always refer to the invoice reconciliation data for complete credit information.
By following these steps, you can accurately track and manage Azure credits, ensuring a clear understanding of your reconciliation data.
How do you reconcile telco pay-as-you-go charges?
Follow these steps to track your telco product charges on a daily and monthly basis:
- Daily rated usage reconciliation: Check your daily charges under
BillingPreTaxTotaland your call minutes in "NumMin" underAdditionalInfo.
Note
Quantity in the daily rated usage data doesn't show exact call minutes.
| CustomerName | ProductId | SkuId | ProductName | UsageDate | ChargeType | UnitPrice | Quantity | UnitType | BillingPreTaxTotal | BillingCurrency | AdditionalInfo | EffectiveUnitPrice |
|---|---|---|---|---|---|---|---|---|---|---|---|---|
| Constoso | CFQ7TTC0JL2N | 1 | Microsoft 365 International Calling Plan - Outbound US | 9/17/2021 | New | 1 | 0.1524 | Per Call | 0.15 | USD | { "NumMin": 0.2} | 0.984251969 |
| Constoso | CFQ7TTC0JL2S | 1 | Microsoft 365 Audio Conferencing - Outbound US | 9/18/2021 | New | 1 | 6.6275 | Per Call | 6.623381835 | USD | { "NumMin": 24.1} | 0.999378625 |
| Constoso | CFQ7TTC0JL2S | 1 | Microsoft 365 Audio Conferencing - Outbound US | 9/21/2021 | New | 1 | 2.97 | Per Call | 2.968154515 | USD | { "NumMin": 10.8} | 0.999378625 |
| Constoso | CFQ7TTC0JL2S | 1 | Microsoft 365 Audio Conferencing - Outbound US | 9/22/2021 | New | 1 | 0.0585 | Per Call | 0.05846365 | USD | { "NumMin": 0.3} | 0.999378625 |
| Constoso | CFQ7TTC0JL2S | 1 | Microsoft 365 Audio Conferencing - Outbound US | 9/23/2021 | New | 1 | 0.4485 | Per Call | 0.447924684 | USD | { "NumMin": 2.3} | 0.998717244 |
| Constoso | CFQ7TTC0JL2S | 1 | Microsoft 365 Audio Conferencing - Outbound US | 9/24/2021 | New | 1 | 0.0975 | Per Call | 0.097374931 | USD | { "NumMin": 0.5} | 0.998717244 |
| Constoso | CFQ7TTC0JL2S | 1 | Microsoft 365 Audio Conferencing - Outbound US | 9/29/2021 | New | 1 | 0.156 | Per Call | 0.15579989 | USD | { "NumMin": 0.8} | 0.998717244 |
| Constoso | CFQ7TTC0JL2S | 1 | Microsoft 365 International Calling Plan - Outbound US | 9/29/2021 | New | 1 | 0.2114 | Per Call | 0.211128825 | USD | { "NumMin": 1.4} | 0.998717244 |
| Constoso | CFQ7TTC0JL2S | 1 | Microsoft 365 Audio Conferencing - Outbound US | 9/30/2021 | New | 1 | 0.178 | Per Call | 0.177771669 | USD | { "NumMin": 8.9} | 0.998717244 |
| Total | 10.89 | 49.3 |
- Invoice reconciliation: Check your total call minutes and costs per call, look at
BillableQuantityandSubtotal.
| CustomerName | ProductId | SkuId | ProductName | ChargeType | UnitPrice | Quantity | Subtotal | TaxTotal | Total | Currency | ChargeStartDate | ChargeEndDate | EffectiveUnitPrice | BillableQuantity |
|---|---|---|---|---|---|---|---|---|---|---|---|---|---|---|
| Contoso | CFQ7TTC0JL2N | 1 | Microsoft 365 International Calling Plan - Outbound US | new | 0.381 | 1 | 0.36 | 0 | 0.36 | USD | 9/1/2021 | 9/30/2021 | 0.225 | 1.6 |
| Contoso | CFQ7TTC0JL2S | 1 | Microsoft 365 Audio Conferencing - Outbound US | new | 0.352836167 | 1 | 10.53 | 0 | 10.53 | USD | 9/1/2021 | 9/30/2021 | 0.220755 | 47.7 |
| Total | 10.89 | 49.3 |
If you exceed your free talk time, you pay for each extra minute. To reconcile the charges and call minutes between your daily usage and monthly invoice, use the ProductId and SkuId.
Check charges and minutes by call type: domestic, international, or toll-free. The bill shows total call minutes and total amount before tax. The subtotal equals the sum of BillingPreTaxTotal, and BillableQuantity equals the sum of "NumMin."
How to find tiered pricing in the reconciliation data
Tiered pricing depends on your usage tier. Find the tiered pricing in your reconciliation data by looking at these fields:
The
UnitPricein the line item shows the unit price for the first tier in the price list.The
EffectiveUnitPricein the line item reflects your usage tier's unit price from the price list. Adjustments like partner earned credit may change the final price.The
PriceAdjustmentDescriptionindicates the discount percentage for your usage tier and other adjustments that affect the final price.See the final cost in individual line items based on your usage tier.
Understanding Reservation Order ID prefixes
To ensure a smooth experience with Azure reservations, it's essential to understand the meaning behind different Reservation Order ID prefixes. The prefix indicates where you bought your Azure reservations from:
- PCTest: Indicates reservations bought from Partner Center for testing purposes.
- RIOderId: Denotes reservations bought from Partner Center for production use.
- No prefix: Refers to reservations purchased through Microsoft Cost Management.
By recognizing these prefixes, you can better manage your reservations and streamline your Azure operations.