Tutorial: Host a RESTful API with CORS in Azure App Service
Azure App Service provides a highly scalable self-patching web hosting service. In addition, App Service has built-in support for cross-origin resource sharing (CORS) for RESTful APIs. This tutorial shows how to deploy an ASP.NET Core API app to App Service with CORS support. You configure the app using command-line tools and deploy the app using Git.
In this tutorial, you learn how to:
- Create App Service resources using Azure CLI.
- Deploy a RESTful API to Azure using Git.
- Enable App Service CORS support.
You can complete this tutorial on macOS, Linux, or Windows.
If you don't have an Azure subscription, create an Azure free account before you begin.
Prerequisites
Create a local ASP.NET Core app
In this step, you set up the local ASP.NET Core project. App Service supports the same workflow for APIs written in other languages.
Clone the sample application
In the terminal window, use
cdto go to a working directory.Clone the sample repository, and then go to the repository root.
git clone https://github.com/Azure-Samples/dotnet-core-api
cd dotnet-core-api
This repository contains an app that's created based on the tutorial ASP.NET Core web API documentation with Swagger / OpenAPI. It uses a Swagger generator to serve the Swagger UI and the Swagger JSON endpoint.
Make sure the default branch is
main.git branch -m mainTip
The branch name change isn't required by App Service. However, since many repositories are changing their default branch to
main(see Change deployment branch), this tutorial shows you how to deploy a repository frommain.
Run the application
Run the following commands to install the required packages, run database migrations, and start the application.
dotnet restore
dotnet run
Navigate to
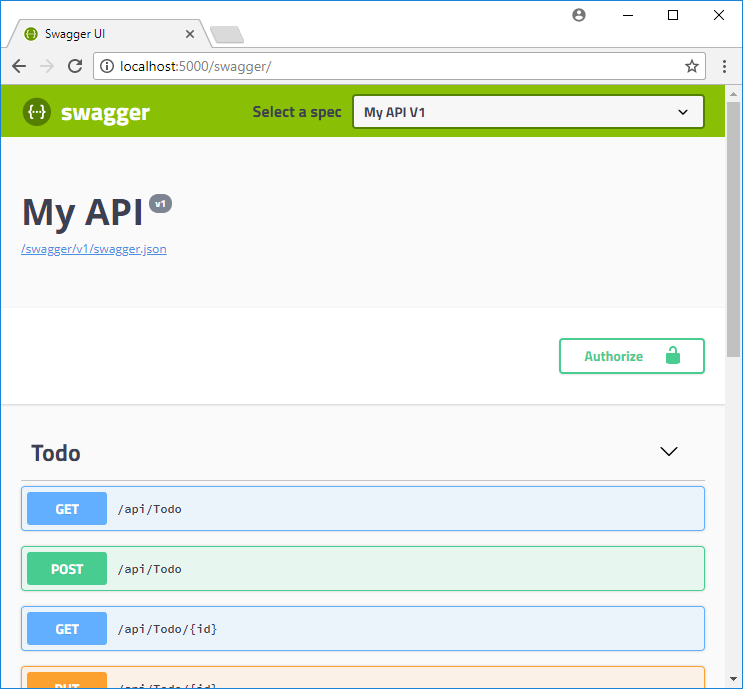
http://localhost:5000/swaggerin a browser to try the Swagger UI.
Navigate to
http://localhost:5000/api/todoto see a list of ToDo JSON items.Navigate to
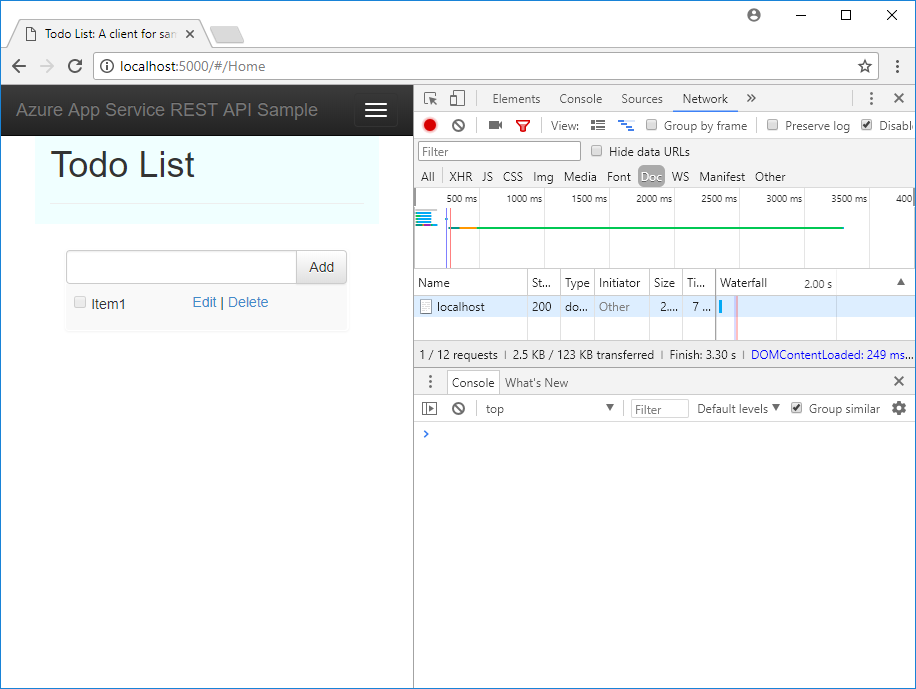
http://localhost:5000and experiment with the browser app. Later, you'll point the browser app to a remote API in App Service to test CORS functionality. Code for the browser app is found in the repository's wwwroot directory.To stop ASP.NET Core at any time, select Ctrl+C in the terminal.
Azure Cloud Shell
Azure hosts Azure Cloud Shell, an interactive shell environment that you can use through your browser. You can use either Bash or PowerShell with Cloud Shell to work with Azure services. You can use the Cloud Shell preinstalled commands to run the code in this article, without having to install anything on your local environment.
To start Azure Cloud Shell:
| Option | Example/Link |
|---|---|
| Select Try It in the upper-right corner of a code or command block. Selecting Try It doesn't automatically copy the code or command to Cloud Shell. |  |
| Go to https://shell.azure.com, or select the Launch Cloud Shell button to open Cloud Shell in your browser. |  |
| Select the Cloud Shell button on the menu bar at the upper right in the Azure portal. |  |
To use Azure Cloud Shell:
Start Cloud Shell.
Select the Copy button on a code block (or command block) to copy the code or command.
Paste the code or command into the Cloud Shell session by selecting Ctrl+Shift+V on Windows and Linux, or by selecting Cmd+Shift+V on macOS.
Select Enter to run the code or command.
Deploy the app to Azure
In this step, you deploy your .NET Core application to App Service.
Configure local Git deployment
FTP and local Git can deploy to an Azure web app by using a deployment user. Once you configure your deployment user, you can use it for all your Azure deployments. Your account-level deployment username and password are different from your Azure subscription credentials.
To configure the deployment user, run the az webapp deployment user set command in Azure Cloud Shell. Replace <username> and <password> with a deployment user username and password.
- The username must be unique within Azure, and for local Git pushes, must not contain the ‘@’ symbol.
- The password must be at least eight characters long, with two of the following three elements: letters, numbers, and symbols.
az webapp deployment user set --user-name <username> --password <password>
The JSON output shows the password as null. If you get a 'Conflict'. Details: 409 error, change the username. If you get a 'Bad Request'. Details: 400 error, use a stronger password.
Record your username and password to use to deploy your web apps.
Create a resource group
A resource group is a logical container into which Azure resources, such as web apps, databases, and storage accounts, are deployed and managed. For example, you can choose to delete the entire resource group in one simple step later.
In the Cloud Shell, create a resource group with the az group create command. The following example creates a resource group named myResourceGroup in the West Europe location. To see all supported locations for App Service in Free tier, run the az appservice list-locations --sku FREE command.
az group create --name myResourceGroup --location "West Europe"
You generally create your resource group and the resources in a region near you.
When the command finishes, a JSON output shows you the resource group properties.
Create an App Service plan
In the Cloud Shell, create an App Service plan with the az appservice plan create command.
The following example creates an App Service plan named myAppServicePlan in the Free pricing tier:
az appservice plan create --name myAppServicePlan --resource-group myResourceGroup --sku FREE
When the App Service plan has been created, the Azure CLI shows information similar to the following example:
{
  "adminSiteName": null,
  "appServicePlanName": "myAppServicePlan",
  "geoRegion": "West Europe",
  "hostingEnvironmentProfile": null,
  "id": "/subscriptions/0000-0000/resourceGroups/myResourceGroup/providers/Microsoft.Web/serverfarms/myAppServicePlan",
  "kind": "app",
  "location": "West Europe",
  "maximumNumberOfWorkers": 1,
  "name": "myAppServicePlan",
  < JSON data removed for brevity. >
  "targetWorkerSizeId": 0,
  "type": "Microsoft.Web/serverfarms",
  "workerTierName": null
}
Create a web app
Create a web app in the myAppServicePlan App Service plan.
In the Cloud Shell, you can use the az webapp create command. In the following example, replace <app-name> with a globally unique app name (valid characters are a-z, 0-9, and -).
az webapp create --resource-group myResourceGroup --plan myAppServicePlan --name <app-name> --deployment-local-git
When the web app has been created, the Azure CLI shows output similar to the following example:
Local git is configured with url of 'https://<username>@<app-name>.scm.azurewebsites.net/<app-name>.git'
{
  "availabilityState": "Normal",
  "clientAffinityEnabled": true,
  "clientCertEnabled": false,
  "clientCertExclusionPaths": null,
  "cloningInfo": null,
  "containerSize": 0,
  "dailyMemoryTimeQuota": 0,
  "defaultHostName": "<app-name>.azurewebsites.net",
  "deploymentLocalGitUrl": "https://<username>@<app-name>.scm.azurewebsites.net/<app-name>.git",
  "enabled": true,
  < JSON data removed for brevity. >
}
Note
The URL of the Git remote is shown in the deploymentLocalGitUrl property, with the format https://<username>@<app-name>.scm.azurewebsites.net/<app-name>.git. Save this URL as you need it later.
Push to Azure from Git
Since you're deploying the
mainbranch, you need to set the default deployment branch for your App Service app tomain(see Change deployment branch). In the Cloud Shell, set theDEPLOYMENT_BRANCHapp setting with theaz webapp config appsettings setcommand.az webapp config appsettings set --name <app-name> --resource-group myResourceGroup --settings DEPLOYMENT_BRANCH='main'Back in the local terminal window, add an Azure remote to your local Git repository. Replace <deploymentLocalGitUrl-from-create-step> with the URL of the Git remote that you saved from Create a web app.
git remote add azure <deploymentLocalGitUrl-from-create-step>Push to the Azure remote to deploy your app with the following command. When Git Credential Manager prompts you for credentials, make sure you enter the credentials you created in Configure local git deployment, not the credentials you use to sign in to the Azure portal.
git push azure mainThis command might take a few minutes to run. While running, it displays information similar to the following example:
Enumerating objects: 83, done.
Counting objects: 100% (83/83), done.
Delta compression using up to 8 threads
Compressing objects: 100% (78/78), done.
Writing objects: 100% (83/83), 22.15 KiB | 3.69 MiB/s, done.
Total 83 (delta 26), reused 0 (delta 0)
remote: Updating branch 'master'.
remote: Updating submodules.
remote: Preparing deployment for commit id '509236e13d'.
remote: Generating deployment script.
remote: Project file path: .\TodoApi.csproj
remote: Generating deployment script for ASP.NET MSBuild16 App
remote: Generated deployment script files
remote: Running deployment command...
remote: Handling ASP.NET Core Web Application deployment with MSBuild16.
remote: .
remote: .
remote: .
remote: Finished successfully.
remote: Running post deployment command(s)...
remote: Triggering recycle (preview mode disabled).
remote: Deployment successful.
To https://<app_name>.scm.azurewebsites.net/<app_name>.git
* [new branch]      master -> master
Browse to the Azure app
Navigate to
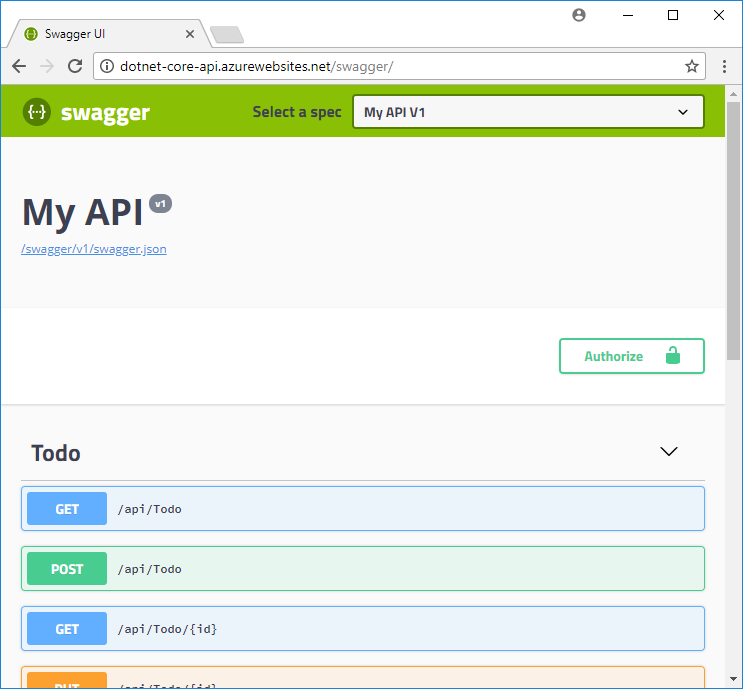
http://<app_name>.azurewebsites.net/swaggerin a browser and view the Swagger UI.
Navigate to
http://<app_name>.azurewebsites.net/swagger/v1/swagger.jsonto see the swagger.json for your deployed API.Navigate to
http://<app_name>.azurewebsites.net/api/todoto see your deployed API working.
Add CORS functionality
Next, you enable the built-in CORS support in App Service for your API.
Test CORS in the sample app
In your local repository, open wwwroot/index.html.
On line 51, set the
apiEndpointvariable to the URL of your deployed API (http://<app_name>.azurewebsites.net). Replace <appname> with your app name in App Service.In your local terminal window, run the sample app again.
dotnet runNavigate to the browser app at
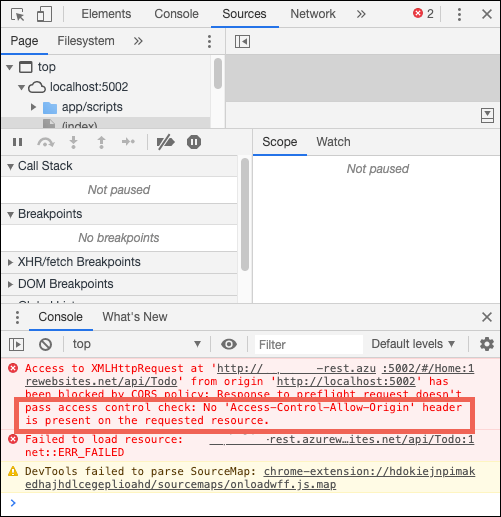
http://localhost:5000. Open the developer tools window in your browser (Ctrl+Shift+i in Chrome for Windows) and inspect the Console tab. You should now see the error message,No 'Access-Control-Allow-Origin' header is present on the requested resource.
The domain mismatch between the browser app (
http://localhost:5000) and remote resource (http://<app_name>.azurewebsites.net) is recognized by your browser as a cross-origin resource request. Also, because the App Service app isn't sending theAccess-Control-Allow-Originheader, the browser has prevented cross-domain content from loading.In production, your browser app would have a public URL instead of the localhost URL, but the process for enabling CORS to a localhost URL is the same as the process for a public URL.
Enable CORS
In Cloud Shell, enable CORS to your client's URL by using the az webapp cors add command. Replace the <app-name> placeholder.
az webapp cors add --resource-group myResourceGroup --name <app-name> --allowed-origins 'http://localhost:5000'
You can add multiple allowed origins by running the command multiple times or by adding a comma-separated list in --allowed-origins. To allow all origins, use --allowed-origins '*'.
Test CORS again
Refresh the browser app at http://localhost:5000. The error message in the Console window is now gone, and you can see the data from the deployed API and interact with it. Your remote API now supports CORS to your browser app running locally.

Congratulations, you're running an API in Azure App Service with CORS support.
Frequently asked questions
- App Service CORS vs. your CORS
- How do I set allowed origins to a wildcard subdomain?
- How do I enable the ACCESS-CONTROL-ALLOW-CREDENTIALS header on the response?
App Service CORS vs. your CORS
You can use your own CORS utilities instead of App Service CORS for more flexibility. For example, you might want to specify different allowed origins for different routes or methods. Since App Service CORS lets you specify only one set of accepted origins for all API routes and methods, you would want to use your own CORS code. See how CORS is enabled in ASP.NET Core at Enable CORS.
The built-in App Service CORS feature doesn't have options to allow only specific HTTP methods or verbs for each origin that you specify. It will automatically allow all methods and headers for each origin defined. This behavior is similar to ASP.NET Core CORS policies when you use the options .AllowAnyHeader() and .AllowAnyMethod() in the code.
Note
Don't try to use App Service CORS and your own CORS code together. If you try to use them together, App Service CORS takes precedence and your own CORS code has no effect.
How do I set allowed origins to a wildcard subdomain?
A wildcard subdomain like *.contoso.com is more restrictive than the wildcard origin *. The app's CORS management page in the Azure portal doesn't let you set a wildcard subdomain as an allowed origin. However, you can do that by using Azure CLI, like so:
az webapp cors add --resource-group <group-name> --name <app-name> --allowed-origins 'https://*.contoso.com'
How do I enable the ACCESS-CONTROL-ALLOW-CREDENTIALS header on the response?
If your app requires credentials such as cookies or authentication tokens to be sent, the browser might require the ACCESS-CONTROL-ALLOW-CREDENTIALS header on the response. To enable this in App Service, set properties.cors.supportCredentials to true:
az resource update --name web --resource-group <group-name> \
  --namespace Microsoft.Web --resource-type config \
  --parent sites/<app-name> --set properties.cors.supportCredentials=true
This operation isn't allowed when allowed origins include the wildcard origin '*'. Specifying AllowAnyOrigin and AllowCredentials isn't secure. Doing so can result in cross-site request forgery. To allow credentials, try replacing the wildcard origin with wildcard subdomains.
Clean up resources
In the preceding steps, you created Azure resources in a resource group. If you don't expect to need these resources in the future, delete the resource group by running the following command in the Cloud Shell:
az group delete --name myResourceGroup
This command may take a minute to run.
Next steps
What you learned:
- Create App Service resources using Azure CLI.
- Deploy a RESTful API to Azure using Git.
- Enable App Service CORS support.
Go to the next tutorial to learn how to authenticate and authorize users.