Work with incidents in many workspaces at once
To take full advantage of Microsoft Sentinel’s capabilities, Microsoft recommends using a single-workspace environment. However, there are some use cases that require having several workspaces, in some cases – for example, that of a Managed Security Service Provider (MSSP) and its customers – across multiple tenants. Multiple workspace view lets you see and work with security incidents across several workspaces at the same time, even across tenants, allowing you to maintain full visibility and control of your organization’s security responsiveness.
Note
For information about feature availability in US Government clouds, see the Microsoft Sentinel tables in Cloud feature availability for US Government customers.
If you onboard Microsoft Sentinel to the Microsoft Defender portal, see Microsoft Defender multitenant management.
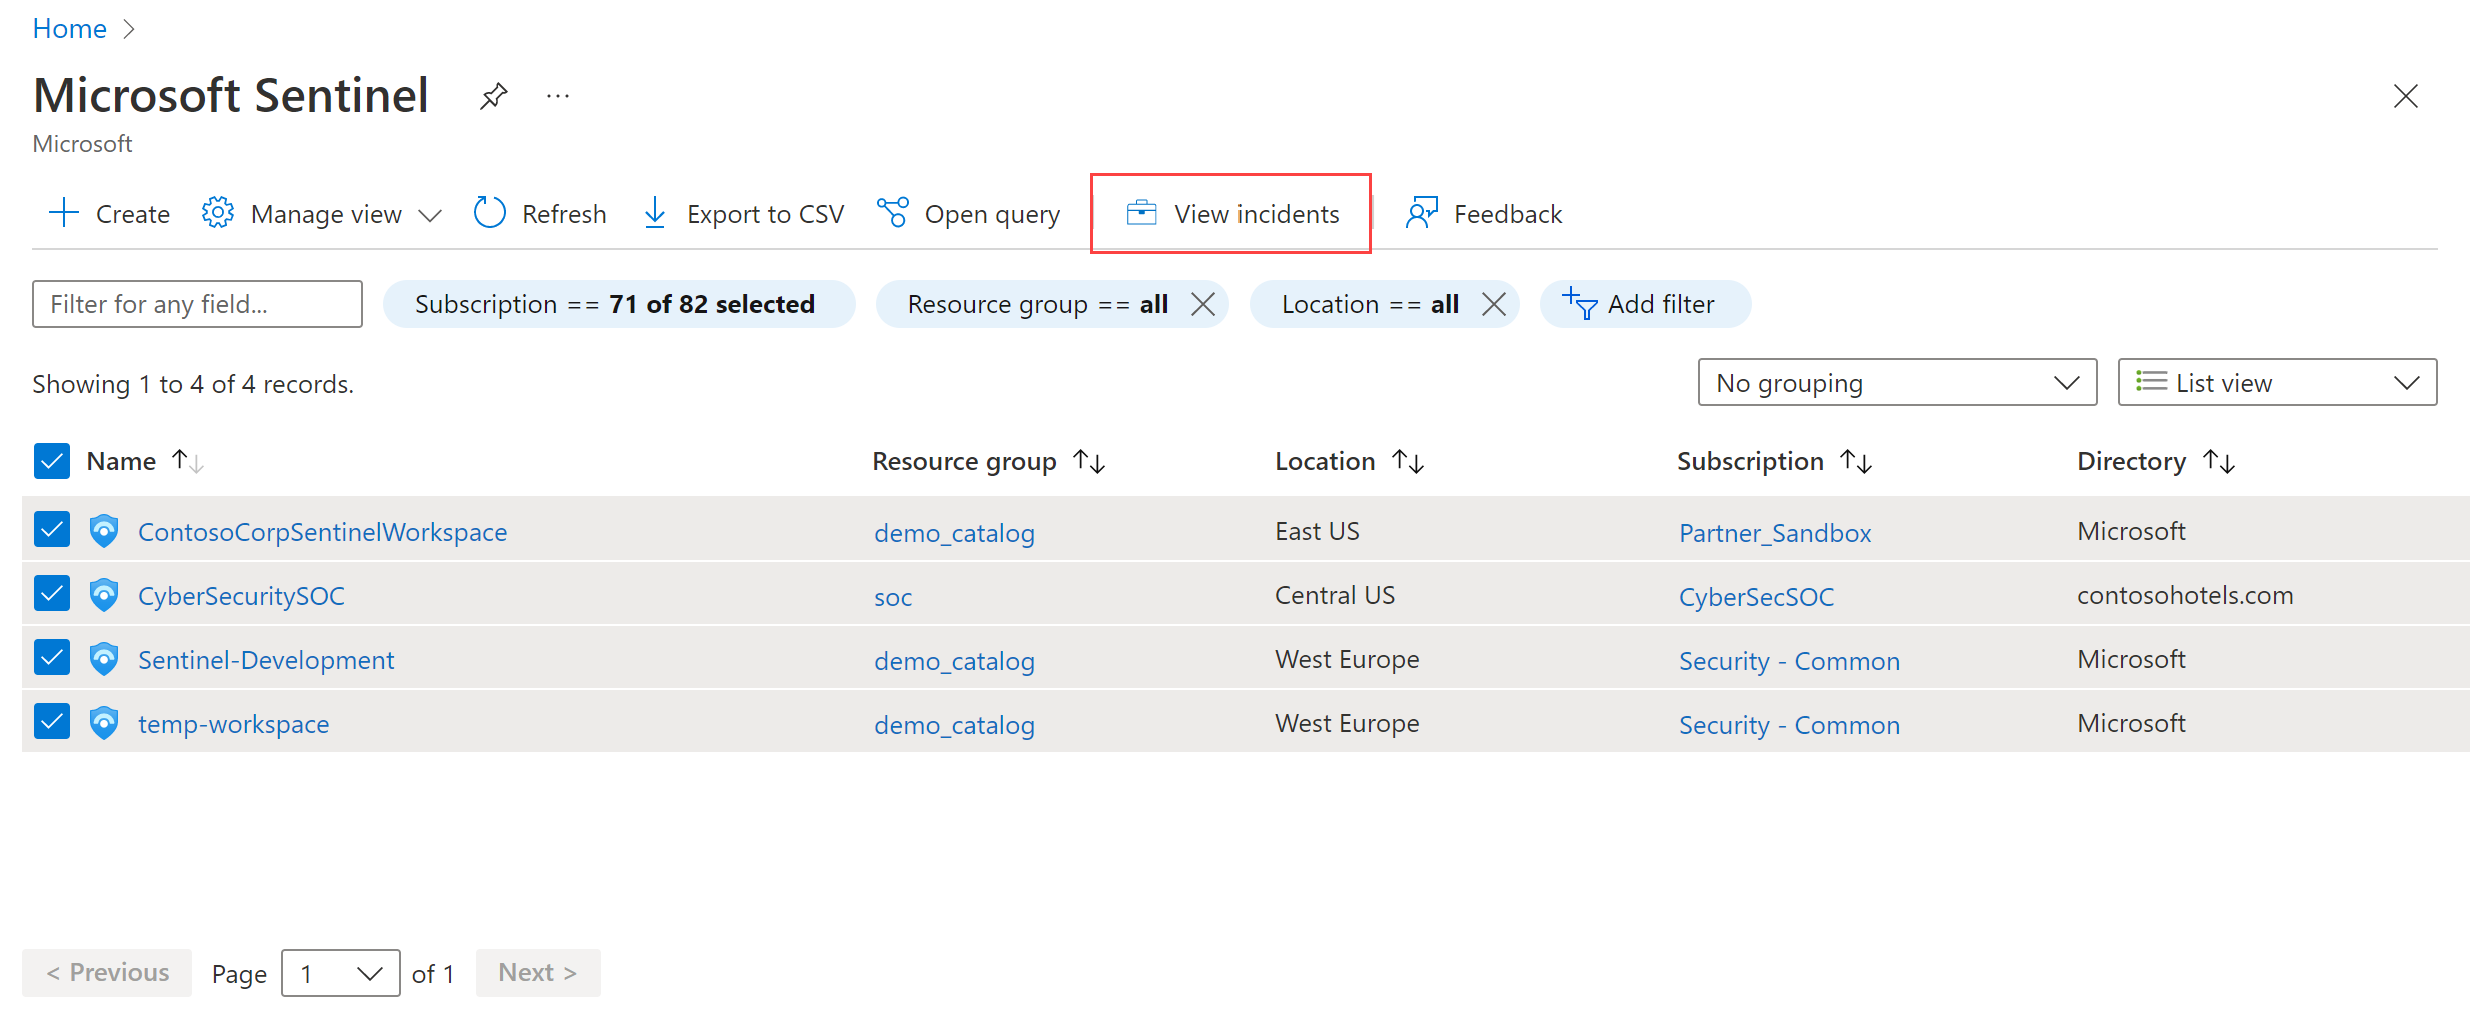
When you open Microsoft Sentinel, you're presented with a list of all the workspaces to which you have access rights, across all selected tenants and subscriptions. Selecting the name of a single workspace brings you into that workspace. To choose multiple workspaces, select all the corresponding checkboxes, and then select the View incidents button at the top of the page.
Important
Multiple Workspace View now supports a maximum of 100 concurrently displayed workspaces.
In the list of workspaces, you can see the directory, subscription, location, and resource group associated with each workspace. The directory corresponds to the tenant.

Multiple workspace view is currently available only for incidents. This page looks and functions in most ways like the regular Incidents page, with the following important differences:
The counters at the top of the page - Open incidents, New incidents, Active incidents, etc. - show the numbers for all of the selected workspaces collectively.
You see incidents from all of the selected workspaces and directories (tenants) in a single unified list. You can filter the list by workspace and directory, in addition to the filters from the regular Incidents screen.
You need to have read and write permissions on all the workspaces from which you've selected incidents. If you have only read permissions on some workspaces, you see warning messages if you select incidents in those workspaces. You aren't able to modify those incidents or any others you've selected together with those (even if you do have permissions for the others).
If you choose a single incident and select View full details or Actions > Investigate, you'll from then on be in the data context of that incident's workspace and no others.
In this article, you learned how to view and work with incidents in multiple Microsoft Sentinel workspaces concurrently. To learn more about Microsoft Sentinel, see the following articles:
- Learn how to get visibility into your data, and potential threats.
- Get started detecting threats with Microsoft Sentinel.
