Tutorial - Upgrade an Azure Kubernetes Service (AKS) cluster
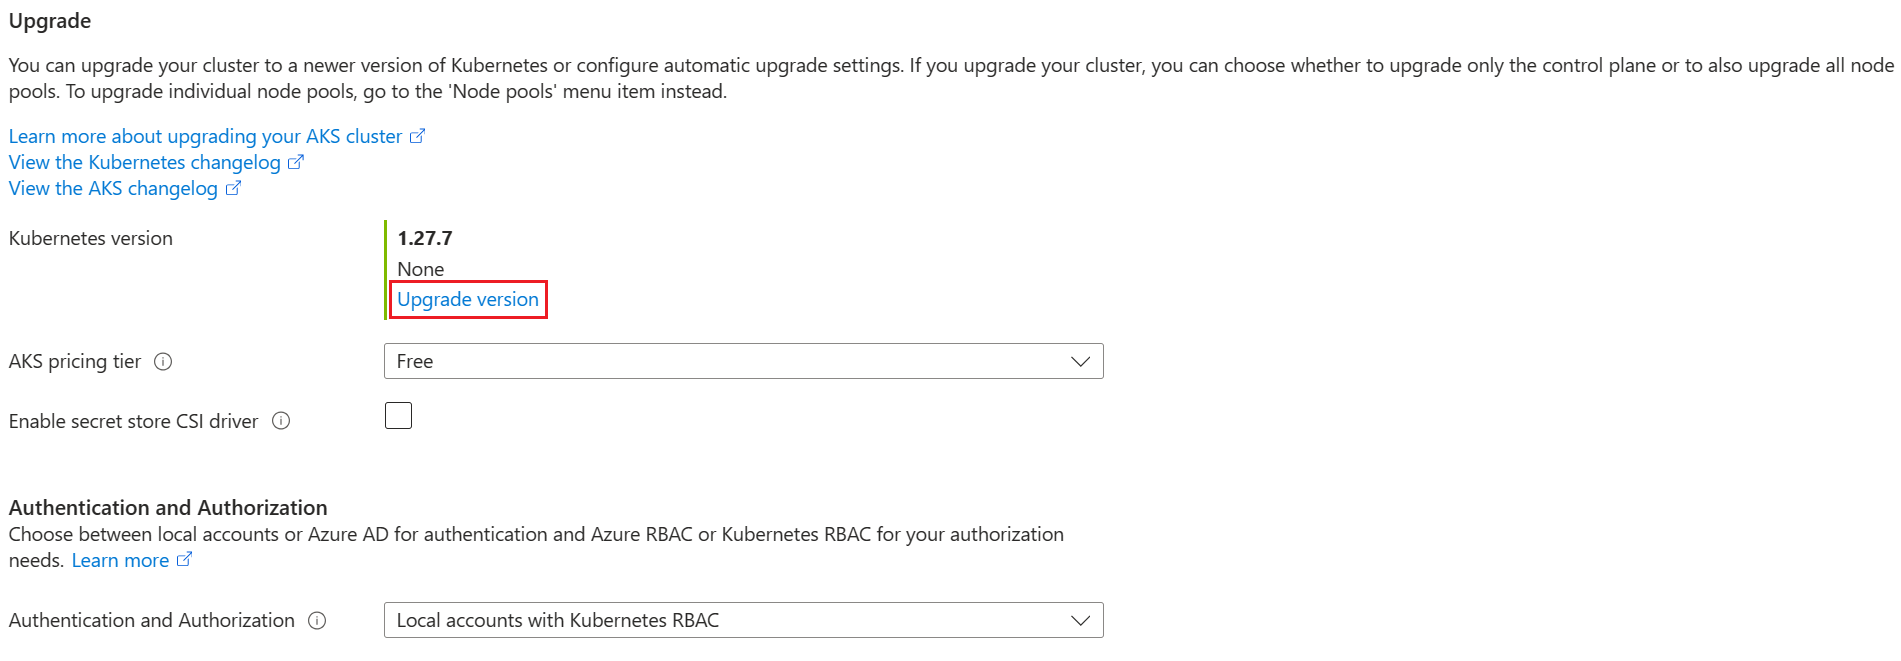
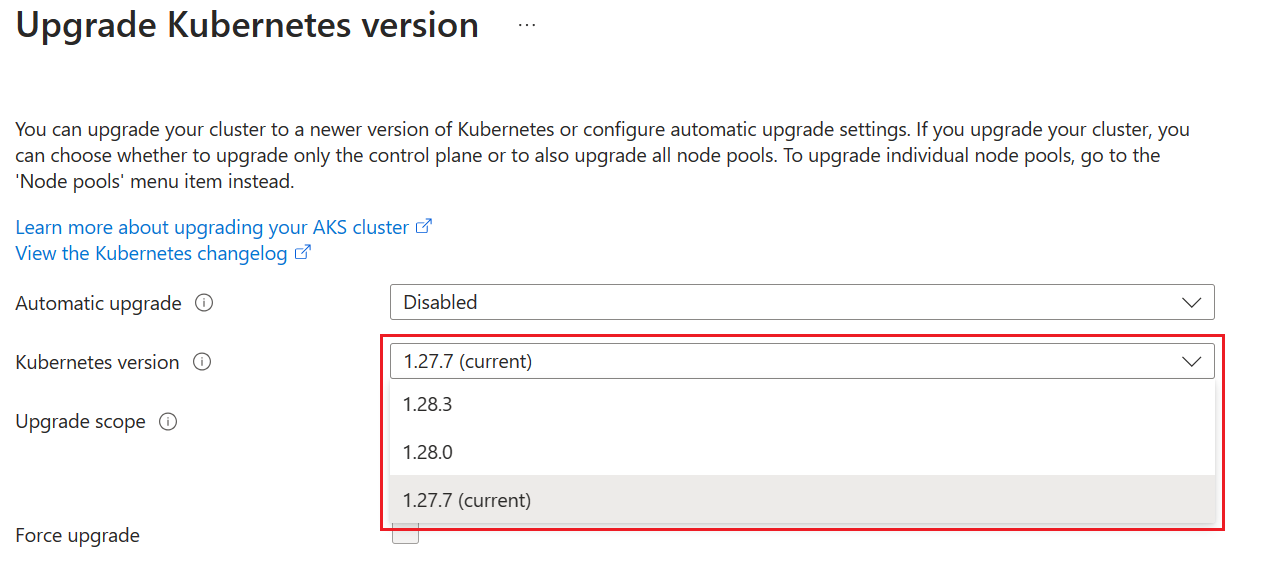
As part of the application and cluster lifecycle, you might want to upgrade to the latest available version of Kubernetes. You can upgrade your Azure Kubernetes Service (AKS) cluster using the Azure CLI, Azure PowerShell, or the Azure portal.
In this tutorial, part seven of seven, you upgrade an AKS cluster. You learn how to:
- Identify current and available Kubernetes versions.
- Upgrade your Kubernetes nodes.
- Validate a successful upgrade.
Before you begin
In previous tutorials, you packaged an application into a container image and uploaded the container image to Azure Container Registry (ACR). You also created an AKS cluster and deployed an application to it. If you haven't completed these steps and want to follow along, start with Tutorial 1 - Prepare application for AKS.
If using Azure CLI, this tutorial requires Azure CLI version 2.34.1 or later. Run az --version to find the version. If you need to install or upgrade, see Install Azure CLI.
If using Azure PowerShell, this tutorial requires Azure PowerShell version 5.9.0 or later. Run Get-InstalledModule -Name Az to find the version. If you need to install or upgrade, see Install Azure PowerShell.
Get available cluster versions
Before you upgrade, check which Kubernetes releases are available for your cluster using the
az aks get-upgradescommand.az aks get-upgrades --resource-group myResourceGroup --name myAKSClusterThe following example output shows the current version as 1.28.9 and lists the available versions under
upgrades:{ "agentPoolProfiles": null, "controlPlaneProfile": { "kubernetesVersion": "1.28.9", ... "upgrades": [ { "isPreview": null, "kubernetesVersion": "1.29.4" }, { "isPreview": null, "kubernetesVersion": "1.29.2" } ] }, ... }
Upgrade an AKS cluster
AKS nodes are carefully cordoned and drained to minimize any potential disruptions to running applications. During this process, AKS performs the following steps:
- Adds a new buffer node (or as many nodes as configured in max surge) to the cluster that runs the specified Kubernetes version.
- Cordons and drains one of the old nodes to minimize disruption to running applications. If you're using max surge, it cordons and drains as many nodes at the same time as the number of buffer nodes specified.
- When the old node is fully drained, it's reimaged to receive the new version and becomes the buffer node for the following node to be upgraded.
- This process repeats until all nodes in the cluster have been upgraded.
- At the end of the process, the last buffer node is deleted, maintaining the existing agent node count and zone balance.
Note
If no patch is specified, the cluster automatically upgrades to the specified minor version's latest GA patch. For example, setting --kubernetes-version to 1.28 results in the cluster upgrading to 1.28.9.
For more information, see Supported Kubernetes minor version upgrades in AKS.
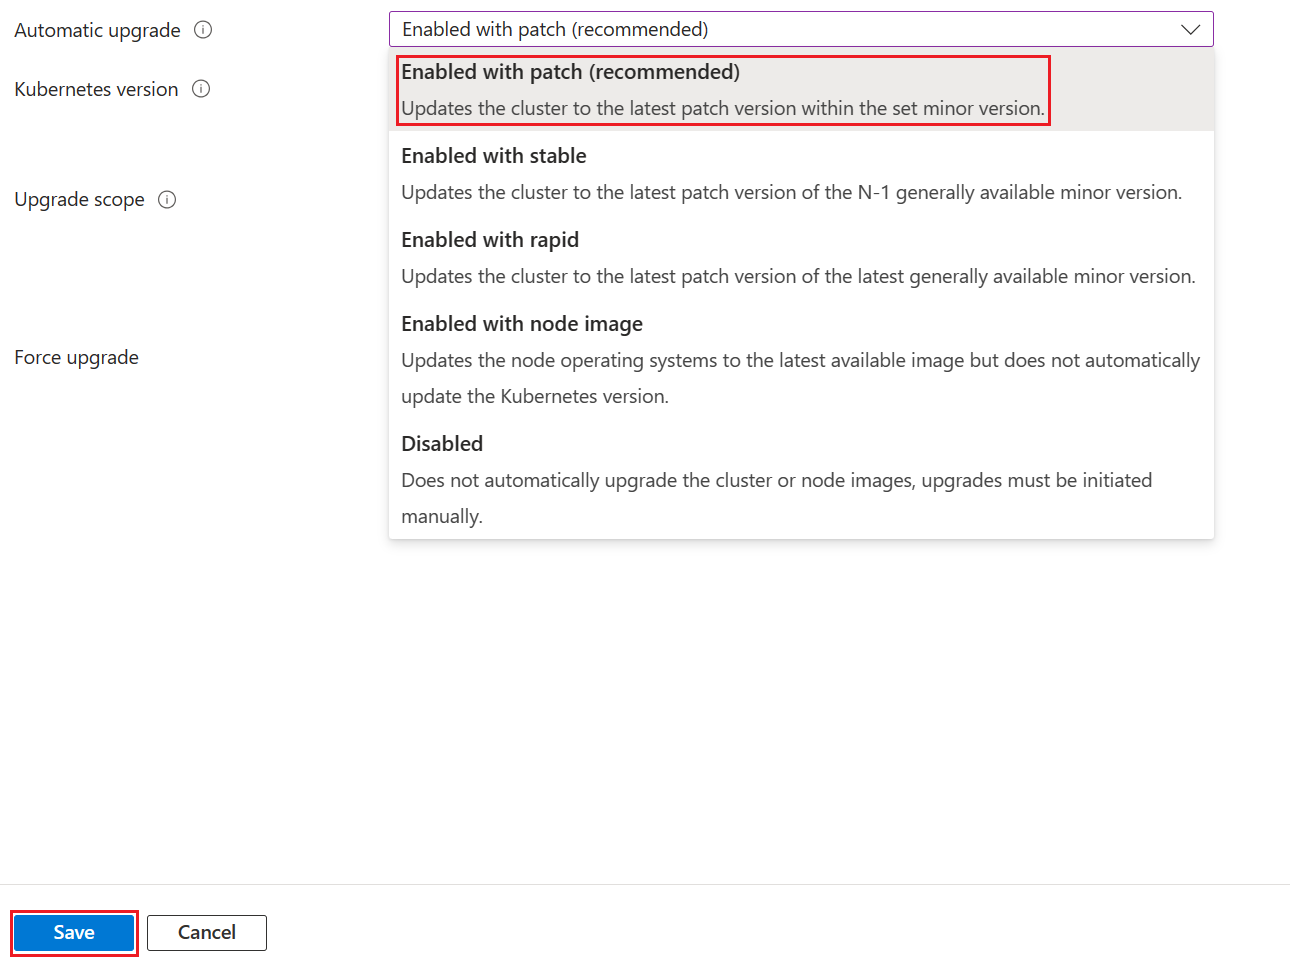
You can either manually upgrade your cluster or configure automatic cluster upgrades. We recommend you configure automatic cluster upgrades to ensure your cluster is always running the latest version of Kubernetes.
Manually upgrade cluster
Upgrade your cluster using the
az aks upgradecommand.az aks upgrade \ --resource-group myResourceGroup \ --name myAKSCluster \ --kubernetes-version KUBERNETES_VERSIONYou will be prompted to confirm the upgrade operation, and to confirm that you want to upgrade the control plane and all the node pools to the selected version of Kubernetes:
 Are you sure you want to perform this operation? (y/N): y
Since control-plane-only argument is not specified, this will upgrade the control plane AND all nodepools to version 1.29.2. Continue? (y/N): y
Note
You can only upgrade one minor version at a time. For example, you can upgrade from 1.14.x to 1.15.x, but you can't upgrade from 1.14.x to 1.16.x directly. To upgrade from 1.14.x to 1.16.x, you must first upgrade from 1.14.x to 1.15.x, then perform another upgrade from 1.15.x to 1.16.x.
The following example output shows the result of upgrading to 1.29.2. Notice the
kubernetesVersionnow shows 1.29.2:{ ... "agentPoolProfiles": [ { ... "count": 3, "currentOrchestratorVersion": "1.29.2", "maxPods": 110, "name": "nodepool1", "nodeImageVersion": "AKSUbuntu-2204gen2containerd-202405.27.0", "orchestratorVersion": "1.29.2", "osType": "Linux", "upgradeSettings": { "drainTimeoutInMinutes": null, "maxSurge": "10%", "nodeSoakDurationInMinutes": null, "undrainableNodeBehavior": null }, "vmSize": "Standard_DS2_v2", ... } ], ... "currentKubernetesVersion": "1.29.2", "dnsPrefix": "myAKSClust-myResourceGroup-19da35", "enableRbac": false, "fqdn": "myaksclust-myresourcegroup-19da35-bd54a4be.hcp.eastus.azmk8s.io", "id": "/subscriptions/<Subscription ID>/resourcegroups/myResourceGroup/providers/Microsoft.ContainerService/managedClusters/myAKSCluster", "kubernetesVersion": "1.29.2", "location": "eastus", "name": "myAKSCluster", "type": "Microsoft.ContainerService/ManagedClusters" ... }
Configure automatic cluster upgrades
Set an auto-upgrade channel on your cluster using the
az aks updatecommand with the--auto-upgrade-channelparameter set topatch.az aks update --resource-group myResourceGroup --name myAKSCluster --auto-upgrade-channel patch
For more information, see Automatically upgrade an Azure Kubernetes Service (AKS) cluster.
Upgrade AKS node images
AKS regularly provides new node images. Linux node images are updated weekly, and Windows node images are updated monthly. We recommend upgrading your node images frequently to use the latest AKS features and security updates. For more information, see Upgrade node images in Azure Kubernetes Service (AKS). To configure automatic node image upgrades, see Automatically upgrade Azure Kubernetes Service (AKS) cluster node operating system images.
View the upgrade events
Note
When you upgrade your cluster, the following Kubernetes events might occur on the nodes:
- Surge: Create a surge node.
- Drain: Evict pods from the node. Each pod has a five minute timeout to complete the eviction.
- Update: Update of a node has succeeded or failed.
- Delete: Delete a surge node.
View the upgrade events in the default namespaces using the
kubectl get eventscommand.kubectl get events --field-selector source=upgraderThe following example output shows some of the above events listed during an upgrade:
LAST SEEN   TYPE      REASON    OBJECT                                   MESSAGE
...
5m          Normal    Drain     node/aks-nodepool1-96663640-vmss000000   Draining node: aks-nodepool1-96663640-vmss000000
5m          Normal    Upgrade   node/aks-nodepool1-96663640-vmss000000   Deleting node aks-nodepool1-96663640-vmss000000 from API server
4m          Normal    Upgrade   node/aks-nodepool1-96663640-vmss000000   Successfully reimaged node: aks-nodepool1-96663640-vmss000000
4m          Normal    Upgrade   node/aks-nodepool1-96663640-vmss000000   Successfully upgraded node: aks-nodepool1-96663640-vmss000000
4m          Normal    Drain     node/aks-nodepool1-96663640-vmss000000   Draining node: aks-nodepool1-96663640-vmss000000
...
Validate an upgrade
Confirm the upgrade was successful using the
az aks showcommand.az aks show --resource-group myResourceGroup --name myAKSCluster --output tableThe following example output shows the AKS cluster runs KubernetesVersion 1.27.3:
Name          Location    ResourceGroup    KubernetesVersion    CurrentKubernetesVersion  ProvisioningState    Fqdn
------------  ----------  ---------------  -------------------  ------------------------  -------------------  ----------------------------------------------------------------
myAKSCluster  eastus      myResourceGroup  1.29.2               1.29.2                    Succeeded            myaksclust-myresourcegroup-19da35-bd54a4be.hcp.eastus.azmk8s.io
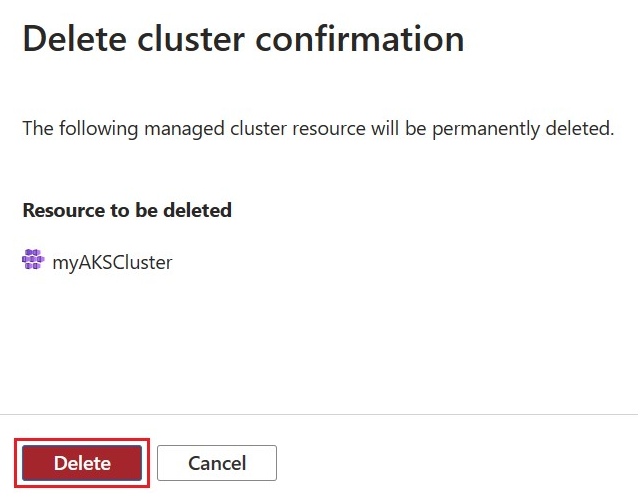
Delete the cluster
As this tutorial is the last part of the series, you might want to delete your AKS cluster to avoid incurring Azure charges.
Remove the resource group, container service, and all related resources using the
az group deletecommand.az group delete --name myResourceGroup --yes --no-wait
Note
When you delete the cluster, the Microsoft Entra service principal used by the AKS cluster isn't removed. For steps on how to remove the service principal, see AKS service principal considerations and deletion. If you used a managed identity, the identity is managed by the platform and doesn't require that you provision or rotate any secrets.
Next steps
In this tutorial, you upgraded Kubernetes in an AKS cluster. You learned how to:
- Identify current and available Kubernetes versions.
- Upgrade your Kubernetes nodes.
- Validate a successful upgrade.
For more information on AKS, see the AKS overview. For guidance on how to create full solutions with AKS, see the AKS solution guidance.
Azure Kubernetes Service


