Deploy Cloud Services (extended support) by using the Azure portal
This article shows you how to use the Azure portal to create an Azure Cloud Services (extended support) deployment.
Prerequisites
Review the deployment prerequisites for Cloud Services (extended support) and create the required resources.
Deploy Cloud Services (extended support)
To deploy Cloud Services (extended support) by using the portal:
Sign in to the Azure portal.
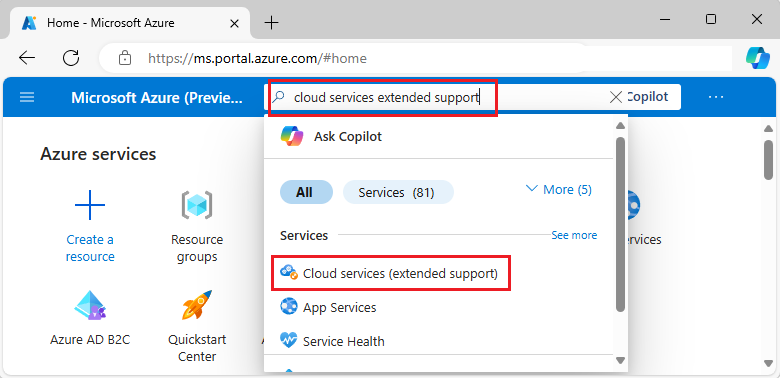
In the search bar, enter Cloud Services (extended support), and then select it in the search results.

On the Cloud services (extended support) services pane, select Create.

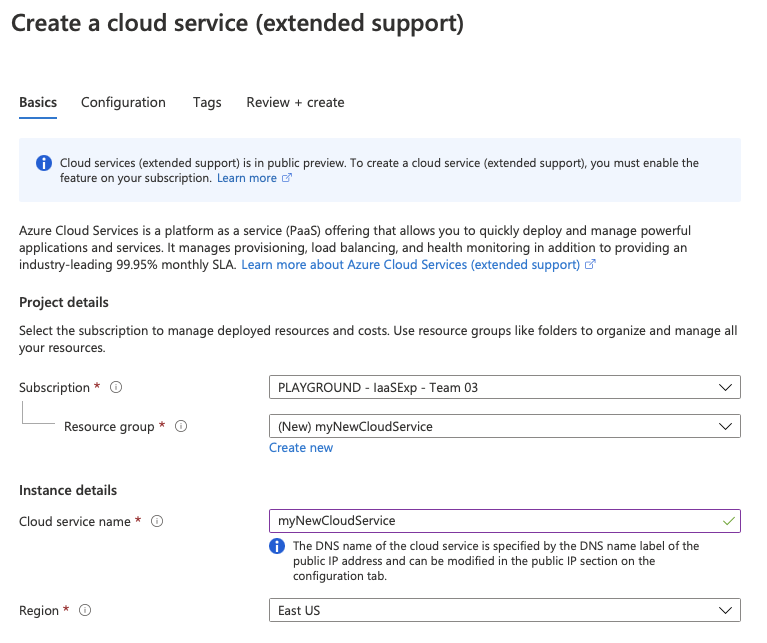
The Create a cloud service (extended support) pane opens.
On the Basics tab, select or enter the following information:
- Subscription: Select a subscription to use for the deployment.
- Resource group: Select an existing resource group, or create a new one.
- Cloud service name: Enter a name for your Cloud Services (extended support) deployment.
- The DNS name of the cloud service is separate and is specified by the DNS name label of the public IP address. You can modify the DNS name in Public IP on the Configuration tab.
- Region: Select the region to deploy the service to.

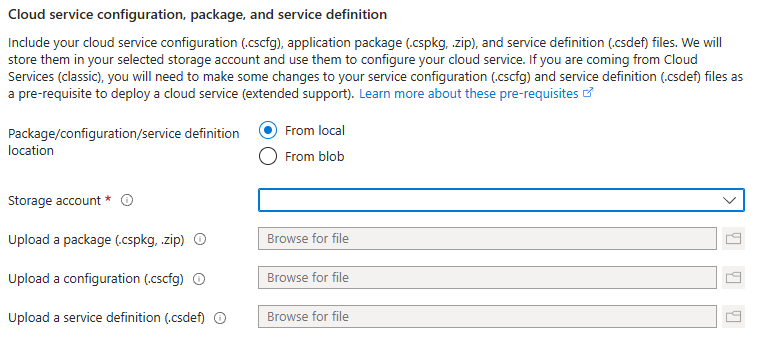
On the Basics tab under Cloud service configuration, package, and service definition, add your package (.cspkg or .zip) file, configuration (.cscfg) file, and definition (.csdef) file for the deployment. You can add existing files from blob storage or upload the files from your local machine. If you upload the files from your local machine, the files are then stored in a storage account in Azure.

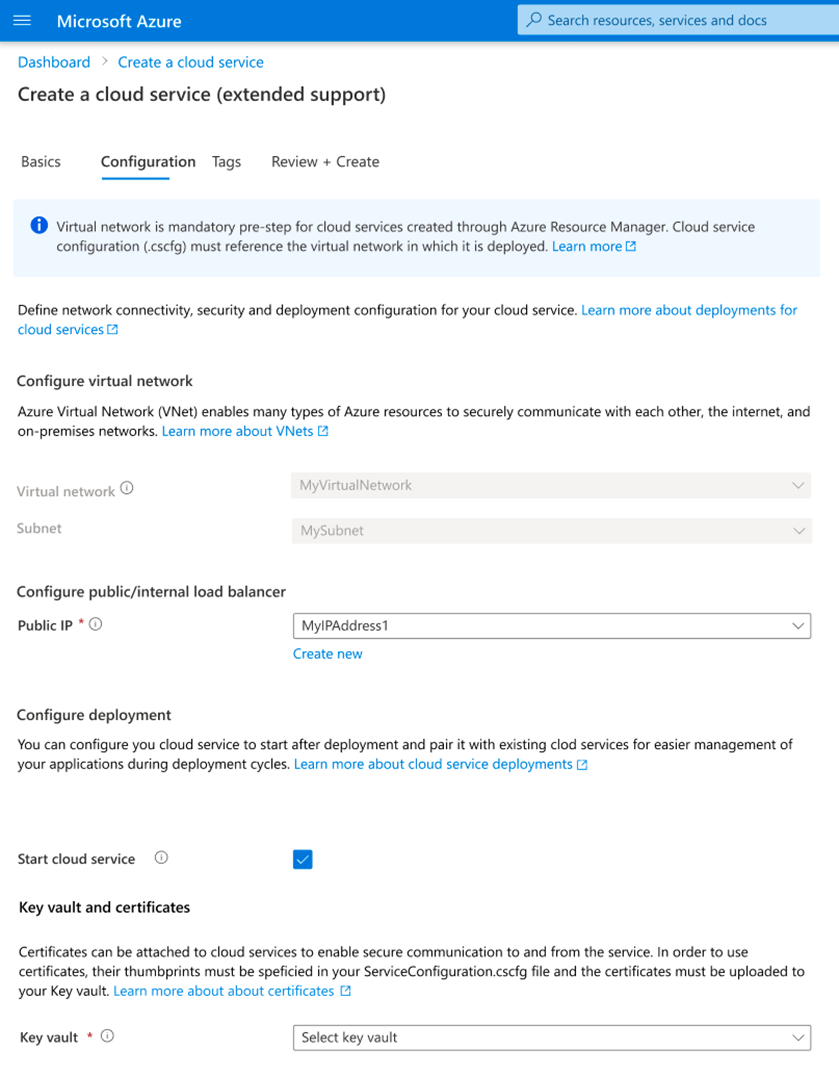
Select the Configuration tab, and then select or enter the following information:
Virtual network: Select a virtual network to associate with the cloud service, or create a new virtual network.
- Cloud Services (extended support) deployments must be in a virtual network.
- The virtual network must also be referenced in the configuration (.cscfg) file under
NetworkConfiguration.
Public IP: Select an existing public IP address to associate with the cloud service, or create a new one.
- If you have IP input endpoints defined in your definition (.csdef) file, create a public IP address for your cloud service.
- Cloud Services (extended support) supports only a Basic SKU public IP address.
- If your configuration (.cscfg) file contains a reserved IP address, set the allocation type for the public IP address to Static.
- (Optional) You can assign a DNS name for your cloud service endpoint by updating the DNS label property of the public IP address associated with the cloud service.
(Optional) Start cloud service: Select the checkbox if you want to start the service immediately after it deploys.
Key vault: Select a key vault.
- A key vault is required when you specify one or more certificates in your configuration (.cscfg) file. When you select a key vault, we attempt to find the selected certificates that are defined in your configuration (.cscfg) file based on the certificate thumbprints. If any certificates are missing from your key vault, you can upload them now , and then select Refresh.

When all information is entered or selected, select the Review + Create tab to validate your deployment configuration and create your Cloud Services (extended support) deployment.
Related content
- Review frequently asked questions for Cloud Services (extended support).
- Deploy Cloud Services (extended support) by using Azure PowerShell, an ARM template, or Visual Studio.
- Visit the Cloud Services (extended support) samples repository.