Manage a public IP address by using Azure Firewall
In this article, you learn how to manage public IP addresses for Azure Firewall by using the Azure portal. You learn how to create an Azure Firewall by using an existing public IP in your subscription, change the IP configuration, and finally, add an IP configuration to the firewall.
Azure Firewall is a cloud-based network security service that protects your Azure Virtual Network resources. Azure Firewall requires at least one public static IP address to be configured. This IP or set of IPs is the external connection point to the firewall.
Azure Firewall supports Standard SKU public IP addresses. Basic SKU public IP address and public IP prefixes aren't supported.
Prerequisites
- An Azure account with an active subscription. Create one for free.
- Three Standard SKU public IP addresses that aren't associated with any resources. For more information on creating a Standard SKU public IP address, see Quickstart: Create a public IP address by using the Azure portal.
- For the purposes of the examples in this article, create three new public IP addresses: myStandardPublicIP-1, myStandardPublicIP-2, and myStandardPublicIP-3.
Create an Azure firewall with an existing public IP
In this section, you create an Azure firewall. Use the first IP address you created in the prerequisites as the public IP for the firewall.
In the Azure portal, search for and select Firewalls.
On the Firewalls page, select Create.
In Create firewall, enter or select the following information.
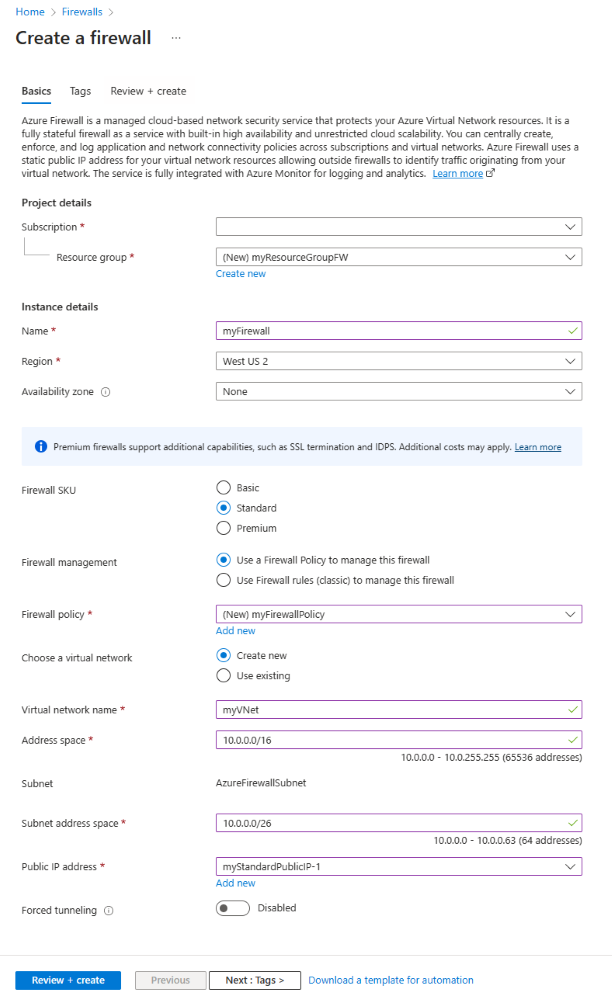
Setting Value Project details Subscription Select your subscription. Resource group Create a new resource group named myResourceGroupFW. Instance details Name Enter myFirewall. Region Select West US 2. Availability zone Leave the default of None. Firewall SKU Select Standard. Firewall management Leave the default of Use a Firewall Policy to manage this firewall. Firewall policy Create a new firewall policy named myFirewallPolicy in West US 2, and set the Policy tier to Standard. Choose a virtual network Leave default of Create new. Virtual network name Enter myVNet. Address space Enter 10.0.0.0/16. Subnet address space Enter 10.0.0.0/26. Public IP address Select myStandardPublicIP-1 or your public IP. Forced tunneling Leave the default of Disabled. Select Review + create.
Select Create.
The following image shows the Create firewall page with the example information.
Change the public IP address for a firewall
In this section, you change the public IP address associated with the firewall. A firewall must have at least one public IP address associated with its configuration. You can't update the IP address if the firewall's existing IP has any destination network address translation (DNAT) rules associated with it.
In the Azure portal, search for and select Firewalls.
On the Firewalls page, select myFirewall.
On the myFirewall page, go to Settings, and then select Public IP configuration.
In Public IP configuration, select myStandardPublicIP-1.
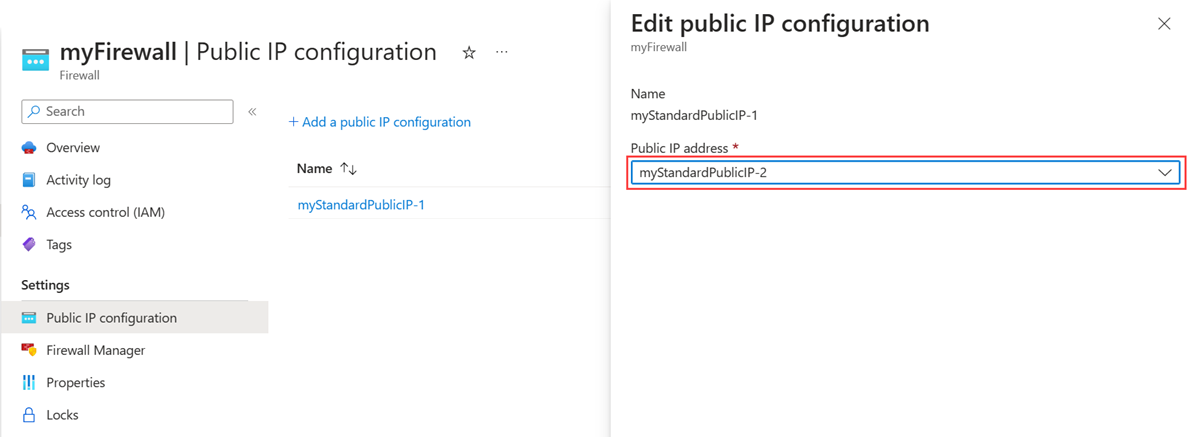
Select the Public IP address dropdown, and then select myStandardPublicIP-2.

Select Save.
Add a public IP configuration to a firewall
In this section, you add a public IP configuration to Azure Firewall. For more information about multiple IPs, see Multiple public IP addresses.
In the Azure portal, search for and select Firewalls.
On the Firewalls page, select myFirewall.
On the myFirewall page, go to Settings, and then select Public IP configuration.
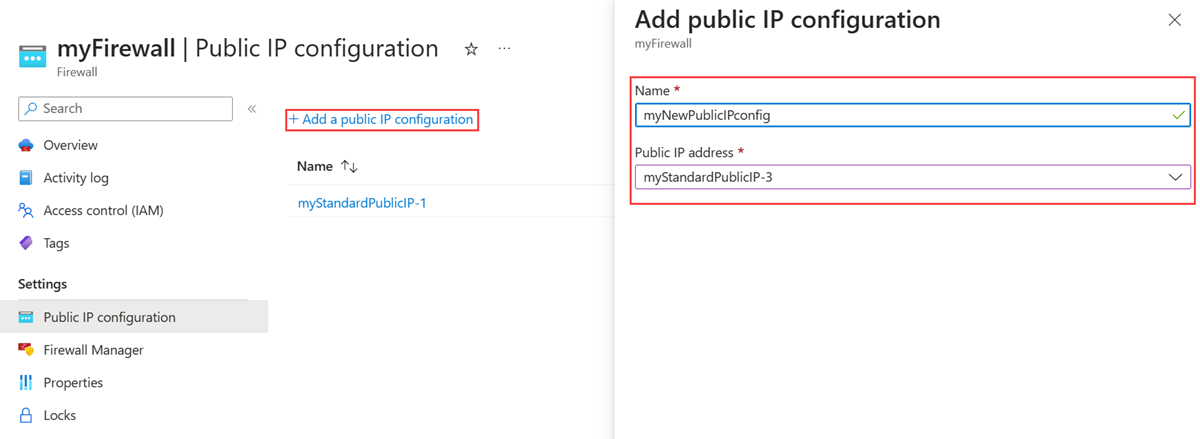
Select Add a public IP configuration.
In Name, enter myNewPublicIPconfig.
In Public IP address, select myStandardPublicIP-3.

Select Add.
Advanced configuration
This example is a simple deployment of Azure Firewall. For advanced configuration and setup, see Tutorial: Deploy and configure Azure Firewall and policy by using the Azure portal. When associated with multiple public IPs, Azure Firewall randomly selects the first source Public IP for outbound connectivity and only uses the next available Public IP after no more connections can be made from the current public IP due to SNAT port exhaustion. You can associate a network address translation (NAT) gateway to a Firewall subnet to extend the scalability of source network address translation (SNAT). With this configuration, all outbound traffic uses the public IP address or addresses of the NAT gateway. For more information, see Scale SNAT ports with Azure Virtual Network NAT.
Note
. It is recommended to instead use [NAT Gateway] to provide dynamic scalability of your outbound connectivity. Protocols other than Transmission Control Protocol (TCP) and User Datagram Protocol (UDP) in network filter rules are unsupported for SNAT to the public IP of the firewall. You can integrate an Azure firewall with the Standard SKU load balancer to protect backend pool resources. If you associate the firewall with a public load balancer, configure ingress traffic to be directed to the firewall public IP address. Configure egress via a user-defined route to the firewall public IP address. For more information and setup instructions, see Integrate Azure Firewall with Azure Standard Load Balancer.
Next steps
In this article, you learned how to create an Azure firewall and use an existing public IP. You changed the public IP of the default IP configuration. Finally, you added a public IP configuration to the firewall.
- To learn more about public IP addresses in Azure, see Public IP addresses.
- To learn more about Azure Firewall, see What is Azure Firewall?
