In this article, you learn how to update a peered virtual network by modifying, adding, or deleting an address space using the Azure portal. These updates don't incur downtime interruptions. This feature is useful when you need to grow or resize the virtual networks in Azure after scaling your workloads.
Update the address space for a peered virtual network using the Azure portal
Prerequisites
There are two items:
An existing peered virtual network with two virtual networks
If you add an address space, ensure that it doesn't overlap other address spaces
Modify the address range prefix of an existing address range
In this section, you modify the address range prefix for an existing address range within your peered virtual network.
In the search box at the top of the Azure portal, enter virtual networks. Select Virtual networks from the search results.
From the list of virtual networks, select the virtual network to modify.
Under Settings, select Address space.
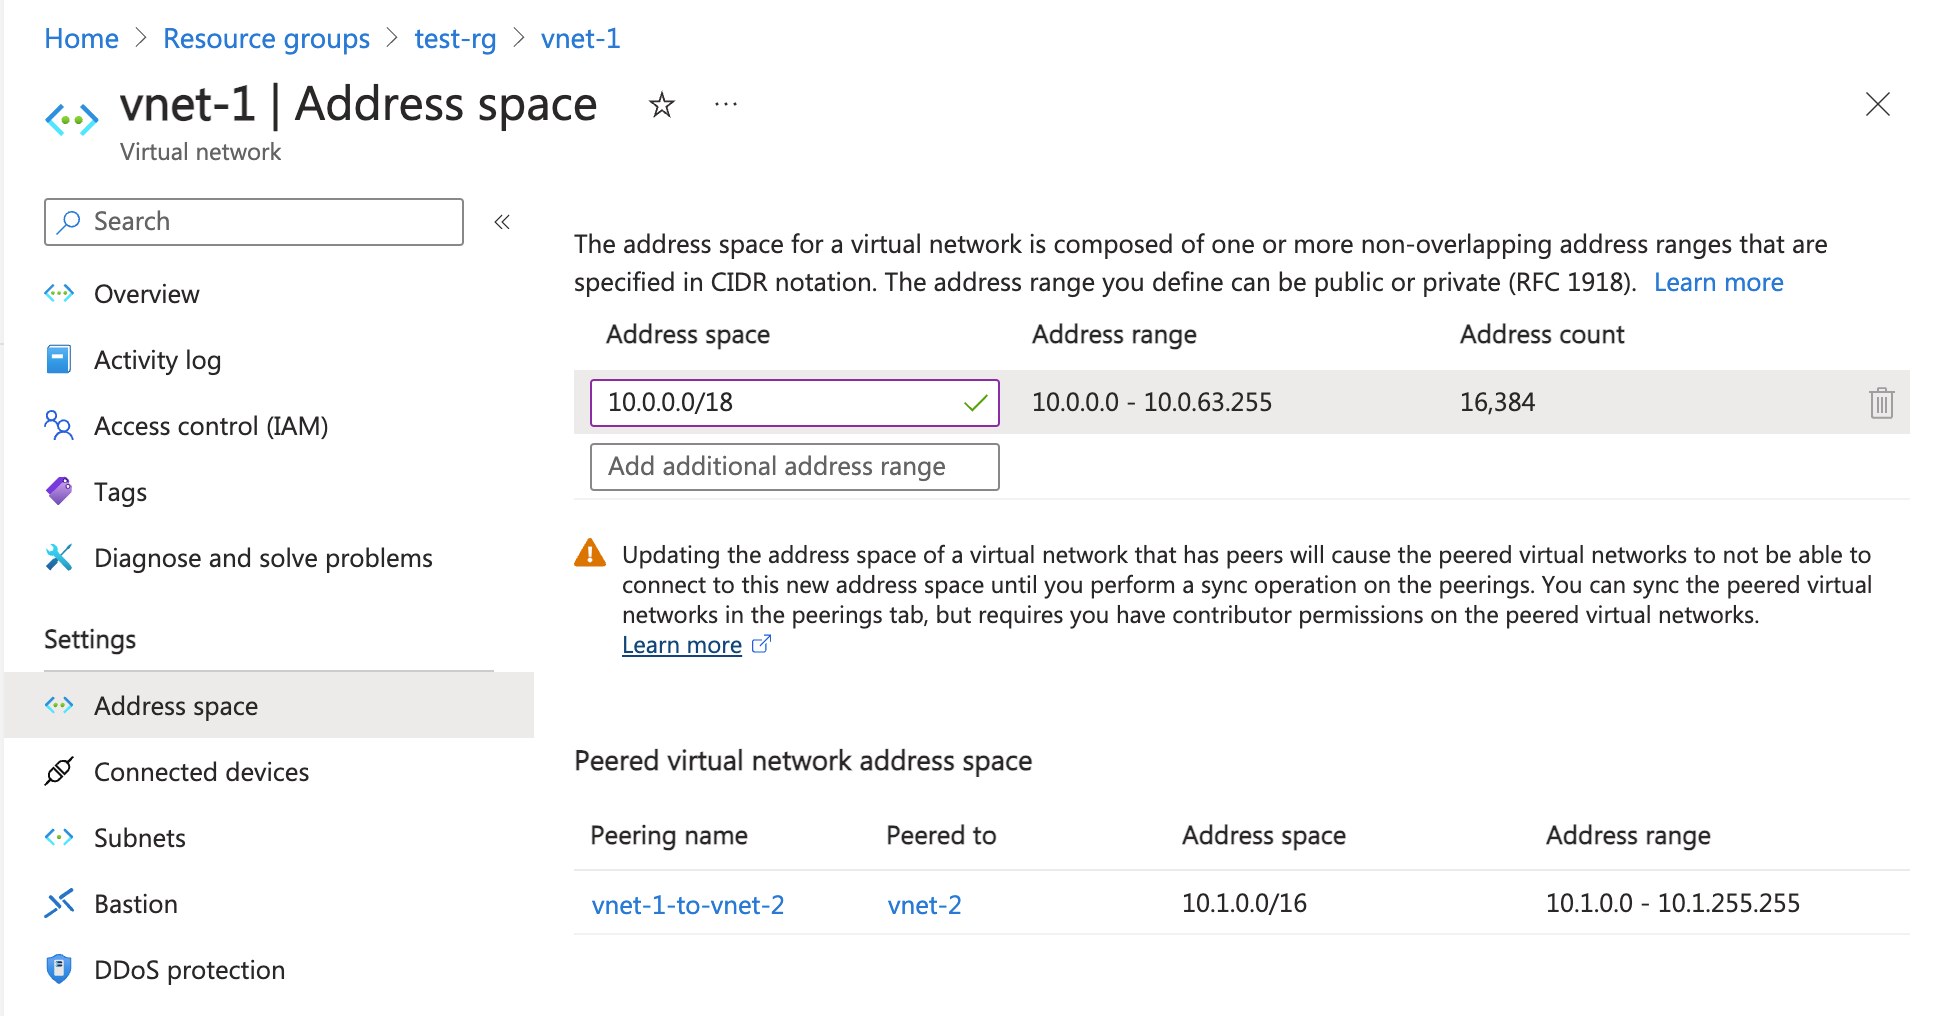
On the Address space page, change the address range prefix per your requirements, and select Save.
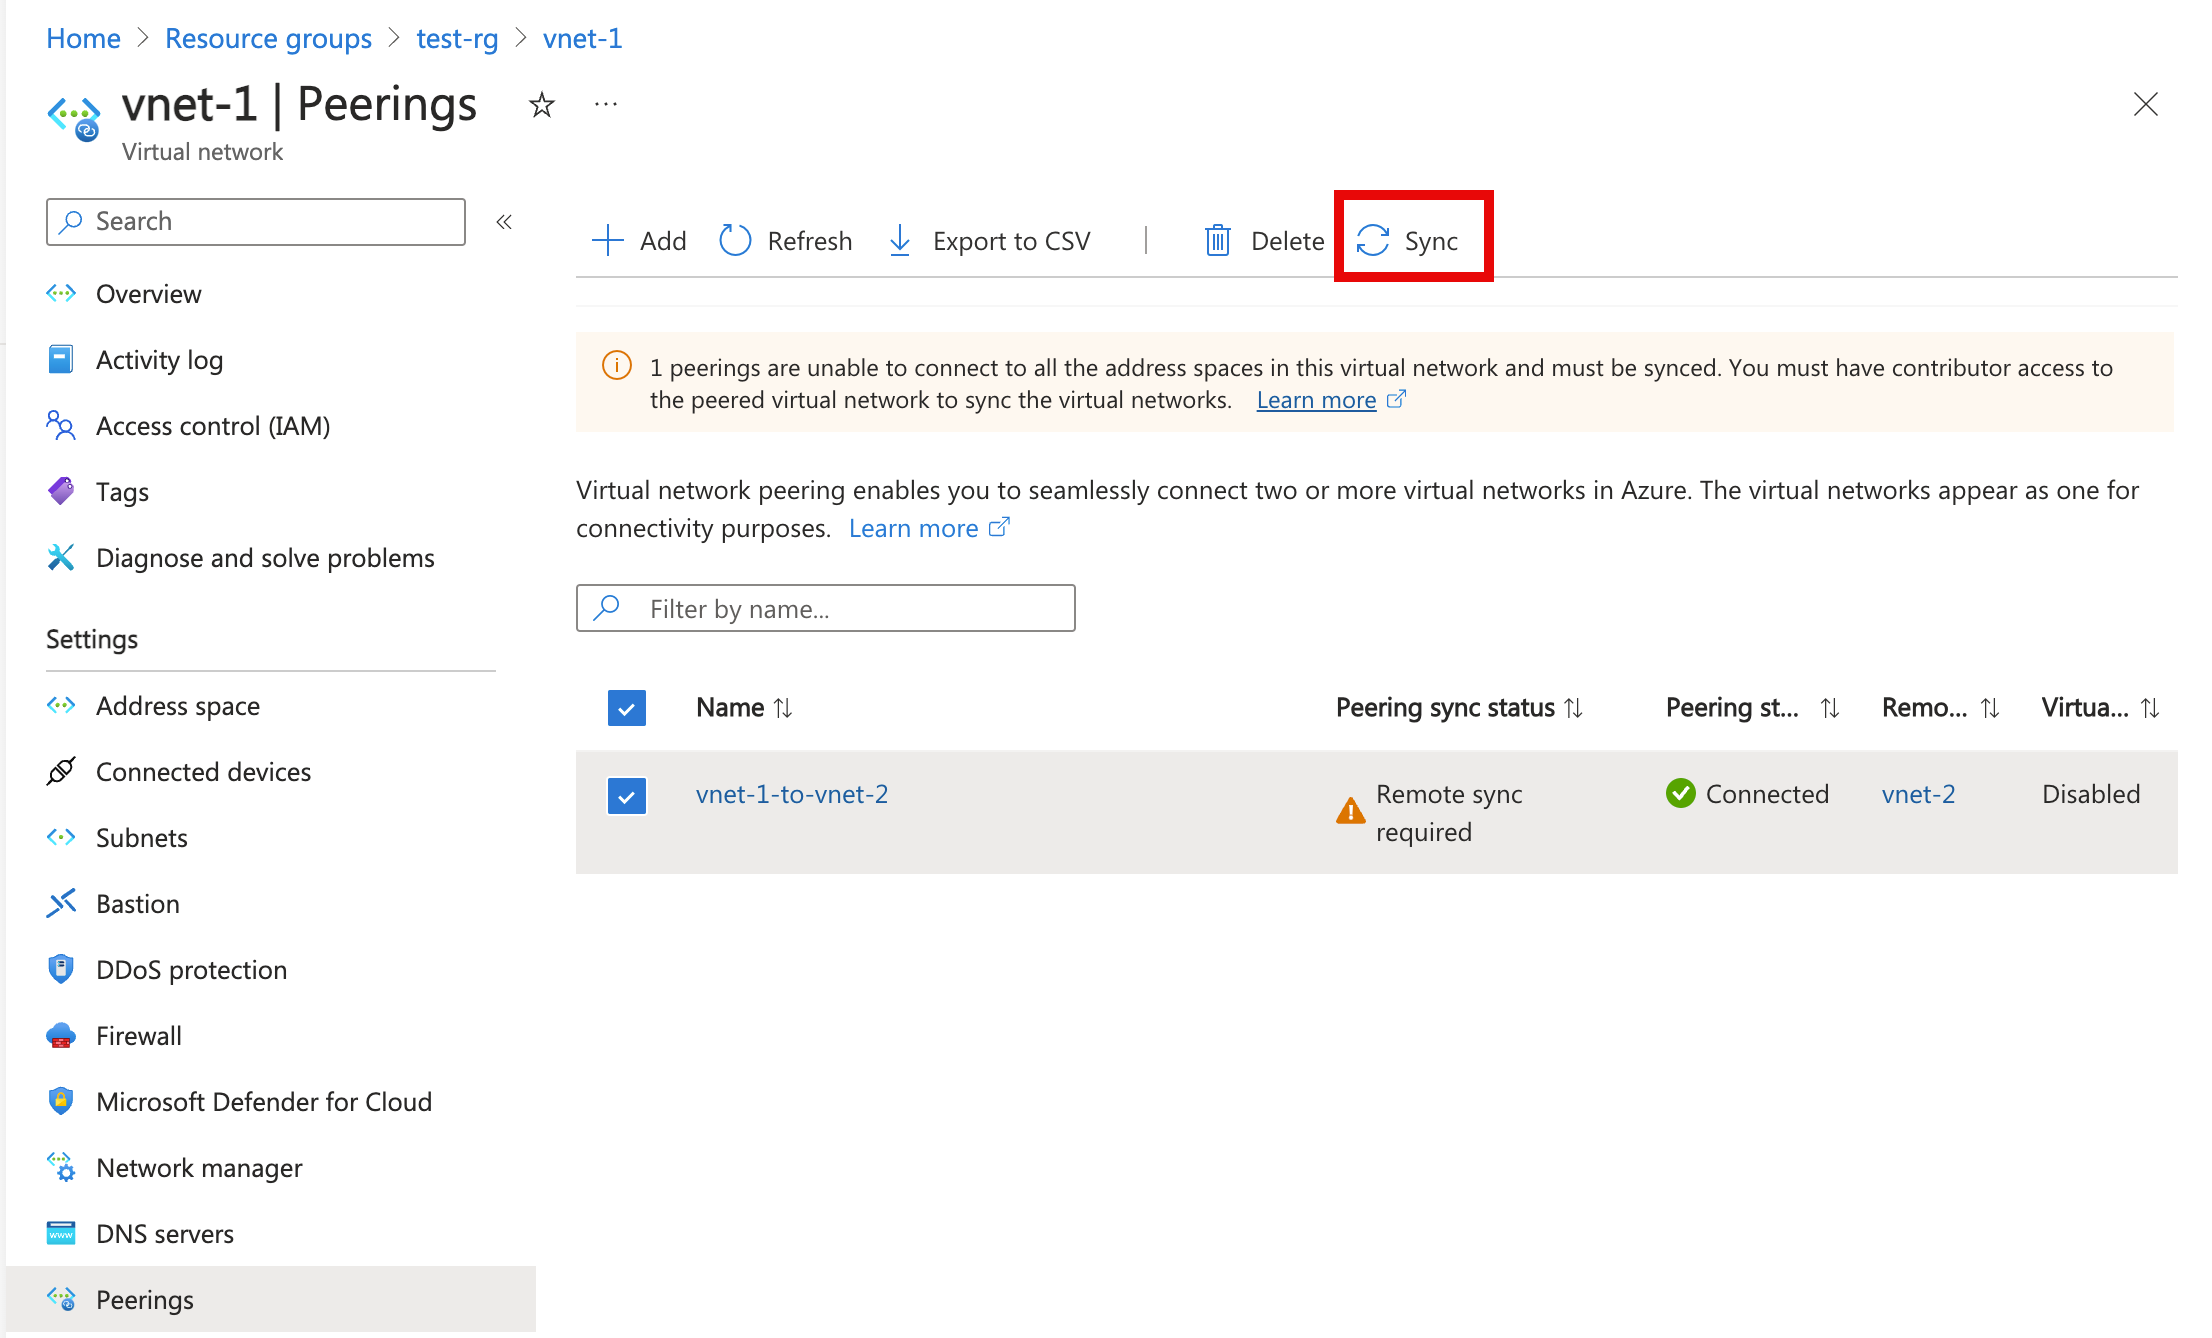
Under Settings, select Peerings and select the checkbox for the peering that you want to sync.
Select Sync from the taskbar.
Select the peer to resync. Select the directory to authenticate if needed in Virtual network peering sync.
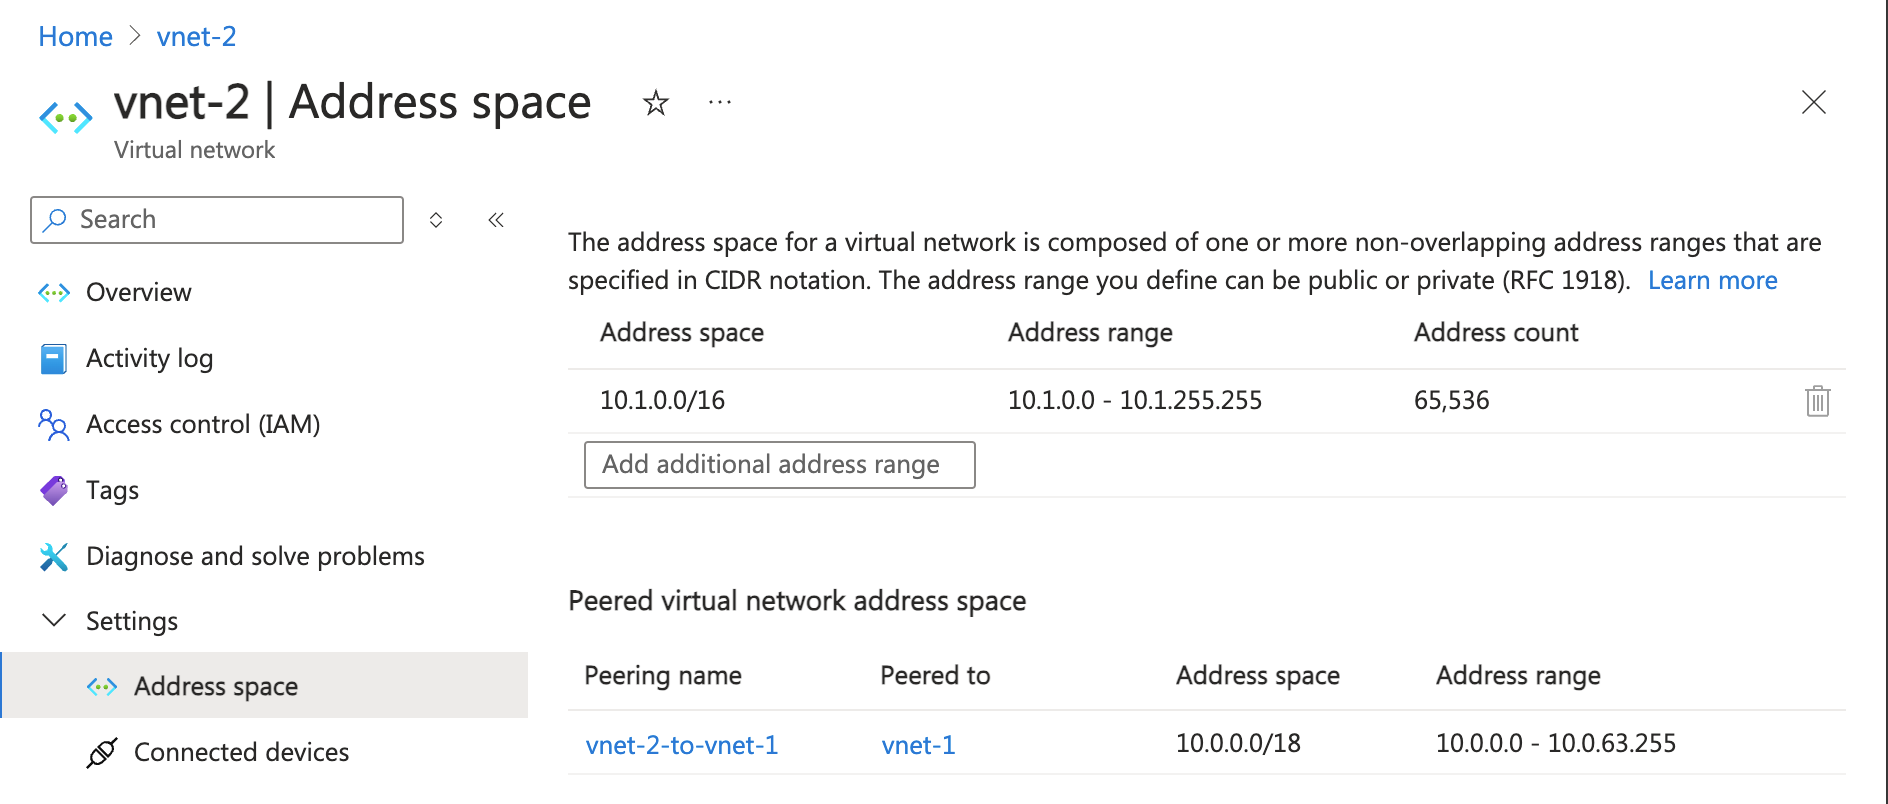
Under Settings for the peered virtual network, select Address space and verify that the address space listed has been updated.
Note
When you update the address space for a virtual network, you need to sync the virtual network peer for each remote peered virtual network. We recommend that you run sync after every resize address space operation instead of performing multiple resizing operations and then running the sync operation.
The following actions require you to sync:
- Modifying the address range prefix of an existing address range, for example changing 10.1.0.0/16 to 10.1.0.0/18
- Adding address ranges to a virtual network
- Deleting address ranges from a virtual network
Add an address range
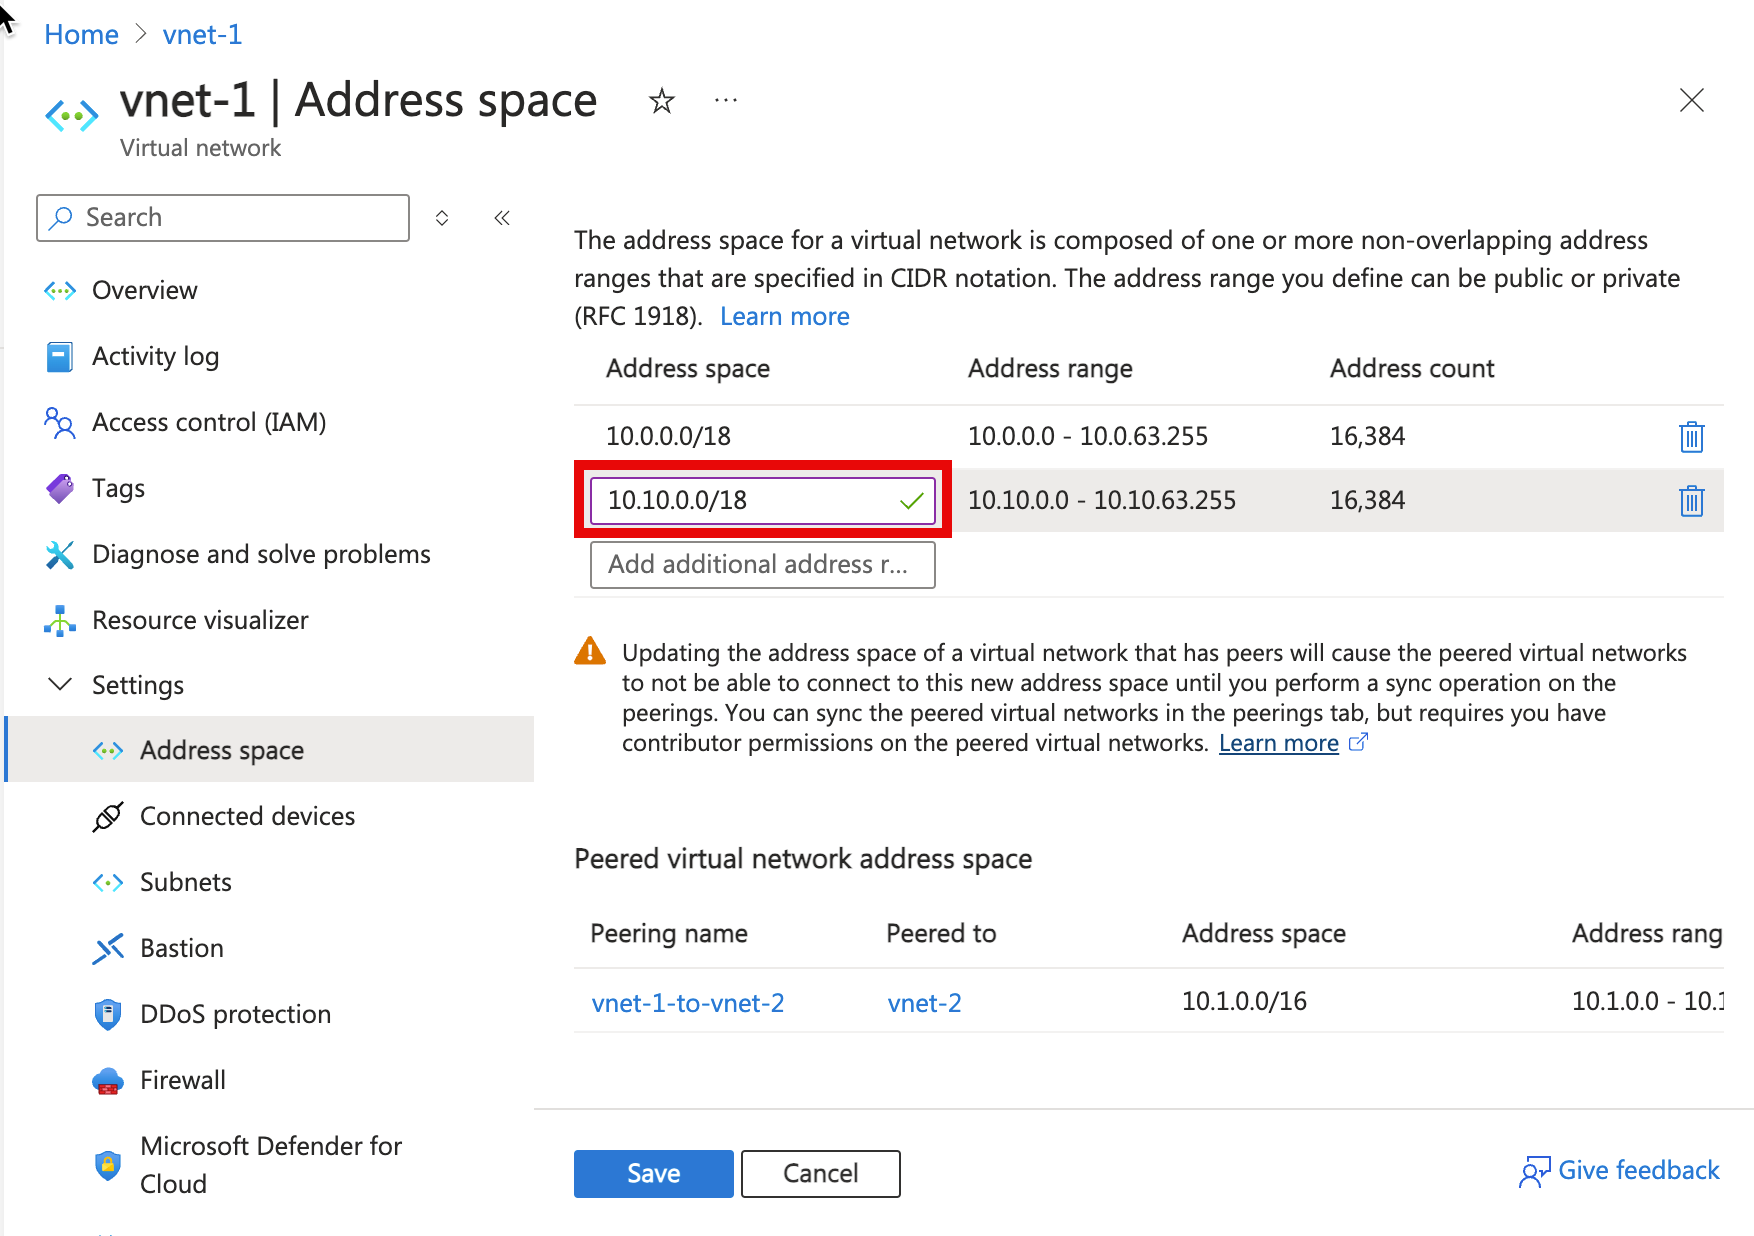
In this section, you add an IP address range to the IP address space of a peered virtual network.
In the search box at the top of the Azure portal, enter virtual networks. Select Virtual networks from the search results.
From the list of virtual networks, select the virtual network where you're adding an address range.
Under Settings, select Address space.
On the Address space page, add the address range per your requirements, and select Save when finished.
Under Settings, select Peering, and sync the peering connection.
Under Settings for the peered virtual network, select Address space and verify that the address space listed has been updated.
Delete an address range
In this task, you delete an IP address range from a subnet in a peered virtual network.
Important
Before you can delete an address space, it must be empty. If a resource or service exists in the address range, you can't remove the address range. To remove an address range, you must remove any resource or services using the address range within the subnet.
In the search box at the top of the Azure portal, enter virtual networks. Select Virtual networks from the search results.
From the list of virtual networks, select the virtual network from which to remove the address range.
Under Settings, select Address space.
To the right of the address range you want to remove, select the trash can icon.
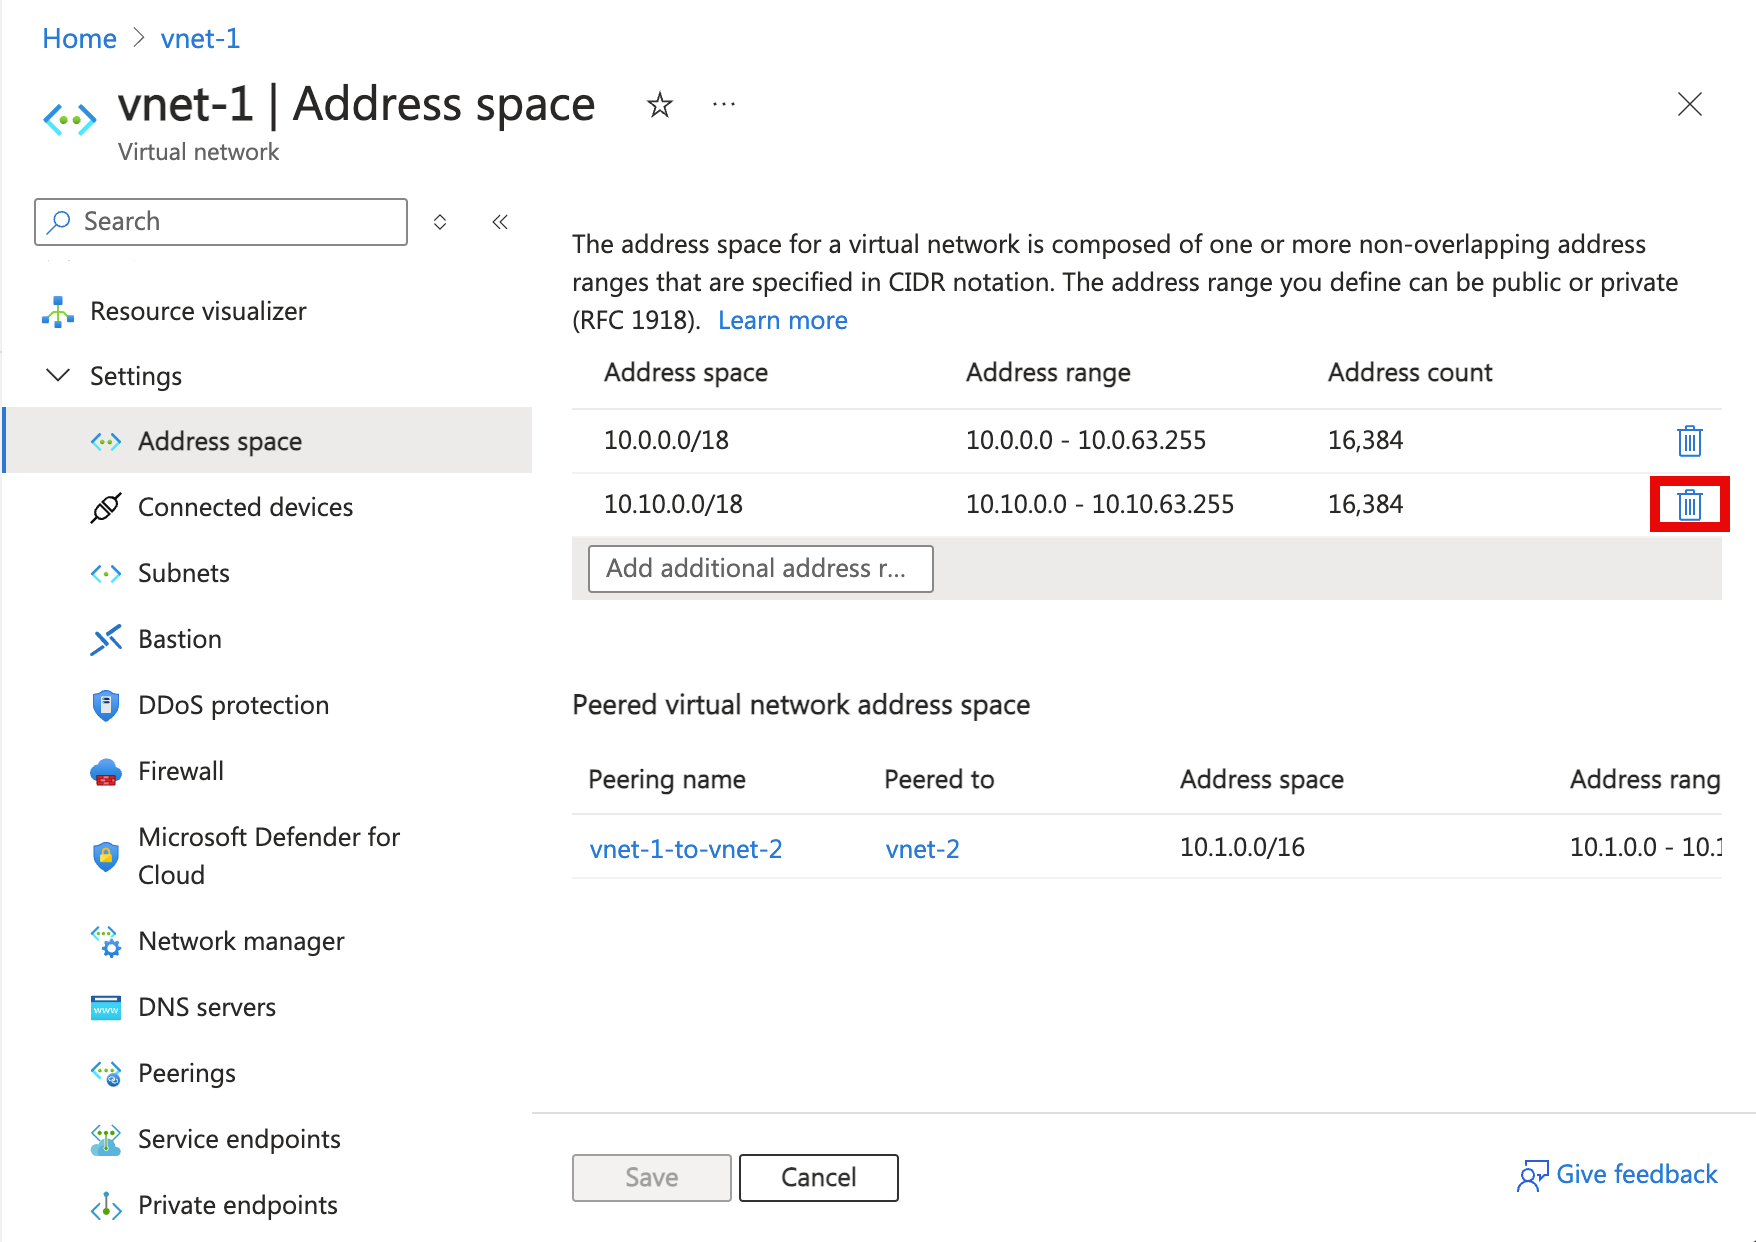
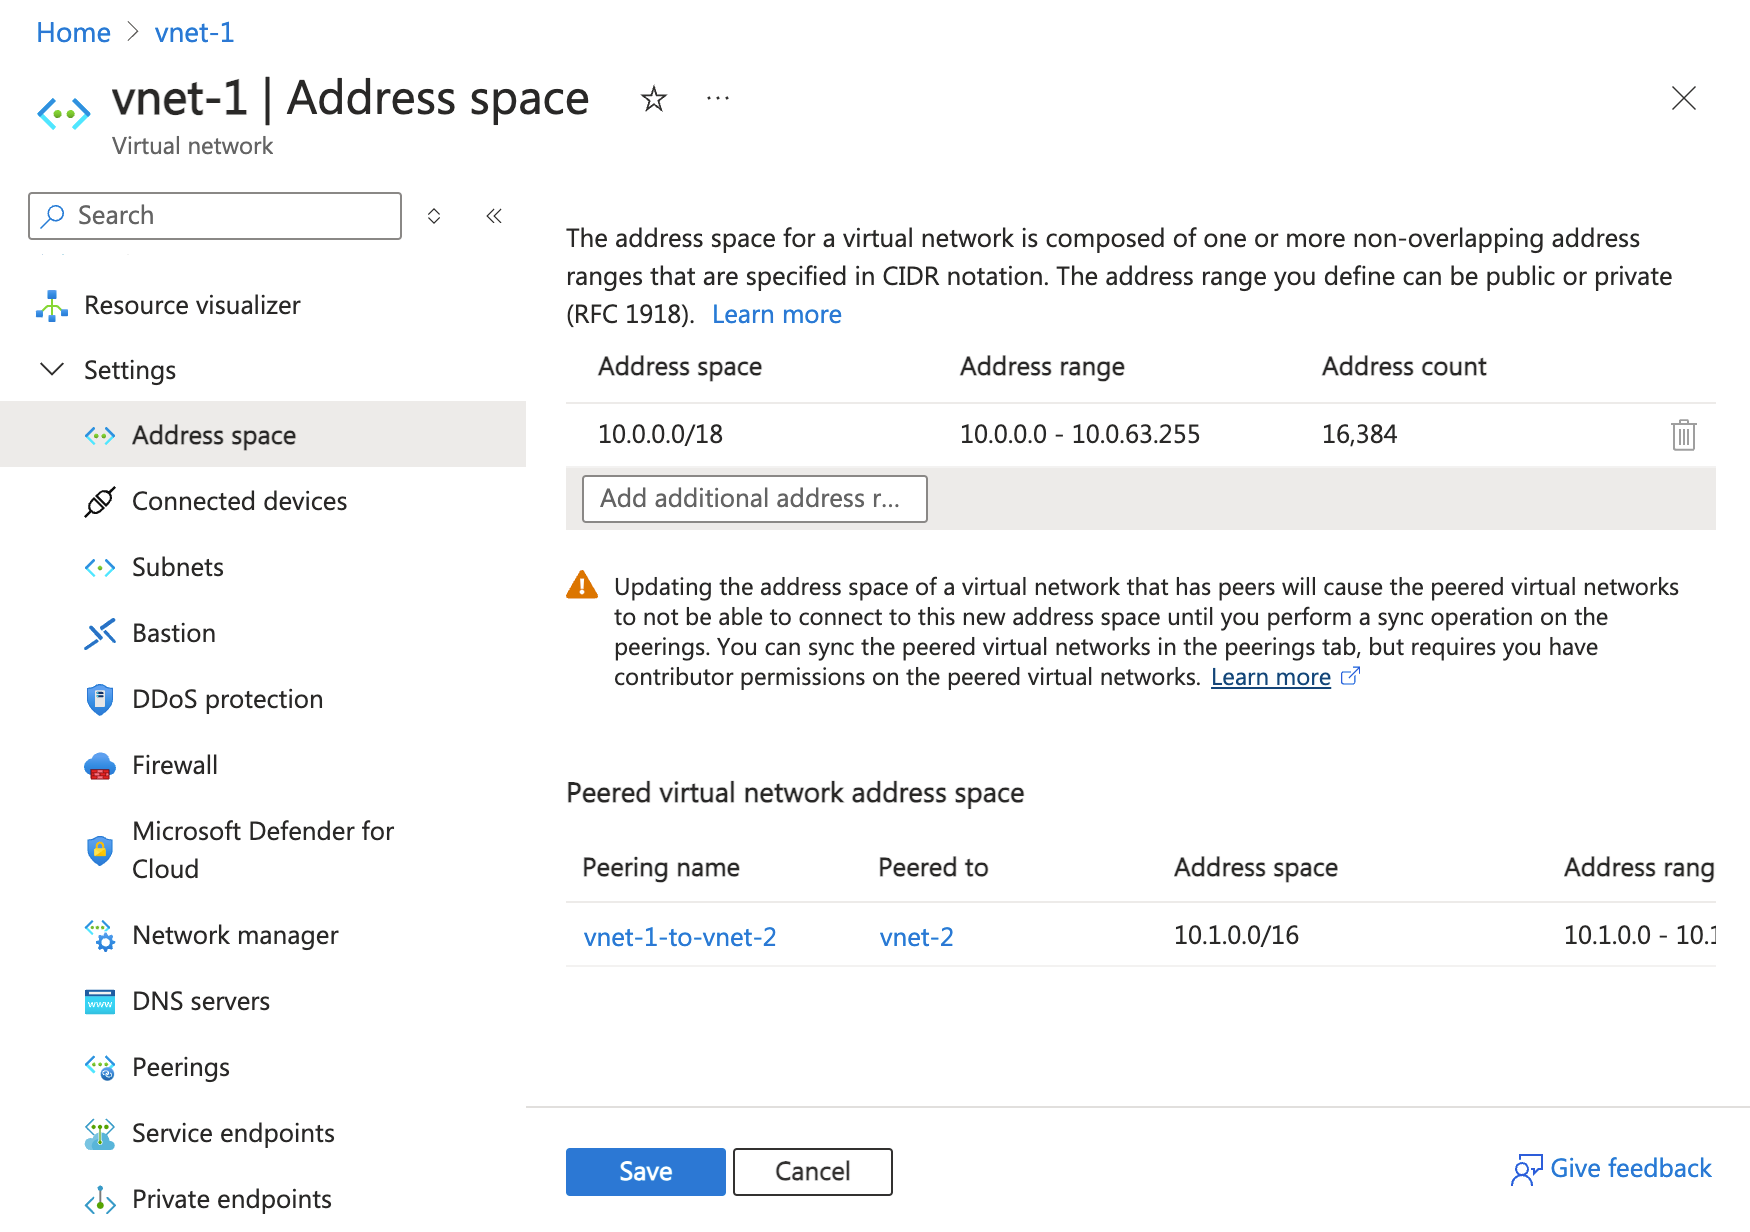
Select Save after you complete your changes.
Under Settings, select Peering and sync the peering connection.
Under Settings for the peered virtual network, select Address space and verify that the address space listed has been updated.
