How to config Password Box in Windows Installer

Jason Qian 41 Reputation points
2020-09-22T15:37:12.613+00:00

I use Visual studio 2008 for the installation project. The current project has a password field in the Textboxes. It shows "******" during the installation.  I am trying to add a new Textbox with a password field, however, the new field added displays a normal text format.

I have compared the 2 Textboxes and could not see any differences.  

Open the .msi with Orca, the working one is Type 8499 and the no working one is 307.

My question is where and how to configure the "Type"?

I did change the Type from 307 to 8499 in Orca and saved, but is still displayed in normal text format.

Thanks for help,

Jason

Visual Studio Debugging
Visual Studio: A family of Microsoft suites of integrated development tools for building applications for Windows, the web and mobile devices.Debugging: The act or process of detecting, locating, and correcting logical or syntactical errors in a program or malfunctions in hardware. In hardware contexts, the term troubleshoot is the term more frequently used, especially if the problem is major.
999 questions
0 comments No comments
{count} votes

Accepted answer
  1. RLWA32 45,476 Reputation points
    2020-09-22T16:14:30.527+00:00

    I don't know what you're changing but to use Orca to change a textbox edit control to a password field you need to set the Password attribute as described here - edit-control After opening the .msi file with Orca go to the Control Table and find the Edit control for the dialog that you want to turn into a password field. Change the attributes of that field.
    For example,
    26503-pwmsi.png


1 additional answer

Sort by: Most helpful
  1. RLWA32 45,476 Reputation points
    2020-09-23T13:59:31.793+00:00

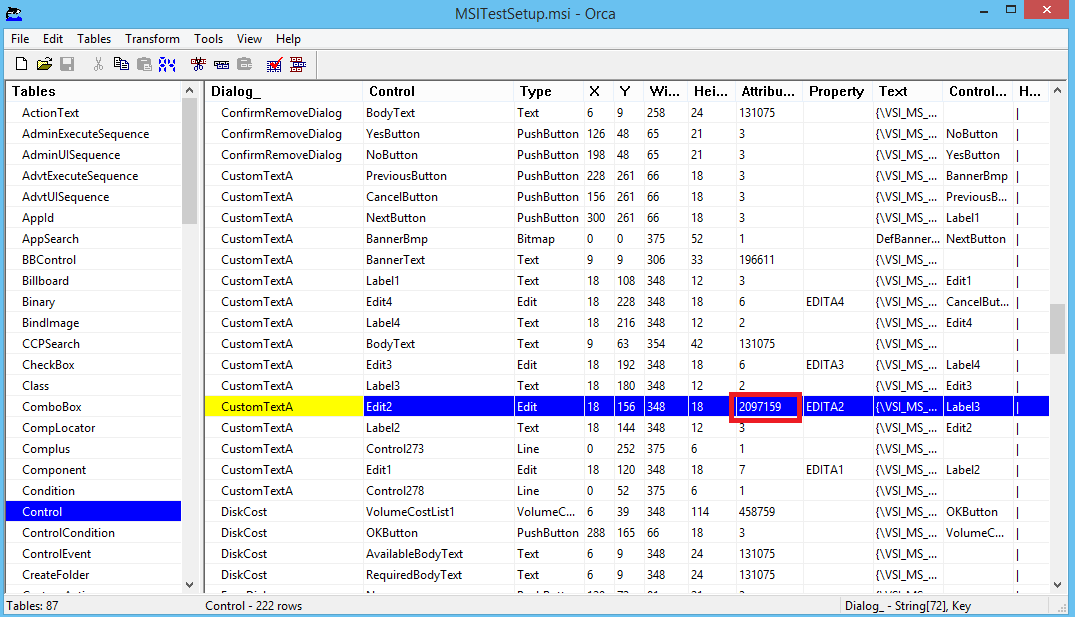
    I'm writing this as an answer because of the 1000 character limit on comments. Using Orca to update an installer (.msi file) after every build is tedious. The process can be automated by using the installer project's post-build event to run a script. Continuing with my previous example, the following script when run as a post-build event will update the .msi file to add the password attribute to the Edit2 control of the CustomTextA dialog.

    The script file should be place in the same folder as the installer project (.vdproj file). The post-build event command assumes that cscript.exe is on the path.

    EditToPassword.js -

    // EditToPassword.js <msi-file>
    // Performs a post-build fixup of an msi to add the password attribute to an edit field in the control table
    
    
    // Constant values from Windows Installer
    var msiOpenDatabaseModeTransact = 1;
    var msiViewModifyReplace        = 4
    
    
    if (WScript.Arguments.Length != 1)
    {
        WScript.StdErr.WriteLine(WScript.ScriptName + " file");
        WScript.Quit(1);
    }
    
    var filespec = WScript.Arguments(0);
    var installer = WScript.CreateObject("WindowsInstaller.Installer");
    var database = installer.OpenDatabase(filespec, msiOpenDatabaseModeTransact);
    
    var sql
    var view
    var record
    var attribute
    
    try
    {
        WScript.Echo("Updating the Control table...");
        // Add password attribute to edit control
        sql = "SELECT `Dialog_`, `Control`, `Type`, `X`, `Y`, `Width`, `Height`, `Attributes`, `Property`, `Text`, `Control_Next`, `Help` FROM `Control` WHERE `Dialog_`='CustomTextA' AND `Control`='Edit2'";
        view = database.OpenView(sql);
        view.Execute();
        record = view.Fetch();
        attribute = record.IntegerData(8);
        attribute += 2097152;
        record.IntegerData(8) = attribute;
        view.Modify(msiViewModifyReplace, record);
        view.Close();
    
        database.Commit();
    }
    catch(e)
    {
        WScript.StdErr.WriteLine(e);
        WScript.Quit(1);
    }
    

    Command line to use for installer project post-build event -

    cscript.exe "$(ProjectDir)EditToPassword.js" "$(BuiltOuputPath)"
    
    0 comments No comments

Your answer

Answers can be marked as Accepted Answers by the question author, which helps users to know the answer solved the author's problem.