User Profile Picture Import with Active Directory Import(Dirsync)
UPDATE 8/16/17 My colleague, Josh, wrote a great post on his blog detailing the benefits and considerations when moving to ADI. https://blogs.technet.microsoft.com/spjr/2017/08/14/sharepoint-considerations-when-switching-from-fim-sync-to-ad-import/
SharePoint 2013 introduced Active Directory Import. This is built on a technology called DirSync. There are many advantages with using Active Directory Import. We do not need to start up the User Profile Synchronization service and the syncs are many times faster than FIM.
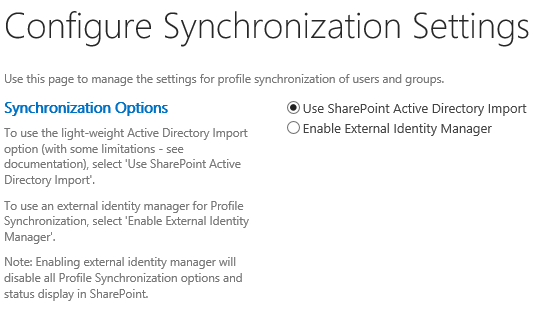
SharePoint 2016 only has two options: External Identity Provider(MIM) or Active Directory Import.
This script will import profile pictures from Active Directory to SharePoint using DirSync. You can have your pictures imported and use Active Directory Import. This assumes your user profiles are being imported and populated. This will require your account to have Replicate Directory Changes for your domain as you would for SharePoint. I would suggest using the same account that you are using to sync users in SharePoint.
Scroll to the bottom for the entire script. Make sure to create the DNLookup.xml
There is logging and even a write to disk so you can see the pictures that were imported. Logs and the pictures will be written to $location. Here are the variables that will need to be changed to your environment:
$Location = "C:\Dirsync\" #First time running, just run "DirSync" then "UploadPicture $adusers" #Update RootDSE to match your domain $RootDSE = [ADSI]"LDAP://dc=contoso,dc=com" $site = Get-SpSite https://MySiteHost $domain = "contoso\" #This will write the pictures to the folder specified in $location $write2disk = $true #LDAP filter that is currently set to pull in users with thumbnailphoto and not disabled users. $LDAPFilter = "(&(objectCategory=person)(objectclass=user)(thumbnailphoto=*)(!(userAccountControl:1.2.840.113556.1.4.803:=2)))" #Set $UseDifferentSvcAccount to true to be prompted for a different service account. False will use the user that is running the script to connect to AD. $UseDifferentSvcAccount = $false
We also need a DNLookup.xml in the $location file. We need the DNLookup just like SharePoint does since DirSync returns DN. Create that file and fill it with this sample data:
<Users> <UR> <dn>CN=aa,ou=hh</dn> <sAMAccountName>PlaceholderAccountDonotdelete</sAMAccountName> </UR> <UR> <dn>CN=bb,ou=hh</dn> <sAMAccountName>PlaceholderAccountDonotdelete2</sAMAccountName> </UR> </Users>
The first time you run this script it will run a full sync. The cookie.bin will be populated. This will require your account to have Replicate Directory Changes(same requirement for SharePoint) for your domain as you would for SharePoint. I would suggest using the same account that you are using to sync users in SharePoint.
NOTE: We still need to run Update-SPProfilePhotoStore to create the thumbnails
Download the zip from here
Comments
- Anonymous
August 20, 2017
Excellent. - Anonymous
November 30, 2017
do we need to change the CN=aa,ou=hh ?? in the DNLookup file?- Anonymous
November 30, 2017
Do not change that. It's a place holder since I couldn't get my XML generation to work correctly in PowerShell. I found that the place holder is easier since we just clone the XML then change the values.
- Anonymous
- Anonymous
December 07, 2017
The comment has been removed- Anonymous
December 14, 2017
Thanks Joni!
- Anonymous
- Anonymous
November 08, 2018
Problem: the script cannot process the thumbnailPhoto attribute, where the value >8KB. Any fix/workaround?Otherwise, great - thanks!- Anonymous
December 19, 2018
I haven't reproduced that issue but I found a performance related bug that will speed the script up significantly and might fix this issue as well. A new version should be posted soon.- Anonymous
January 04, 2019
Thanks for the reply. Looking forward to it.- Anonymous
April 24, 2019
A new version is published here: https://adamsorenson.com/sharepoint-profile-picture-import-1-3/
- Anonymous
- Anonymous
- Anonymous