Build a Windows 8.1 App before dessert with Project Siena
Last week, you may have seen that Microsoft came out with a Windows 8 application called Project Siena. You can read one of the many press releases here.
In this blog post, I'm going to show you how you can build a simple and useful Windows app in a few hours.
You can now follow along as I walk Michael Palermo at DevRadio through building his first Project Siena app.
Step 1: Install Project Siena on your Windows 8/8.1 device.
You can download it here.
If you're going to want to submit this to the store, you should do these two things as well:
Get a developer account — Use this link to register.
Download and install Visual Studio Express 2012 for Windows 8 (don’t download the Express 2013 version). And don’t worry, you don’t need to know how to use Visual Studio, this is just to be able to Submit your newly created app to the Windows Store.
Step 2: Come up with an app idea.
I love teaching people the history of women computing, and that’s what my app is going to do.
I already have 2 premade excel files and an RSS feed I use in a windows phone app I’ve built, which I’ll be using, you can download them for yourself here:https://sdrv.ms/1e2S2LM.
You will need to replace the images and videos with one on your local computer, as I have not uploaded them.
Step 3: Launch Project Siena & Add Data Sources
Please note, that I am no longer saving dessert until I complete this app. I am eating it while I build the app. Mint chocolate chip ice cream is my favorite.
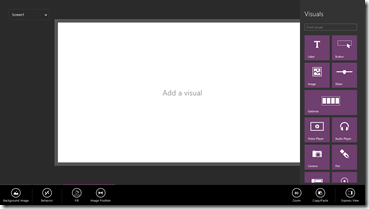
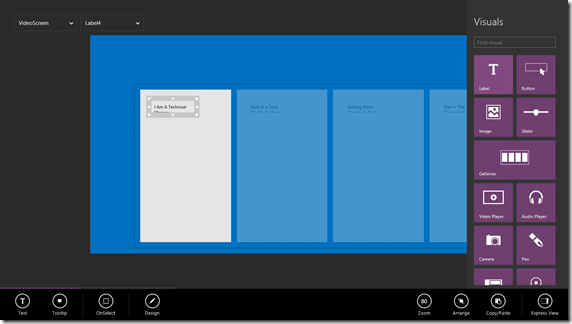
When Project Siena first opens, you’ll get a screen like this. As you can see on the right side, there are lots of different visuals we can add.
The first thing we’re going to do, though, is add our data sources. If you swipe down form the top/right click in the empty space, a menu bar will appear. Choose File –> Data Sources, and this page will appear.
On the right side, choose the + and we can add our two excel files (each individually, importing the table from each document one at a time), as well as our RSS feed.
Step 4: Let’s add some visuals.
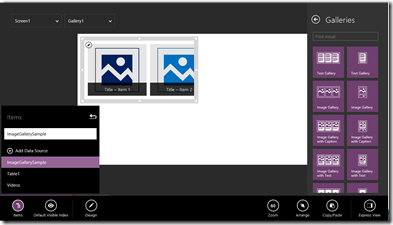
Select Add Visual + to open Add Visuals, and then click Galleries
Click Image gallery with Caption.
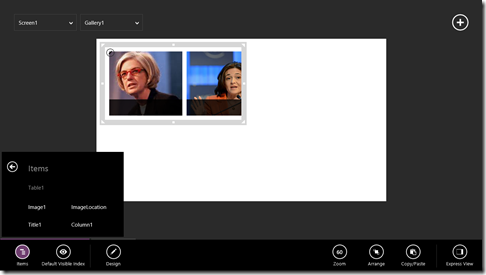
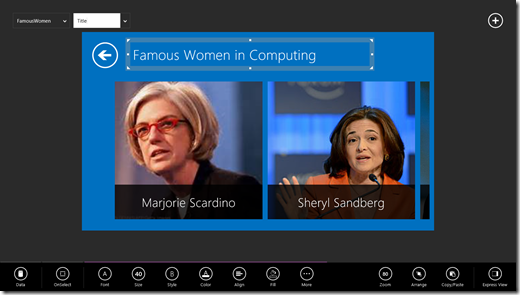
An Items menu will pop up. I’m going to use Table 1 to create a famous women in Computing gallery. When I select Table 1, we’re brought to the following screen.
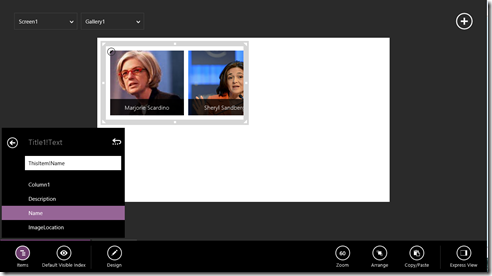
We want to change the caption on each woman to be her name, so if we choose Title 1, we can change it to be Name.
Next we’ll resize the gallery of famous women in computing to be pretty large as well as change the background color.
The background color can be changed by clicking on the empty part of the page, and selecting fill. I decided to go with a pretty blue.
We can resize things like we do in any other program. By dragging the corners of the object.
Step 5: Add a back button, a title, and name the page
Let’s add a back button and a title to make this page more complete.
Back button. I want people to come to this page from another page, and then be able to return to that initial launch screen.
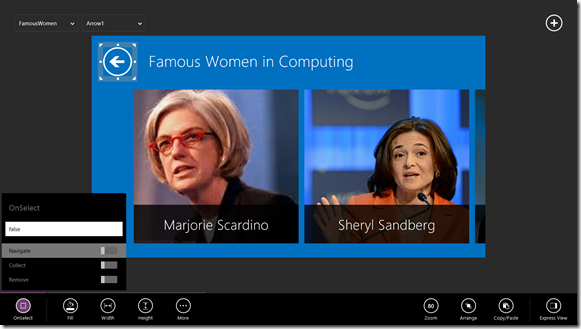
Add a new Visual, select Shapes. Scroll down to the bottom and select a back arrow. Place it in the top left corner. I’m also going to change it to white, by selecting fill, and choosing white as the color.
Title: I want my user to know where they are within my app, and to understand what they’re seeing.
Add a new Visual, select Label. I’m going to title my page “Famous Women in Computing”.
Under Data, select Text to change the text of the label.
Under Design, I’m changing my label to white, size 45, and style:lighter.
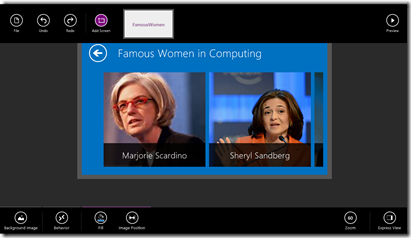
Lastly, in the top left corner of Project Siena, you’ll notice it says Screen1 and Label1. We can change these so they’re more logical and are easier to navigate. I’ll change screen1 to FamousWomen, and Label1 to Title.
Step 6: Add a new page with linked data
I want my users to be able to select one of these famous women, and learn more about her.
If you swipe down from the top/right click, you’ll see a menu. Here, add a screen.
On this screen
1. Change the background color to match
2. Add a back button & a title (I recommend just copy-pasting from the FamousWomen Screen)
3. Add a new image from Visuals.
4. Change the name of the page to IndividualWomen
Next, we’re going to change the title of this screen to reflect which woman the user has chosen. Project Siena can tell which item in the gallery we’ve selected, and we’ll use this feature. This means that instead of creating one page for each individual woman, we can create a template, and it will auto-fill based on who’s selected.
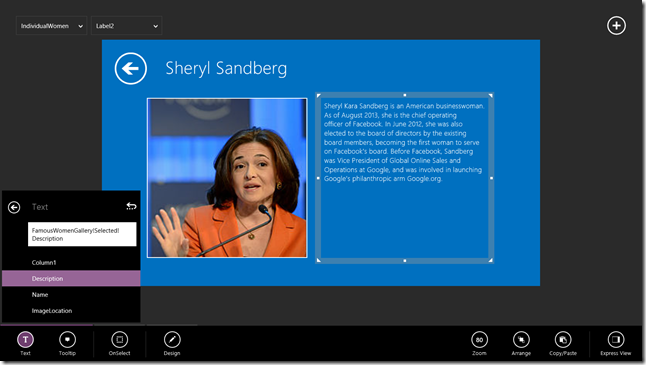
Select the title you’ve added, then choose Text, select Gallery1!Selected, and then choose name. It should look like: Gallery1!Selected!Name
We’re now going to do the same thing with the image. Set the image to be Gallery1!Selected!ImageLocation. This pulls the image from my computer using the image path I specified in my excel file.
If we now go to Design for the image, we can add a border for our image. You can find all the border controls under ( …) more.
I’m going to choose:
BorderStyle!Solid
BorderColor: White
BorderThickness: 3
Beautiful!
One more visual element left. We’re going to add the description/biography about the woman on this page.
Add a new label, make the font white, and stretch it to be next to the photo. Set the text to Gallery1!Selected!Description
LAST THING!
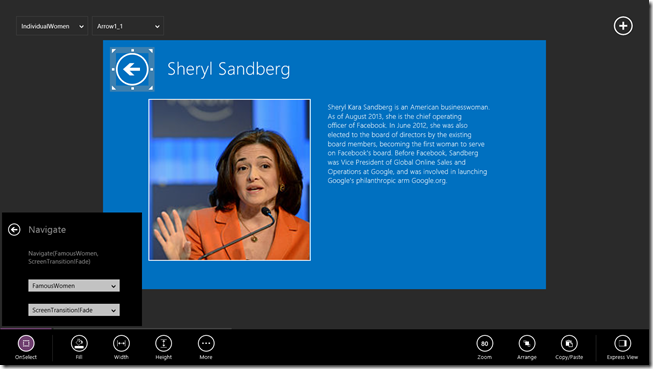
Select the back button, choose On Select, Navigate, and we’re going to have it go back to the FamousWomen page.
Step 7: Linking a gallery and to a page
We’ve told the app to go back to the FamousWomen page if we’re on the IndividualWomen page, but we haven’t told the Famous Women page to go to the IndividualWomen page when someone’s been selected.
On the FamousWomen page, select the first photo. Choose OnSelect, and Navigate to IndividualWomen.
REMEMBER TO SAVE YOUR WORK!
From here, we can run the app, by selecting Preview from the top app bar.
Step 8: Add a video gallery
I have many inspirational and educational videos about women in computing, and I want to add a gallery to share them.
Add a new page. Set the background color to match the rest of the app. Name it VideoScreen
Add a custom gallery, and link it to the videos table we imported from Excel.
Select the first gray box, and then add a label. It will auto populate with the title of the video.
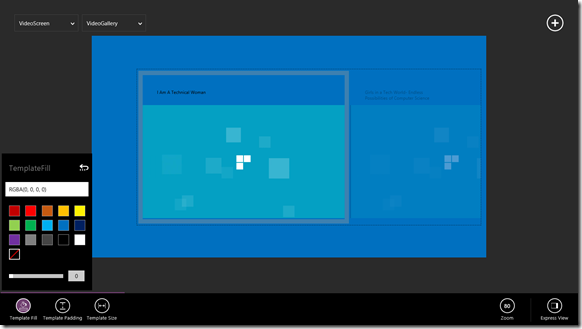
Select the gray box again, add a video player, and then set the fill of the Gallery2!TemplateFill to be transparent.
You may also want to play around with the Gallery2!TemplateSize and the width and height of the video player to make it look pretty.
Tie the videos to our video links by choosing the video player, selecting Media, and setting it toThisItem!VideoLocation.
Set the video titles to be white, and reasonably sized.
Add a page title and back button, as we did previously.
Step 9: Add a page with an RSS news feed
As with every other new page:
Set the background fill
Add a Title
Add a Back Button
Set the name of the page
On this page, we’re going to add a Text Gallery and link it to rss_1. (We imported the rss feed earlier)
Set:
Body1 to description
Heading1 to title
Subtitle1to pubDate
Also set the fill of the gallery to transparent, and the text white. Resize as appropriate.
Lastly, I want to launch a web browser to the article when the user clicks on the headline or description. This is done by choosing OnSelect and then calling the command Launch(ThisItem!link) .
Sweet, we have three awesome pages, and now we need to have a screen to launch them all from.
Step 10: Creating a home screen
Create one more screen.
Set the background, add a title, and add three images.
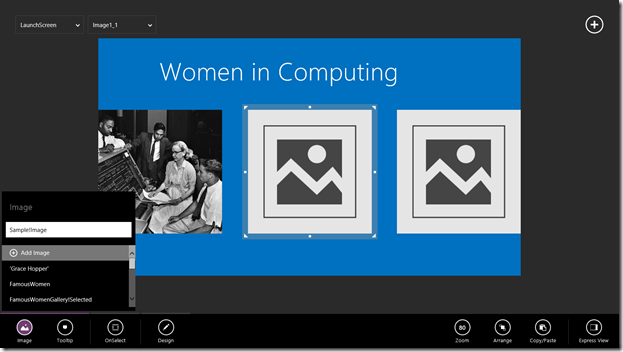
One image will take me to my famous women in computing gallery, one will take me to the videos gallery, and one will take me to my news gallery. I had images for each already, and uploaded them using the (+) Add Image button.
For consistency, add a the same border we had earlier. BorderStyle!Solid BorderColor:White BorderThickness:3
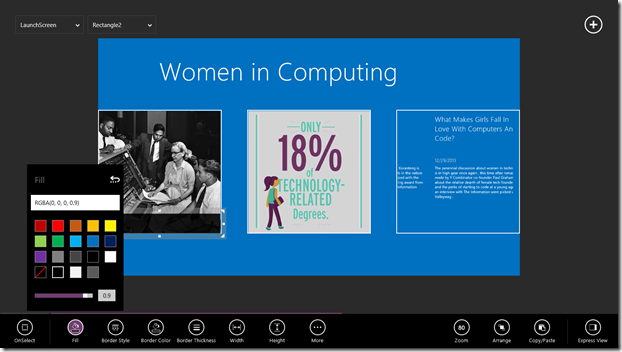
Add a new rectangle (visual, shapes), and arrange one at the bottom of each image. Set the transparency to 0.9 (as seen below).
Then add a white text label on top of each rectangle.
When the user clicks on one of the images, we want to take them to the appropriate gallery.
Choose the image, OnSelected, and navigate to the correct page.
The last thing we need to do is tie our back buttons to the LaunchScreen. Go back to FamousWomen, NewsScreen, and VideoScreen, and have the back button when selected navigate to the LaunchScreen.
Step 11: Save and Publish!
Save your project one more time.
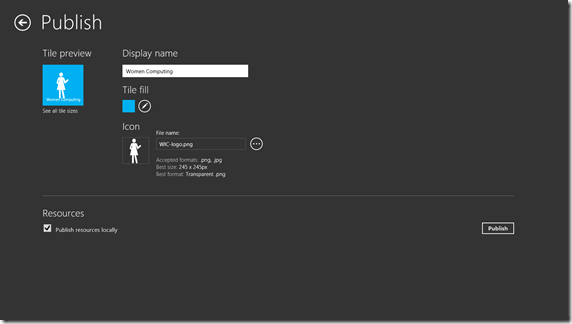
Under the file menu, choose publish. Pick a name for your app and add a logo.
We want to publish the resources locally, because all the content is coming from my local computer, and we want to have it saved locally on each user’s computer.
You are able to choose where it’s saved.
Congratulations! You’ve completed your first Windows 8 app. (And may even still have some ice cream left)
You can download my completed app, and see all other related files here https://sdrv.ms/1e2S2LM.
You’re also welcome to download it from the store here: https://apps.microsoft.com/webpdp/app/77d461b1-89d1-4052-a066-837d057e71f6
(Optional) Step 12: Publishing to the Windows Store
A) Get a developer account — Use this link to register.
B) Download and install Visual Studio Express 2012 for Windows 8 (don’t download the Express 2013 version). And don’t worry, you don’t need to know how to use Visual Studio, this is just to be able to Submit your newly created app to the Windows Store.
C) The Project Siena will creates a folder named PublishedPackage. Enter the folder and double-click InstallApp.exe and select “Install on this PC” — if required, enter your Microsoft Account credentials.
Also download the ProduceAppForStore.zip from https://aka.ms/ProjectSienaProduceAppForStore and extract all the files inside the PublishedPackage\YourAppName folder. If you’re prompted to overwrite any file, click yes.
You’ll also see a file called ProduceAppForStore.cmd, double-click it. If during this step you get the message “Windows protected your PC” , click the “More info” link and select “Run anyway” .
Time to submit your app to the Windows Store:
D) Start Visual Studio Express 2012 for Windows 8, go to Store > Reserve App Name, and create a good name for your app.
E) Select Store > Associate App with Store and follow the instructions.
F) Select Store > Edit App Manifest, select the Capabilities tab, and uncheck any capability that your newly created Windows 8.1 app doesn’t have.
G) In the Solution Explorer, double-click privacy.html to edit your custom Privacy Policy for your app built with Project Siena.
Remove the placeholder text “[REVIEW PRIVACY POLICY]“ and edit the rest of text to accurately describe your app’s privacy policy
Substitute “[INSERT EMAIL ADDRESS]“ with your own email address(es). The text should now look like this:<a href=”mailto:someone@somewhere.com”>anyone@somewhere.com</a>
Substitute “[INSERT DATE]“ with the actual date
H) Select Store > Create App Packages and follow the instructions to create the app package (.appx).
I)Select Store > Upload App Packages to open the Developer Dashboard website. Then enter the require information: In the section ”Packages” , select your .appx using the path on step (8) . In the section “Description” , choose the Windows 8 tab (but don’t be afraid, the app will work in both operating system 8 and 8.1). Finally, complete any remaining information and click the “Submit for certification” to finish.
You done it! Now just wait for Microsoft to approve and publish your app in the Windows Store. For more information on these instructions, visit this Microsoft web page.
Comments
Anonymous
January 07, 2014
The comment has been removedAnonymous
January 08, 2014
So , you can share parts of your skydrive publicly in your app? (excel and one note files)Anonymous
January 08, 2014
@sky drive. I don't understand what you're asking.You can yes, access files from SkyDrive and use them in your Project Siena app. I don't believe you can use one note files.I have shared my project on Skydrive so people can access my work http://sdrv.ms/1e2S2LM .Anonymous
January 09, 2014
I love Project Siena. Please tell me that Win 8.1 JavaScript 2.0 is coming so I can build Win 8.1 apps with some of the new features, like webview.. Here's what I built first try: digitalmediaphile.com/.../using-ms-project-siena-for-rapid-app-developmentAnonymous
January 10, 2014
this is very helpful..thank you a lot...i ws wondring if we can creat some apps and add ads on theme with Project Siena...Anonymous
March 22, 2014
Hi ChristineThanks for the awesome post. I started working an corporate app.couple of questionsFor Galleries, Can I pull the images/videos from a server location? like YouTube videos links in excel spreadsheet / SharePoint list? Does the Sharepoint data source supports only Sharepoint 2013?.Can I use Sharepoint 2010 / 2007?Anonymous
April 30, 2014
Get started making your own app today at http://easyappcreation.comAnonymous
June 16, 2014
Can we create windows phone app using project siena?Anonymous
June 19, 2014
You are amazing! Thank you for getting me started with Project Siena. What an awesome tool!Anonymous
July 07, 2014
this link is more useful :www.youtube.com/watchAnonymous
October 08, 2014
how to you add a webpage on siena?
