Deploying a kiosk using Windows Autopilot
In today’s Tech Community blog, we talk about a variety of new Autopilot features. For the Autopilot self-deploying mode, I thought it would be useful to get into more of the specifics of how to deploy a kiosk with Autopilot, where the end result is a device that is configured to automatically log in and run a specific kiosk app (in this case, the new Kiosk Browser app configured to automatically load a specific web page).
Let’s start with some specific requirements before you get too far:
- The device must have a physical TPM 2.0 chip. Devices with virtual TPMs (e.g. Hyper-V VMs) or those with TPM 1.2 chips won’t work with self-deploying mode.
- The device must be running Windows 10 version 1809 or later. (If you try this with Windows 10 1803, it won’t work very well – it’s only supported with these later builds.)
With that out of the way, let’s get into the specific steps.
Step 1: Create Autopilot profile
Let’s start off on the Autopilot side. We first need to create an Autopilot profile for “Self-deploying” mode. So let’s navigate in the Azure Portal to “Intune –> Device Enrollment –> Windows enrollment –> Deployment Profiles.” From there, you can create a new profile that specifies “Self-deploying”:

Configure the appropriate settings on that profile:

Notice that you can specify a “Language (Region)” setting that can automate the initial prompts in OOBE – this only works for wired Ethernet connections though, because the Autopilot settings can’t be downloaded until there is a network connection in place.
Step 2: Assign Autopilot profile
Intune now uses Azure AD groups to assign Autopilot profiles to devices. So to use the Autopilot profile that we just created, we need to first create an Azure AD group that can be used for that assignment. Navigate to “Azure Active Directory –> Groups” and create a new group. In my case, I created a “Kiosk Devices” group:

Now go back to the Autopilot profile that you created before, and click on “Assignments.” Click the “Select groups” button and find the group that was just created:

Click “Select” then “Save.” Now, any device added to the group will automatically get this Autopilot profile.
Step 3: Add a device
To do a “Self-deploying” device, we need one that meets the requirements: It must have a TPM 2.0 chip (and it must be a physical device, a Hyper-V VM won’t work), and should be running Windows 10 1809 or later. You can gather the hardware hash from it using the Get-WindowsAutoPilotInfo script, then import it via the "Intune –> Device enrollment –> Windows enrollment –> Devices” node.
After that import completes (it will take a few minutes), not only will there be an entry in the list of Autopilot devices, but there will also be a new Azure AD object created for the device. If you go to “Azure Active Directory –> Devices” you’ll see the device in the list. The device will be named using the serial number of the device, and will be shown as disabled. When the device is actually deployed, you’ll see the object renamed to reflect the computer name (instead of the serial number) and it will then be enabled.
Now let’s add the device to the Azure AD group that was created earlier. Find the group (“Azure Active Directory –> Groups”), click to see its details, and then click “Members.” Click “Add members” and select the device you imported:

Then click “Select” to add it. After a few minutes, Intune will assign the Autopilot profile to the device; you can confirm that the assignment is complete via the Autopilot devices list (“Intune –> Device enrollment –> Windows enrollment –> Devices”).
Step 4: Get and deploy the Kiosk Browser app
To have a kiosk that runs a single app, you need a single app. Fortunately, we now publish a Kiosk Browser app that works nicely, and more importantly it can be easily configured via Intune as well. But first, we need to get that app. It’s available in the Microsoft Store for Business, so you need to acquire it from there. (If you haven’t yet integrated the Microsoft Store for Business with Intune, see the Intune docs for setting that up. And make sure you have enabled offline licenses via the “Show offline apps” slider on the Setting page in MSfB.)
Sign into the store via https://businessstore.microsoft.com. Search for “Kiosk Browser” and make sure you choose the right one. Specify “Offline” for the license type and then click “Get the app.” (If you already have the app with an offline license, the button will say “Manage” – that’s fine, it just means you’ve done this step already. And if you don’t see the “Offline” choice see the previous note about enabling offline licenses.)
Now that the app has been added to your collection, you can go back into Intune and initiate a sync with the Microsoft Store for Business to get it to show up quickly. Navigate to “Intune –> Mobile apps –> Microsoft Store for Business” and then click the “Sync” button. That might take a couple of minutes, but after the sync completes, you’ll see the app in the list at “Intune –> Mobile apps –> Apps.” Select the app to see its details (it should show “Yes” under “Supports device licensing”), then click “Assignments.” Click “Add group” and change the assignment type to “Required.” Click “Included groups” and then “Select groups to include” and choose the kiosk device group that you created in Azure AD earlier:

Then click “Select.” In the “Licensing Type” drop-down, choose “Device licensing" then click OK:

Then click “OK” again to add the group, and “Save” to save the new assignment.
Step 5: Create and deploy the kiosk configuration
Now we need to specify how the kiosk should be configured. To do that, navigate to “Intune –> Device configuration –> Profiles” and click “Create profile”. Give it a name (e.g. “Kiosk Configuration”), choose a platform of “Windows 10 and later” and a profile type of “Kiosk (Preview)”. You will then see the available setting categories:

Click the “Kiosk” setting to see the “one” setting. As you can see, there’s a little more that needs to be done:

So click “Add” to create a kiosk configuration. Give it a name (e.g. “Kiosk Browser”) and choose “Single full-screen app kiosk” from the drop-down, which then shows additional options:

If you’ve ever configured a kiosk on Windows 10, you might remember that you need to specify an AUMID for the app, which is a UWP concept that combines the app package family name with an entry point – basically, a gibberish string that you should never have to type. Fortunately, Intune will let you pick an app from a list instead, which is much easier. So under the “*Managed Intune app to use for kiosk mode” click the “Select a managed app” link to choose an app:

Search for the Kiosk Browser app and then click on it to accept it. (Notice that I have two: one is an online license, one is offline. Either will work here, since we’re just using the app to get the AUMID. But in the previous step when we acquired and deployed the app, it needs to be an offline app for this scenario to work.) Then click OK. Next, select “Autologon” as the user account type. This will automatically create a local account on the device and configure it to automatically log on and run the specified app. Click “OK” to create the configuration, and then “OK” again to complete that settings category.
Next, click on the “Kiosk web browser” category to see the available Kiosk Browser settings:

At a minimum, fill in the “Default home page URL” setting to point to an appropriate web page. Depending on that page, you may want to populate other settings (e.g. restrict where you can navigate to from that page). You can also control the UI in the browser app itself, e.g. show or hide navigation buttons, and configure when the browser should automatically refresh. Click “OK” to commit these settings, “OK” to commit both categories, and “Create” to create the configuration profile.
Next, click on “Assignments” for that newly-created profile. Then click “Select groups to include” and select the same kiosk devices group that was created earlier:

Then click “Select” to confirm that group selection, and “Save” to save the assignment.
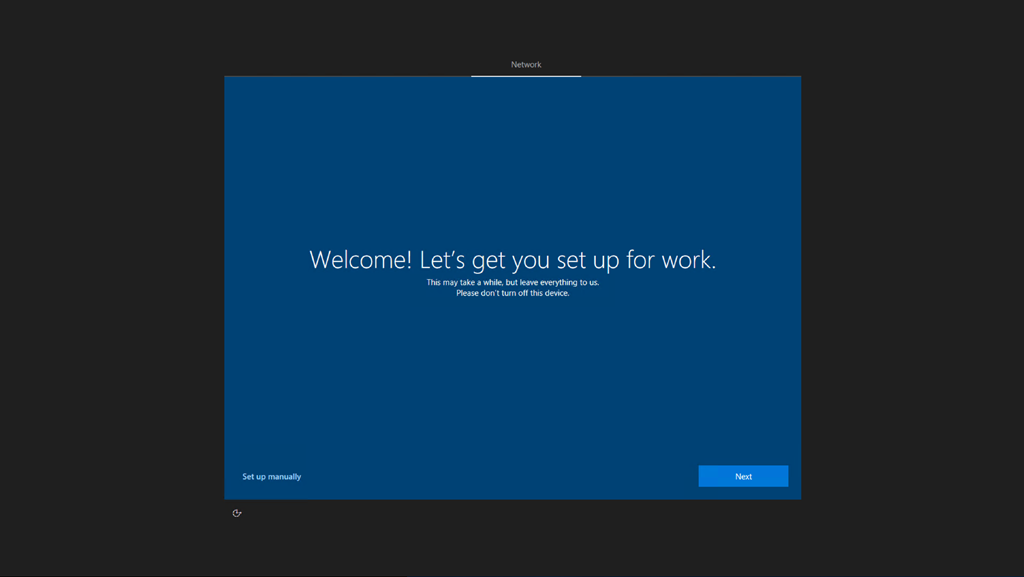
Step 6: Deploy
Reset the device that you used in step #3. When it starts OOBE, what you see depends on the device. If it has an internet connection, it may skip the language, locale, and keyboard selection screens (if you configured a language/locale in the Autopilot profile). If it needs a Wi-fi connection, you’ll have to do that manually. It will then get to a screen that will progress automatically, telling you that it is deploying the device.
When the Autopilot provisioning process completes, you should see the device automatically log on and run the Kiosk Browser app, which will navigate to the configured web page.
Comments
- Anonymous
June 12, 2018
I am receiving a failure at the first 'securing your hardware' step - it is a device with TPM 2.0 on and enabled. Are there any other hardware specific settings to be enabled?- Anonymous
June 12, 2018
What kind of device are you using, and what error do you see? (I have seen errors at that point with older devices, e.g. a 2nd generation ThinkPad X1 Carbon, that doesn't have the needed EK key in the TPM. The TPM does need to support attestation - you can see if it does using the Windows Security center on the client.)- Anonymous
June 12, 2018
Thanks for the quick reply! It's a T470 - error 0x800705b4. I'm going to test on another piece of hardware to see if it is reproducible. So you need more then just TPM 2.0 support?- Anonymous
June 12, 2018
It does need to support TPM attestation. If you launch the "Windows Security" app (on my Insider build that's what it's called) and navigate to "Device Security" and then "Security processor" you can see the capabilities of the device. That should show TPM 2.0, and both status boxes (Attestation and Storage) should show "Ready." - Anonymous
June 12, 2018
The comment has been removed- Anonymous
June 13, 2018
Interesting - yes I've seen this failure on a Lenovo T470 and now a Surface Pro 3. I am re-generating my hashes. Previously I installed 1803 Ent, enabled Preview builds to get to build 17686, ran the script, uploaded to Intune, and then reset the pc. On both this has failed so far. - Anonymous
June 13, 2018
It spins on 'securing your hardware' for 10mins, then fails even with re-gen'd hashes on both devices so far on re-testing. I'm simply doing the following to get the csv :Set-ExecutionPolicy UnrestrictedInstall-Script -Name Get-WindowsAutopilotInfoGet-WindowsAutopilotInfo.ps1 -OutputFile AutopilotHWID_new.csvThen importing in either the windows store for business of intune - assigning profiles appears to only be available in the store for business just yet, so I assign there and sync. - Anonymous
June 13, 2018
Correction - I re-read the article and correctly setup the Group based AzAD assignments. - Anonymous
June 13, 2018
Hit shift+f10 and use event viewer to check the Autopilot logs.Microsoft/Windows/Provisioning-Diagnostics-Provider/AutoPilot - Anonymous
June 13, 2018
156 - AutoPilotManager reported that MSA TPM is not configured for hardware TPM attestation even though the profile indicates it is required. AutoPilot cannot proceed. - Anonymous
June 13, 2018
An update to this - I updated the TPM firmware to become compliant in the 'Device Security' section, this allowed passing of the 'securing your hardware' step. It unfortunately fails now on 'registering your device for mobile management (failed: 4 0x80070047)'.
- Anonymous
- Anonymous
June 13, 2018
Did you have success with T470? We have a bunch of those, I'll do a test run with T480 tomorrow to check whether we need firmware update on those.
- Anonymous
- Anonymous
- Anonymous
- Anonymous
June 13, 2018
The 0x80070047 error is a known issue at the moment, affecting all self-deploying devices. We're working on that, hoping it will be resolved yet today.- Anonymous
June 13, 2018
Thanks, good to know it's not just our environment. :)- Anonymous
June 13, 2018
I got past the 0x80070047 error by resetting again today. The TPM update did get me past the securing device step. Currently I'm not getting past the Apps install of the Kiosk browser. Failed once but re-attempt now.- Anonymous
June 13, 2018
The Kiosk Browser error found in Mobile App \ Monitor section - DESKTOP-UOC35HA Bulk-enrolled device Windows 10.0.17686.1003 Failed Package installation failed, contact the software vendor (0x80073CF9) Wed Jun 13 2018 13:12:23 GMT-0700 (Pacific Daylight Time)- Anonymous
June 13, 2018
Did you assign them the offline/device licensing version of the app? :) - Anonymous
June 13, 2018
Shows as 'Supports device licensingYes' - Anonymous
June 13, 2018
If it "supports device licensing" then you at least chose the right type in MSfB. But when you assign the app as a "required" app in Intune, you also need to choose a device license there. - Anonymous
June 13, 2018
Yup it's set there as well. "GROUPASSIGNMENT TYPEMODELICENSE TYPEAVAILABLE FOR ENROLLED DEVICESNo assignments, select 'Add group' to add a groupREQUIREDAutoPilot_Demo_SelfDeployingRequiredIncludedDevice" - Anonymous
June 13, 2018
I unfortunately did add the online version as well as the offline, but only assigned the offline. - Anonymous
June 13, 2018
That error (80073CF9) just means "install failed." Can you look at the Event Viewer to see why it failed? It should have an entry in the Microsoft -> Windows -> AppXDeployment event log. - Anonymous
June 14, 2018
Worked today!
- Anonymous
- Anonymous
- Anonymous
- Anonymous