Private Cloud: Step-by-Step Guide
This guide will show you steps to build a private cloud. I started four years ago to build such a design. I just started to see the term private cloud appearing, but on the Internet, there is a lack of information on how to do it. I will show some high-level steps there, be advised that it's only a guide, so these steps might not be the best for your environment.
NB: I will talk about a mix of Microsoft and Citrix as I didn't explore System Center Virtual Machine Manager 2012 or Hyper-V in Windows 2012. At my knowledge, the Citrix Provisionning Service is something not available yet to provision a golden image to multiple virtual machine(s). I need the Citrix Desktop Delivery Controller too for creating a dynamic pool of desktop to deliver (I talk about the Web Interface in my documentation, but it's something that comes with that server's role, the best practices make us install that on another server). Only similar product I found for all is vmware view, but I am certified Citrix so I will talk about something I know. You will see that Microsoft and Citrix is tied together in that scenario.
To keep the text easy to read I will use DDC acronym for Desktop Delivery Controler and PVS for Provisioning Service.
Introduction
You want to share single machine image for multiple users ? Do you got a golden image that you deploy to new laptop or computer ? In that case my guide is for you. I will show how to make one virtual machine available for as much computers your hypervisor can hold.
The design will look that way in the end.
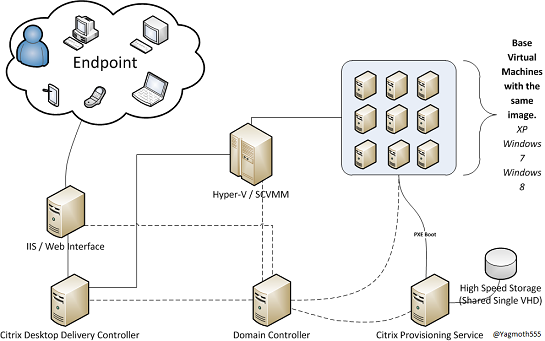
The harder is to isolate what application your users use and see how it can be re-grouped to unify the IT's park.
RemoteApp / XenApp keep the application outside the virtual machine for licensed product. (like Microsoft Office). What we want to prevent is to create multiple golden images. Application that use serial port are harder to virtualize, but feasible with port redirection. The planning step is really important to isolate any application that can be hard to distribute. In case of non-compliant TS application you can always have some backdoor to distribute them. (Like to stream it (with App-V, XenApp, etc..) but it's another story)
The pro:
- Easier to manage for your helpdesk and your user as it's always the same for their computer.
- A virus can't stay for long in the system's folder. As restarting the VM put back the original VM into place.
- Easy to scale up. Need 50 more Windows 8 ? Add a hypervisor and you load them directly in 4 clicks.
The con:
- A bad update make a bug appear in all VM in that VM's group. A patch management process must be there to test the VM before putting an updated VM into production.
- Profile Management to planify correctly. (Please see that article for further reference: User Profile Best Practices)
What we need
- A Hypervisor. (like Hyper-V)
- Multiple Hypervisor for High Availability.
- SCVMM (if Hyper-V)
- A working Active Directory.
- Shared storage for High Availability.
- SAN.
- NAS.
- Direct Attached Storage.
- Microsoft Windows XP, 7 or 8 VECD license. The VECD license are special license for virtualization. It's an annual fee not like a retail OS you could buy.
- A Microsoft KMS host for the licencing.
- Microsoft CAL
- Citrix PVS licence and XenDesktop CAL.
Bonus
- Terminal Server for the application hosting with of course TS/RDS CAL
Planning it
Ask yourself those questions:
How the user will connect to this virtual computer ?
- Thin client ? Then you will need maybe some Wyse product, like the Zenith or Viance series.
- Re-used computer ? Then you will need to install the Receiver on those machine with maybe the appliance lock.
- From tablet product ? Then you will need to configure the web interface correctly, and most of all planning if you make the Web Interface available in a DMZ (In case the tablet use the cell phone carrier (3G, CDMA, etc..)
- Does your users use software suite that is hard on the hardware ? Like AutoCAD ? If yes, it's harder in virtual to support such application. (You can, but the user will see a difference, as the Hypervisor does not have a dedicated video card for such computing)
Step 1: Prepare the Active Directory
Configure a OU for your streamed computer.
Configure the netlogon share to hold your roaming profile.
Configure your GPO for the roaming's profile.
Configure GPO to delete temporary internet file, to keep roaming profile small.
Configure your GPO for My documents and Desktop's folder redirection.
Configure your GPO for pushing the printers, IE's options, etc...
Configure your DHCP scoop to use the option 66 and 67.

Optional: Configure your DNS's server to allow non-secure update or modify the ACL on all streamed computer to allow less secure update.
Configure your user group for who can use your streamed computers.
Install the KMs's host. (Set Up a KMS Host on a Windows Server 2008 R2 Machine)
Step 2: Prepare the Hyper-V
Install your Hyper-V cluster.
Please see:
-Step-by-Step: Building a FREE Hyper-V Server 2012 Cluster - Part 1 of 2
- Hyper-V: Using Hyper-V and Failover Clustering
- Step-by-Step Guide for Testing Hyper-V and Failover Clustering
Install SCVMM
Please see:
-Deploying System Center 2012 - Virtual Machine Manager
Step 3: Create the Provisioning's Service
Install a Windows 2008R2
* Please see:
-Installing Windows Server 2008 R2
* - How to Install Windows Server 2008 Step by Step
Install SCVMM Administrator Console
* Please see:
-*Deploying System Center 2012 - Virtual Machine Manager
Change some Operating's System option.
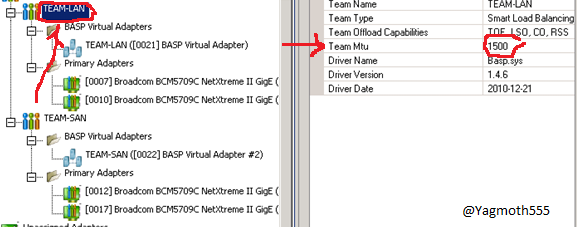
Best practices for the PVS
| NIC on LAN: MTU = 1500 |
|
| Disable spannign-tree and/or Enable PortFast in the switch for the LAN's NIC | In STP the port state is by default blocked, so it can make the PXE process to timeout for our virtual machines. |
| Disable Large Send Offload on the LAN NIC | HKEY_LOCAL_MACHINE\SYSTEM\CurrentControlSet\Services\TCPIP\Parameters\ DisableTaskOffload = 1 |
| Disable Auto-Negotiation on the NIC and the switch | |
| Multipathing the NIC | It's to prevent a bottleneck in the switch, having two switch in case of a failure is a must if you got a lot of users. |
Start the installation from the media.
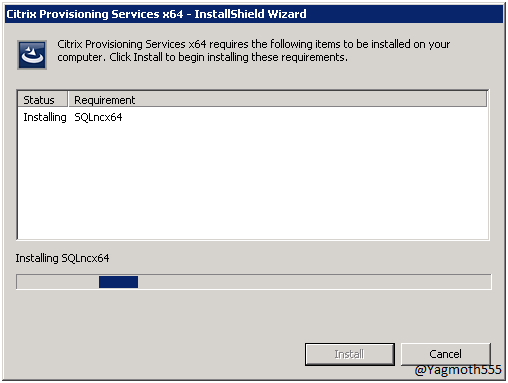
Click install.
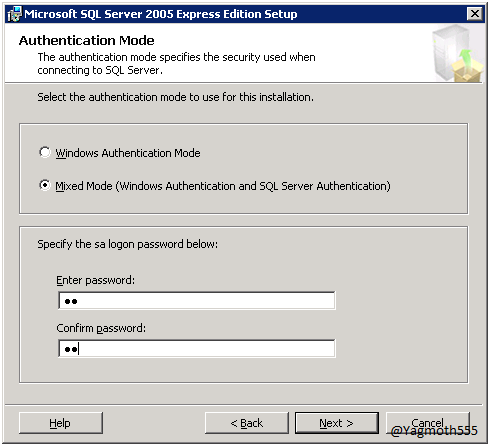
I suggest to use mixed mode authentification (don't forget to write down the SA password)
Keep the default's options.
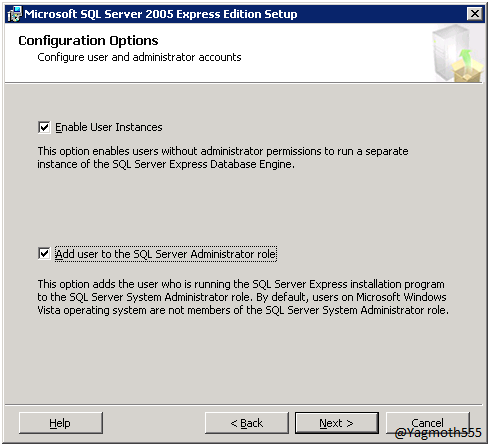
Click Next.
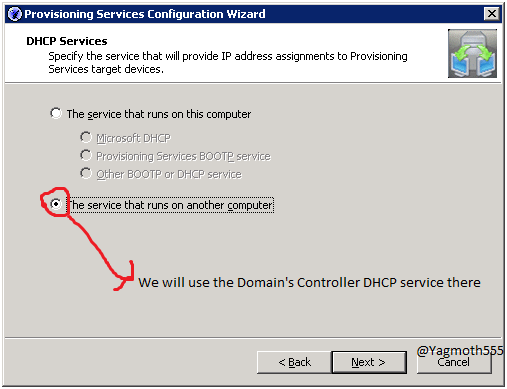
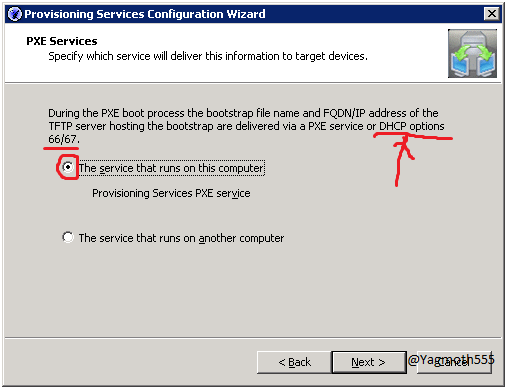
We select to use another server for the DHCP, I strongly suggest to use our domain controller.
We select to use our server for the PXE. (From Step 1 there is the reason for DHCP's option 66 and 67)
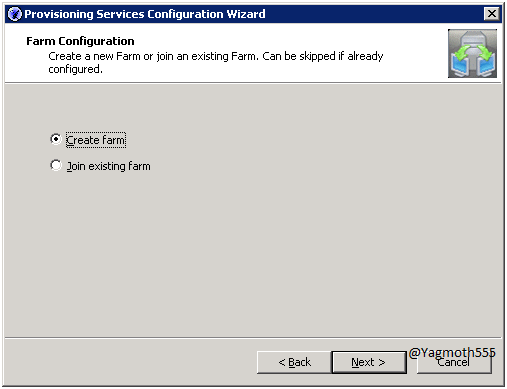
We select to create a new farm.
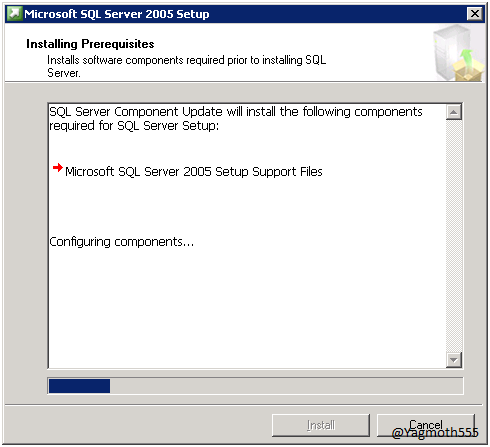
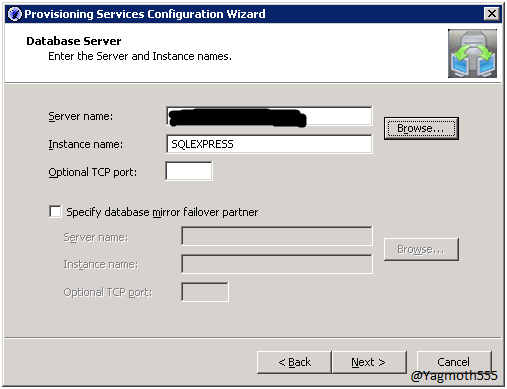
We select the SQL's instance.
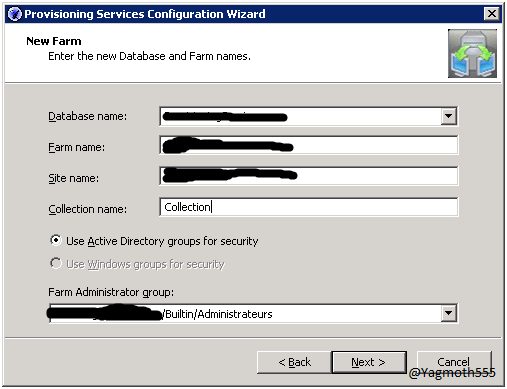
We select the Database name, farm name, site name and collection's name.
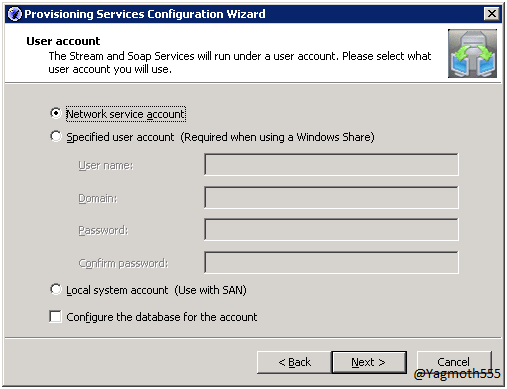
We select the user account that will run the stream's service. Be adviced that if you select Network Service account that you must configure the NTFS's security later on for the datastore to add that account.
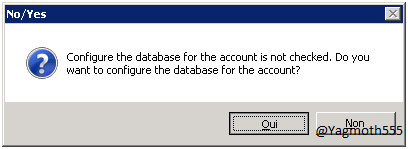
Click Yes.
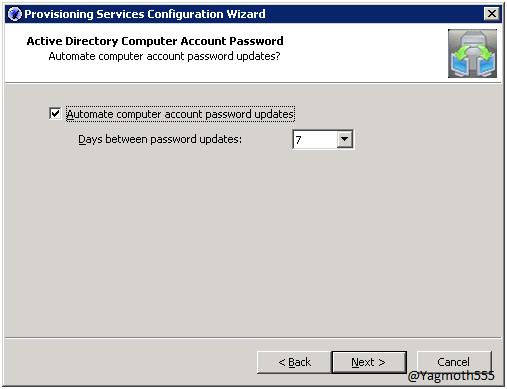
Click Next.
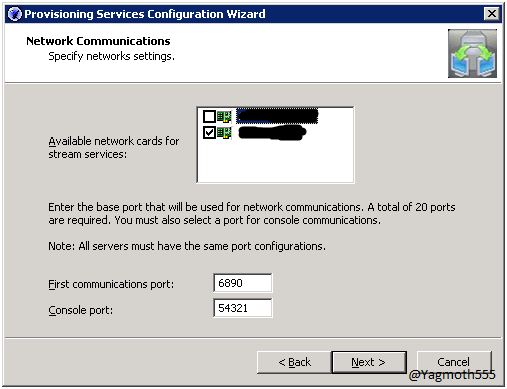
Select the Network Card that will be used for the streaming.
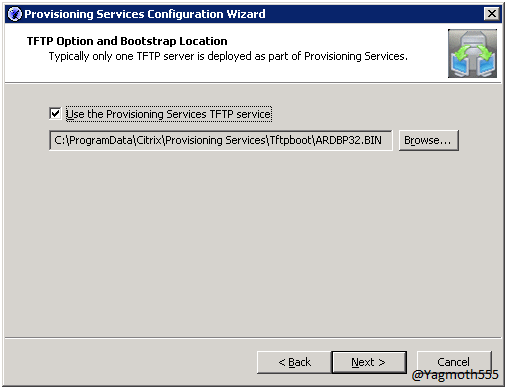
Use the default's PXE's boot file and path.
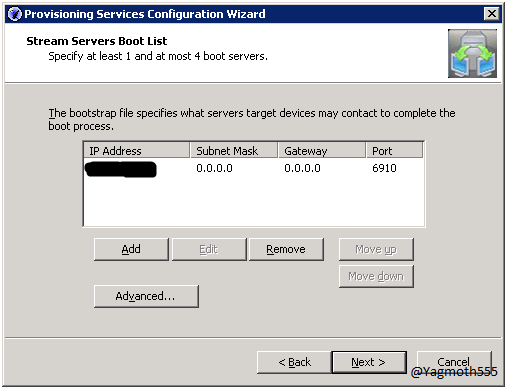
Keep the default's option. It will be your LAN's IP.
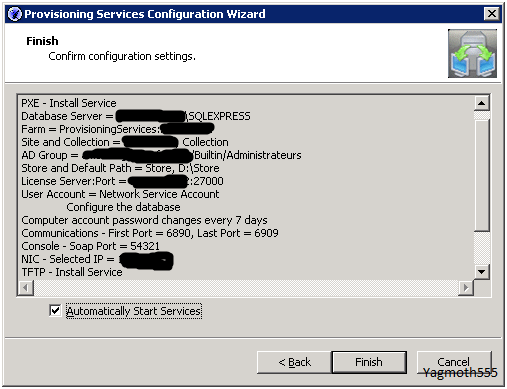
Review the configure and click Finish.
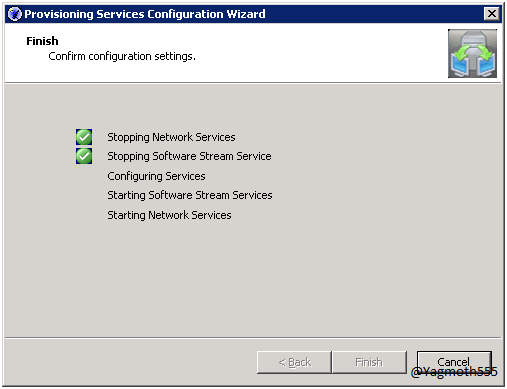
Click finish again.
Create a empty vDisk for our future XP.. Open the console.
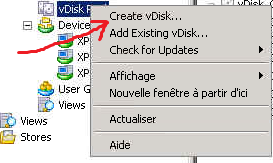
Go into the vdisk menu.

Right-Click and select Create vdisk.
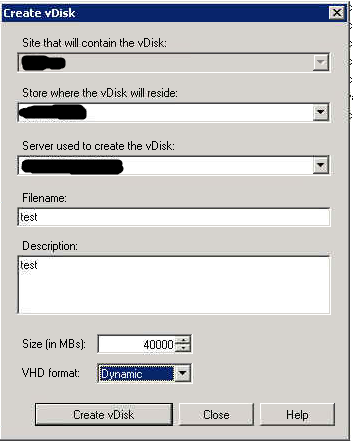
Type in a name, and click create.
That will look that way. Double click on it to set the mode to Private

Step 4: Create the Desktop Broker
Install a Windows 2008R2.
* Please see:
- *Installing Windows Server 2008 R2
- How to Install Windows Server 2008 Step by Step
Install the Citrix Desktop Delivery Controller. (Get the ISO from your myitrix's account)

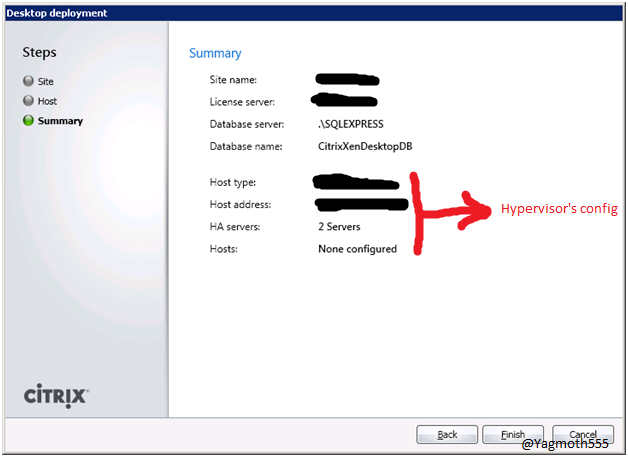
Click to configure the Hypervisor's host and after finish that wizard.
Install SCVMM Administrator Console
Please see:
-Deploying System Center 2012 - Virtual Machine Manager
Create a machine desktop pool.
Assign the correct Active Directory group to that Desktop Group.
Step 5: Create the Virtual Machine Template
Create a new Virtual Machine. For my guide I will use Windows XP.
- For the VM I usually allow 2 CPU and 2G of RAM. The second CPU is to leverage the HDX's backend.
- Please make 2 NIC, there is on bug with a PVS with Hyper-V. The PXE booting only work on legacy network adapter. So add another's one for when the OS is booted, it will switch the traffic to that new NIC (not 100mbps, but 1000mbps)
- A tip, put the legacy NIC without a gateway too.
Get the ISO, mount it and install the Operating System.
Please see:
-Microsoft's Windows XP SP2 Professional (Pro) Install step by step on a used hard drive
- Install Windows XP in Windows 8 Client Hyper-V
Install the Hyper-V Integration Services
Install the Desktop Delivery Controller Agent (located on the DDC's install media)
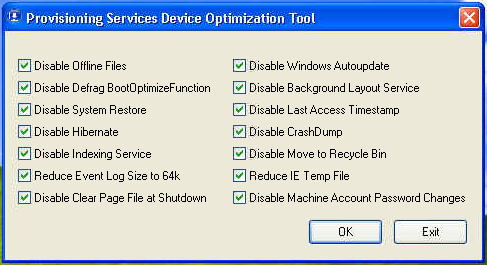
Install the Target Device Optimizer (For the PVS, will be located in the PVS's media)

Run the Provisioning Services Device Optimizer.
Change those registry key.
HKEY_LOCAL_MACHINE\SYSTEM\CurrentControlSet\Control DWORD=ServicesPipeTimeout |
Decimal Value=180000 (3 Minutes) |
| HKEY_LOCAL_MACHINE\Software\Microsoft\Windows\CurrentVersion\Applets\Tour
DWORD=RunCount |
Value=0 |
Run that into the virtual machine. (That will disable last access time stamp)
** “FSUTIL behavior set disablelastaccess 1”**
Disable System Restore.
Install User Profile Hive Cleanup Service
Install any other needed applications. (Antivirus, Office, Acrobat, Flash plugin, etc..)
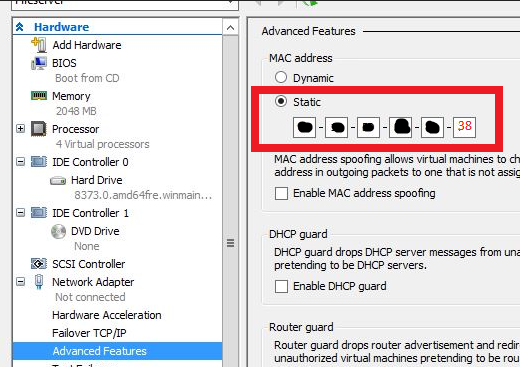
GO BACK TO YOUR PVS server for that step: Create a new device on your PVS and make the MAC's address match the VM's one. In the additional list of vDisk, select the newly created vDisk. Keep it that it boot from the local hard disk.
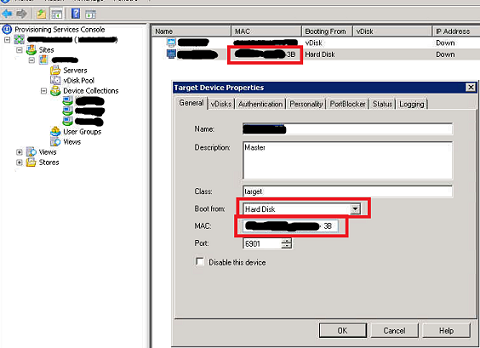
To match the MAC from that Hyper-V console:
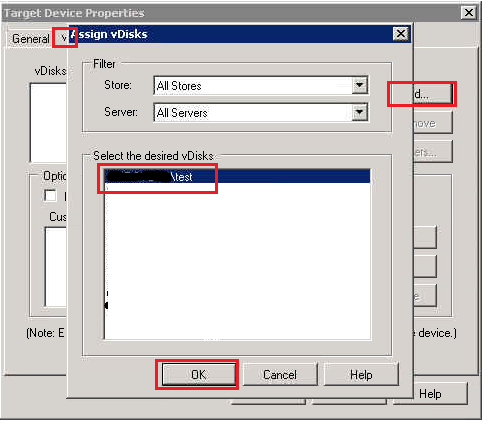
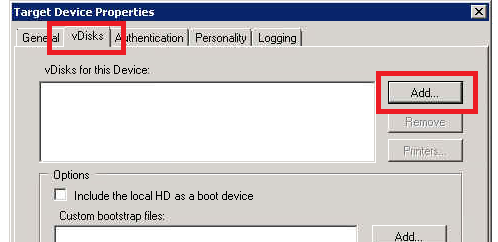
Click the vDisks tab in your PVS from the above step. Click Add... and click the "test" vDisk we did and click OK. It will appear in the first list.
In the Virtual Machine select to boot of network first.

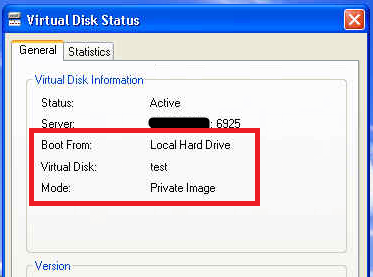
Boot the Virtual Machine, the PXE's process should answer, as it verify the MAC. The newly created vDisk will appear as an additional drive because we selected to boot from the hard disk in the PVS. If you double-click the PVS's icon in the task manager that should look that way;
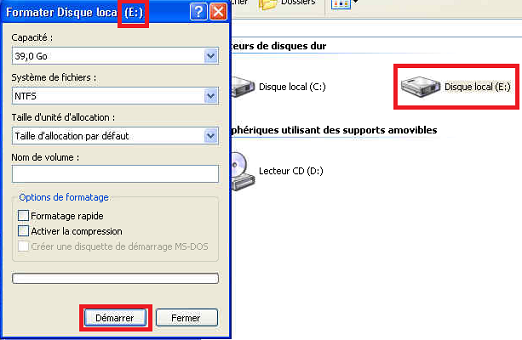
We format that new disk.
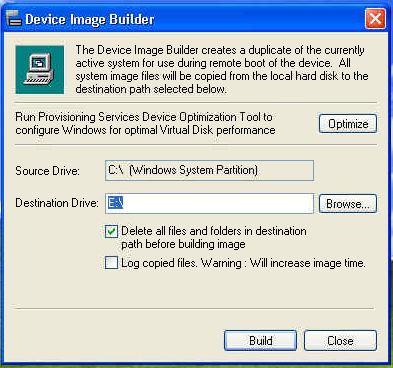
We start the Device Image Builder.
Close the machine.
In the PVS's console put back the vDisk in standard mode.
Create another device in your PVS.

Click to boot from a vDisk. In that Windows, you got the MAC addeess, it must match the Hyper-V's one.
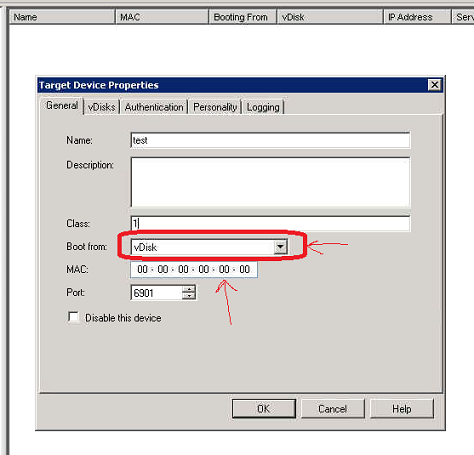
Click to assign a vDisk. (the test's one you did earlier)
Use the XenDesktop Wizard to create the number of Virtual Machine you want from that vDisk. Link it to a new Desktop Group in your DDC. (If that step does not work, you can manually create all computer account in your Hyper-V and after in your PVS. You got to make the MAC match. If you do it manually, don't forget to right click all device and select to create all computer account in your AD)
Step 6: Configure the IIS / Web Interface
Install a Windows 2008R2.
* Please see:
- *Installing Windows Server 2008 R2
- How to Install Windows Server 2008 Step by Step
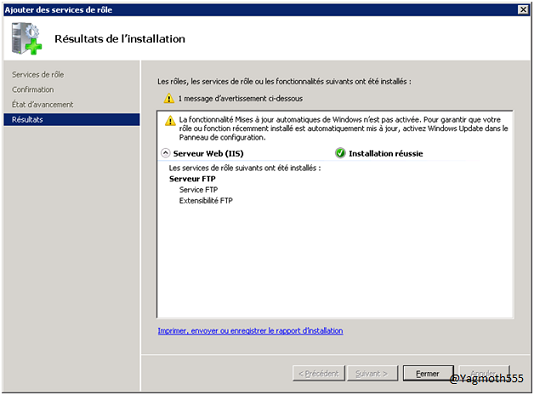
Install the IIS's role. If you intend to use Wyse client, install the FTP's role too.
In the WebInterface console for the PNAgent's website configure the link with the DDC.
Step 7: Testing the configuration
To test the configuration:
- Login with the IP of the WebInterface and select to use a Virtual Machine.
- On the DDC use Desktop Studio and send command to the Virtual Machine. Hyper-V should power on/off the VM correctly.
The final Result
With the current setup I used to run 44 virtual machines that use that single VHD. (so yes, my VM was configured for 2G each of memory, so 44 x 2 = 88G of needed ram for only the VM)
You see the list of computer and their current state. The DDC control what VM it start and close, and you can set rush hour and such.
Sharing VDI Gotchas
- If you use a managed AntiVirus:
- Reset the SID before closing the open VHD (else your managed computer will appear as one in your central console)
- Scan on read can be avoided.
- If you use a WSUS:
- Don't manage those machines as the WSUS SID would be identical.
- When they will restart the updating service will re-do the update again and again.
- A personal tip: I push the WSUS's setting to have the machine in my console, but I prevent update to be done. One machine will appear in the console, but you can see the statistics of all Virtual Machine that way, as they are the same.
- Verify that you are in private mode before applying update.
- Use the local administrator to install ActiveX for the whole machine.
- Never overload your Hypervisor. A good configuration take 50% of the memory. So you can easily balance in case of a server crash. Always think to keep some RAM for the hypervisor.
Reference
Overview of Private Cloud Architecture
User Profile Best Practices
Guest Operating's system:
- Microsoft's Windows XP SP2 Professional (Pro) Install step by step on a used hard drive
- Install Windows XP in Windows 8 Client Hyper-V
- Installing Windows Server 2008 R2
- How to Install Windows Server 2008 Step by Step
- Set Up a KMS Host on a Windows Server 2008 R2 Machine
- User Profile Hive Cleanup Service
Hyper-V:
- System Center Virtual Machine Manager (VMM) 2012 as Private Cloud Enabler (3/5): Deployment with Service Template
- Step-by-Step: Building a FREE Hyper-V Server 2012 Cluster - Part 1 of 2
- Hyper-V: Using Hyper-V and Failover Clustering
- Step-by-Step Guide for Testing Hyper-V and Failover Clustering
- Deploying System Center 2012 - Virtual Machine Manager
- Hyper-V Synthetic Network Interface Card Reinitializes on New Provisioning Services Target
- Thread: XD 4 PVS 5.6 - Hyper-V Server 2008 R2 - Emulated and Synthetic NICs
- Create VMs automatically on Hyper-V 2008 R2 with the PVS Streamed VM Setup Wizard
- Create A Provisioning Server .VHD On Hyper-V
PVS:
- Best Practices for Configuring Provisioning Server on a Network
- Best Practices for Citrix XenDesktop with Provisioning Server