Azure: How to Create a Virtual Network (Old Portal)
Azure Infrastructure Services allow us to create Virtual machines and host them in the cloud while allowing us to connect to each one of them using RDP.
After having created a set of virtual machines required for a particular application, we will require them to be connected to each other and be able to reach each other via definite IP addresses, as we require our virtual machines hosted in an on-premise environment to be connected to each other.
So let's go ahead and explore the step by step process of creating a Virtual network in Windows Azure that allows us to :
- Create Virtual Networks and assign IP address range to the network
- Create Subnets within a Virtual Network and assign the subnet ID to each subnet within a Virtual Network.
- Allows us to extend the connectivity of a virtual network hosted in Windows Azure to specific clients/servers in our on-premise environment (Client to Site Connectivity)
- Allows us to extend the connectivity of a virtual network hosted in Windows Azure to our entire on-premise Site enabling secure communications between the two sites using an IPSec enabled VPN tunnel.
We will explore capabilities #1 and #2 in the list above in this post.
1. Log in to http://manage.windowsazure.com/(Old Portal) with your live credentials that have access to your Windows Azure subscription.
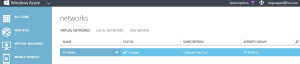
2. Switch to the Networks tab in the management console. You will see 0 networks created as shown:

3. Click "Create a Virtual Network". The following Wizard will appear:


Specify the Name, Region and Affinity Group Details as shown above and click on the Arrow pointing to the right at the bottom right of the window to move to the next step.
4. On the "DNS Servers and VPN Connectivity Page" specify the address of the DNS Server (if you have hosted any on Windows Azure), else leave it blank. The 2 checkboxes on the right provide you with options to extend this network to on-premise. We will explore these capabilities in future posts. At this point, just click on the arrow pointing to the right at the bottom right to proceed to the next step.


5. On the "Virtual Network Address Spaces" page, you will need to configure the IPv4 address range for your virtual network and all the subnets that you would want to be part of that virtual network.

Note
By default, Windows Azure allows you to configure an address space in the ranges of 10.0.0.0, 172.16.0.0 and 192.168.0.0

It allows you to choose a subnet mask based on the no. of host addresses required or based on the CIDR notation. You may switch between the 2 formats from the button in the top right as shown:

After selecting an address range for your virtual network, you may create multiple subnets in the network as shown:


6. Just click in the circle showning the Tick mark at the bottom right to complete the waizard. The virtual network creation starts and the created Virtual Network appears in the management console:
7. You may click the virtual network name to reach the Dashboard and see the virtual machines connected to this Virtual Network:

8. You may click on the "Configure" tab to add/change the DNS configuration, Point to Site connectivity or subnets to this virtual network post its creation:


Happy Virtual networking on Azure!!