Managed Navigation In SharePoint Server 2013
The managed navigation feature in SharePoint Server 2013 enables you to build navigation for publishing site that is derived from SharePoint managed metadata taxonomy. For this first of all you need to crate term set as per your business structure and then bind it to navigation. This will differentiate you business navigation with site stricture along with this it will give you more user friendly URLs rather than that old long Ugly URL's. This will also help in Search Engine Optimization and easier for site visitors to read. Like http://synhnjseza244:7072/Practice/company/about-us In SharePoint Server 2010, by default, you could base navigation only on the structure of a site. To create site navigation based on any data structure, you had to create a custom navigation provider. By using managed navigation, you can design site navigation around important business concepts.
Screen shot below shows navigation based on term set.

In above example I have created term set like below and assigned it as navigation.

Following are steps by using that we can create navigation by using Managed term set.
1) Create Publishing Site (This feature is only available in publishing site template)
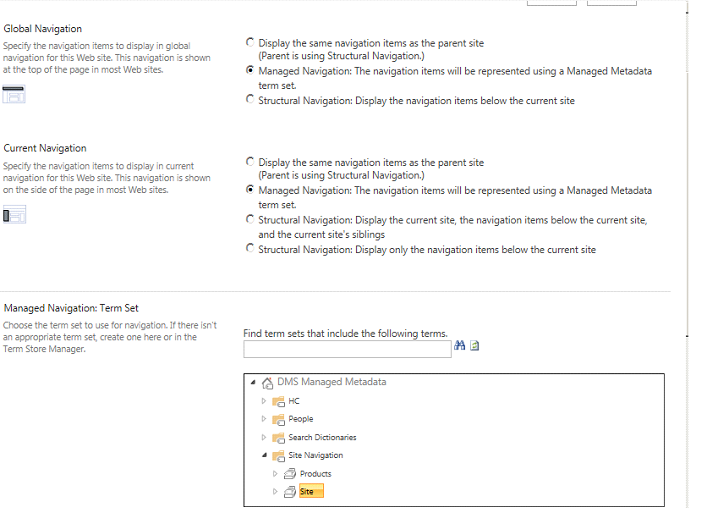
2) Go to Site Setting >>Navigation, Page will open like below.


Global Navigation will be Top navigation, as we are going to use term set for navigation tick 2nd option.
Left hand side navigation is called as Current navigation, here we going to use term navigation so select 2nd option.
Search if you have already created any term set or else these is link below called "Term Store management Tool" to create new. We will create new Term store, so click on it will open Term store management tool like below.

Right click "Site Navigation" select "Create New Group" give the name in my case I have given "Site"
Then right click on site and select "Create term" give the name I have given "Company"
Now here comes important configuration
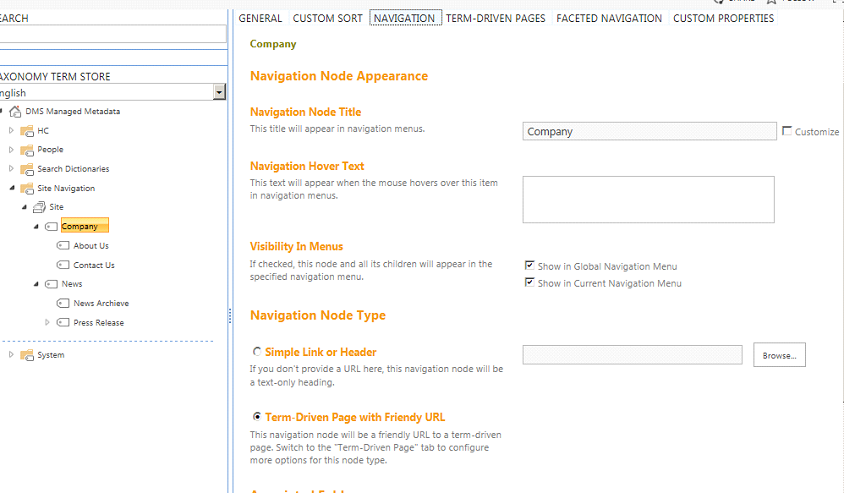
When you create term then in right hand side panel we need to do following configuration, leave as it is in General and Custom sort then got to Navigation tab and do configuration as shown in below image. Give the node title as you want in my case I have given "Company" then tick marks both the check boxes from "Visibility in Menus" this will show our term in both Global and current navigation. In Navigation node select 2nd option for friendly URL. Click Save Button.
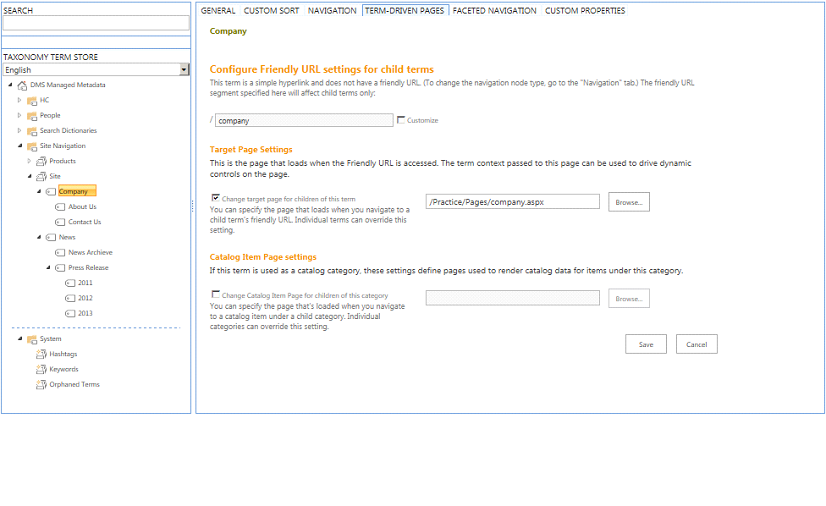
Then go to Term-Driven pages tab if you want you can give friendly URL for this term(It will populated automatically ,if you want to change you can change it), In target Page Setting tab click the first checkbox namely "Change target page for this term" browse the page which you want to set.
Also if you want to upload any image for categories you can do that in second blog. "Catalog Item Page settings "used when you want to use categories pages (Ex any product site, I am not using it so not required now)
Keep other setting as it and save the tab.

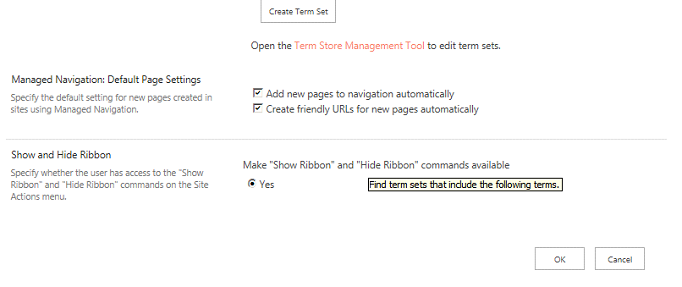
Do this for all other Term set and save it. Now get back to our original navigation page.(Site Setting >>Navigation, below image) select your newly created term set , Tick two checkboxes , this is saying that whenever you create new page then new page will automatically gets added to term set. Also it will create friendly URL.
Now go and test your site.