AD RMS Troubleshooting: Reset the Client (MSIPC)
In the course of troubleshooting the MSIPC rights management, it may be beneficial to reset the client. The reset process removes the pertinent registry settings and files. This reset applies to the logged on user. Other users on the same machine are not reset.
The steps are as follows.
- Exit running Office applications.
- Delete existing registry entries.
- Clear existing licenses, GICs (RACs), and etc.
- Reproduce the issue.
NOTE: Feel free to export the DRM registry key before deleting it. Moving the entire MSIPC directory to another location or renaming it may be done instead of deleting it.
Delete the RMS registry settings for the user.
- Open regedit.exe.
- Navigate to HKCU\Software\Microsoft\Office\XXX\Common\DRM.
XXX is the current Office version. 15.0 is Office 2013, 16.0 is Office 2016. There may be multiple versions listed (which is normal). Picking the highest is usually the correct one.- Delete the DefaultServer and DefaultServerURL values.

- Navigate to HKCU\Software\Classes\Local Settings\Software\Microsoft\MSIPC.
Note: this step resets the template distribution settings to default.- Delete the <Server name> key that corresponds to desired RMS server/cluster.

Clear the existing licenses, GICs (RACs), and etc.
- Use one of the following methods to open the user MSIPC directory.
- Open a command prompt and enter the following commands.
- Cd %localappdata%
- Start. (the command is the word Start followed by a “period” and the enter key.
- In the “Search programs and files” dialog type %localappdata%
- Open a command prompt and enter the following commands.
- In the AppData\Local directory navigate to the Microsoft directory.
- Delete the MSIPC directory.
NOTE: The CLC*.drm file may be too long for either Explorer or the command prompt to delete. Explorer reports a "destination path too long" error and the command prompt says "the file name or extension is too long." In this case, we may use robocopy.exe to move the MSIPC directory to another location.
Created a C:\Temp directory and used the following command.
robocopy "C:\Temp" %localappdata%\Microsoft\MSIPC /mir
Screenshots
Use the Start menu to navigate to the MSIPC directory


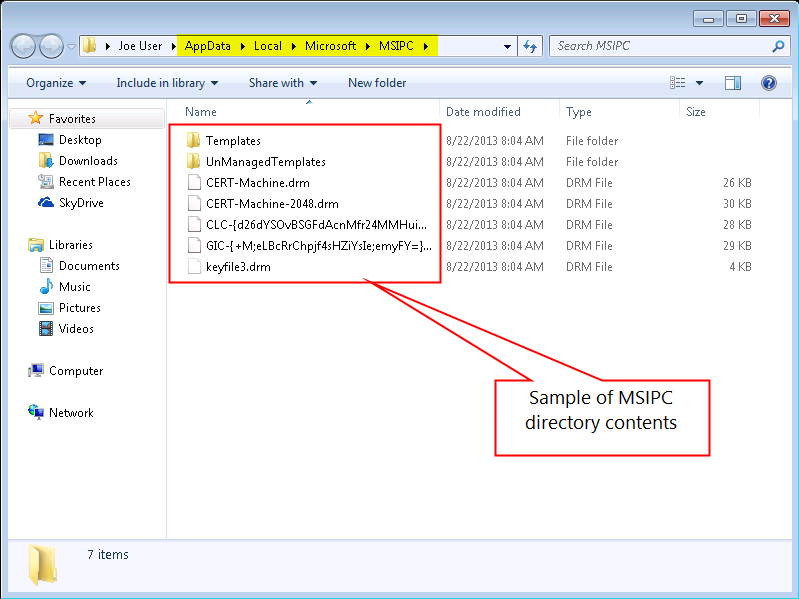
Sample contents of the MSIPC directory for the curious.