SharePoint: Master Child Relationships
Every once in a while you would want to relate one list to another, to form a master-child relationship. Here the master is the main list you display and when an individual item is opened, you display a list of child items related to your current selection. You can add, modify, and delete child items directly from the master item.
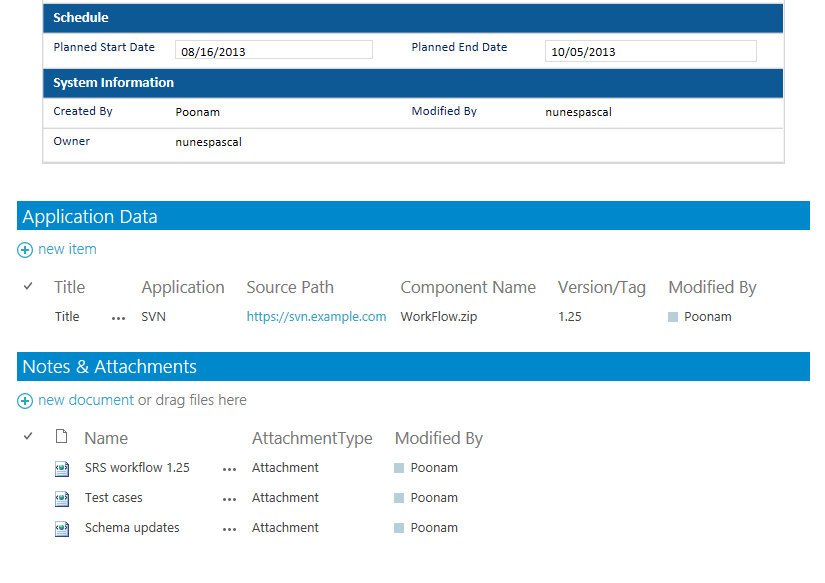
E.g: Master list with children as application data and attachments
Implementing this behavior in SharePoint is not straight forward. Let's begin step by step.
Creating the relation
Adding the relation is fairly straightforward. You go into the settings of the child list and add a lookup to the parent. If you do not know how to add a lookup column, you can follow the steps listed here:
Create list relationships by using lookup columns
Displaying child elements on the master view
Go to your display item page(displayifs.aspx) and click edit page
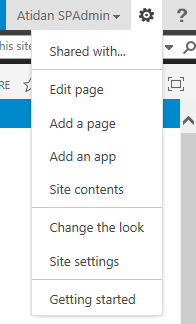
Once in edit mode, click “Add a Web Part”

The child list you add a lookup to earlier will be listed here. Select the child item you want to add.
When you add a related list, SharePoint adds the connections to the list webpart to filter and display only those child items that are related to the current master item.
So far we are using out of the box components and it looks great.
Associating the parent id on child pages
The default WebPart also shows the toolbar that allows us to add new items. However, when you try to add a new item, you will find that SharePoint needs you to select the master item to link to. Not so nice.
What would be nice is if we could add child elements from the parent item, and they would automatically get associated with the parent item. Sadly SharePoint doesn’t provide this out of the box. Here is a simple but effective workaround to achieve this behavior.
The logic goes as follows:
- Fetch the id of the current master item and store it in a cookie
- When user opens child item, fetch the cookie value on child page
- Set value for the lookup field to value from cookie
- Hide the entry field so user doesn’t change it accidentally
- Set the child library to open as a modal dialog (Advanced settings of a list) so that user doesn’t have to navigate away from current master item page
Script to fetch id of current item: This is added to the master item display page
<script type="text/javascript">
    //get the ID for the Issue from the Query String
    var appID = getParameterByName("ID");

    //create a cookie with the name "MasterID"
    createCookie("MasterID", appID);

    function getParameterByName(name)
    {
      name = name.replace(/[\[]/, "\\\[").replace(/[\]]/, "\\\]");
      var regexS = "[\\?&]" + name + "=([^&#]*)";
      var regex = new RegExp(regexS);
      var results = regex.exec(window.location.href);
      if(results == null)
        return "";
      else
        return decodeURIComponent(results[1].replace(/\+/g, " "));
    }

    function createCookie(name, value) {
       var date = new Date();
       date.setTime(date.getTime()+(3600*1000));
       var expires = "; expires="+date.toGMTString();
       document.cookie = name+"="+value+expires+"; path=/";
    }
</script>
Script to set lookup of child item: This is added to the child page.
<script  type="text/javascript" src="//ajax.aspnetcdn.com/ajax/jQuery/jquery-1.8.0.js"></script>
<script type="text/javascript">

    //On load set the master lookup value from cookie and hide the field
    _spBodyOnLoadFunctionNames.push("SetNHide");

     function SetNHide(){
        var appID = getCookie("MasterID");
       if (appID != undefined)
        {
            //"MasterID" is the column name of your master list lookup
            SetLookup("MasterID", appID);
        }
    }

    function getCookie(name) {
        var cookieArray = document.cookie.split(";");
        for (index in cookieArray)
        {
            var keyValuePair = cookieArray[index].split("=");
            var key = keyValuePair[0];
            key  = key.replace(/^\s+|\s+$/g, "");
            if (key == name)
            {
                var value = keyValuePair[1];
                return value;
            }
        }
    }

    //Sets the value of a lookup field whether it is an input or select field.
    function SetLookup( fieldTitle, lookupVal)
    {
        //Set default value for lookups with less that 20 items
        if ( $("select[title='" +fieldTitle+ "']").html() != null)
        {
            var element = $("select[title='"+ fieldTitle +"']");
            $(element).val(lookupVal);
            $(element).find('option:not(:selected)').attr('disabled', true);
            $(element).closest('tr').hide();
        }
        else
        {
            choices = $("input[title='" +fieldTitle +"']").attr("choices");
            hiddenInput = $("input[title='" +fieldTitle +"']").attr("optHid");
            $("input[id='" +hiddenInput +"']").attr("value",lookupVal)

            if(choices!=null)
            {
                choiceArray = choices.split("|");
                for (index = 1; index < choiceArray.length; index = index + 2)
                {
                    if (choiceArray[index] == lookupVal){
                        var element = $("input[title='" +fieldTitle +"']");
                        $(element).val(choiceArray[index - 1]);
                        $(element).attr('readonly',true);
                        //hide the button that is used for the dropdown list
                        $(element).next('img').hide();
                        $(element).closest('tr').hide();
                    }
                }
            }
        }
    }

</script>
Note: This script uses a reference to the ASP.NET Ajax CDN. If you are running this on SharePoint online, you are good to go. If you want to run this on premise and are using jQuery for other purposes, you can link it to the library you have added to your site collection.