How to deploy .NET Framework using SCCM 2012 R2
This step-by-step article shows how one can deploy .NET Framework using SCCM 2012 R2. In this article we will see the steps to deploy .NET Framework 4.0 using SCCM 2012 R2. However, you can deploy the other versions of .NET Framework with the same procedure. The overall deployment of .NET Framework 4.0 is easy. However, if you follow screenshots it will be pretty easy.
Download the .NET Framework 4.0 standalone installer from the below link:
.Net Framework standalone Installer
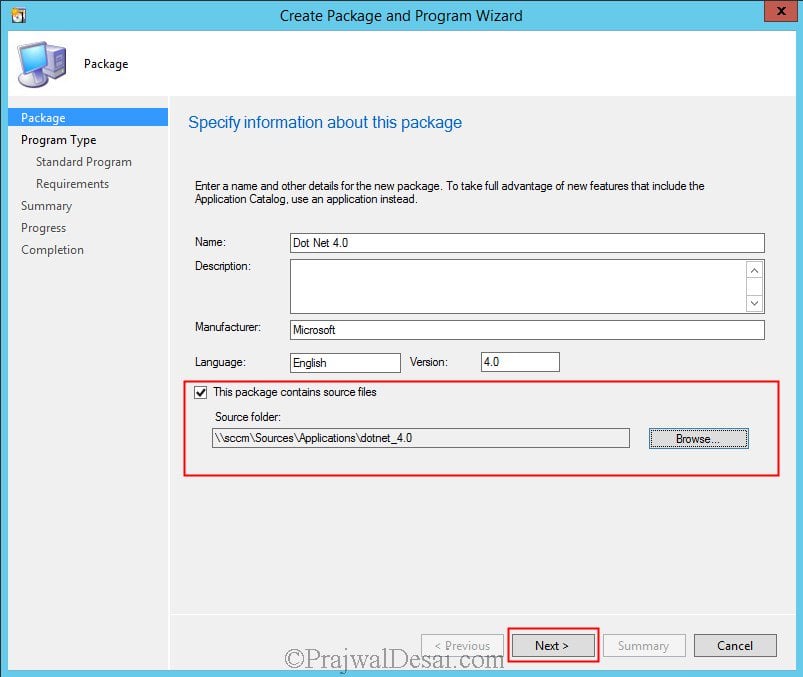
After you download .NET Framework 4.0 installer, copy it to a folder on the SCCM server. In the Configuration Manager console, choose Software Library. In the Software Library workspace, expand Application Management, and then choose Packages. Right click Packages and click Create Package. Specify the Name, Source folder and click Next.
http://prajwaldesai.com/wp-content/uploads/2014/04/Deploy-.NET-Framework-4.0-Using-SCCM-2012-R2-Snap2.jpg
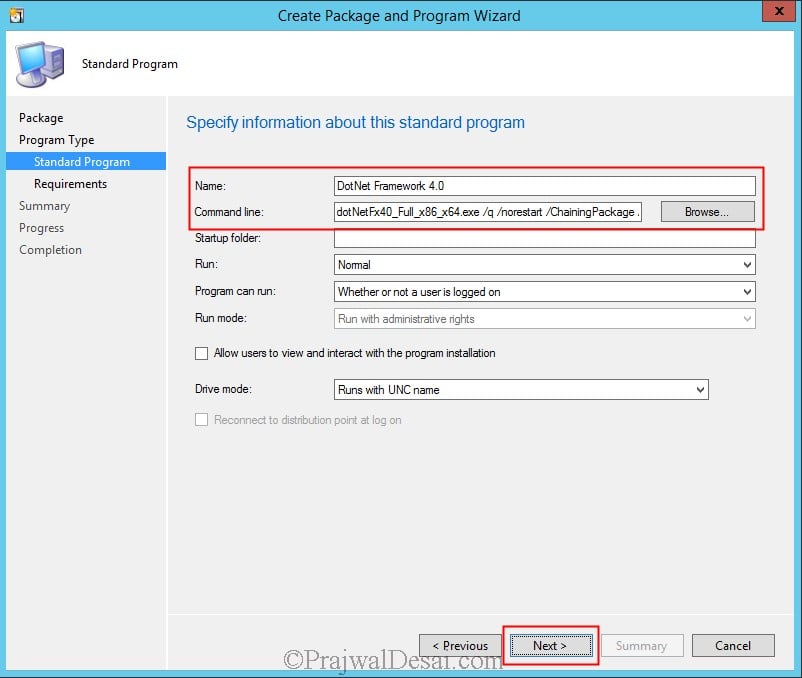
Choose the Program Type as Standard Program. Click Next.
http://prajwaldesai.com/wp-content/uploads/2014/04/Deploy-.NET-Framework-4.0-Using-SCCM-2012-R2-Snap3.jpg
Specify the Name for the standard program, enter the Command line as **dotNetFx40_Full_x86_x64.exe /q /norestart /ChainingPackage ADMINDEPLOYMENT **and click Next.
http://prajwaldesai.com/wp-content/uploads/2014/04/Deploy-.NET-Framework-4.0-Using-SCCM-2012-R2-Snap4.jpg
Click Next.
http://prajwaldesai.com/wp-content/uploads/2014/04/Deploy-.NET-Framework-4.0-Using-SCCM-2012-R2-Snap5.jpg
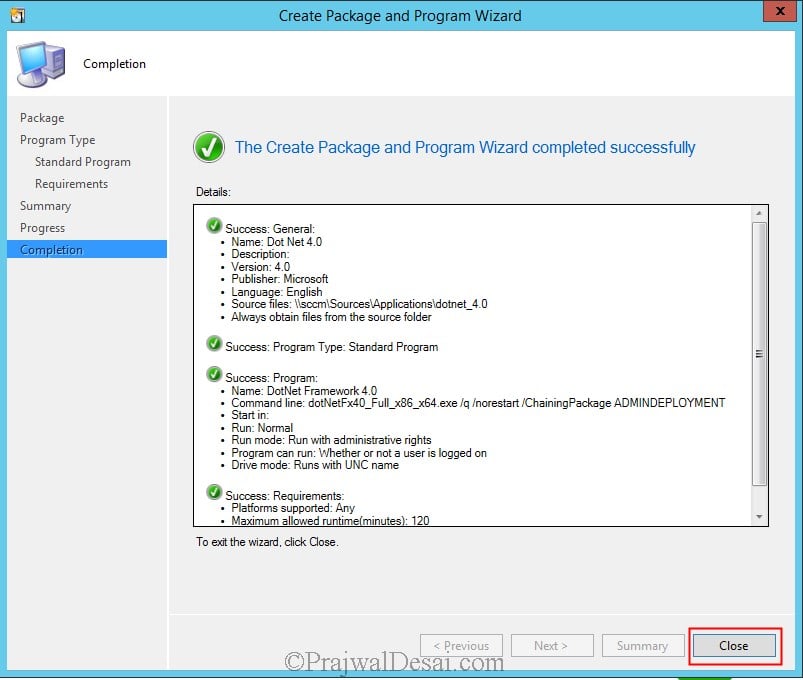
Click on Close.
http://prajwaldesai.com/wp-content/uploads/2014/04/Deploy-.NET-Framework-4.0-Using-SCCM-2012-R2-Snap6.jpg
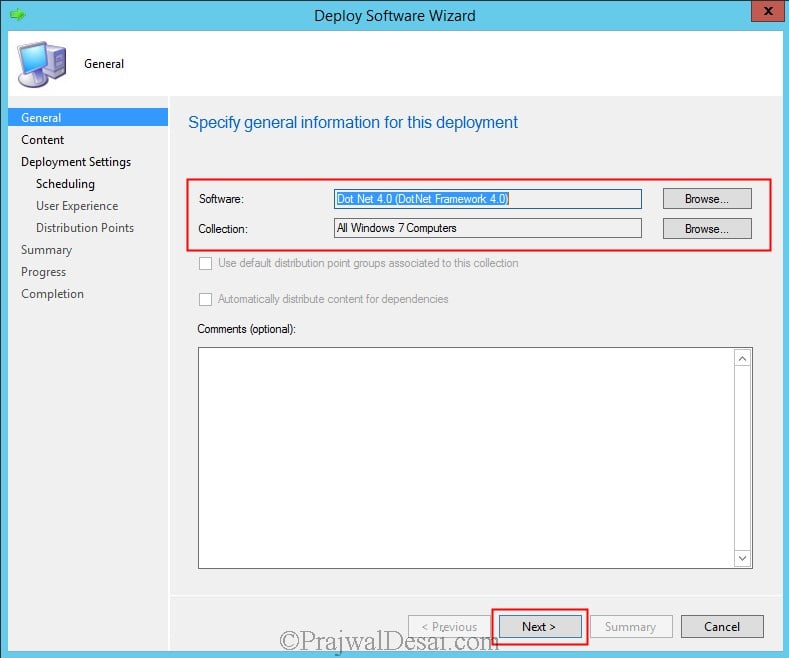
The next step to distribute the program to DP and deploy it to the collection. To distribute the package, right click the package and click Distribute Content. Follow the wizard, add your DP and close the wizard. Once the package has distributed the next step is to deploy the package. Right click the package and click Deploy. Click on Browse and add the collection to which this package is to be deployed. Click Next.
http://prajwaldesai.com/wp-content/uploads/2014/04/Deploy-.NET-Framework-4.0-Using-SCCM-2012-R2-Snap7.jpg
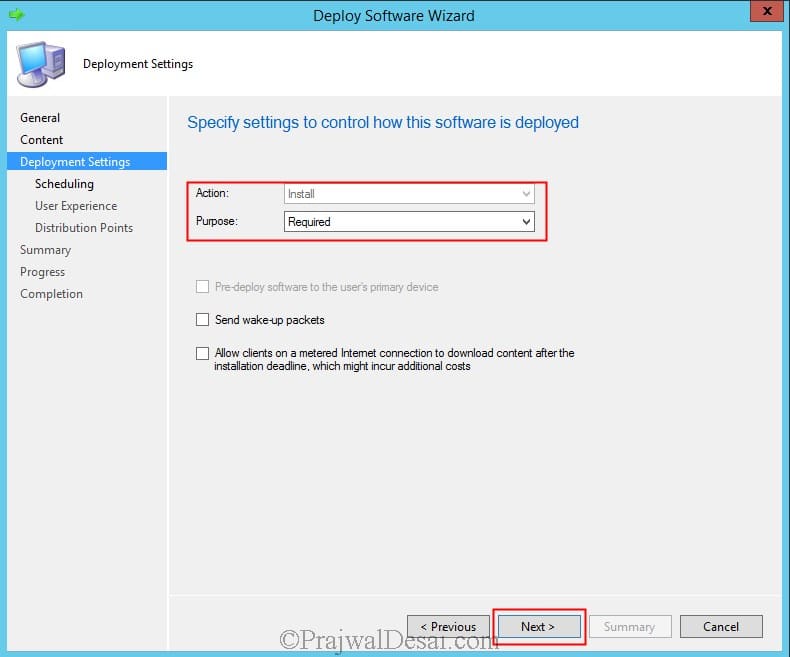
Set the purpose as Required and click Next.
http://prajwaldesai.com/wp-content/uploads/2014/04/Deploy-.NET-Framework-4.0-Using-SCCM-2012-R2-Snap8.jpg
Specify the schedule for this deployment. Specify when you want the .NET Framework 4.0 to be installed. Click New and set the assignment schedule to As soon as possible. Click Next.
http://prajwaldesai.com/wp-content/uploads/2014/04/Deploy-.NET-Framework-4.0-Using-SCCM-2012-R2-Snap9.jpg
Follow the wizard and complete the next steps. Click Close.
http://prajwaldesai.com/wp-content/uploads/2014/04/Deploy-.NET-Framework-4.0-Using-SCCM-2012-R2-Snap10.jpg
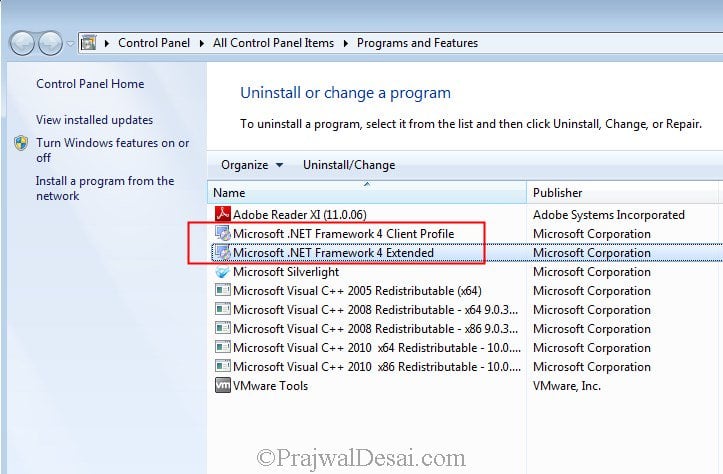
On one the client machine, under Program and Features we see that .NET Framework 4.0 has been installed.
http://prajwaldesai.com/wp-content/uploads/2014/04/Deploy-.NET-Framework-4.0-Using-SCCM-2012-R2-Snap11.jpg
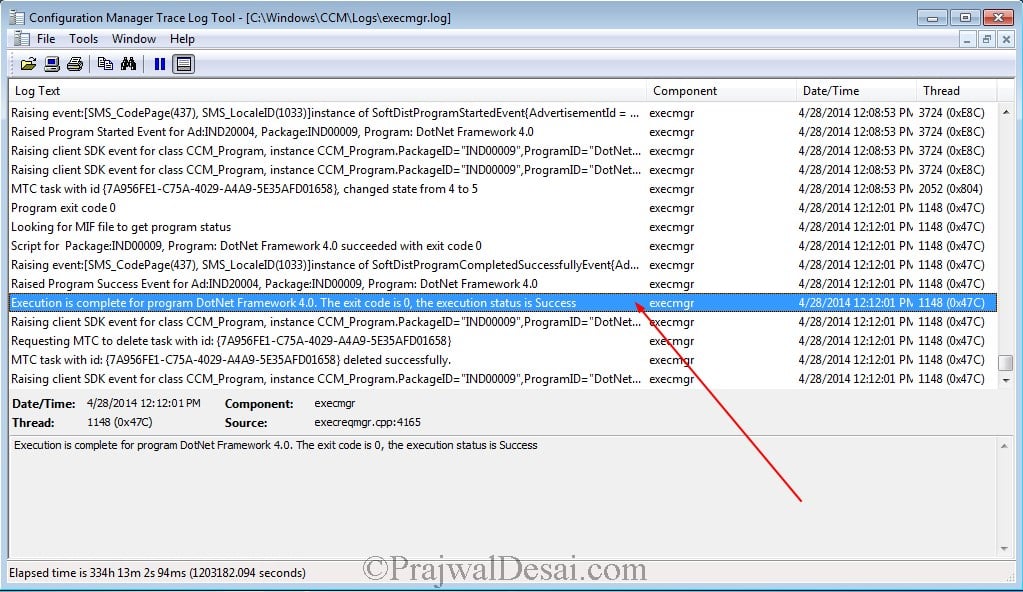
Open the execmgr.log file on the client machine, we see that the execution is complete for .Net Framework 4.0. In case the installation fails check the log file for any errors.
http://prajwaldesai.com/wp-content/uploads/2014/04/Deploy-.NET-Framework-4.0-Using-SCCM-2012-R2-Snap12.jpg