Installing MS SQL Server AlwaysOn AG (Availability Groups) Step by Step
Installing MS SQL server AlwaysOn AG (Availability Groups)
This lab installation is using MS SQL server 2012 SP1, installed on Windows Server 2012 R2 Failover Cluster.
- Both servers should have the latest updates, Network connectivity (two network cards for redundancy), and storage path for SQL data. storage does not need to be a shared storage, so when running the cluster validation uncheck storage validation.
- Install Failover clustering feature on all server to be part of the availability group. Check the below link on Failover clusters. The link contains checklists, prerequisites, validation and creating a cluster.
http://technet.microsoft.com/en-us/library/cc754482.aspx
If you are installing availability groups, always on SQL server on windows server 2012 or windows server 2012 R2, you don’t have prerequisites other than the servers should be nodes in a WFCS, and the same latest updates to be installed on all nodes. All hotfixes are included in WIN server 2012 and some are Not Applicable.
- Install MS SQL server 2012 on every node in the cluster. this link provides guidance on installing SQL 2014 http://msdn.microsoft.com/en-us/library/ms143219.aspx while installing you will be prompted whether you wanted to use a named SQL server instance, the instance name does not need to be the same on all servers. also for the instance authentication, use a domain service account. this will save you a lot of headache.
- The name of the folder to hold the SQL data files should be the same on all servers in the AG.
- Run the following power shell commandlet to change the HostRecordTTL to 300:
Import-Module FailoverClusters
$nameResource = "(Name of your cluster)"
Get-ClusterResource $nameResource | Set-ClusterParameter HostRecordTTL 300
If you are not sure what cluster resource has the HostRecordTTL parameter run Get-ClusterResource | Get-ClusterParameter locate the cluster resource name that corresponds to the cluster parameter “HostRecordTTL” and supply it to the $nameResource variable in the above commandlet.
- Add the account used to install Availability Groups to the local administrators group.
- Add the same account to the sysadmin SQL server role.
- Add the same account to the db_owner
- Enable AlwaysOn Availability Groups feature:
- Open SQL server Configuration Manager from the start menu.
- Click on SQL Server Service
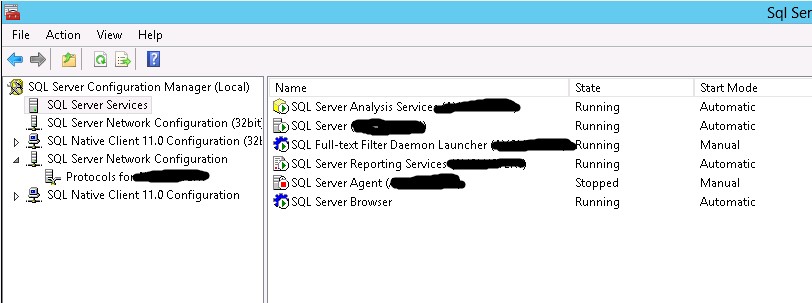
- In the right pane right click SQL Server(server instance) and choose properties
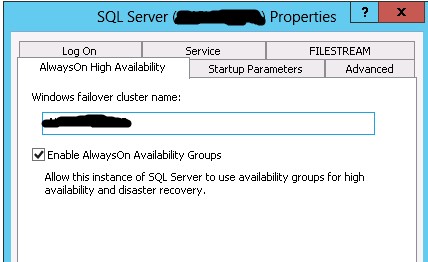
- Switch to the tab AlwaysOn High Availability and check the box Enable AlwaysOn Availability Groups
- Restart the SQL server service
- Wait for the SQL server service to restart and then enable HADRAO on the other nodes
- After checking all the prerequisites and requirements for the Database, our setup is ready
- Disable Windows Firewall. If you don’t want this, you can open the ports required for SQL.
- Create a file share on the LAN accessible from all cluster instances. The file share should have full permission for the AD service account used for SQL.
- Create AlwaysOn availability group:
- Right click on AlwaysOnHighAvailabitiy then select New Availability Group Wizard

- Provide a name for your AG. Note (this is different from AG Listener)

- On the next window select the User database that you want to join to the AG. Click next
- On the Specify Replica window, the server instance you are working on would be present by default. Click add replica to add the secondary SQL servers.

Specify the server name and instance name, with the authentication method, username and password. And click connect.
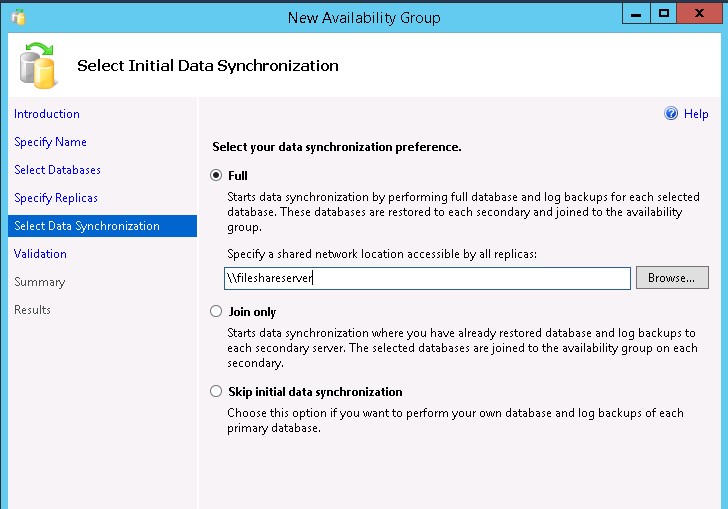
- Specify the file share created earlier and click next.
- On the validation page, check for any errors and showstoppers. You can ignore the two errors shown in the next image. For we will create the AG Listener at a later time, and the free disk warning can be safely ignored if you have enough storage on the secondary servers.
- Click next, on the summary page review and click install.

- To configure the listener right click on availability group listener and select Add Listener

- Add the listener DNS name. This will be the name that your client will connect to. Add the port 1433 to the Port. Choose Static IP. Provide the subnets and the IP address of the listener. Click Ok to configure the AG listener.
