Configure Maximum message size limit on Send-Receive Connectors in Exchange 2013
This simple guide shows you how to configure your send/receive connectors and change the maximum send/receive message size.
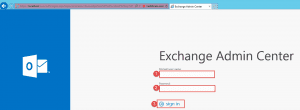
Open up the Exchange Admin Center:
http://collaborationpro.com/wp-content/uploads/2015/02/conn1-300x110.png
- Step 1 -> Enter in the user that has access to create databases. E.g. Domain\username
- Step 2 -> Enter in the password
- Step 3 -> Click Sign in
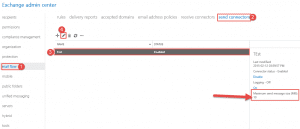
Send Connector:
http://collaborationpro.com/wp-content/uploads/2015/02/conn2-300x129.png
- Step 1 -> Click on Mail flow.
- Step 2 -> Click on Send Connectors.
- Step 3 -> Click on your defined send connector.
- Step 4 -> Click the Pencil to edit the current send connector.
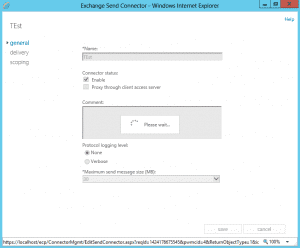
As you can see the maximum send message size is 10 MB. In this exercise we will change it to 30MB.
http://collaborationpro.com/wp-content/uploads/2015/02/conn3-300x248.png
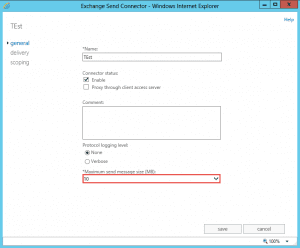
- Default view of the current config.
http://collaborationpro.com/wp-content/uploads/2015/02/conn4-300x248.png
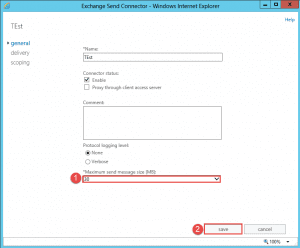
- Step 1 -> Change the value to 30.
- Step 2 -> Click Save.
http://collaborationpro.com/wp-content/uploads/2015/02/conn5-300x248.png
- Progress Screen.
http://collaborationpro.com/wp-content/uploads/2015/02/conn6-300x127.png
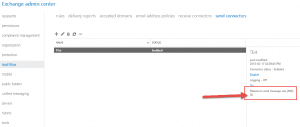
- Back in the Exchange Admin Center (EAC) you can now see that the new value is 30MB.
Configure Receive Connectors:
http://collaborationpro.com/wp-content/uploads/2015/02/conn7-300x119.png
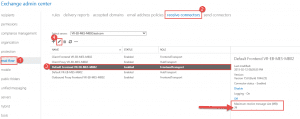
- Step 1 -> Click on Mail Flow
- Step 2 -> Click on Receive Connectors
- Step 3 -> Click on the Default Frontend connector.
- Step 4 -> click the Pencil to edit the current connector.
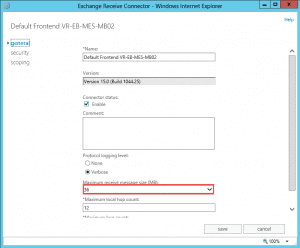
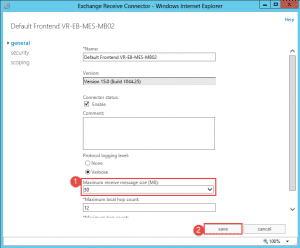
As you can see the maximum receive message size is 36MB, in this exercise we are going to change this to 30MB.
http://collaborationpro.com/wp-content/uploads/2015/02/conn8-300x248.png
- Current config.
http://collaborationpro.com/wp-content/uploads/2015/02/conn9-300x248.png
- Step 1 -> Change the value from 36 to 30.
- Step 2 -> Click on Save.
http://collaborationpro.com/wp-content/uploads/2015/02/conn10-300x249.png
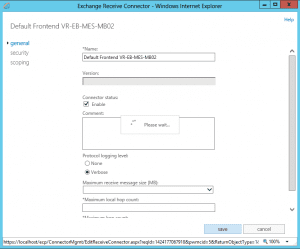
- Progress screen.
http://collaborationpro.com/wp-content/uploads/2015/02/conn11-300x121.png
- Back in the EAC you can now see the value has been changed.
- Complete this for any other connectors.