Exchange 2013: Enable forwarding on a mailbox
In this exercise we will enable forwarding on a users mailbox in Exchange 2013. You have the option to deliver only to the recipient but also to keep a copy in the current mailbox. We will show you how to set forwarding using the Exchange Admin Center and the Exchange Management Shell.
Set email forwarding using the Exchange Admin Center:
https://collaborationpro.com/wp-content/uploads/2015/04/FAccess1-300x178.png
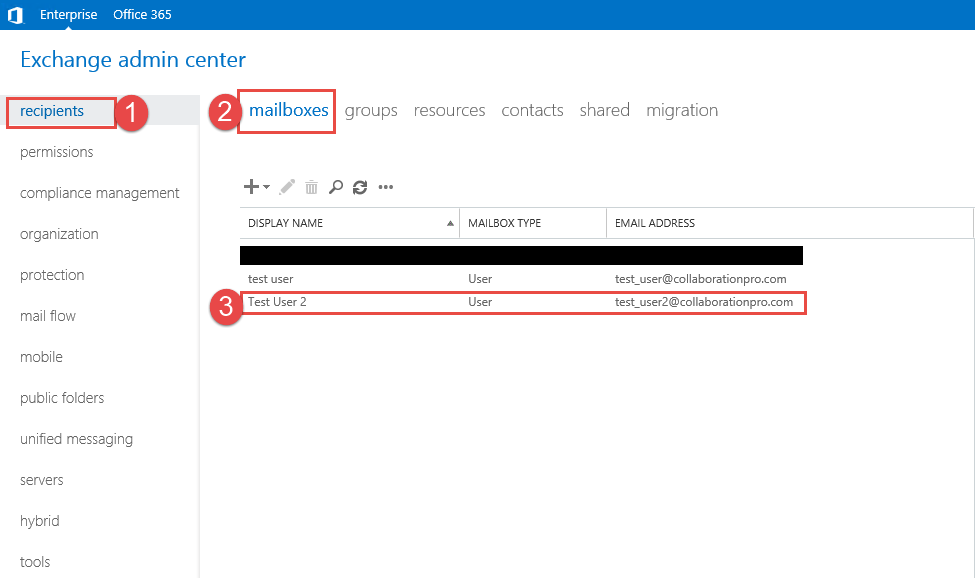
- Step 1 -> Click on Recipients
- Step 2 -> Click on Mailboxes
- Step 3 -> Click on the mailbox where you want to grant access.
Once you have located the mailbox you can double click it or click on the pencil.
https://collaborationpro.com/wp-content/uploads/2015/04/mforward1-300x260.png
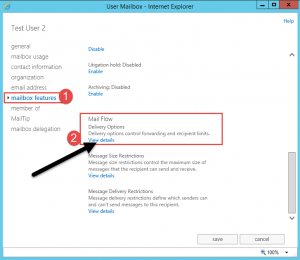
- Click on the Mailbox Features option on the left.
- Scroll down with the scroll bar until you see Mail Flow. Click on view details.
https://collaborationpro.com/wp-content/uploads/2015/04/SForward2-246x300.png
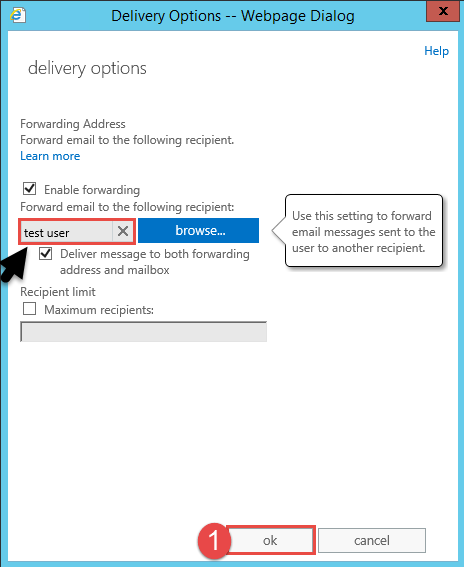
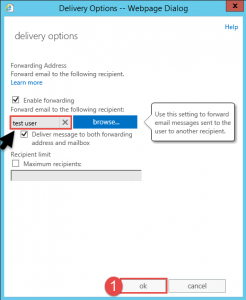
- Under the Deliver Options Window you can set the following:
- Enable Forwarding -> Select this option.
- Deliver message to both forwarding address and mailbox (optional)
- Click the browse button to select the recipient that you want to forward mail to.
https://collaborationpro.com/wp-content/uploads/2015/04/SForward3-245x300.png
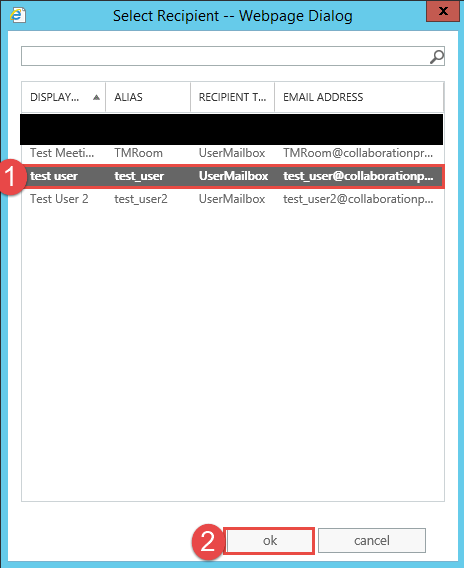
- Highlight the user that you want to forward mail to and then click the OK button.
https://collaborationpro.com/wp-content/uploads/2015/04/SForward4-246x300.png
- As shown above the user you selected in now shown in the text box.
- You can set the last field if you require.
- Click the OK button.
https://collaborationpro.com/wp-content/uploads/2015/04/SForward5-300x259.png
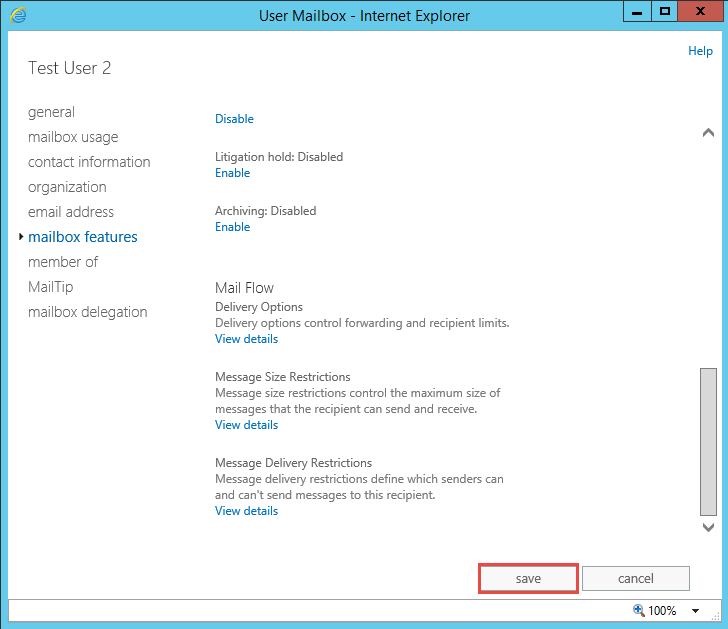
- Back at the main User Mailbox option screen click the save button for the change to be applied.
Set forwarding using the Exchange Management Shell:
- Set-Mailbox -Identity "Test_User2" -DeliverToMailboxAndForward $true -ForwardingSMTPAddress "Test_User1@domain.com"