Apply custom mailbox quotas for a user in Exchange 2013
In Exchange 2013, you set your default quotas for all mailboxes, however you might need to increase an individual mailbox because of the large amount of email that the user processes, this can be a marketing person for example. In this exercise we will increase the size of a mailbox using the Exchange Admin Center and the Exchange Management Shell.
Increase quota size using the Exchange Admin Center:
https://collaborationpro.com/wp-content/uploads/2015/04/FAccess1-300x178.png
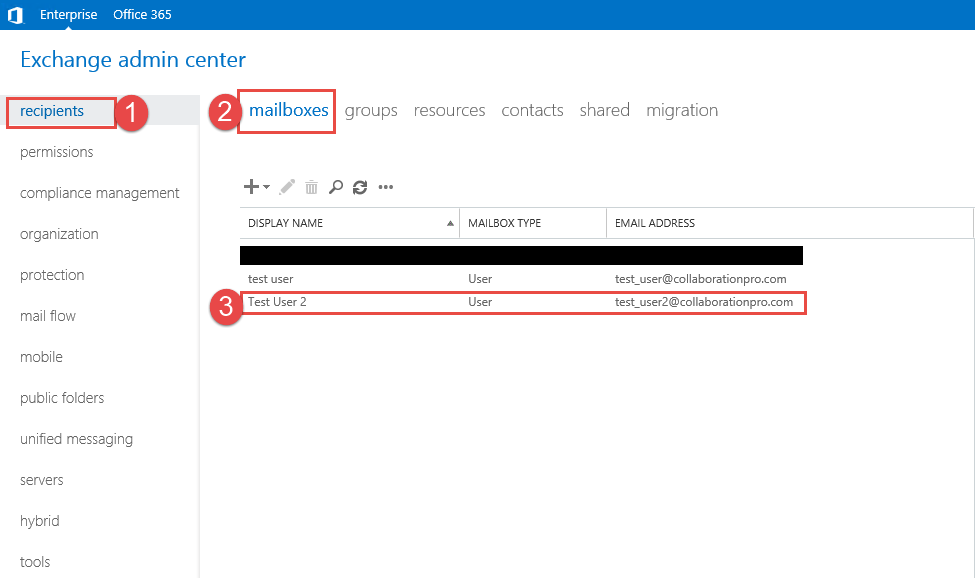
- Step 1 -> Click on Recipients.
- Step 2 -> Click on Mailboxes.
- Step 3 -> Click on the mailbox where you want to grant access.
Once you have located the mailbox you can double click it or click on the pencil.
https://collaborationpro.com/wp-content/uploads/2015/04/quota1-300x259.png
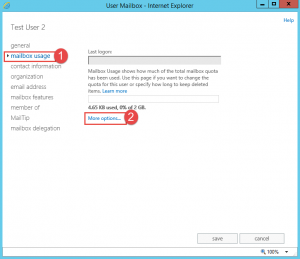
- Click on the Mailbox usage link on the left.
- Now click on More options as shown above (Step 2)
https://collaborationpro.com/wp-content/uploads/2015/04/quota2-300x258.png
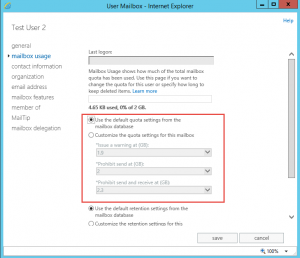
- As shown above, once the more options link is click then you will see the quota settings.
- The default radio button is currently selected.
https://collaborationpro.com/wp-content/uploads/2015/04/quota3-300x259.png
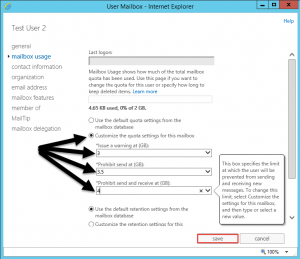
- Click on the second radio button to customize the settings for this user.
- Here you can enter in the new defaults for the user.
- Once done click the save button.
Increase quota using the Exchange Management Shell:
- Set-Mailbox -Identity "Test User2" -IssueWarningQuota 3gb -ProhibitSendQuota 3.5gb -ProhibitSendReceiveQuota 4gb -UseDatabaseQuotaDefaults $false