Integrate Exchange 2013 OWA and Skype for Business 2015
Overview
In this article we will demonstrate the steps for integration between Exchange Server 2013 Outlook Web App and Skype for Business Server 2015 to enable instant messaging and presence in Outlook Web App.
There is four virtual machines, all servers belong to the same Active Directory Domain Services and installed with Windows Server 2012 R2. In the figure below we have the names and functions of virtual machines.
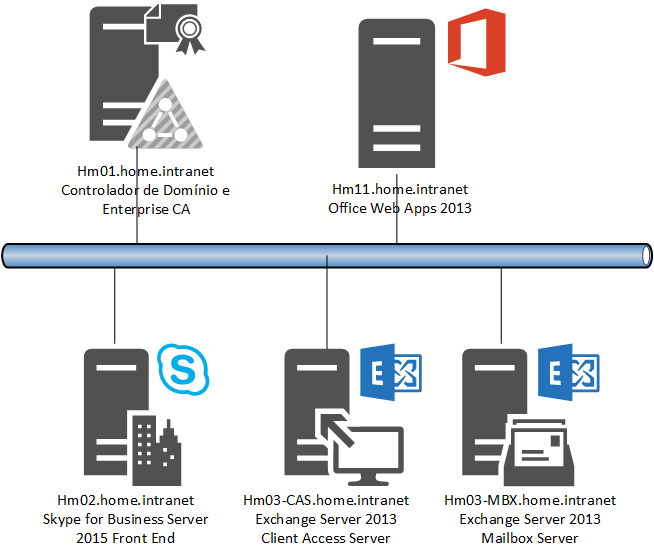
The internal DNS name is home.intranet and a sip domain *home.eti.br *
| FQDN | Endereço IP | Função do Servidor |
| Hm01.home.intranet | 172.16.1.245 |
Domain Controller and Enterprise CA |
| Hm02.home.intranet | 172.16.1.247 | Skype for Business 2015 Front End |
| Hm03-CAS.home.intranet | 172.16.1.244 | Exchange Server 2013 Client Access Server |
| Hm03-MBX.home.intranet | 172.16.1.243 | Exchange Server 2013 Mailbox Server |
Exchange Server Settings
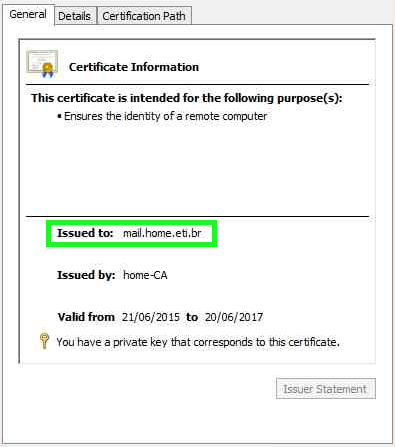
The Exchange services Outlook Anywhere, ActiveSync, Offline Address Book and Autodiscover are configured with mail.home.eti.br URL and pointing th HM03-CAS host that is my Client Access Server role.


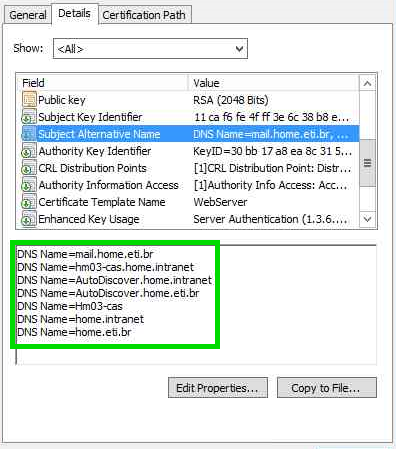
The digital certificate used for services was issued by an internal CA installed on the domain controller. Subject Name of the certificate is set to the URL that services are using, in this case mail.home.eti.br and in the field Subject Alternative Name is configured netbios and Client Access FQDN name.
 |
 |
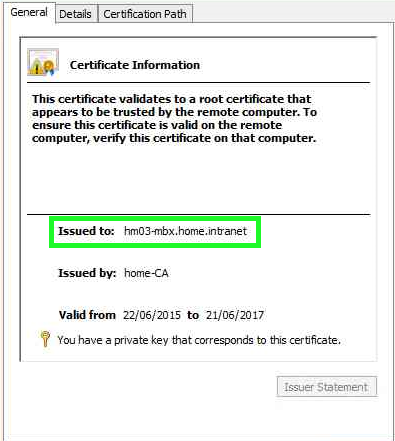
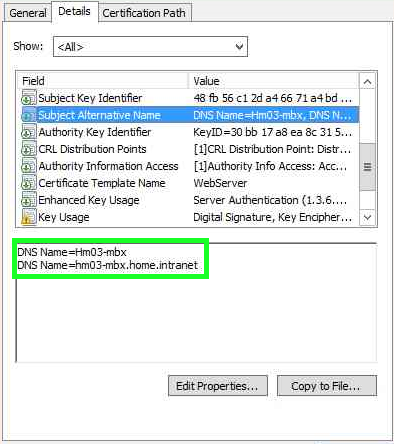
In the Mailbox Server we have a certificate issued by the same internal CA. The Subject Name of the certificate has been configured with the FQDN of the Mailbox Server and the Subject Alternative Name configured with the FQDN and netbios name.
 |
 |
To configure the connection between the servers you must select a digital certificate for encryption of traffic. We will need the Thumbprint and Subject Name of this certificate in your Mailbox Server. Use the cmdlet to identify and extract the information:
Get-ExchangeCertificate
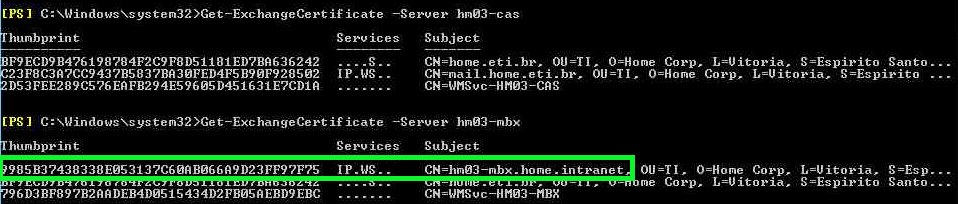
Write down the Thumbprint of the certificate to identify which certificate will be used for the connection. The Subject Name is used in the creation of Trusted Application on the * Skype Server*, the name of the Trusted Application must be identical to name Subject Name of the certificate.
Then enable the integration of Exchange web service with Skype for Business run the cmdlet
Get-OwaVirtualDirectory | Set-OwaVirtualDirectory -InstantMessagingEnable $True -InstantMessagingType OCS

Configure OWA access policy and enable the IM function for all users
Get-OwaMailboxPolicy | Set-OwaMailboxPolicy -InstantMessagingEnabled $true –InstantMessagingType OCS

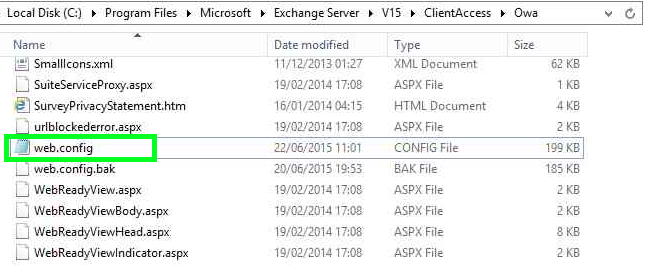
To finish the configuration change the *web.config *file on Mailbox Server. By default the file is located in C:\Program Files\Microsoft\Exchange Server\V15\ClientAccess\Owa
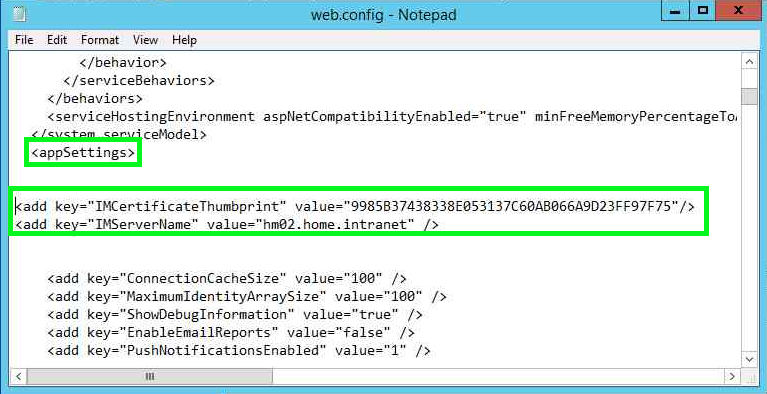
Open the file in a text editor, locate the <appSettings> tag and add the two lines in the configuration file:
| <add key="IMCertificateThumbprint" value="Certificate ThumbPrint of Mailbox Server"/> <add key="IMServerName" value="FQDN Pool Skype for Business" /> |
The final configuration should look like this
.Run the command to apply the changes in OWA.
C:\Windows\System32\Inetsrv\Appcmd.exe recycle apppool /apppool.name:"MSExchangeOWAAppPool"

Skype for Business Server Settings
A Trusted Application is an application based on Microsoft Unified Communications Managed API entrusted by Skype Server.
To configure the integration with OWA you must configure a Trusted Application between Exchange and Skype.
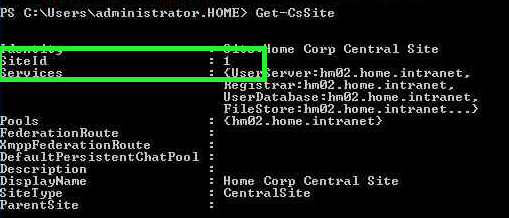
To create an application Skype Server first identify the site created. Use the Get-CsSite cmdlet and note the pool SiteId.
Get-CsSite
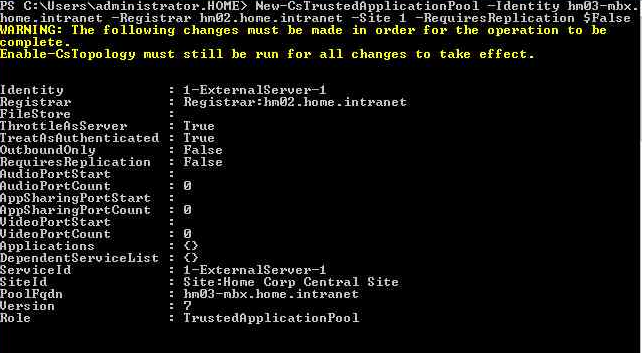
To create an application pool run the cmdlet
New-CsTrustedApplicationPool -Identity <Certificate Subject Name of Mailbox Server> -Registrar <FQDN Pool Skype Server> -Site <SiteID Pool> -RequiresReplication $False
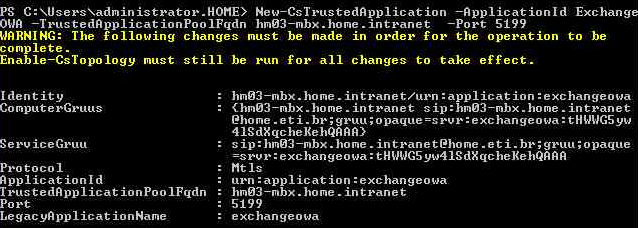
To create the application that represents OWA in Skype Server run the cmdlet
New-CsTrustedApplication -ApplicationId OutlookWebApp -TrustedApplicationPoolFqdn <Certificate Subject Name of Mailbox Server> -Port <Available TCP port number>
Execute *Enable-CsTopology *to aplly the changes.
Enable-CsTopology

Outlook Web App Access
To check the integration between servers is up and running access Exchange OWA and check that the presence was activated and the presence of other users is working.
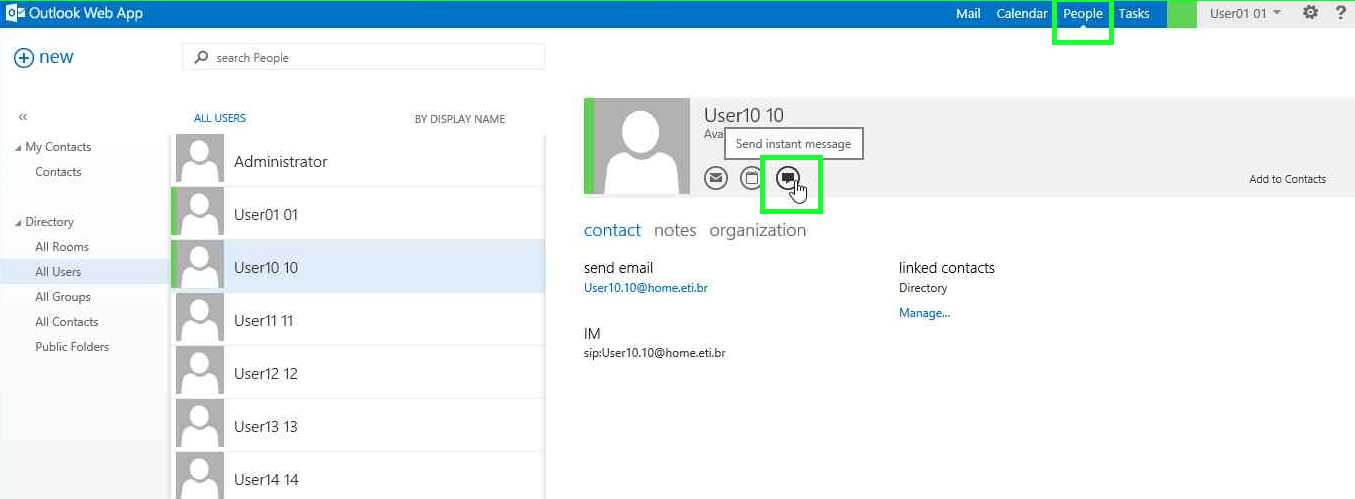
Within the OWA it is also possible to start an instant messaging session.