SCCM: Change Site Code of Client
Introduction
Every Configuration Manager site has a site server, a site database, and a three-character alphanumeric site code. The Configuration Manager site code must be unique in the hierarchy. Site codes are used to identify the sites in a Configuration Manager and site code must uniquely identify each Configuration Manager site in the hierarchy. Having said that there might be reasons why we want to change the site code of the configuration manager client. Let's assume we have ConfigMgr 2012 installed in our company and now we want to migrate the objects to Configuration manager current branch.
ConfigMgr 2012 and Configuration Manager current branch publish information into the same Active Directory system folder when implemented in the same domain. As a part of the migration process, we should plan for new site codes for our Configuration Manager current branch hierarchy.
Remarks
When we are choosing the site code while installing SCCM we should keep few things in mind.
- Avoid using reserved names such as AUX, CON, NUL, PRN when choosing site codes.
- Avoid reusing site codes previously used in our ConfigMgr hierarchy. Configuration Manager Setup does not verify that the site code entered is not already in use. Site codes are stored in the site databases. If we were to reuse a site code, we may discover that all references to the old site were not fully removed or are re-introduced from a restored backup. This could cause problems resolving the site.
Change Site Code of Configuration Manager Client
Now we will see how to change site code of SCCM client using a script. In the below script replace our site code in place of P01 and save it as filename.vbs.
On Error Resume Nextset oSMSClient = CreateObject ("Microsoft.SMS.Client")'if Err.Number <>0 then'wscript.echo "Could not create SMS Client Object - quitting"'end if'Assign client to ServernameoSMSClient.SetAssignedSite "P01",0set oSMSClient=nothing
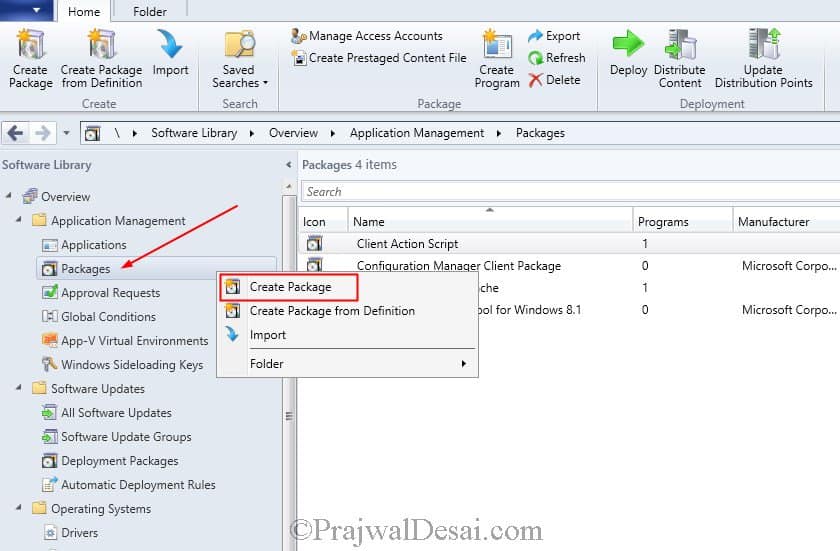
If we want to change the site code on a single computer then copy the script to the computer and run the script manually. If we are looking to change the site code for set of computers then let's see how to do that. Launch the configuration manager console, navigate to Software Library and click on Packages. Right Packages and click Create Package.
http://prajwaldesai.com/wp-content/uploads/2015/06/Change-Site-Code-of-Configuration-Manager-Client-Snap1.jpg
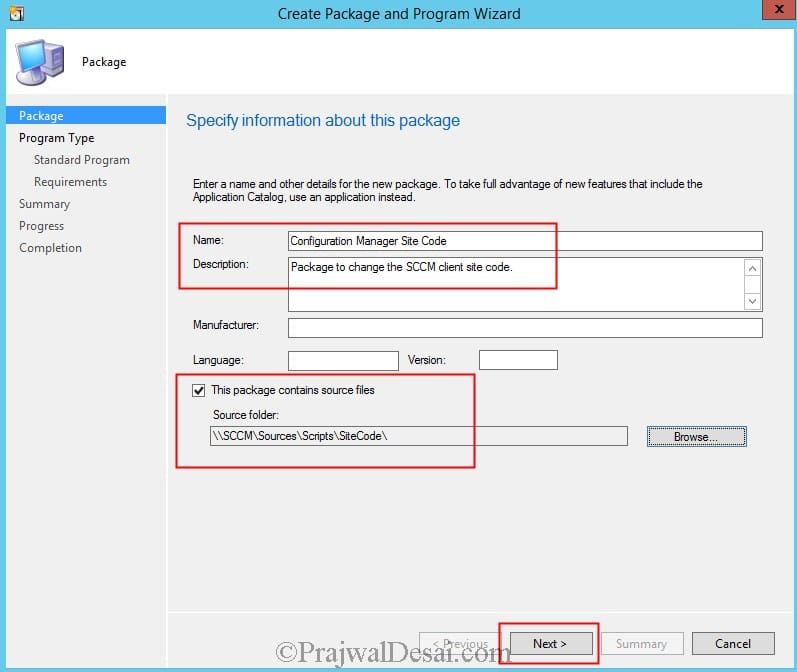
Specify the Name and Source folder of the package. Click Next.
http://prajwaldesai.com/wp-content/uploads/2015/06/Change-Site-Code-of-Configuration-Manager-Client-Snap2.jpg
Create a standard program and specify the details such Name, command line etc. The command line here is the script that actually changes the site code. Select Program can run as Whether or not a user is logged on. Click Next.
http://prajwaldesai.com/wp-content/uploads/2015/06/Change-Site-Code-of-Configuration-Manager-Client-Snap3.jpg
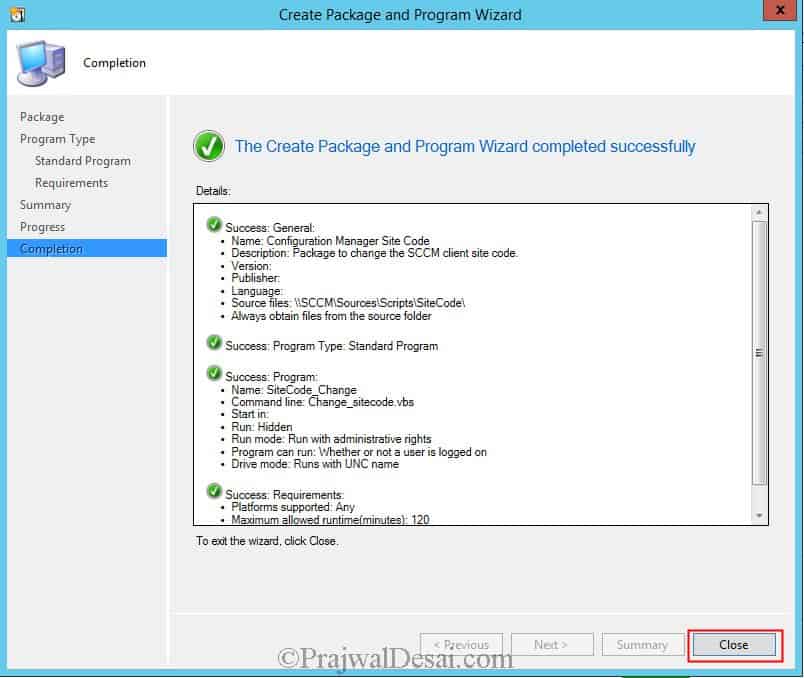
Complete the rest of the steps and click Close.
http://prajwaldesai.com/wp-content/uploads/2015/06/Change-Site-Code-of-Configuration-Manager-Client-Snap4.jpg
After we create this package we need to distribute the package to the DP. Once the package is available with the distribution point, right the package and click Deploy. Choose the collection to which the package is to be deployed. Click Next.
http://prajwaldesai.com/wp-content/uploads/2015/06/Change-Site-Code-of-Configuration-Manager-Client-Snap5.jpg
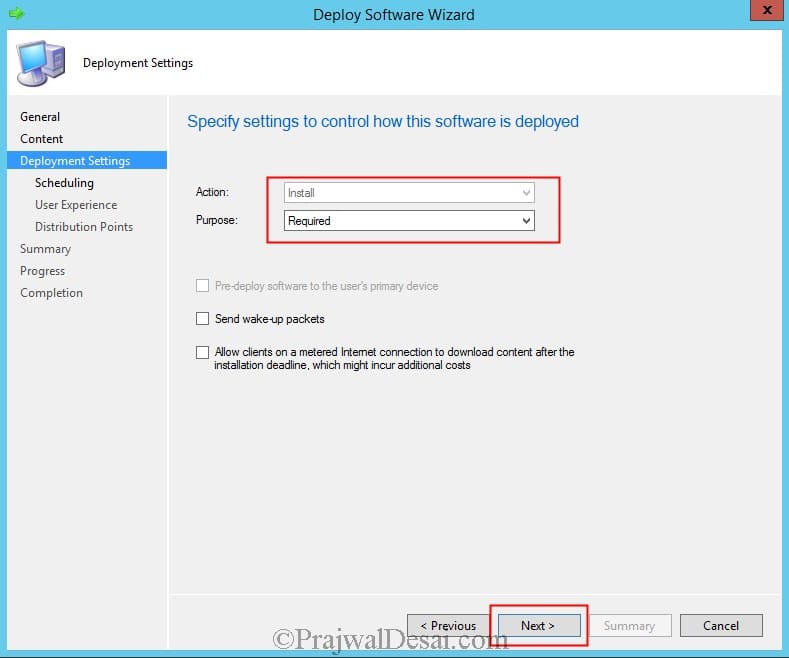
Choose the purpose as Required or Available. If you set the purpose as Available, the package will be available for installation in Software Center. If you set the purpose as Required, it simply gets deployed to the target collection. Click Next.
http://prajwaldesai.com/wp-content/uploads/2015/06/Change-Site-Code-of-Configuration-Manager-Client-Snap6.jpg
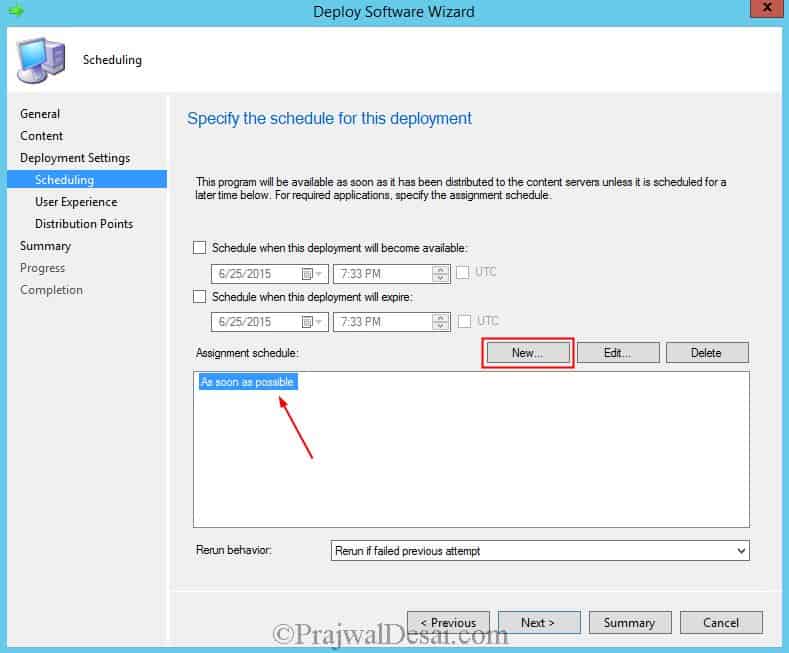
To schedule the deployment click on New and click As soon as possible. Click Next.
http://prajwaldesai.com/wp-content/uploads/2015/06/Change-Site-Code-of-Configuration-Manager-Client-Snap7.jpg
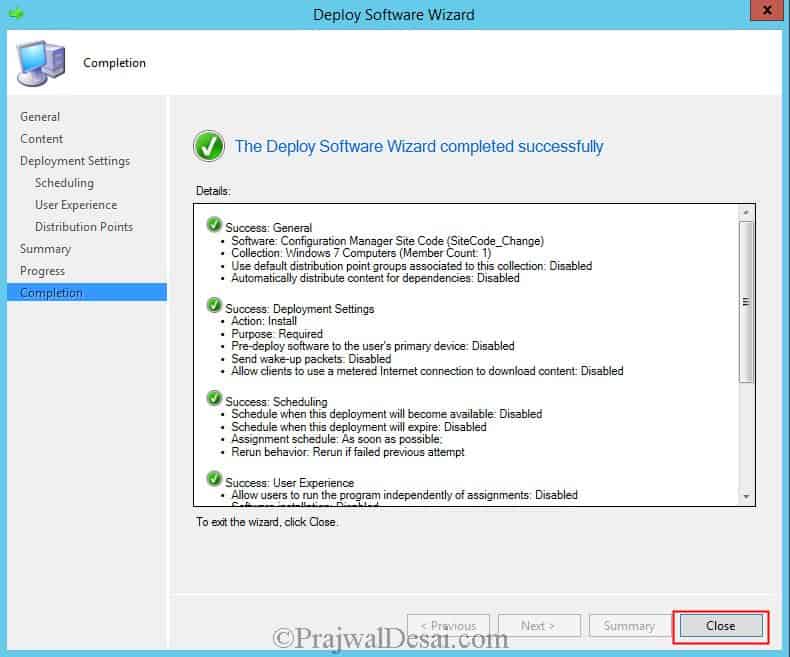
Complete the remaining steps and click Close.
http://prajwaldesai.com/wp-content/uploads/2015/06/Change-Site-Code-of-Configuration-Manager-Client-Snap8.jpg
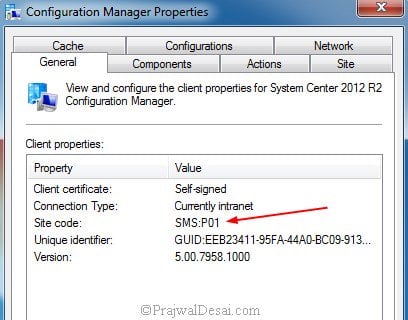
After few minutes login to the client computer and check the configuration manager properties. Click General tab and under client properties we see that the site code is changed to P01 (as per the script).
http://prajwaldesai.com/wp-content/uploads/2015/06/Change-Site-Code-of-Configuration-Manager-Client-Snap9.jpg
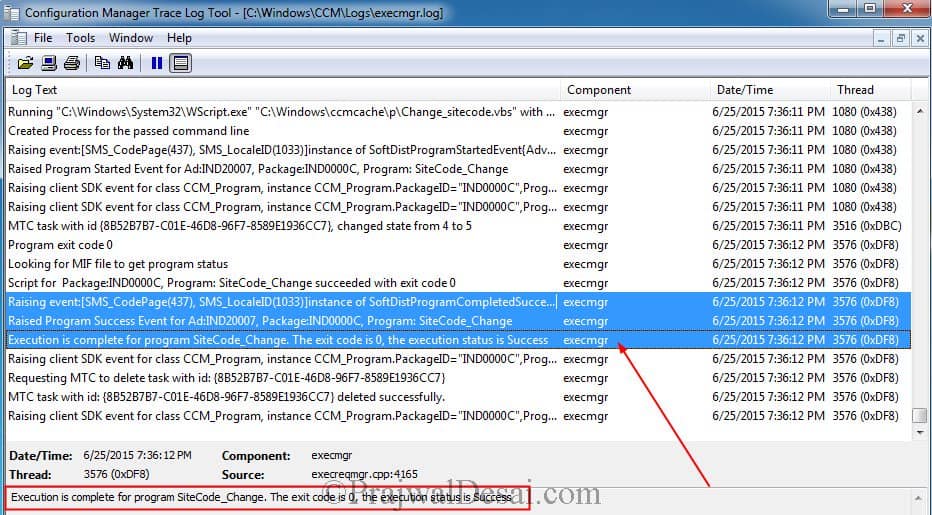
For troubleshooting purpose we can view the execmgr.log file. Exit code 0 means the script has been executed successfully. On the client computer, you can now verify the site code change.
http://prajwaldesai.com/wp-content/uploads/2015/06/Change-Site-Code-of-Configuration-Manager-Client-Snap10.jpg