SQL Server 2014: Step by Step Guide to Setup a Failover Cluster Virtual Lab
Introduction
This article provides a step by step guide to set up a virtual lab for exploring the Microsoft SQL Server Failover Cluster.
Problem
The main problem is how to test SQL Failover Cluster (FCI) feature in a test environment. The setup must be simple and practical.
Solution
To setup such test environment, we use the Vmware Workstation and Microsoft Windows Server 2012 R2 and SQL Server 2014. Having a SSD drive will increase the performance.
Steps at a Glance
The general steps will be:
- Install a virtual machine with Windows Server 2012 R2 (Main)
- Implement Virtual Domain Controller (DC1)
- Implement Virtual Server (SQL1)
- Implement Virtual Server (SQL2)
- Setup SQL Server Failover Cluster
Detailed Steps
We will see all the detailed steps in this section. Ready to start? Let's begin...
Install a virtual machine with Windows Server 2012 R2 (Main)
Assuming that you have an installed Vmware workstation on your current OS, open it and click on “Create a New Virtual Machine”. In the new window choose Typical and click on Next.

In the “Guest Operating System Installation” choose the last option which is “I will install the operating system later”.

In the “Select a Guest Operating System” window choose Windows Server 2012 and click on Next.

Next window is “Name the Virtual Machine”. I chose “Main” as virtual Machine Name.

In the “Specify Disk Capacity” window leave the default Maximum disk size and choose the first option which is “Store virtual disk as a single file”. It has better performance than others.

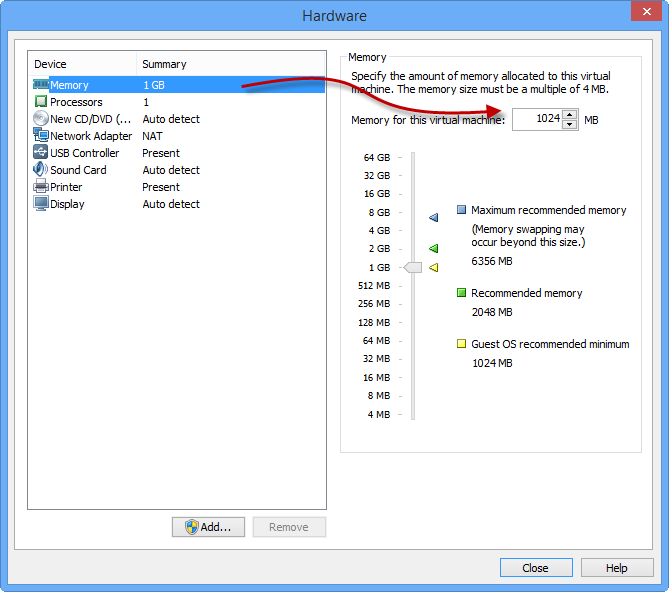
Now click on “Customize Hardware…” in the “Ready to Create Virtual Machine”.

From the left pane, select Memory and enter 1024 MB for “Memory for this virtual Machine”
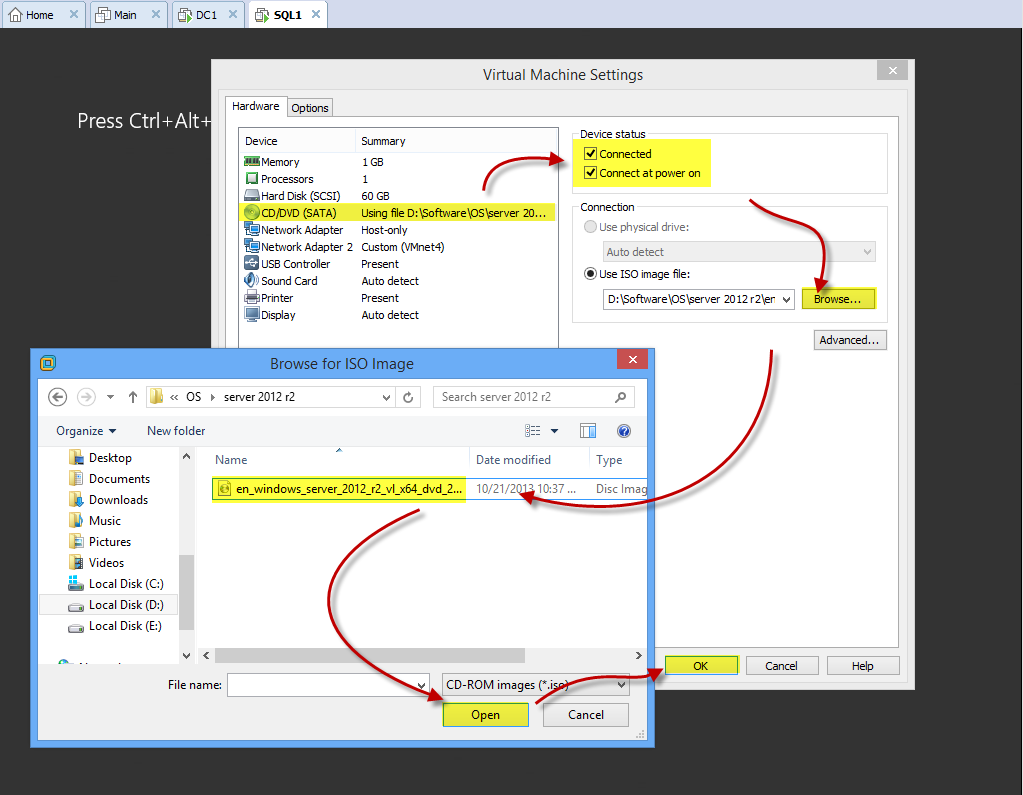
Again, from left pane select “New CD/DVD” and then set connection to “Use ISO image file. Click on “Browse” and select the Windows Server 2012 R2 Installation image and click on Open.

Now, select the “Network Adapter”, then choose the “Host-only” from Network types and click on Close.

Review the final settings and click on Finish.

Click on “Power on this virtual machine”. It will be able to boot from virtual CD/DVD with Windows installer Image that we selected in former steps.
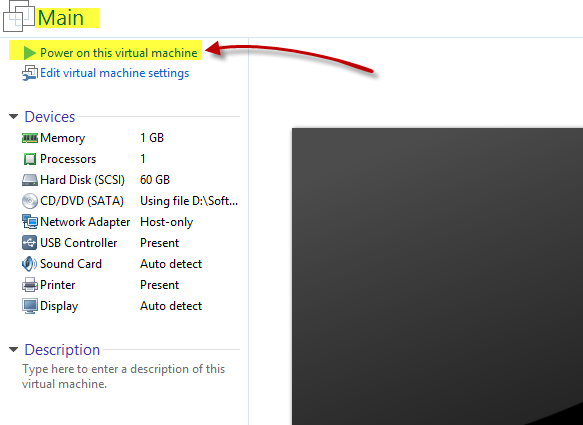
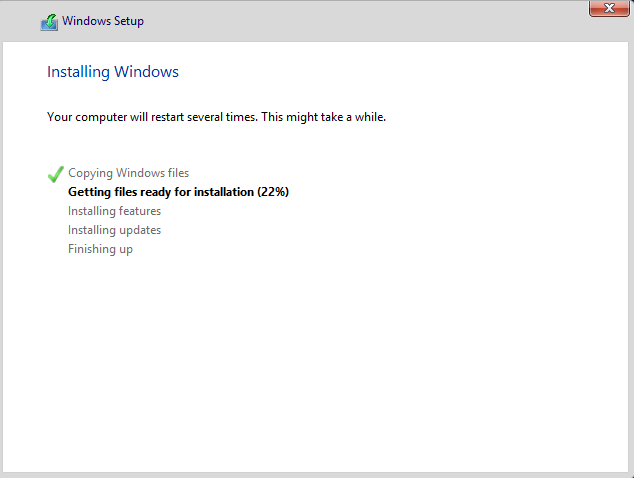
Follow the installation progress and finish the setup.


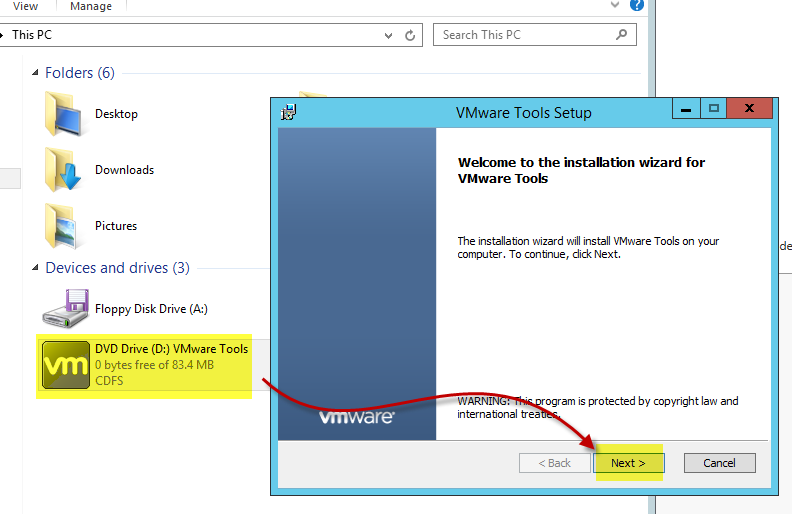
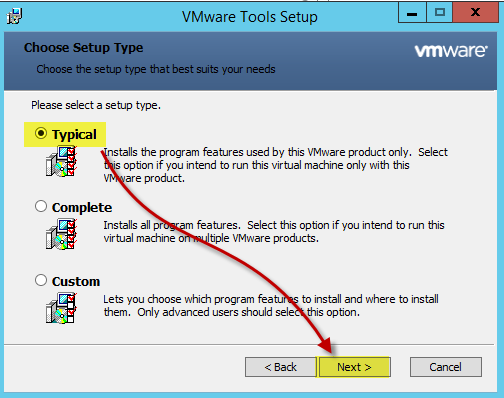
After first login, select Main virtual machine from vmware workstation left pane, click on VM, and click on “Install VMware Tools…”

If you do not see VMware Tools installing, open windows explorer (This PC) and double click on D:\ which is the virtual machine DVD drive. Follow the installation and reboot virtual machine.


Backup from Main (Full Clone)
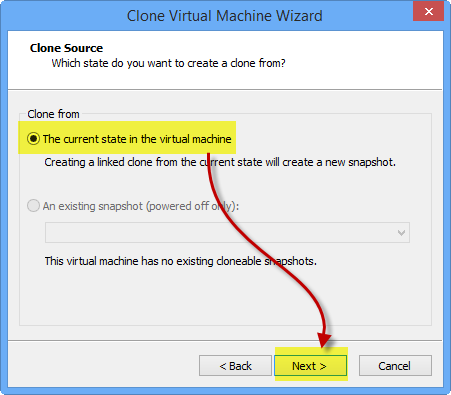
Our Main virtual machine is ready. We will use it as a base image for creating next virtual machines. So, we can turn it off and make a backup from it.
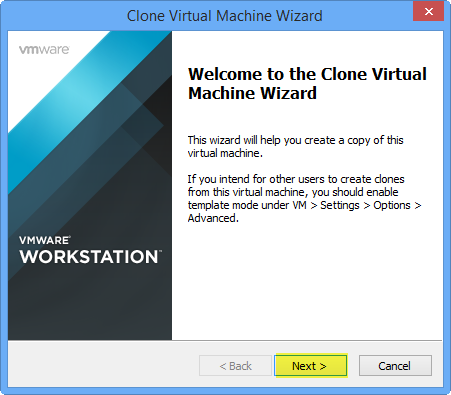
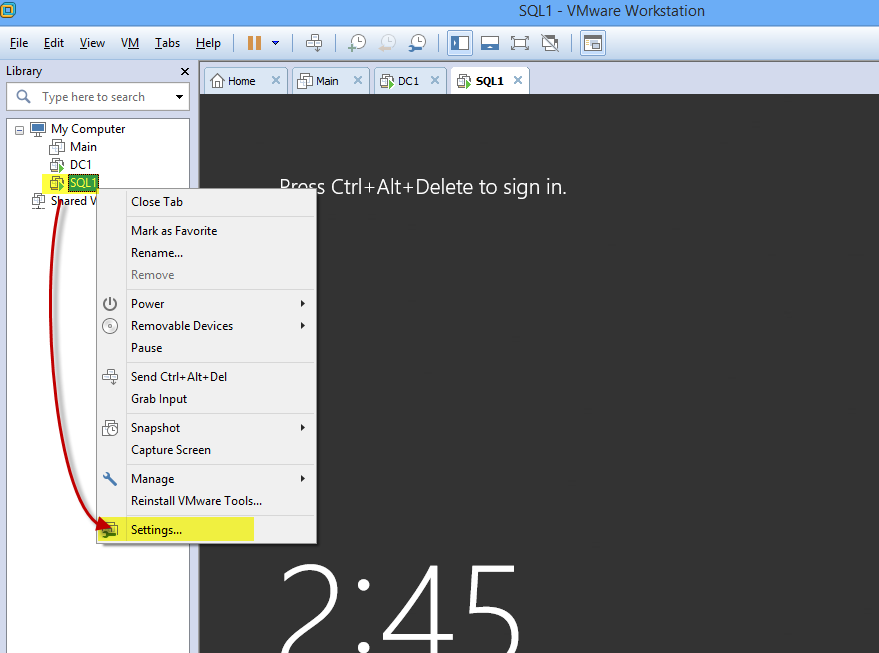
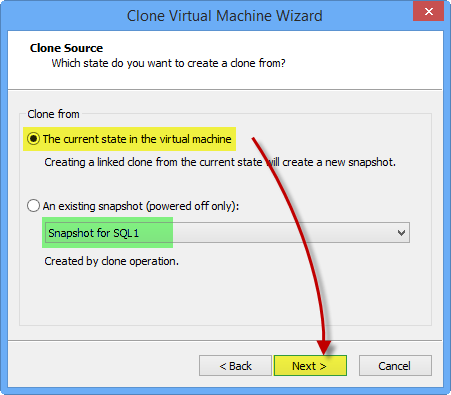
Turn off the Main and right click on its icon in the library pane, then click on “Manage” and click on “Clone…”


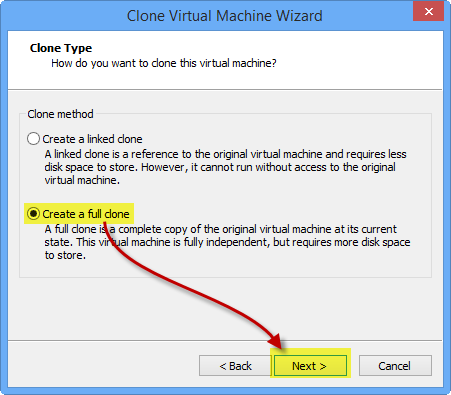
Select “Create a full clone” which is best for backup from the virtual machine. This option needs more space than linked clone.

Now, right click on “Clone of Main” and select “Remove”. It just removes it from the library list and whenever we need it we can add it. It is only for having a clear library pane. Other option is right click on library and create a new folder, name it, for example “Backups” and drag backup virtual machine and drop in that folder.

Implement Domain Controller (DC1)
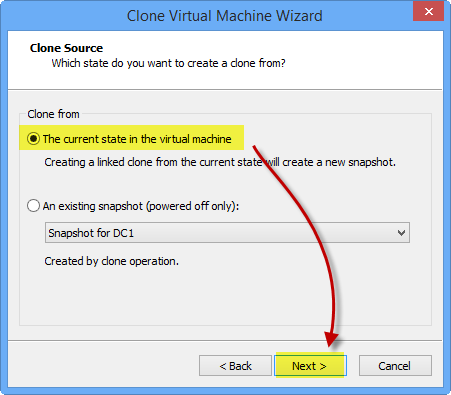
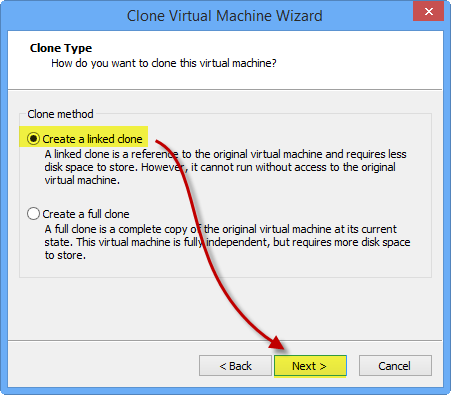
We can use the Main virtual machine for creating new virtual machines like domain controller. We do not need to setup OS again. We can use Clone image from Main to create a new one, but this time, we can create a linked clone which consumes much less disk space that the full clone.
Create new virtual machine (Linked Clone)
Select the Main and right click on its icon in the library pane, then click on “Manage” and click on “Clone…”


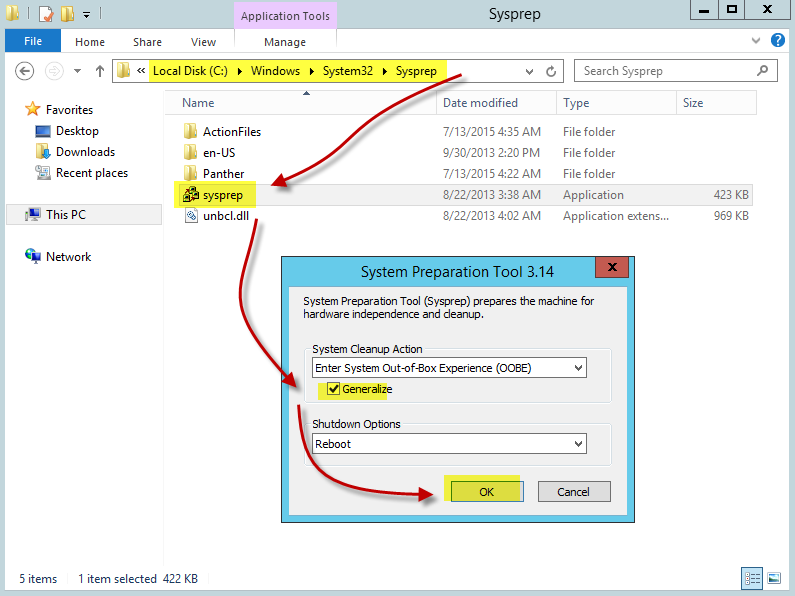
Perform Sysprep
After cloning, we have to run a simple utility called “Sysprep” which usually can be found in “C:\Windows\System32\Sysprep”. If we skip this step, we cannot join our virtual machines to the same domain.

Configure Server
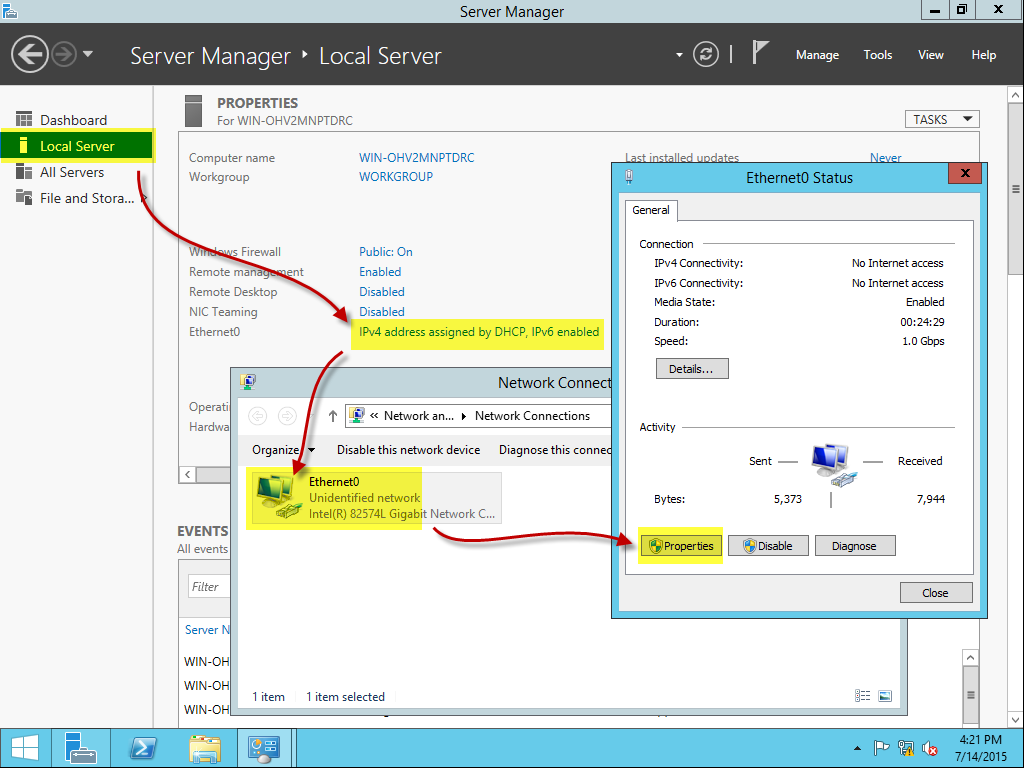
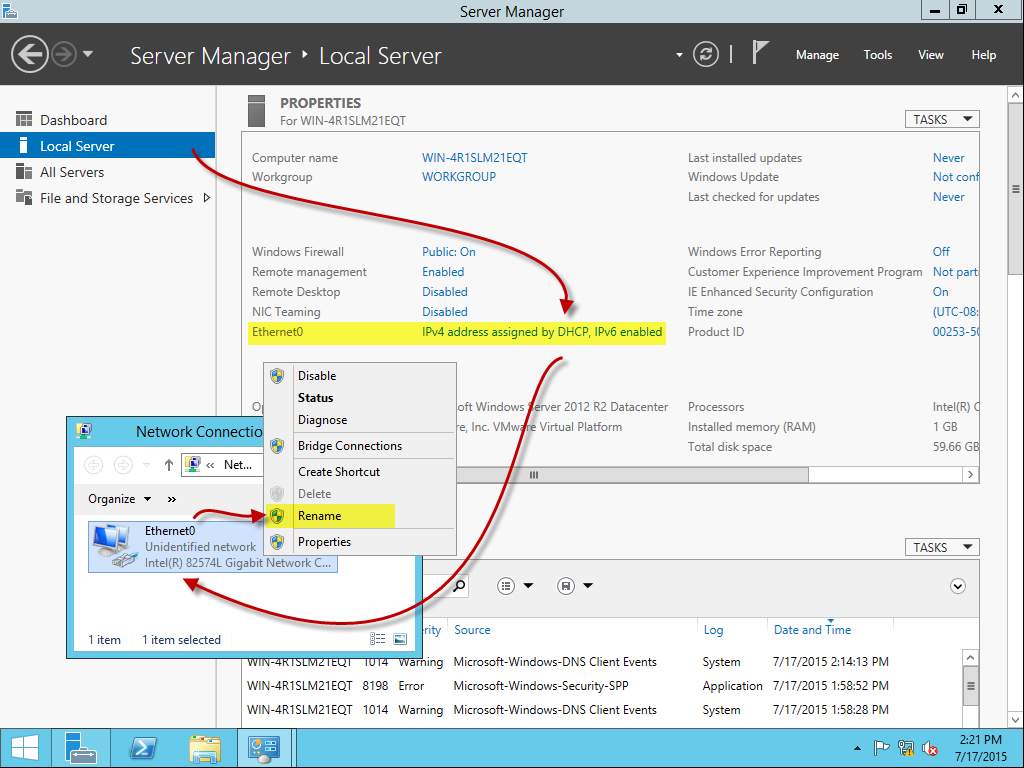
Power on DC1, it is time to configure our domain controller. After login, open “Server Manager”, select “Local Server”, double click on Ethernet(), and select “Properties” to set a static IP address.
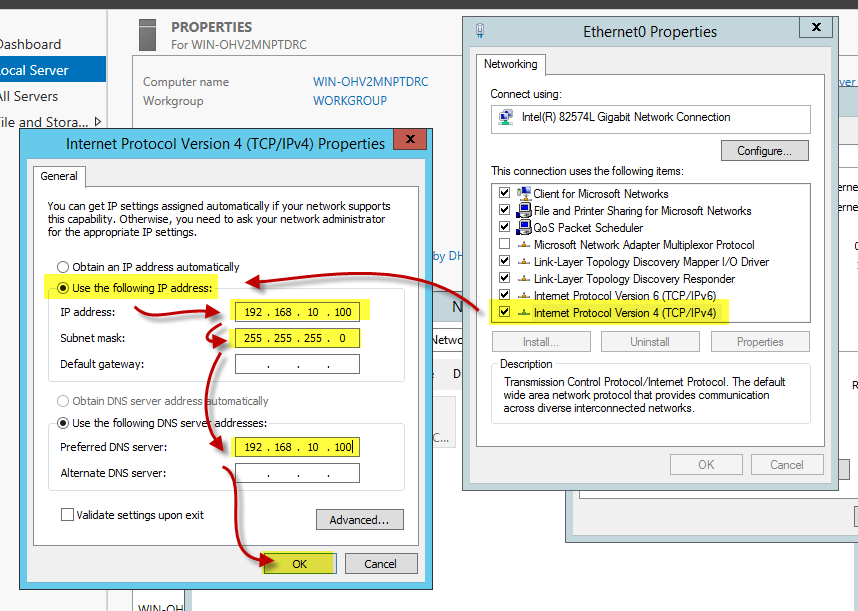
Double click on “Internet protocol version 4”, select “Use the following IP address”, set IP address and Preferred DNS with “192.168.10.100”, and leave “Default Gateway” empty.
We can also change the computer name.

Set up Domain Controller
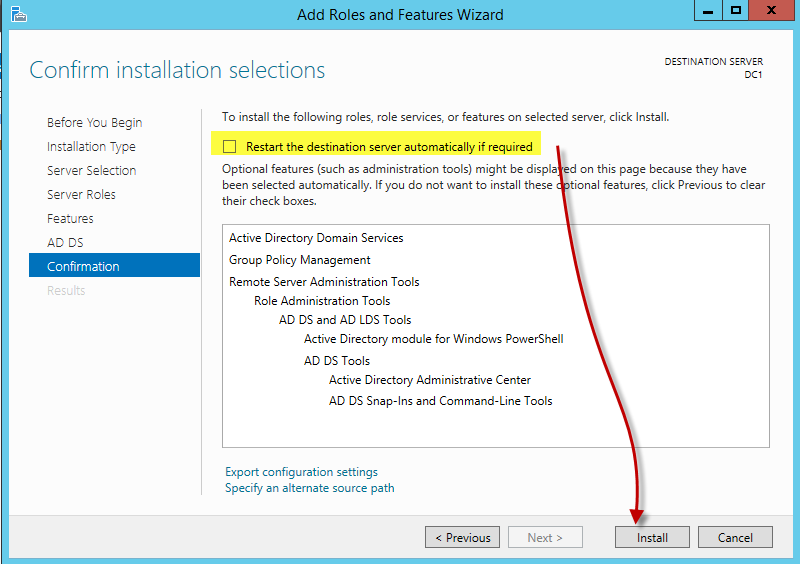
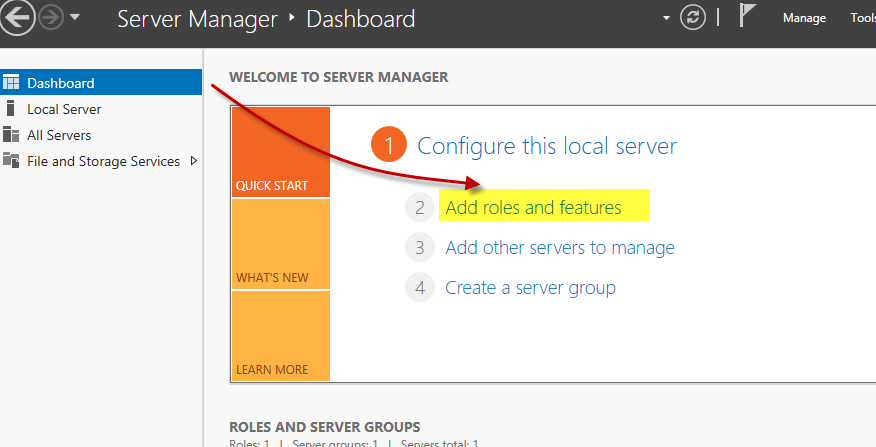
After reboot, open “Server Manager” and click on “Add roles and features”.


From Roles pane, select “Active Directory Domain Services”. Automatically, a pop up shows that wants to add the required features for domain services. Click on “Add features” and click on Next.


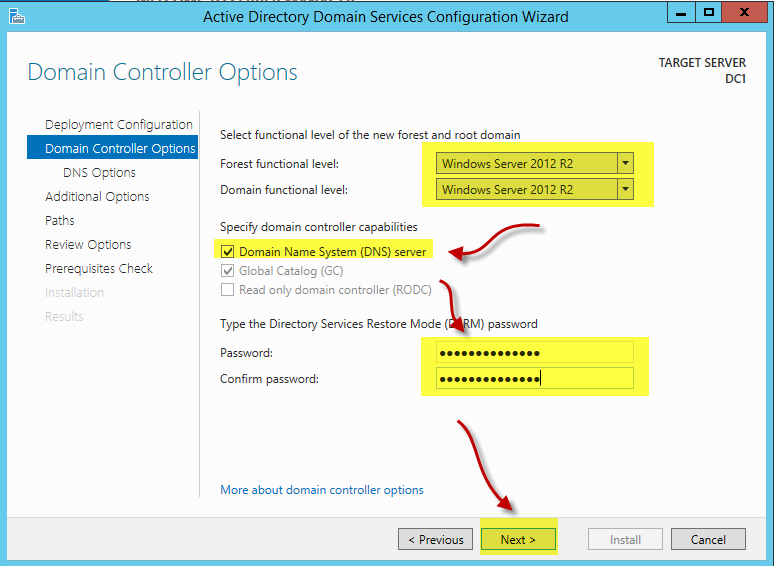
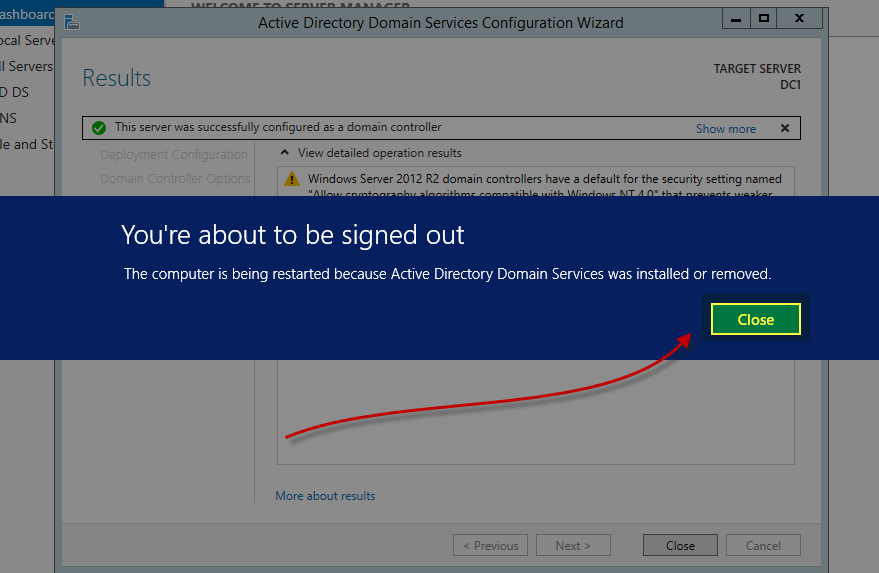
After successful installation, additional step warning appears. Click on “Promote this server to a domain controller”

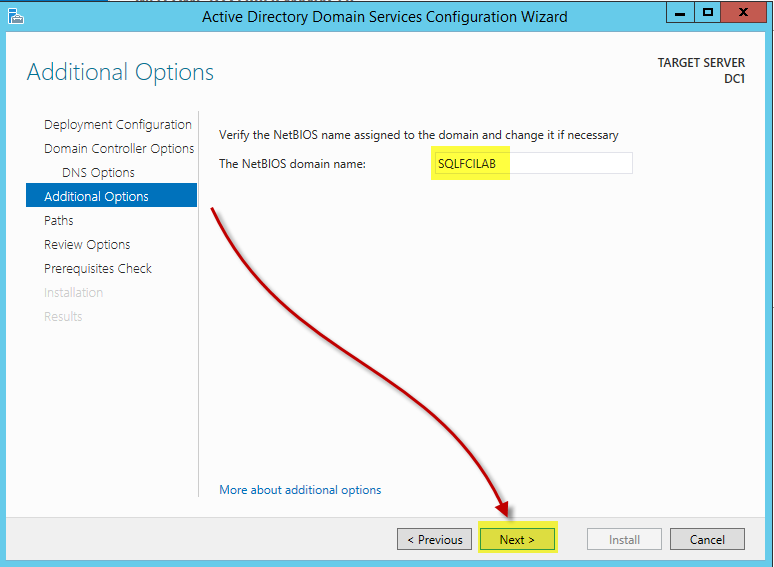
Select “Add a new forest” and enter “sqlfcilab.com” in the “Root domain name”, then click next.


It is done and our domain controller is ready to use. Now, we are able to create two new domain user that we will use them later when installing SQL Server. Open Start menu, then type “dsa” and click on “Active Directory Users and Computers” and open it.

Expand sqlfcilab.com node, then right click on it. From New list select “Organizational Unit” and enter “Lab Users” and click OK. We use this folder to put our new domain users.


Right click on “Lab Users”, then from New list select “User”.

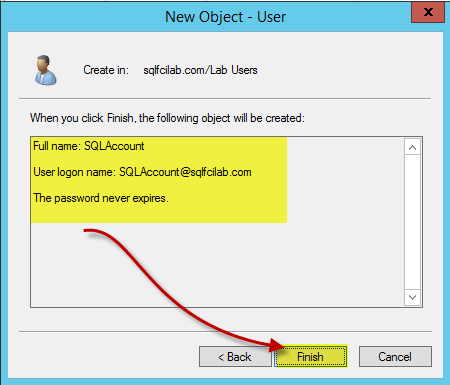
Enter “SQLAccount” in “First name” and “User logon name” and click Next.

Enter a complex password that later we will use for this account in SQL Server installation. Uncheck “User must change password at next logon” option and check the “Password never expires”.

Review and click on Finish.
Repeat the above steps and create another domain user and name it “SQLAgentAccount”.


Finally, we have to have two domain user with minimum privilege that we will use them to run SQL Server services later.

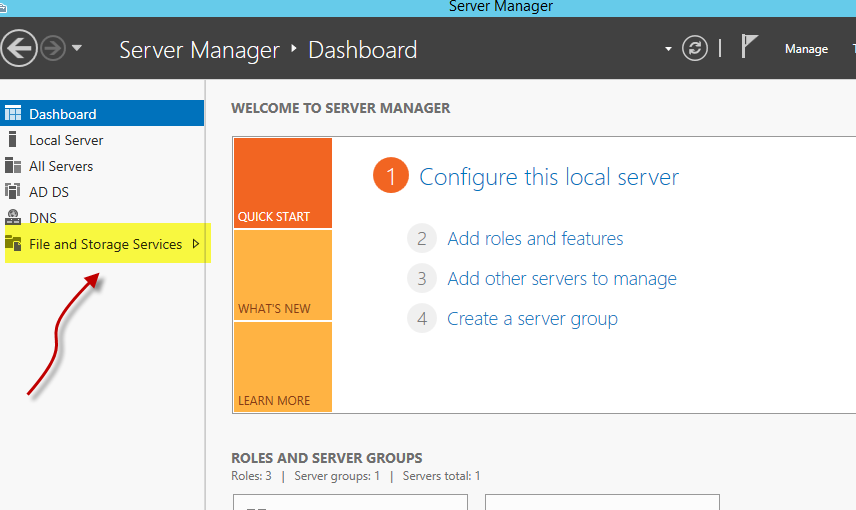
Install File and Storage Services
Open “Server Manager”, then click on “File and Storage Services”.
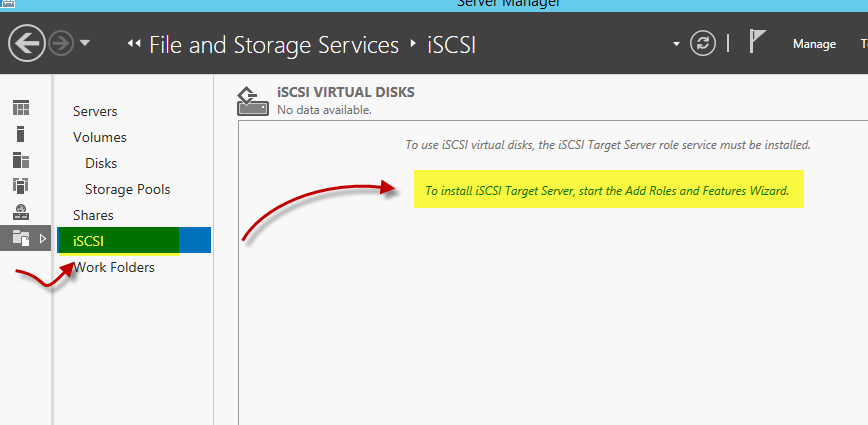
Now, from new options, click on iSCSI”. Then click on a hyperlink in the middle of the form which says: “To install iSCSI Target Server, start the Add Roles and Features Wizard.”
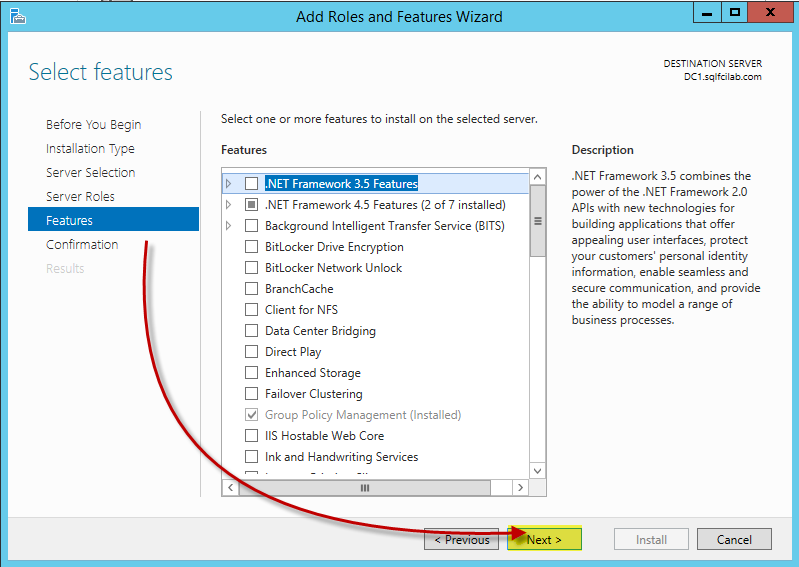
Review Roles and click on Next.


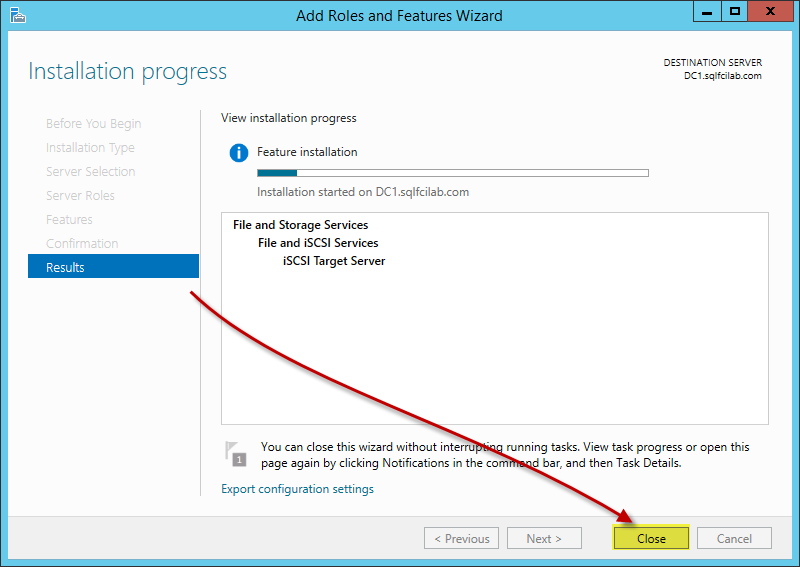
Create an iSCSI Virtual Disk for Windows Cluster
After installation, that hyperlink text will change. Click on it which now says that “To create an iSCSI virtual disk, start the “New iSCSI Disk Wizard.”


Fill Name with “iSCSI Virtual Disk 1” and click on Next.

Give 5 GB and select “Fixed size” which is faster than other options.


Fill Name with “iSCSI-Virtual-Disk-1” and click on Next.

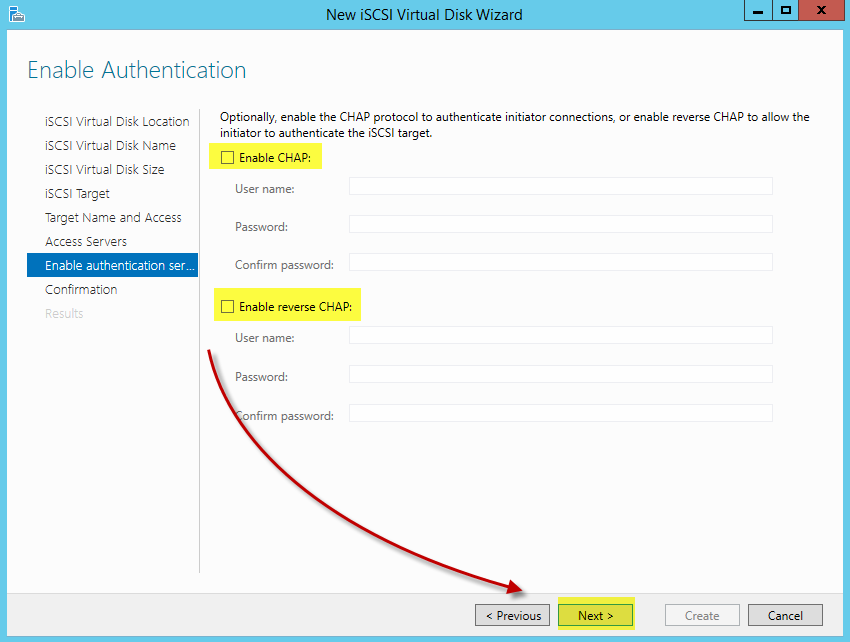
Now, we have to add the servers that we will add later. So, we can add them by their future IPs that will be “192.168.10.1” and “192.168.10.2”


Implement Virtual Server (SQL1)
Again, we use the Main virtual machine for creating this virtual machine and will create a linked clone which consumes much less disk space that the full clone.
Create new virtual machine (Linked Clone)
Select the Main and right click on its icon in the library pane, then click on “Manage” and click on “Clone…”


Perform Sysprep
After booting the SQL1, we have to run “Sysprep” from C:\Windows\System32\Sysprep”.
Configure Server
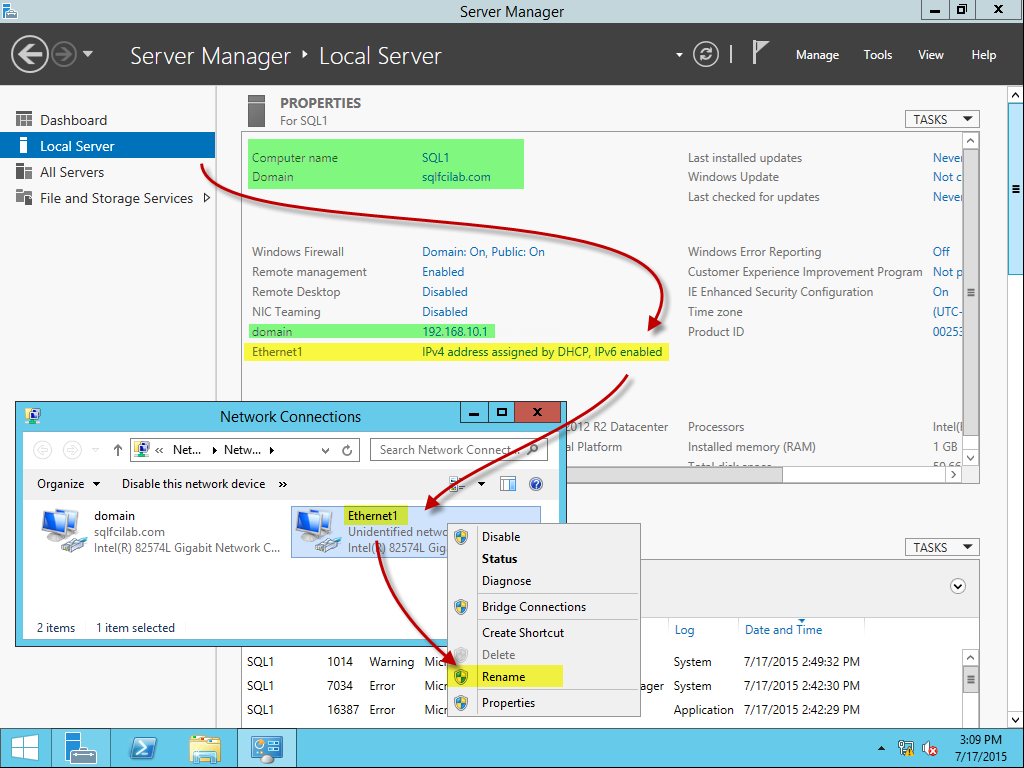
Now, open “Server Manager”, select “Local Server”, right click on Ethernet(), and rename it to “domain”.

Double click on “domain”, then select “Properties” to set a static IP address. Uncheck these three options:
- Linked-Layer Topology Discovery Mapper I/O Driver
- Linked-Layer Topology Discovery Responder
- Internet Protocol Version 6 (TCP/IPv6)
Double click on “Internet protocol version 4”, select “Use the following IP address”, set IP address with “192.168.10.1” and Preferred DNS with “192.168.10.100”, and leave “Default Gateway” empty.

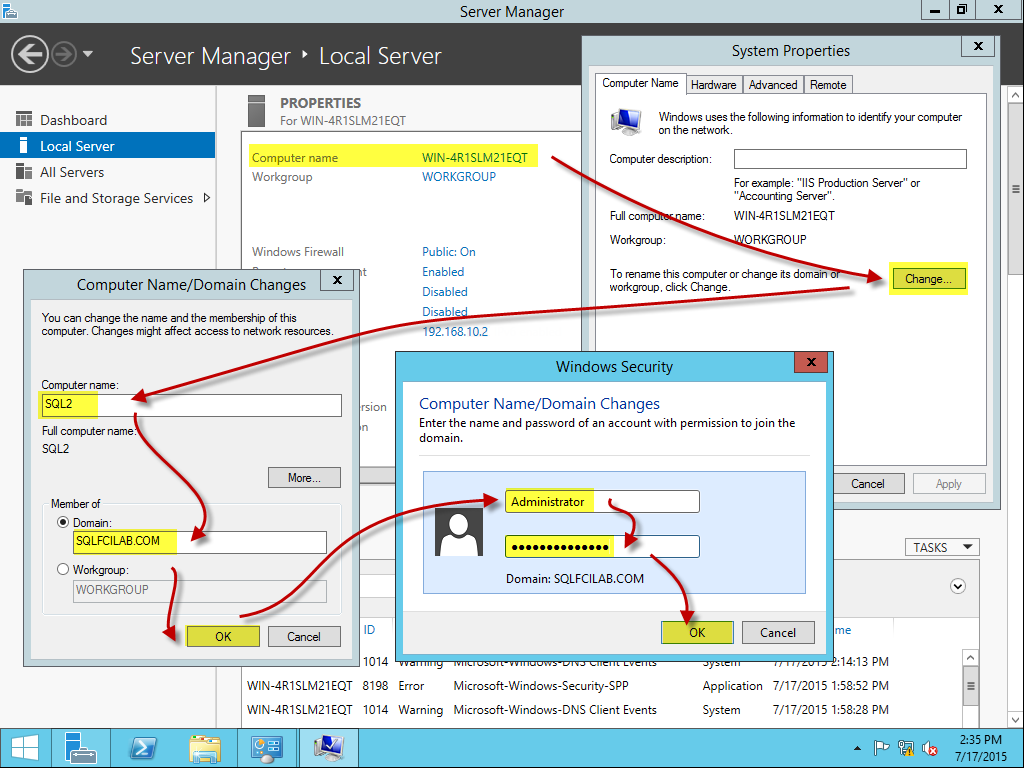
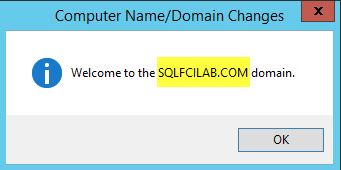
We can change the computer name and join it to “SQLFCILAB” domain.


Add heartbeat connection
After restarting the SQL1 virtual machine, we need to add a new heartbeat connection.

Select “Custom: Specific virtual network”, and select “VMnet4” from the list and click finish. We need to add this connection as a heartbeat connection between SQL1 and SQL2 virtual machines.

Do not close settings window. Select CD/DVD, set Device status” to connected, and select the Windows Server 2012 R2 ISO image. We need it to setup NET Framework 3.5 which is a requirement for installing SQL Server 2014.

Sign in to SQL1 by using domain Administrator login.

Open “Server Manager”, click on “Local Server”, select “Ethernet1”, and rename it to “heartbeat”.
Double click on heartbeat”, then select “Properties”. Uncheck these three options:
- Linked-Layer Topology Discovery Mapper I/O Driver
- Linked-Layer Topology Discovery Responder
- Internet Protocol Version 6 (TCP/IPv6)
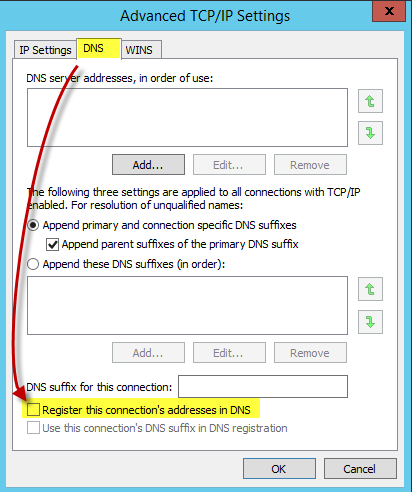
Double click on “Internet protocol version 4”, select “Use the following IP address”, set IP address with “192.168.20.1” , and leave “Default Gateway” and “DNS Servers” empty. Then click on “Advanced…”.

Click on “DNS” tab, uncheck “Register this connection’s addresses in DNS” option.
Finally, from “WINS” tab, select the “Disable NetBIOS over TCP/IP” option and click OK.

Installing .NET Framework 3.5
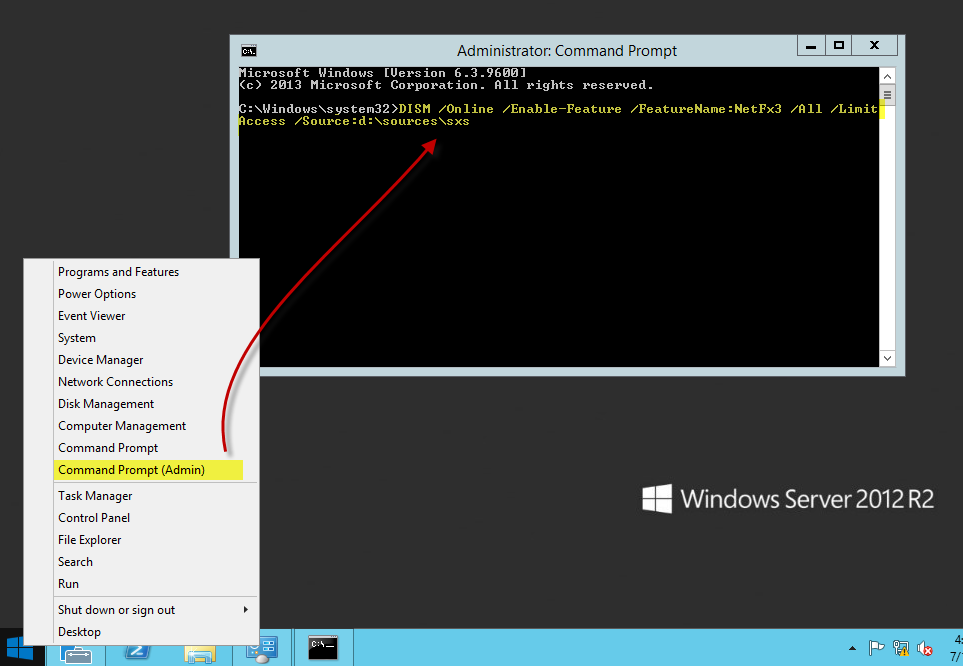
Open “Command Prompt (Admin)” and run the following command to install it offline by using installer media.
DISM /Online /Enable-Feature /FeatureName:NetFx3 /All /LimitAccess /Source:d:\sources\sxs
Configure iSCSI Initiator
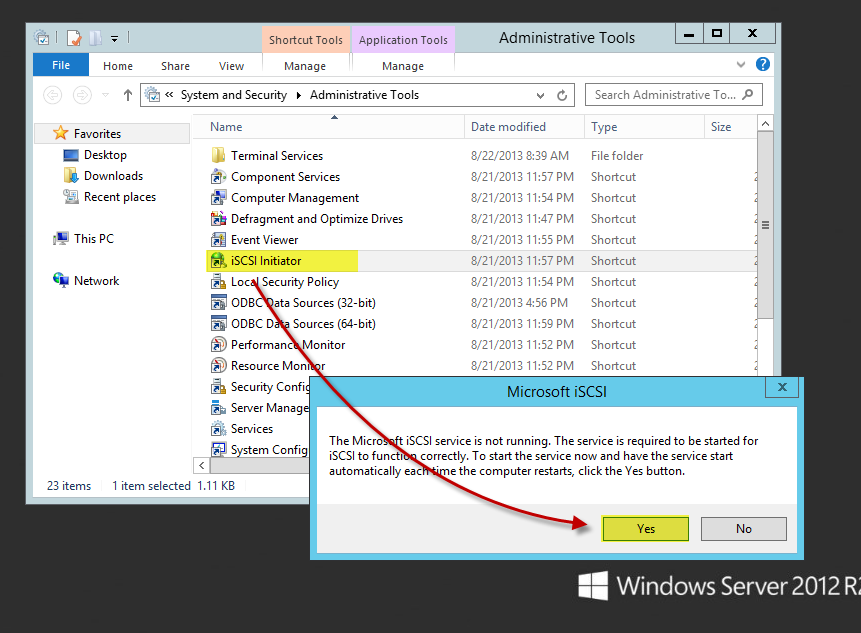
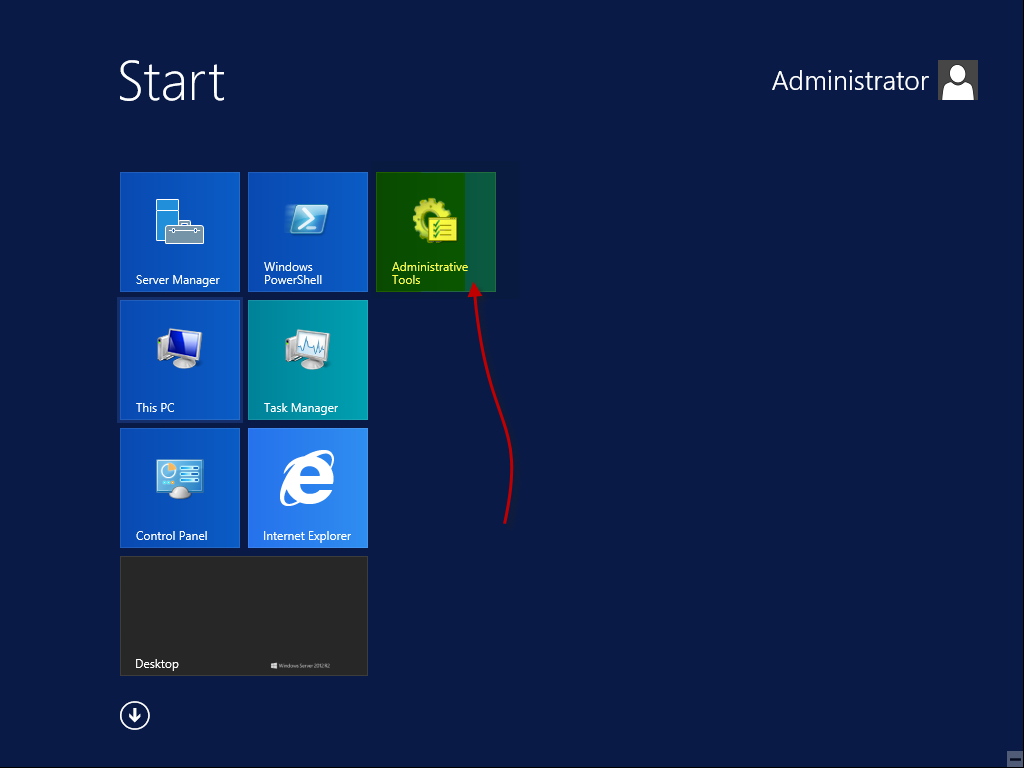
Go to “Start Menu” and click on “Administrative Tools”.

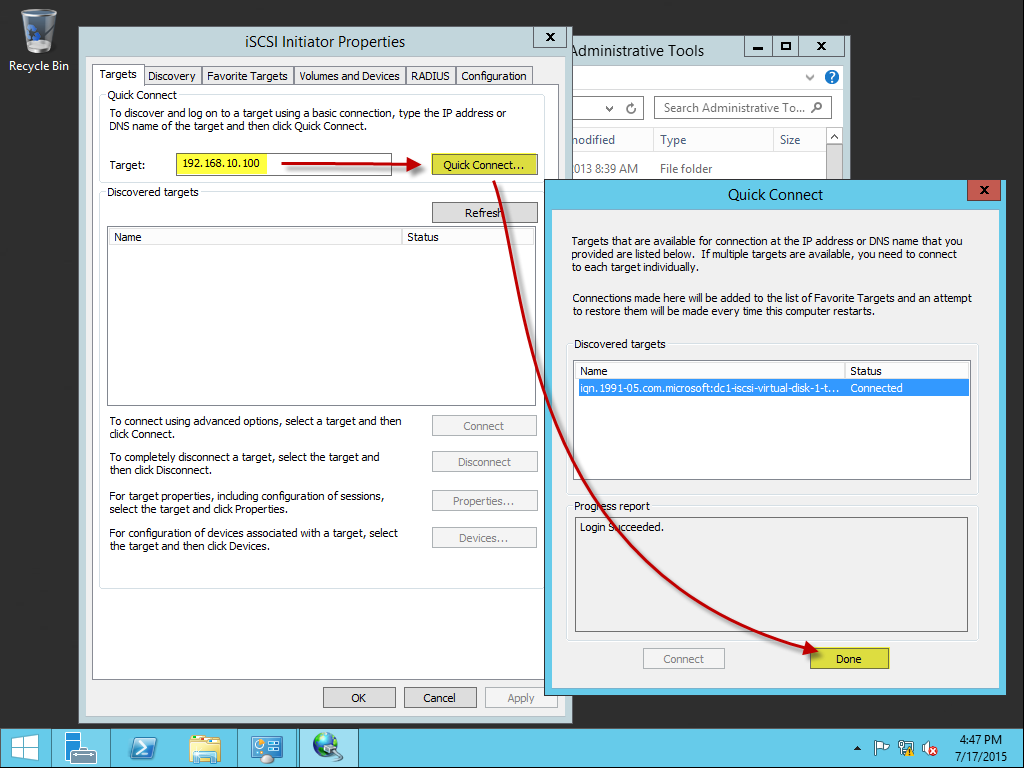
Double click on “iSCSI Initiator” and click on Yes.
Fill the “Target:” with “192.168.10.100”, then click on “Quick Connect…” and click on “Done” and “OK”.

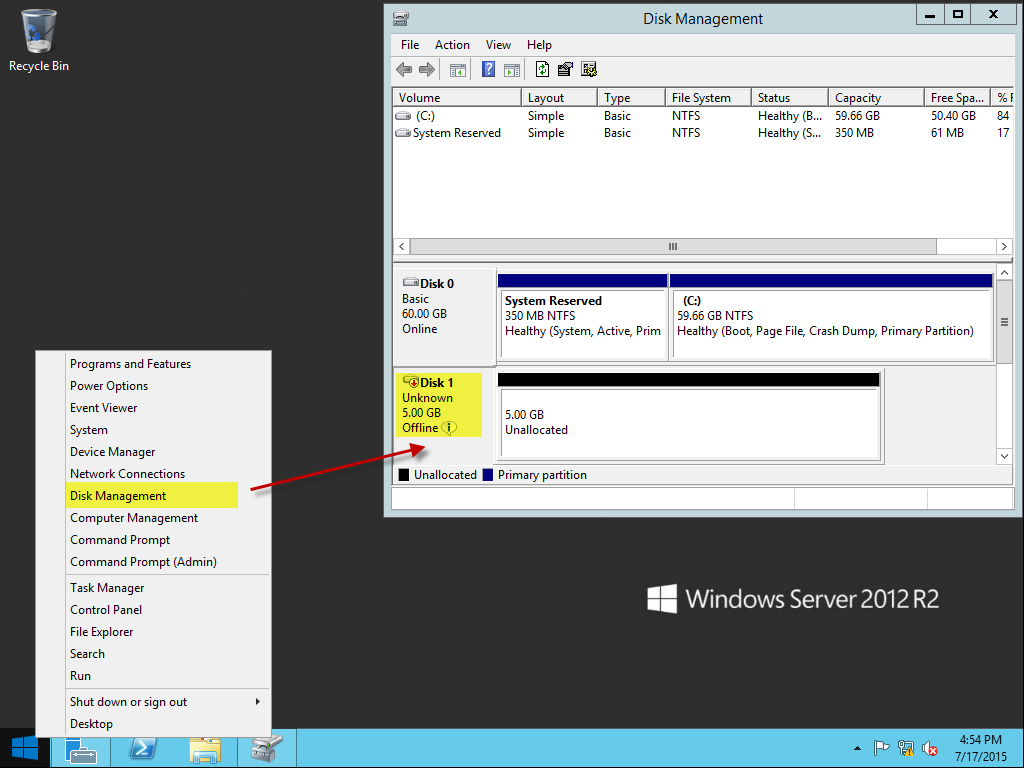
Open “Disk Management”, then right click on “Disk 1” and click “Online”.

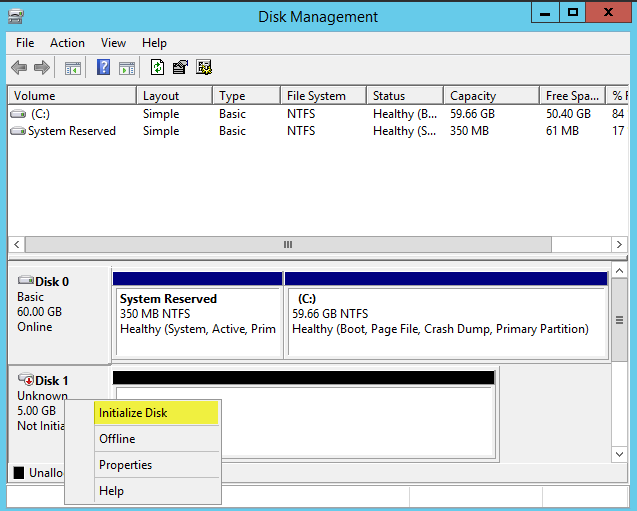
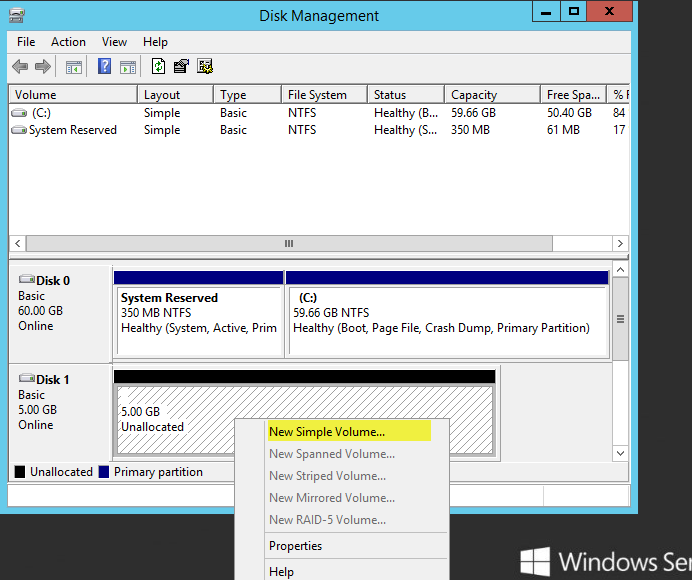
Again, right click on “Disk 1” and click on Initialize Disk”. Then create a


Add Windows Cluster feature
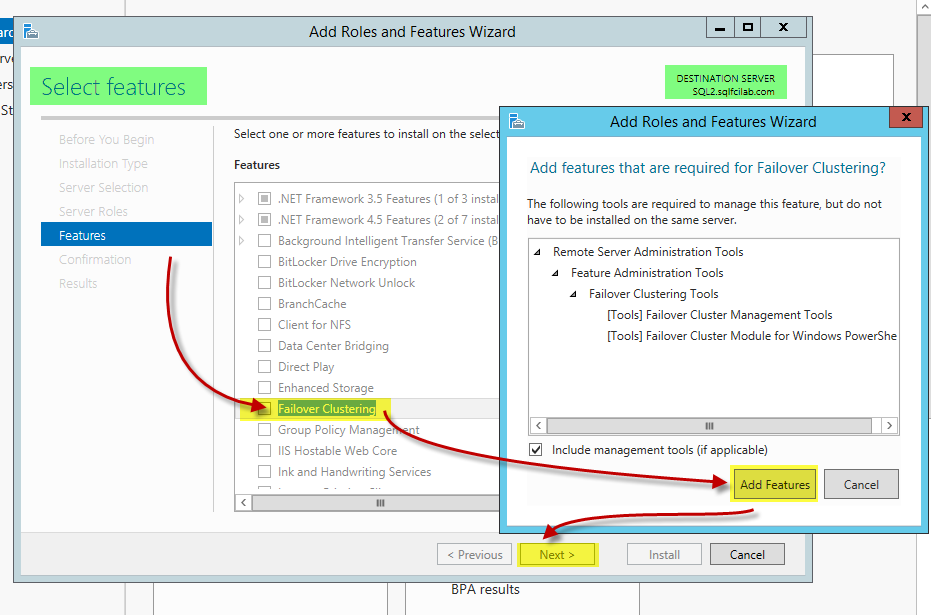
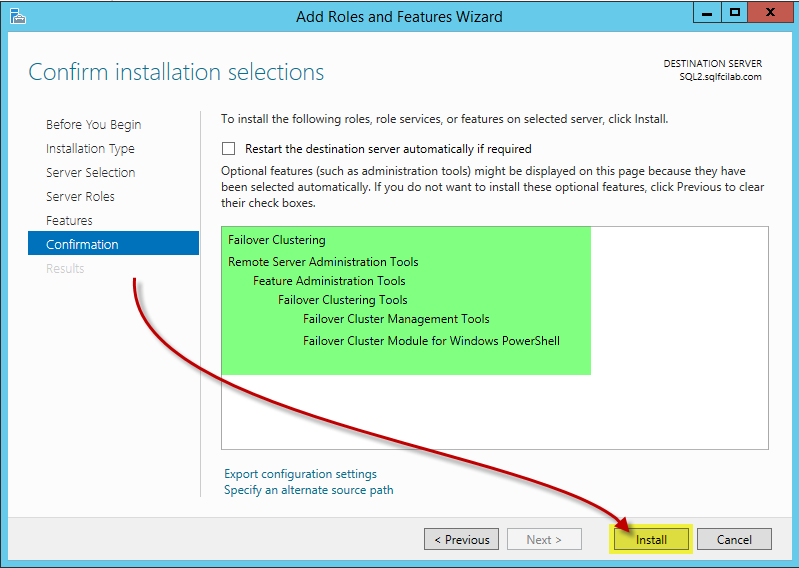
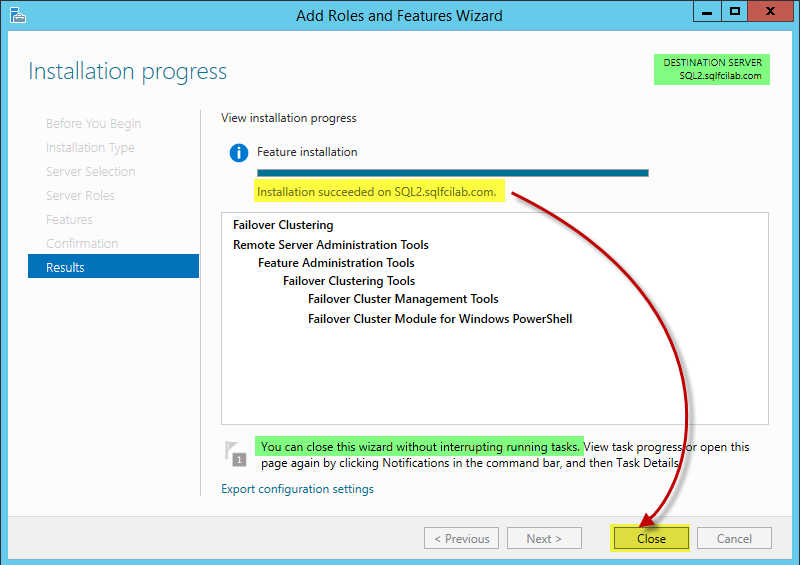
Open “Server Manager”, and click on “Add roles and features”.


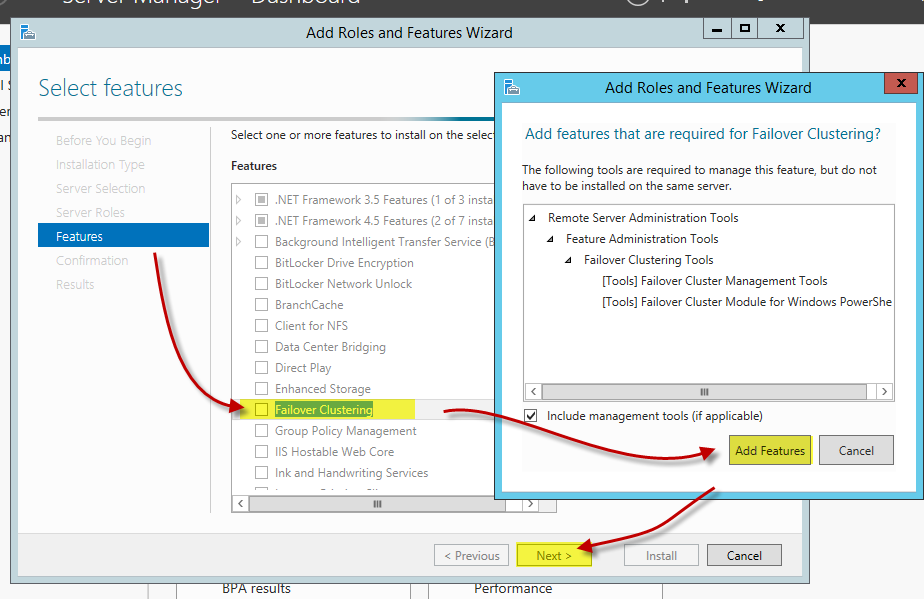
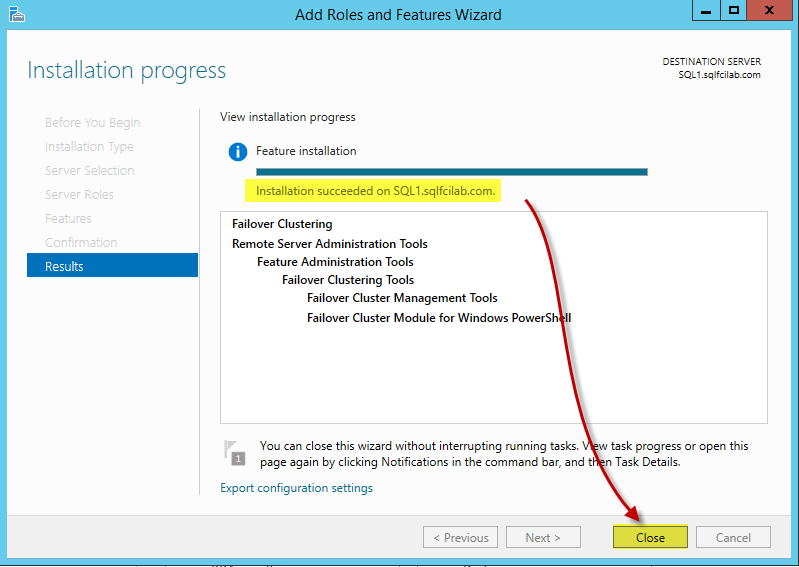
Select “Failover Clustering”, click on “Add Features” and on “Next”.

Implement Virtual Server (SQL2)
Again, we use the Main virtual machine for creating this virtual machine and will create a linked clone which consumes much less disk space that the full clone.
Create new virtual machine (Linked Clone)
Select the Main and right click on its icon in the library pane, then click on “Manage” and click on “Clone…”


Perform Sysprep
After booting the SQL2, we have to run “Sysprep” from “C:\Windows\System32\Sysprep”.

Configure Server
Now, open “Server Manager”, select “Local Server”, right click on Ethernet(), and rename it to “domain”.
Double click on “domain”, then select “Properties” to set a static IP address. Uncheck these three options:
- Linked-Layer Topology Discovery Mapper I/O Driver
- Linked-Layer Topology Discovery Responder
- Internet Protocol Version 6 (TCP/IPv6)
Double click on “Internet protocol version 4”, select “Use the following IP address”, set IP address with “192.168.10.2” and Preferred DNS with “192.168.10.100”, and leave “Default Gateway” empty.

We can change the computer name and join it to “SQLFCILAB” domain.
Add heartbeat connection
After restarting the SQL2 virtual machine, we need to add a new heartbeat connection.

Select “Custom: Specific virtual network”, and select “VMnet4” from the list and click finish. We need to add this connection as a heartbeat connection between SQL2 and SQL2 virtual machines.

Do not close settings window. Select CD/DVD, set “Device status” to connected, and select the Windows Server 2012 R2 ISO image. We need it to setup NET Framework 3.5 which is a requirement for installing SQL Server 2014.
Sign in to SQL2 by using domain Administrator login.

Open “Server Manager”, click on “Local Server”, select “Ethernet1”, and rename it to “heartbeat”.

Double click on “heartbeat”, then select “Properties”. Uncheck these three options:
- Linked-Layer Topology Discovery Mapper I/O Driver
- Linked-Layer Topology Discovery Responder
- Internet Protocol Version 6 (TCP/IPv6)
Double click on “Internet protocol version 4”, select “Use the following IP address”, set IP address with “192.168.20.2” , and leave “Default Gateway” and “DNS Servers” empty. Then click on “Advanced…”.

Click on “DNS” tab, uncheck “Register this connection’s addresses in DNS” option.

Finally, from “WINS” tab, select the “Disable NetBIOS over TCP/IP” option and click OK.

Installing.NET Framework 3.5
Open “Command Prompt (Admin)” and run the following command to install it offline by using installer media.
DISM /Online /Enable-Feature /FeatureName:NetFx3 /All /LimitAccess /Source:d:\sources\sxs

Configure iSCSI Initiator
Go to “Start Menu” and click on “Administrative Tools”.
Double click on “iSCSI Initiator” and click on Yes.

Fill the “Target:” with “192.168.10.100”, then click on “Quick Connect…” and click on “Done” and “OK”.
Open “Disk Management , then right click on “Disk 1” and click “Online”.

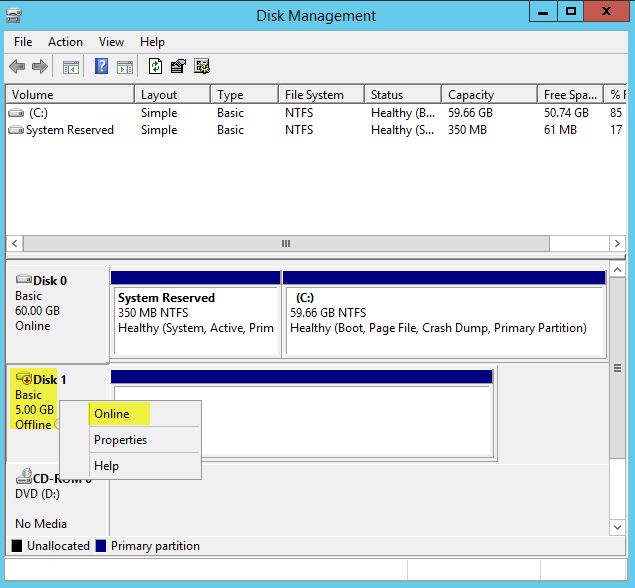
We can see the virtual shared storage’s partition that we created former, now available in SQL2 virtual machine. If you check SQL1 disk management, it became offline on it now.

Add Windows Cluster feature
Open “Server Manager”, and click on “Add roles and features”.


Select “Failover Clustering”, click on “Add Features” and on “Next”.
Configure Windows Failover Cluster
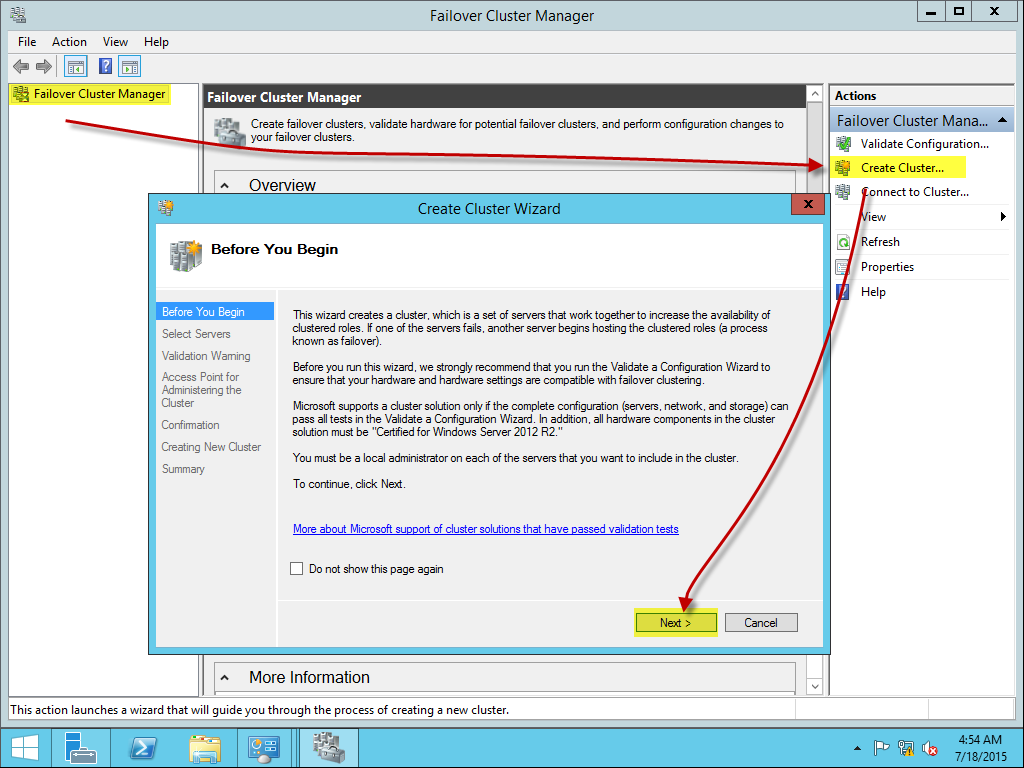
From “Start Menu” open “Administrative Tools” and open the “Failover Cluster Manager”.


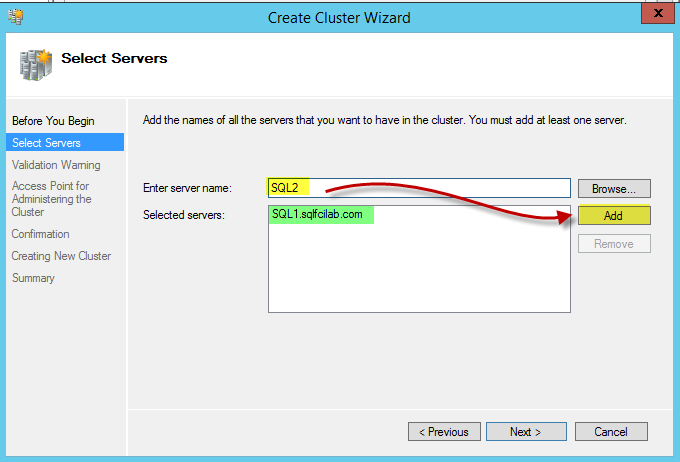
In “Action” pane, click on “Create Cluster…” and click on Next.
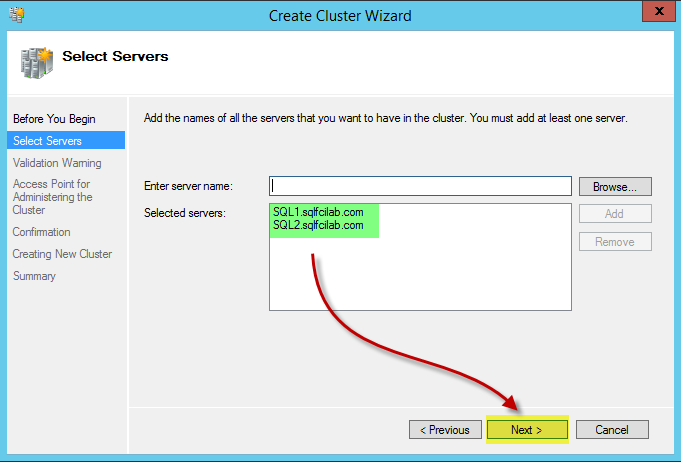
Enter both server names which are “SQL1” and “SQL2” and click on “Add” to add them to “Selected servers”. Then click on Next.

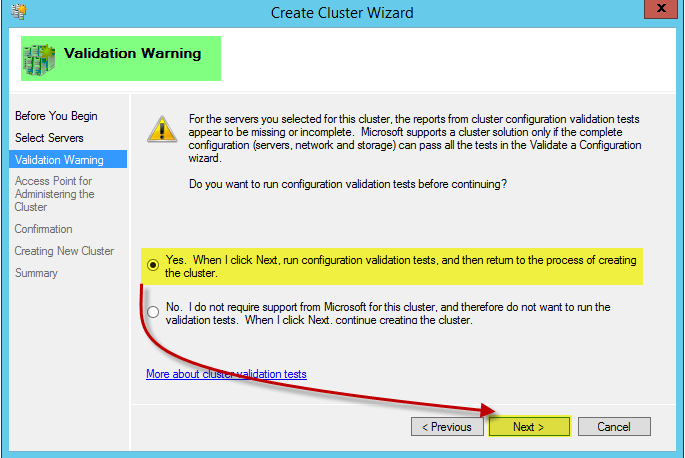
It is recommended to run configuration validation tests.


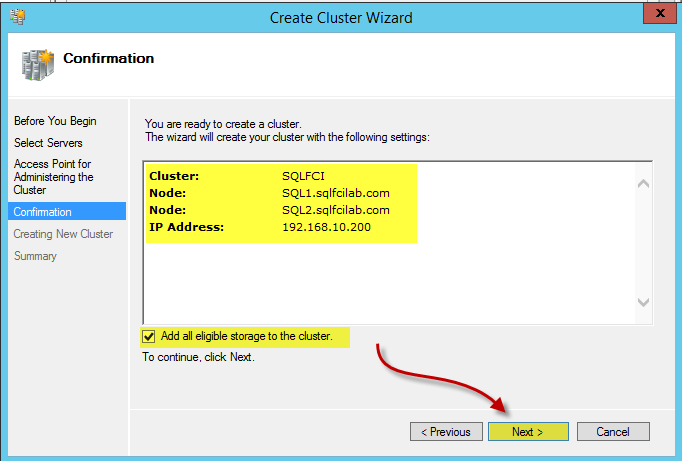
Enter “SQLFCI” in “Cluster Name”, uncheck the heartbeat connection, and enter “192.168.10.200” and click on Next.


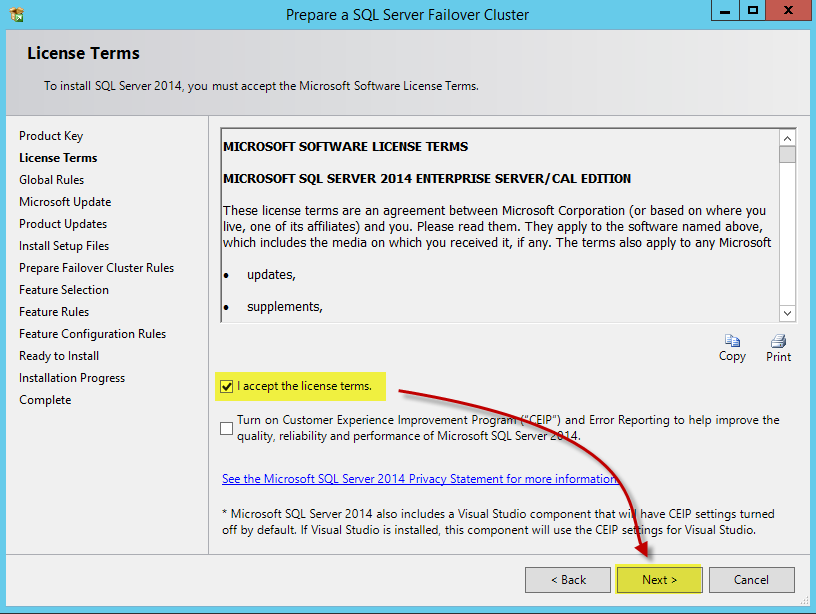
SQL Server Cluster Preparation
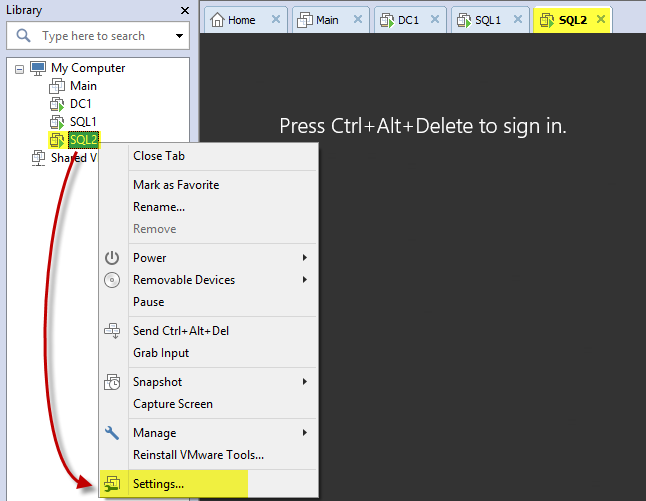
We need to mount SQL Server installation media. Right click on “SQL2” in “Library” pane and click settings. Then select CD/DVD and browse the SQL Server 2014 installation media location.


Open drive D:\ and run setup. In the “SQL Server Installation Center” click on “Advanced”, then click on “Advanced cluster preparation”.

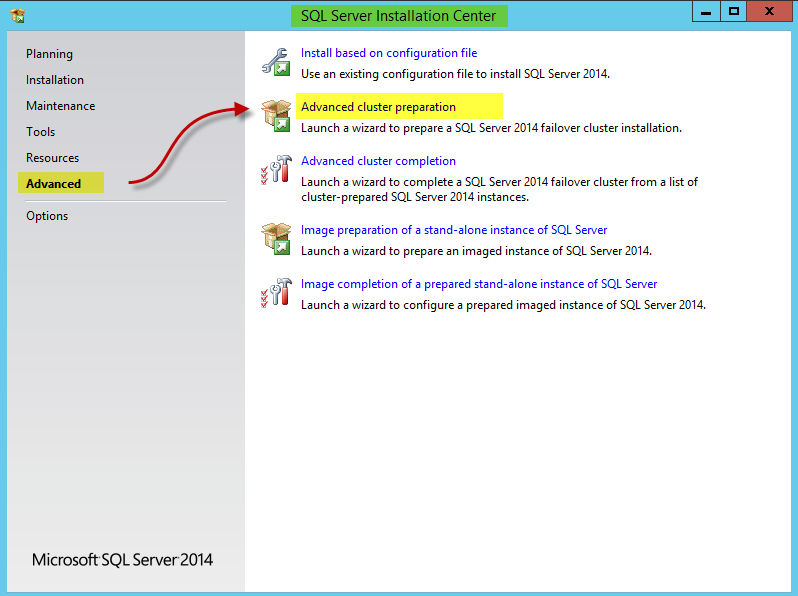


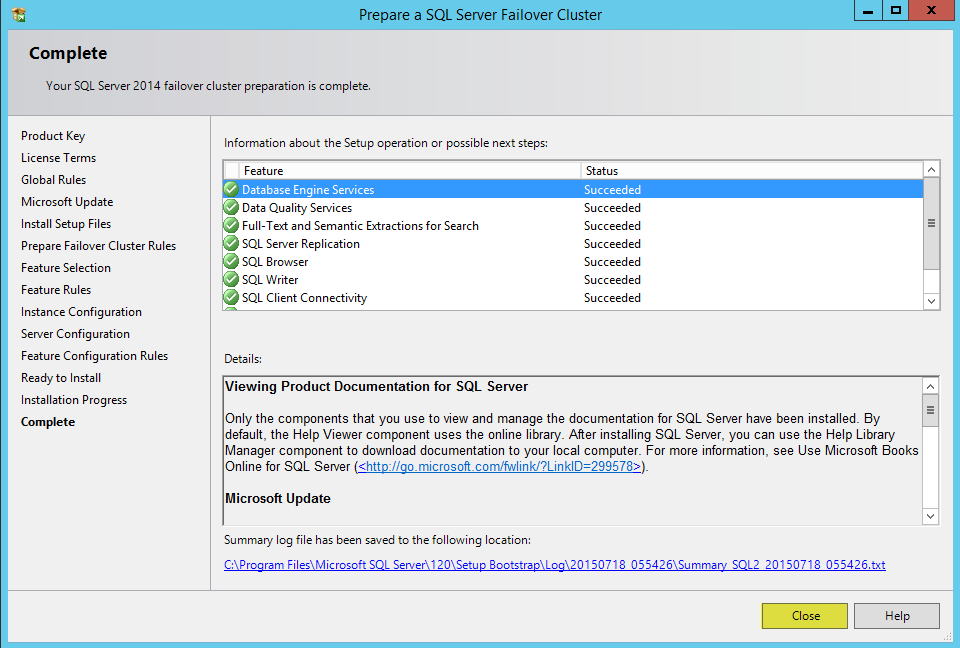
Select “Database Engine Services” and its three subsets.

Then select the “Default instance”.

For the “SQL Server Agent” service enter the account name “SQLFCILAB\SQLAgentAccount” which we created it after setup domain controller. For the “SQL Server Database Engine” service enter the account name “SQLFCILAB\SQLAccount”. Enter their passwords and click on Next.


Setup SQL Server Failover Cluster
Create an iSCSI Virtual Disk for SQL Server Cluster on Virtual Server (DC1)
Before SQL Server installation, we have to create another virtual disk. Login to DC1 virtual machine, open “Server Manager”, click on “File and Storage Services”, click on “iSCSI”, right click in the middle of the window and start the “New iSCSI Disk Wizard.”
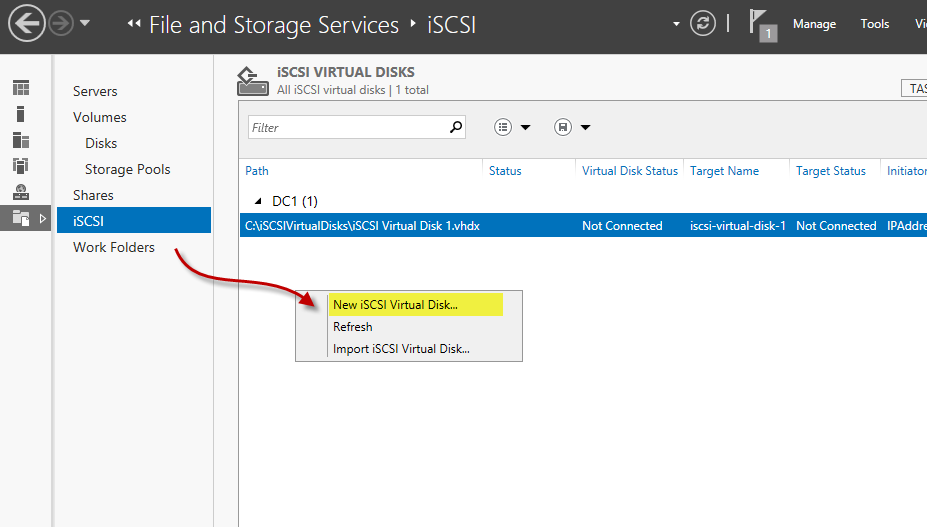

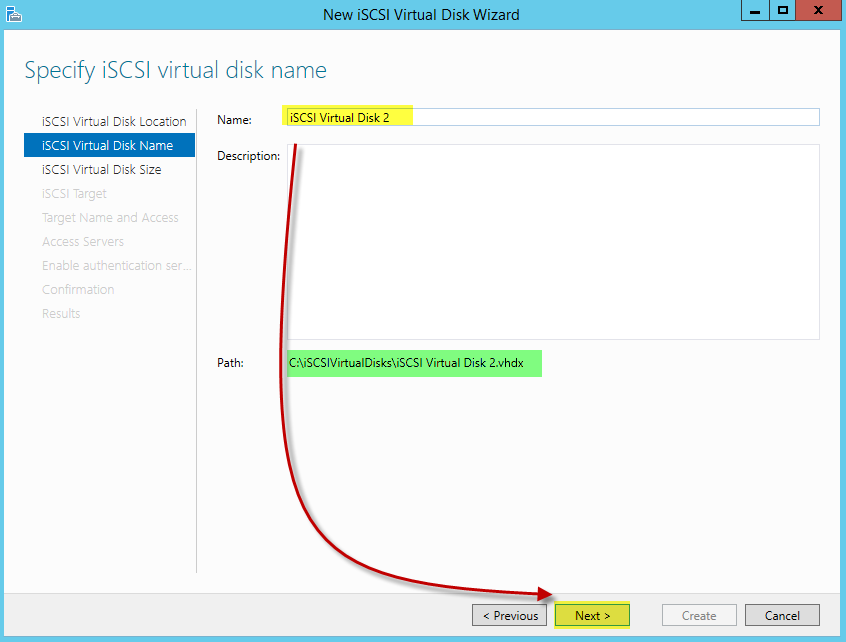
Fill Name with “iSCSI Virtual Disk 2” and click on Next.
Give 10 GB and select “Fixed size” which is faster than other options.


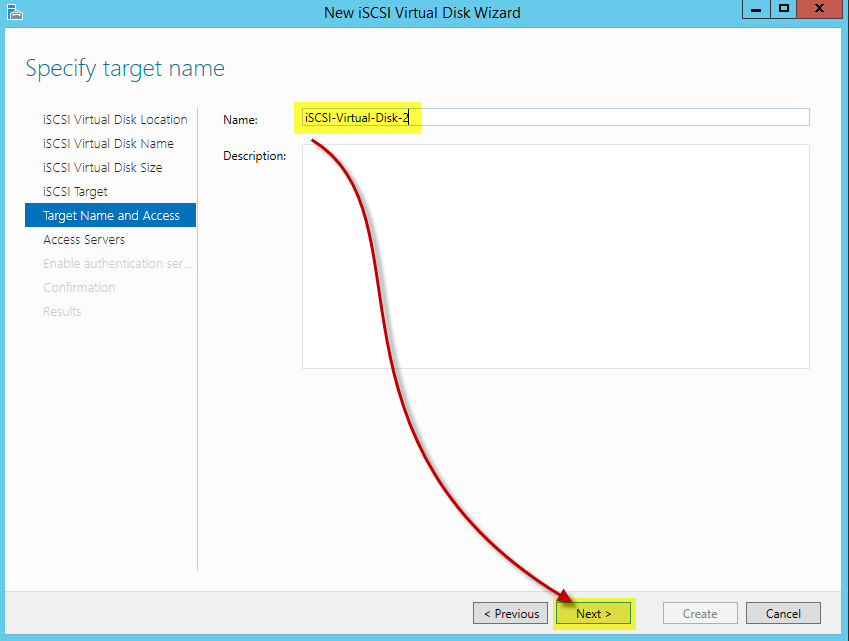
Fill Name with ��iSCSI-Virtual-Disk-2” and click on Next.
Add servers by their IPs which are “192.168.10.1” and “192.168.10.2”.


Configure iSCSI Initiator on Virtual Server (SQL1)
Login to “SQL1” virtual machine and Go to “Start Menu” and click on “Administrative Tools”.

Open “iSCSI Initiator”, click on “Refresh”, select disk-2 which is inactive and click on “Connect” and on “OK”.

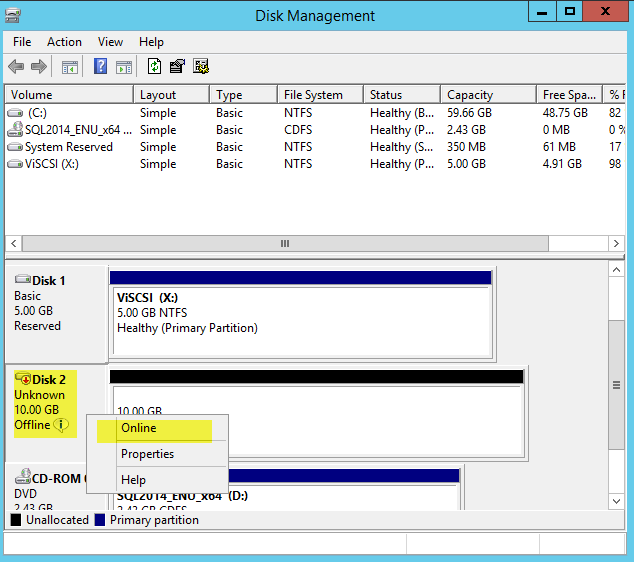
Open “Disk Management”, then right click on “Disk 1” and click “Online”.
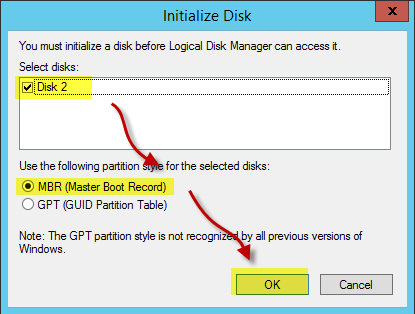
Again, right click on “Disk 1” and click on “Initialize Disk”. Then create a 10 GB drive and name it “ViSCI-SQL”.


From “Administrative Tools”, open “Failover Cluster Manager”. Then right click on “Disks” and click “Add Disk”. Now, add new virtual disk to cluster.


Configure iSCSI Initiator on Virtual Server (SQL2)
Login to “SQL1” virtual machine and Go to “Start Menu” and click on “Administrative Tools”. Open “iSCSI Initiator”, select disk-2 which is inactive and click on “Connect” and on “OK”.

SQL Server Cluster Preparation on Virtual Server (SQL1)
We need to mount SQL Server installation media. Right click on “SQL1” in “Library” pane and click settings. Then select CD/DVD and browse the SQL Server 2014 installation media location.


Open drive D:\ and run setup. In the “SQL Server Installation Center” click on “Advanced , then click on “Advanced cluster preparation”.


Select “Database Engine Services” and its three subsets.

Then select the “Default instance”.

For the “SQL Server Agent” service enter the account name “SQLFCILAB\SQLAgentAccount” which we created it after setup domain controller. For the “SQL Server Database Engine” service enter the account name “SQLFCILAB\SQLAccount”. Enter their passwords and click on Next.


SQL Server Cluster Completion on Virtual Server (SQL1)
In the “SQL Server Installation Center” from “Advanced”, click on “Advanced cluster completion”.


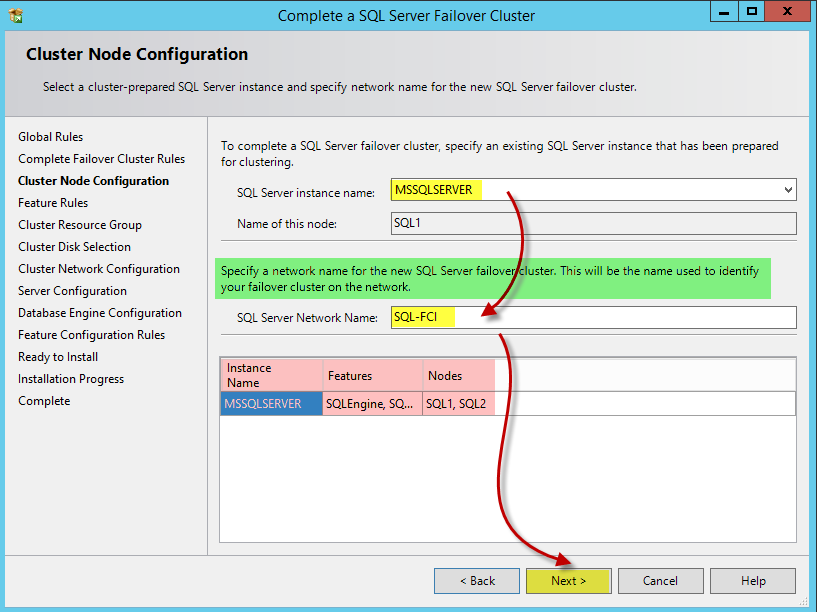

Select Cluster Disk 2 and click on Next.

Enter IP address “192.168.10.201” to SQL Cluster.


Select “Windows authentication mode”, click on “Add Current User” and Next.


Conclusion
This article provides a step by step guide to set up a virtual lab for exploring the Microsoft SQL Server Failover Cluster.
See Also
Other Resources
- High Availability Solutions (SQL Server)
- Understanding the concept of SQL Server Failover Cluster
- Microsoft SQL Server Failover Clusters