Server 2016 Experience guide: Enabling OpenGL Support for vGPU
Note, there was a blocking issue in Tech Preview 3, this issue has been fixed in the Tech Preview 4 release. The below work is now available for experimentation!
RemoteFX vGPU is constantly evolving and Server 2016 is no exception. Since 2012r2 the team has been working hard addressing some of the key features that have been requested. For Tech Preview 4 we invite you to experience some of these improvements.
Overview
For Server 2016 we’ve:
- Added support for designer and engineering applications through:
- OpenGL API support (up to OpenGL 4.4)
- OpenCL API Support (up to OpenCL 1.1)
- Expanded the amount of dedicated vRAM assignable to a VM to 1GB
- Decoupled vRAM from Monitors and Resolution
- Example applications: Adobe Photoshop CS, ArcGIS Pro, Solidworks, etc.
- Added support for RemoteFX vGPU when running Server VMs as a VDI guest
- Added support for Generation 2 VMs
- Improved end to end user experience
- Higher Render FPS and lower Jitter
- Improved application compatibility
For a more detailed overview of the support added for Server 2016, please view this blog post here:
http://blogs.msdn.com/b/rds/archive/2014/11/05/remotefx-vgpu-updates-in-windows-server-next.aspx
Requirements
For the basic requirements of the graphics card for RemoteFX vGPU, please reference this earlier blog post located here: http://social.technet.microsoft.com/wiki/contents/articles/16652.remotefx-vgpu-setup-and-configuration-guide-for-windows-server-2012.aspx
RemoteFX vGPU with OpenGL support is enabled in VDI configurations as either pooled or personal desktops. It is not available when remoting to a physical machine or in RDSH configurations.
The supported configuration for OpenGL support in Tech Preview 4 is Server 2016 host running Server 2016 as a guest VM. At time of ship we will also be supporting Windows 10 guests with OpenGL but for Tech Preview 4, that configuration is not supported.
As of Tech preview 4 and the launch of the Windows 10 November Update. Both Server 2016 as a guest and Windows 10 with the update as a guest are supported configurations.
Summary of Tech Preview 4 Requirements:
- RemoteFX compatible GPU
- Host: Server 2016
- Guest: Server 2016 or Windows 10 Guest with the November Update
RemoteFX vGPU with or without OpenGL support is not enabled for RDSH deployments.
Configuration
There has been minimal change in adding RemoteFX vGPU with OpenGL support to a VM between Server 2012r2 and Server 2016. The only change is with configuring the vGPU for the VM as the vRAM support has increased and the monitor count and resolution are now decoupled. Our goal is the configuration is still straight forward and if you’ve configured RemoteFX vGPU in the past, you shouldn’t have any problems with the 2016 release.
Steps to enable RemoteFX vGPU:
- Install RDVH role on Windows Server
- Install latest GPU drivers
- Select GPUs via Hyper-V UI or PowerShell
- Add the RemoteFX Video Adapter to a VM
- Power on the virtual machine
Where appropriate, you can either use the Server Manager GUI or PowerShell to setup and configure the RemoteFX vGPU. Below I’ll only be going through the Server Manager GUI.
Install RDVH role on Windows Server 2016
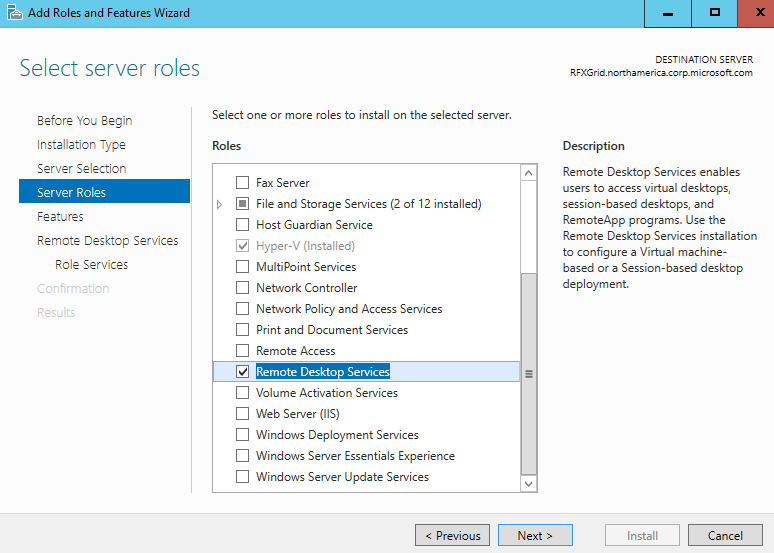
Using Server Manager open the “Add Roles and Features Wizard”. On the Select Server Roles screen ensure “Remote Desktop Services” is selected.
On the “Role Services” window under “Remote Desktop Services” ensure “Remote Desktop Virtualization Host” is selected.
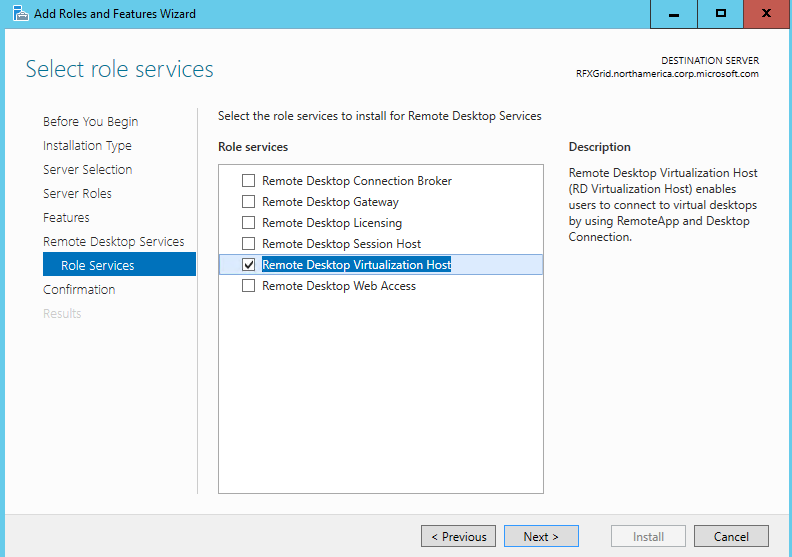
If not previously installed, selecting Remote Desktop Virtualization Host will also cause HyperV to be installed.
Once selected click next, and then “Install”. Your server may need to be restarted to complete the installation.
This step can be completed with Powershell by calling “add-WindowsFeature RDS-Virtualization”
Install latest GPU drivers
As this is a pre-release OS, the hardware vendor’s installation tools may not identify the OS as a supported OS. You may need to get creative to install the drivers. When the installation tools haven’t worked, we’ve had luck explicitly going through the device manager and updating the “Microsoft Basic Display Adapter” driver by pointing the driver to search for the INF file explicitly.
When running a hardware vendor’s driver installer, the first step is usually to extract the files to a known location. Make note of this location for later on.
If after the vendor driver has been installed, you still only the “Microsoft Basic Display Adapter” under “Display Adapters” in device manager, you may need to try the following steps for that adapter to be recognized. If instead, you now see a vendor driver listed, the driver has installed correctly and you can skip ahead to “Select GPUs via Hyper-V UI.”
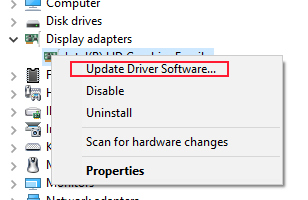
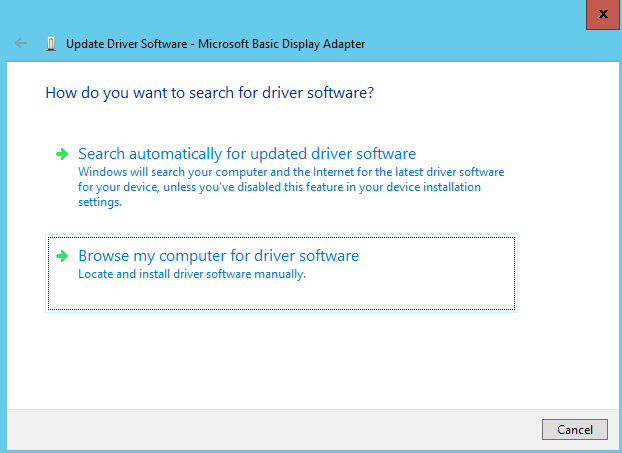
Once this step has completed, you can explicitly update the driver software for the “Microsoft Basic Display Adapter.” Do this by right clicking the Display adapter in Device Manager and selecting “Update Driver Software.
The Update Driver Software wizard will open. Select the “Browse my computer for driver software” option
On the next screen, point the search path to the extracted path from the installer above. Ensure “Include subfolders” is selected as the actual driver is usually buried in a deeper directory.
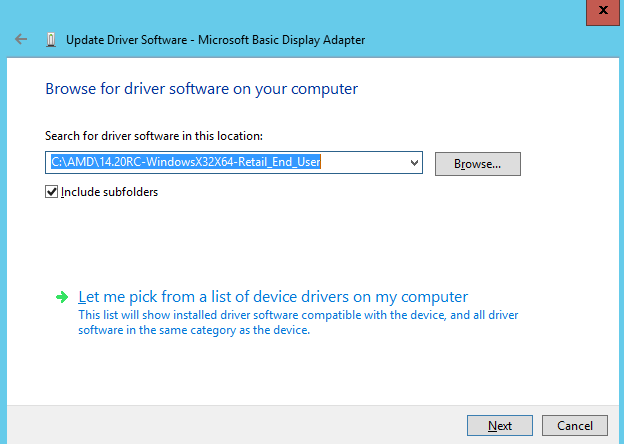
After a few moments, you should be prompted with a dialog saying it has found a driver. Install that driver and you should be good to go.
Select GPUs via Hyper-V UI or PowerShell
Next we need to enable RemoteFX vGPU in HyperV by assigning which adapters we would like to use for hardware acceleration using RemoteFX vGPU. This is done by using opening “HyperV Settings” in the “HyperV Manager.”
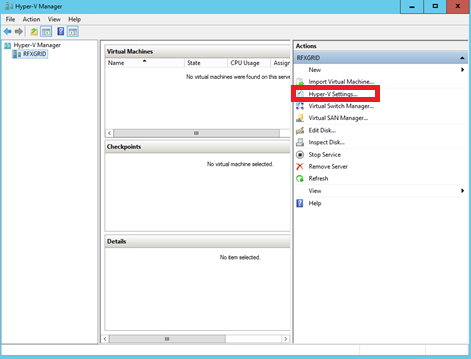
Select “Physical GPUs”
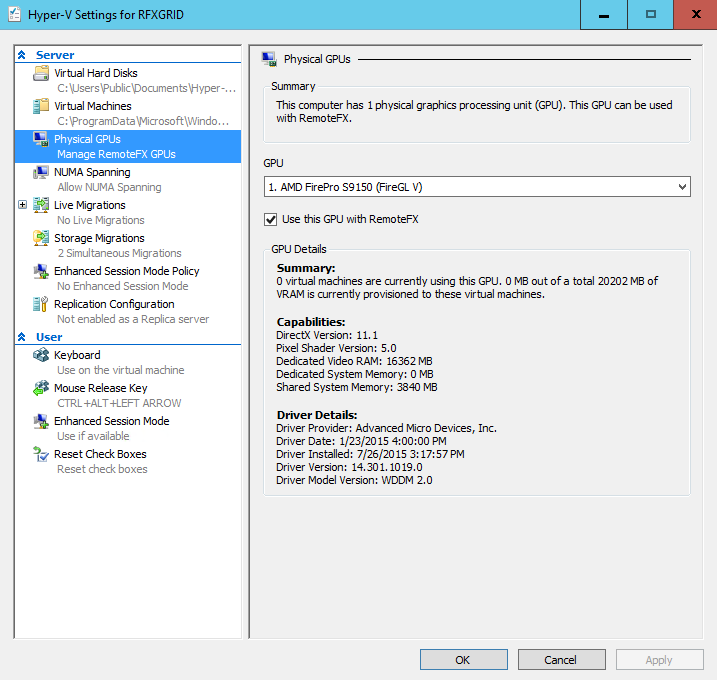
In the GPU dropdown, select each GPU you would like to enable for RemoteFX vGPU. RemoteFX vGPU supports multiple GPUs and will auto balalance assigning which physical GPU is assigned to a VM based off of its load.
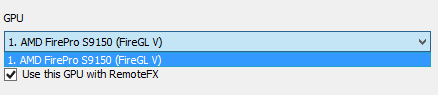
Ensure “Use this GPU with RemoteFX is enabled.
New for this release, we’ve added the ability to see all display adapaters in this dropdown. If an adapter is not supported, you will see it grayed out. It is still selectable but in the Summary it will say it is not supported.
Add the RemoteFX Video Adapter to a VM
Using a Gen1 or Gen2 vm, we next need to add the RemoteFX vGPU driver to that VM. This is done through the “VM settings” in the “HyperV Manager.” Ensure the VM is selected first.
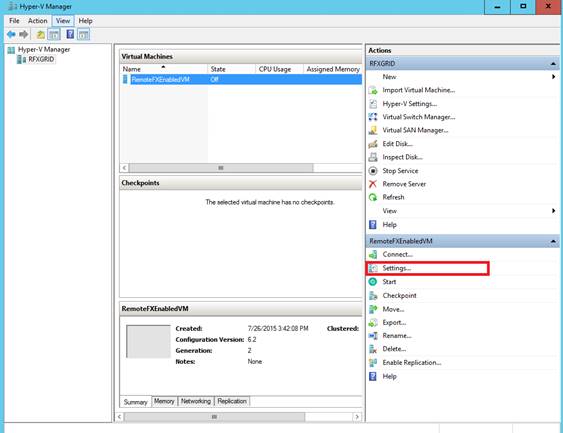
On the “Add Hardware” tab, select “RemoteFX 3d Video Adapter” and click add.
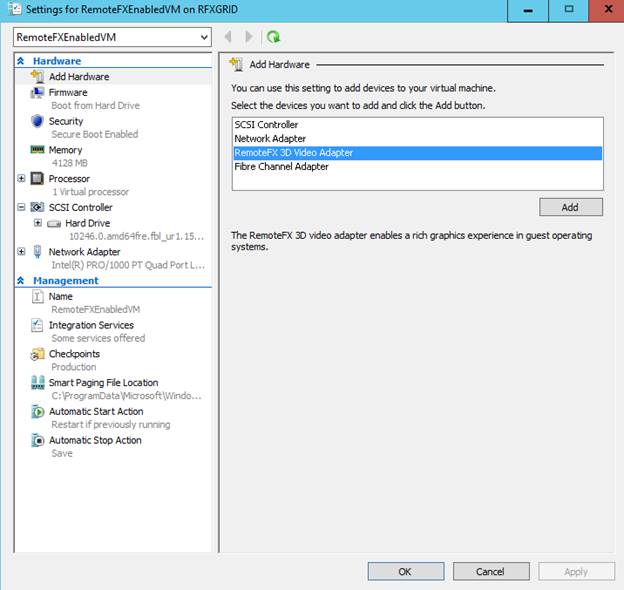
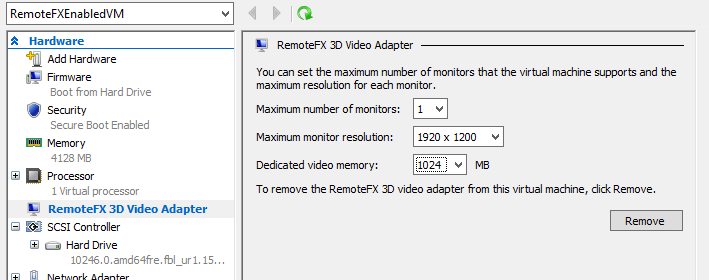
You will automatically be brought to the RemoteFX 3D Video Adapter Settings. Configure the adapter as necessary for the applications you expect to run.
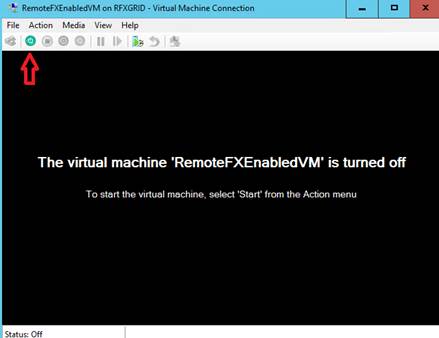
Power on the virtual machine
In the HyperV manager, connect to the VM and then power it on.
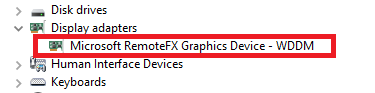
Once started you can see the RemoteFX vGPU display adapter in the device manager. You’re now free to run your OpenGL based applications in a VM using hardware acceleration.
Summary
At this point, you should be able to test out DirectX or OpenGL based applications in your Gen 1 or Gen 2 VMs. We continue to improve performance and app compatibility and welcome your feedback as you start to explore your scenarios using this new functionality.
Note: Questions and comments are welcome. However, please DO NOT post a request for troubleshooting by using the comment tool at the end of this post. Instead, please use our feedback forum. Be assured that we are paying close attention and will be very responsive. Thank you!