XAML: Windows 10 Relative Panel
Microsoft introduced few new controls in windows 10 universal applications, to further facilitate developers. And one of these new controls is Relative panels. As the name suggests, Relative panels are layout controls, used when we want to bind controls position relative to each other. In simple words, we can say that they are used when we want to define the position of one element, in respect to another element. Following this, theoretically, we can make whole interface relative to each other, and by just defining the position of our main element.
If you are coming from WPF background, you might remember and have even worked with anchors and docks. Relative panels work in same manner.
Let’s start with some Hands-on experience with relative panels.
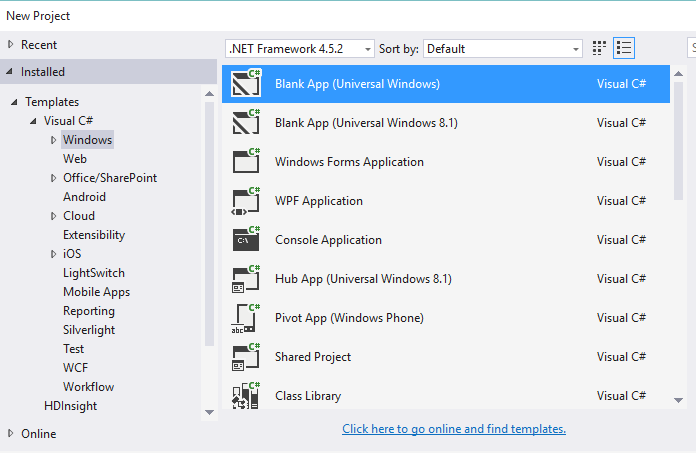
Open Visual Studio and create a Universal application:
Now, let’s just make our grid’s background black. Our xaml and interface till now should be something like this:
Interface:

Xaml:
<``Grid Background``=``"Black"``>
</Grid>
Now, let’s add our relative panel in grid. It’s to be noted here that the elements in a relative panel will behave/react according to the elements/control of that relative panels. But is it possible to define multiple relative panels under one relative panel and then bind them? Yes, it’s completely possible.
We’ll just add our relative panel, and create few rectangles in them. Our interface should look something like this:
Interface:
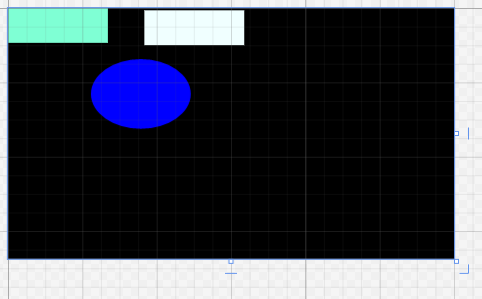
Xaml:
<Grid Background="Black">

      <RelativePanel>

          <Rectangle Fill="Aquamarine" HorizontalAlignment="Left" MinHeight="150"  VerticalAlignment="Top" MinWidth="430"/>

          <Rectangle Fill="Azure" HorizontalAlignment="Left" MinHeight="150" Margin="587,10,-1007,-150" VerticalAlignment="Top" MinWidth="430"/>

          <Ellipse Fill="Blue" HorizontalAlignment="Left" MinHeight="300" Margin="357,220,-710,-577" VerticalAlignment="Top" MinWidth="430"/>

      </RelativePanel>

  </Grid>
So, our basic interface is done. It’s time to implement the actual use of relative panels. Few pointers to note over here:
- Relative panels work on the basis of name of the control. So, we have to name every control through which we have to bind our current control. For this purpose, let’s name our rectangles and Ellipse.
- There are different properties of Relative Panel, through which we can bind them. These properties defines where we have to place our current control in respect to our other control. This includes properties such as
- RelativePanel.Above
- RelativePanel.AlignLeftWith
- RelativePanel.Below
You can find the complete list and details of every property from MSDN.
Now, getting back to coding and implementing our relative panels, after renaming, our xaml should be like this:
Xaml:
<Grid Background="Black">

        <RelativePanel>

            <Rectangle x:Name="rectangle1" Fill="Aquamarine" HorizontalAlignment="Left" MinHeight="150"  VerticalAlignment="Top" MinWidth="430"/>

            <Rectangle x:Name="rectangle2" Fill="Azure" HorizontalAlignment="Left" MinHeight="150" Margin="587,10,-1007,-150" VerticalAlignment="Top" MinWidth="430"/>

            <Ellipse x:Name="ellipse1" Fill="Blue" HorizontalAlignment="Left" MinHeight="300" Margin="357,220,-710,-577" VerticalAlignment="Top" MinWidth="430" />

        </RelativePanel>
 </Grid>
So, finally our code is ready to implement relative paneling.
All we’ll do is remove margins from every control/element, and replace it with relative panel property and define where we want our control/element to be, in regards to other panels.
Interface:

Xaml:
<Grid Background="Black">

        <RelativePanel>

            <Rectangle x:Name="rectangle1" Fill="Aquamarine" HorizontalAlignment="Left" MinHeight="150"  VerticalAlignment="Top" MinWidth="430"/>

            <Rectangle x:Name="rectangle2" Fill="Azure" HorizontalAlignment="Left" MinHeight="150" VerticalAlignment="Top" MinWidth="430" RelativePanel.RightOf="rectangle1"/>

            <Ellipse x:Name="ellipse1" Fill="Blue" HorizontalAlignment="Left" MinHeight="300"  VerticalAlignment="Top" MinWidth="430" RelativePanel.AlignRightWithPanel="True" RelativePanel.Below="rectangle2" />

        </RelativePanel>

    </Grid>
What I’ve done over here is I’ve binded my element rectangle2 with rectangle1. I’ve binded it in such a manner that it will always remain on the right of rectangle1. But in-case of ellipse1, I’ve not only binded it to remain below of rectangle2, but I’ve also binded it that it will always remain to the right side of my current panel. In this manner, whenever I resize my application, It’ll always remain at the right side of my panel. You can get the whole code from here