SBS 2011: Terminal Server/RDS Role
How to Add the Premium Add-On Server to a SBS 2011 Domain - TS/RDS Role
Overview
The Add on premium server provides the ability to provide additional flexibility to your SBS 2011 domain. Windows Server 2008 R2 can be the base OS for a Hyper-V deployment and then can be used as the line of business deployment server. It can also be used for a Terminal Server/Remote Desktop services server.
This step by step is based on http://demoshowcasesuite.com/demos/37cb96dd-b729-44f5-84c9-1360be5b18cb and you can run through a hands on lab of this as well.
Downloading the software.
Download the Premium add on from the MVLS site.

Click on the Windows Small Business Server Premium Add-on 2011 and choose the 64bit download to download the Windows Server 2008 r2 iso.
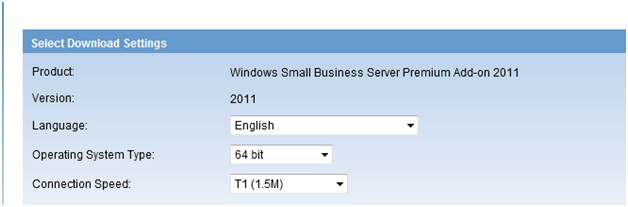
To download the SQL server 2008 r2 for small business choose the 32/64 bit version.

Once you’ve downloaded the media you can install the member server. It will install as a workgroup server. To join it to the domain you must manually join it. Ensure that it is obtaining it’s IP address from the SBS 2011 server.
Manually join the server to the domain
The wizard that one normally runs to join a computer to the domain does not work to join a server to the domain. Thus don’t even attempt to run http://connect on a server as it will indicate it’s not a supported operating system. On the initial configuration tasks screen, click on provide computer name and domain.

On the system properties screen that comes up, click on change to enter the domain and renaming tab.

Rename the member server to make it descriptive based on your normal naming schema.

Click on domain and enter the domain name of the network.

Click OK
If the server cannot find the domain you may need to enter a static IP and point the DNS to the SBS 2011

You will be prompted for a domain administrator account in order to join the domain.

You will be then joined to the domain.

You need to reboot the server to finish joining the domain.

The server will be rebooted.

The server will reboot with the non domain user account setting.

To log in as a domain, click on Switch User. Click on Other User.

Enter the domain username and password.

Click on the blue arrow key to enter the domain.

The member server is now joined to the domain.
Move the server into the right Organizational Unit.
The next step that has to be done is to move the server from the client organizational unit to the Sever organizational unit. If you do not do this you will be unable to successfully add roles to the server. Go back to the SBS 2011 server and check the console and then on the network tab. You’ll notice that the Premium server is listed in the client computer category.
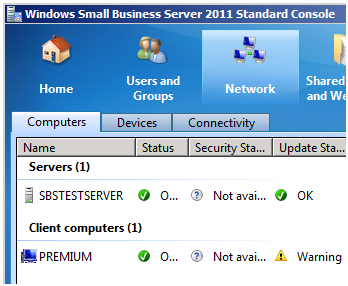
This is due to the fact that when a server is joined to the SBS network, it’s placed in the SBS computers OU. You’ll want to move it to the SBSServers OU. If you do not you cannot install the TS/RDS role.
Click start, administrative tools, then on Active Directory Users and Computers (ADUC) console.

In ADUC, expand the domain to navigate to the SBSComputers OU which is under the domain, then under MyBusiness, then under Computers.

Find the premium member server listed and right mouse click, hold and drag it to the SBSServers Organizational Unit.

Click Yes when you are prompted to confirm the move.
Go back to the console and confirm that the server is now listed as a server. You may need to click “refresh this view” to refresh it.

You’ll notice that the server is now listed in the Server section.

Adding the RDS/TS role to the member server.
Now we’re going to add the TS/RDS role to the member server.
Log back into the member server. Click on Add Roles.

The roles wizard will add the needed features based on what you want the server to do.

In this sample I’ll be adding Remote Desktop Services.

Click Next. The wizard will remind you of what the wizard is doing.

We’ll install Remote Desktop Session host.
If you want to support RemoteApp you’ll need to click on Remote Desktop Virtualization Host.
You can put the Remote Desktop Licensing role on this server OR you can put it on the SBS 2011 box. It is easier (in my opinion) and less potentially hazardous to the network to place the licensing on the member server and not on the SBS box. The reason for this is due to the fact that the SBS 2011 has the remote desktop gateway already installed but not exposing the gui, it’s less potentially impactful of the SBS server to install the licensing role on the member server.
If you want to provide Remote Desktop Web Access you’ll need to add that role as well. We’re going to put both on the member server. While it could go on the SBS box, it’s safer to install on the member server.

Click Next.
Specify the licensing location – in this domain.

Click Next.

Click next again.

On a domain, the remote desktop session authentication is controlled by the group policy on the server.
Click Next.

RDS is licensed separately from SBS, and one of two licensing modes can be selected: per device or per user. Regardless where you are installing the RDS licensing server, choose per device or per user.
By default, only the local Administrators group has access to connect to the RDS server.

Click add to add a group of users to have rights to the server.

Type in domain users to allow all, or whatever specific security group you have set up.
Click OK.

Confirm that domain users are added.
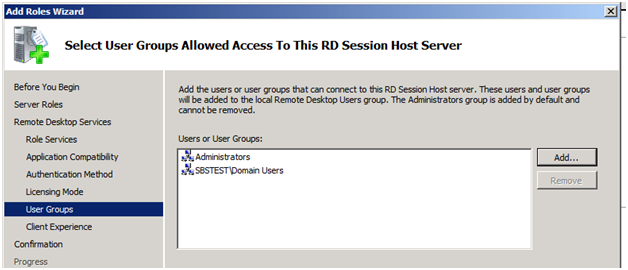
Click next.
The client experience can be tailored for your specific environment based on the level of functionality desired and the hardware available.

I’m going to select all three.

Click next.
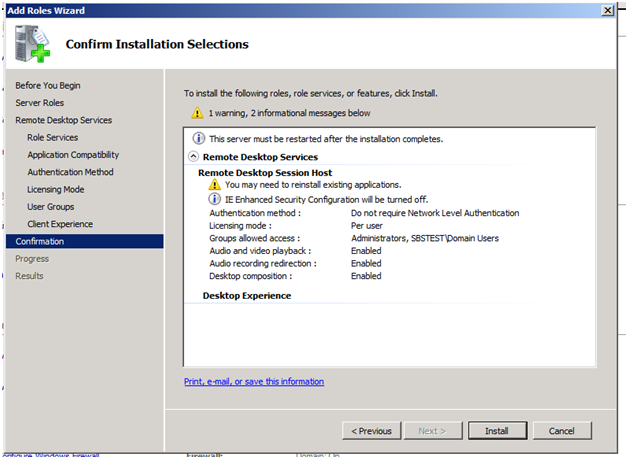
Confirm the choices and click on install.
The role will then install.

You have to restart the server.
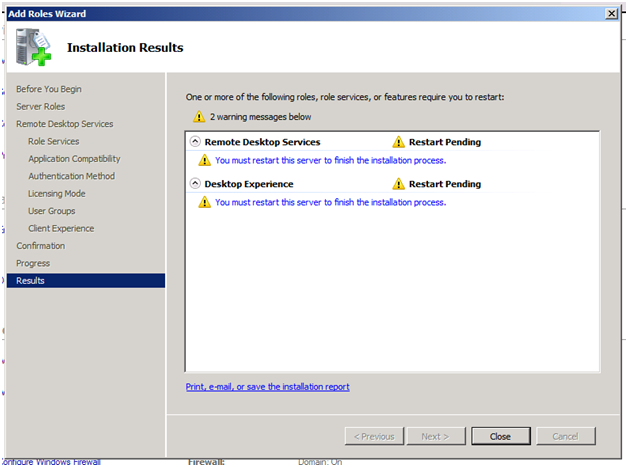
Click yes to restart.

Editing the registry to allow for the member server to be a Remote Web Access server.
Now we need to edit the SBS 2011 server to allow for Remote Web Access to the member server.
Click Start, and in the box type in Regedit and hit enter.

Click YES on the UAC prompt.

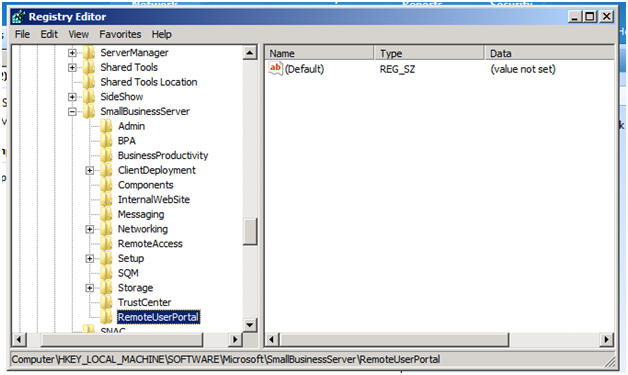
Go to HKEY_LOCAL_MACHINE
Then to Software
Then to Microsoft
Then to Small Business server

After navigating to the SmallBusinessServer key, create a new registry key.

Right mouse click , then on new, then on new key

Name the new key RemoteUserPortal
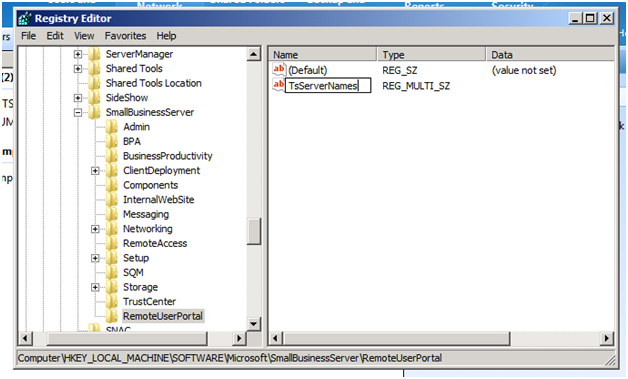
Now inside this key, create a new multi-string value.

Call the multistring value name TsServerNames and enter the name of the member server.
Enter in the name of your TS/RDS member server name.

In our example we named the server PREMIUM.
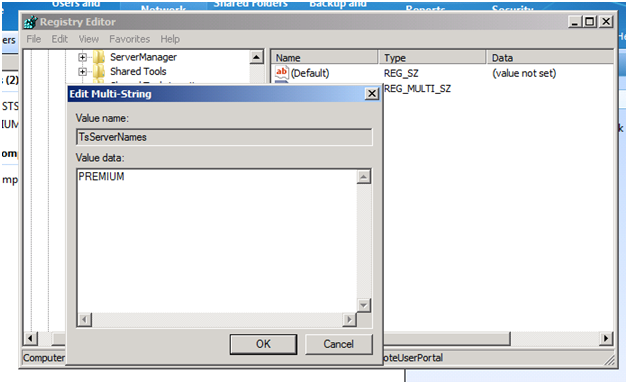
Once the registry key can been created and the value set, users can access the RDS server from RWA.

Adding the TS cals to the member server.
While in a SBS network one does not need Windows Server cals in order to access the r2 member server role, one does need RDS cals in order to properly license the ability to access the member server as a remote web access box.
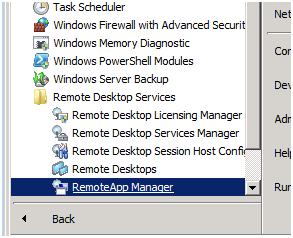
Go to the member server, click on start, run and then the RD licensing console.
Approve the User Account Control prompt.
If you have not yet activated your base Server 2008, you’ll notice the server is not activated.

Ensure that the server is activated via WGA before the next step.
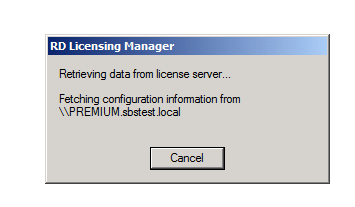
After it has gone through WGPA the error message you get indicates that it is looking for a license server.
Right mouse click and click on "activate server".

Choose the type of connection you'll use to contact Microsoft to activate the TS/RDS cals:

Your other options here are web browser and telephone.
It asks for the name of the company that has the RDS/TS cals.

At this point in time we’re assuming you bought TS/RDS cals from Microsoft via volume licensing, or you bought them via a disti or have the cal codes from the Partner.
The next screen of email address is optional.

You are then prompted to enter the RDS/TS cal wizard.
If you want to call in, you have to click back to change the connection process.

In the next screen you choose the type of agreement that you bought the cals under
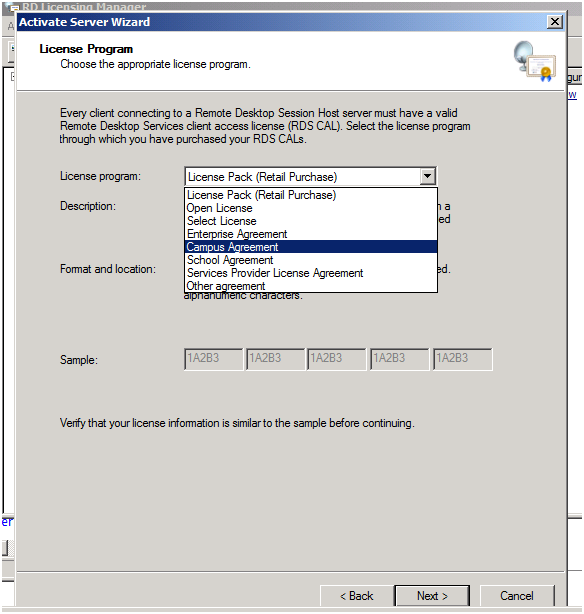
In the case of Open value or open license, it’s the agreement number that activates the server, not a key code you are looking for.
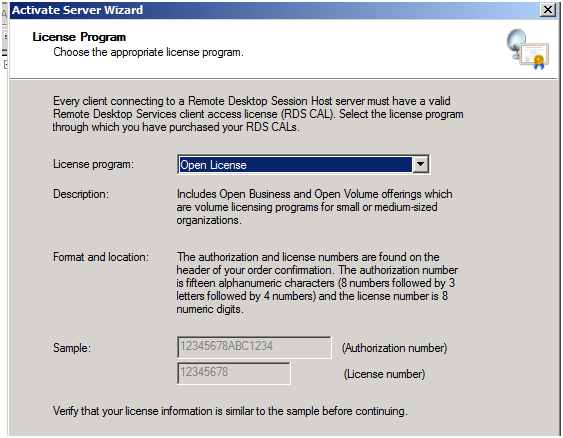
You may have to choose open license or other license depending on the type of agreement you have.
Place the license agreement number and enter next.

If your agreement has a V in front, drop the “V” when you enter the agreement number.
Choose the version of RDS (2k8 or 2k8r2), then user versus device, and then the amount you are licensed for.

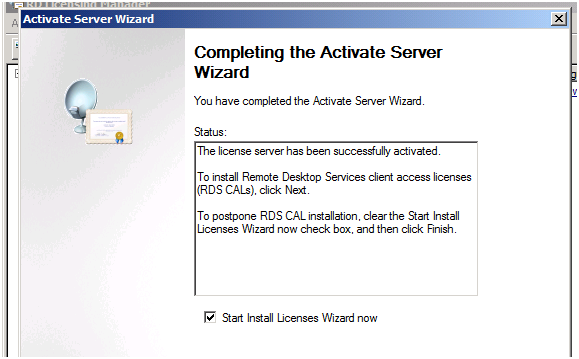
If everything works, you should successfully activate.

If it does not, change the activation type to phone and call them to ask them what agreement information and number you need.
The server should now indicate that it is activated.
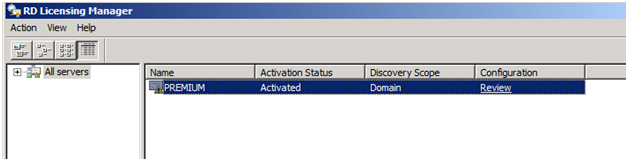
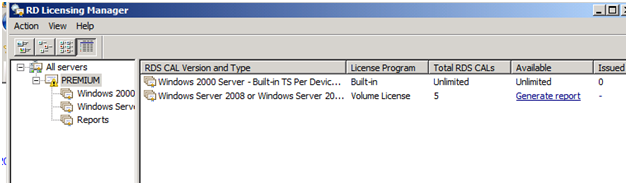
When you expand to review the servers you’ll see that it has the needed RDS cals.
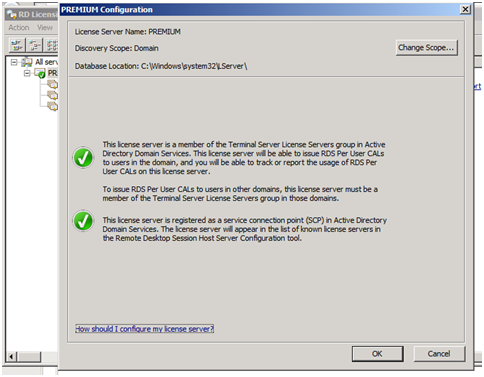
If everything is as it should be the when you click to review the configuration it should find the domain controller and come back green. If it does not, review the IP address settings.
The premium add on server should now be ready to go to be a licensed Remote desktop server in a SBS 2011 domain.