ConfigMgr 2007 Application Mapping With a User Driven Installation Task Sequence
This is a continuation of my previous WIKI Post covering ConfigMgr 2007 Basic User Driven Installation Task Sequence Step by Step, in that post; I covered the basics for creating the Task Sequence, and customizing the user experience with the UDI Wizard Designer. This post builds upon those basics, by introducing another feature of a UDI Task Sequence, called Application Mapping. We will show in this example, how to map a previous version of an application by the package ID, that the client has installed already, and another by Application GUID. We will cover the basics for each of these methods.
To get started, we will open the existing UDIWizard_Config.xml file in the MDT Toolkit Package Source folder discussed previously in the Basics WIKI post on UDI Task Sequence Step by Step:

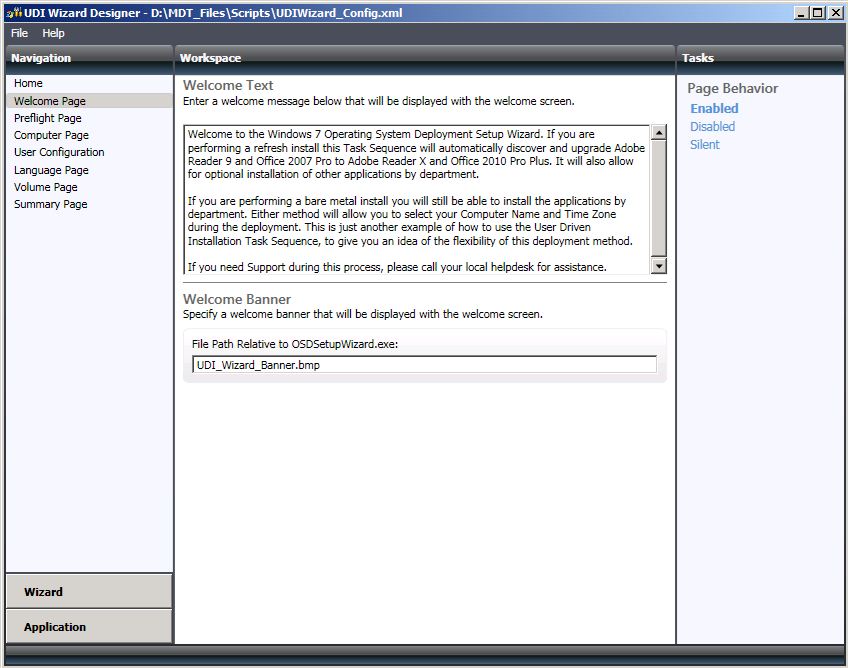
On the welcome screen, you can see I edited the text for this demo indicating that this Task Sequence will be able to deploy to Bare Metal or Refresh scenarios, allowing the user to select from a list if applications for a new install, and/or to automatically map existing versions to new versions depending on the method of deployment:
This is the Preflight Page, I left it at default settings, note the Application Discovery preflight script, this is what allows a refresh install to detect the installed applications either by execution history (Pakcage ID, or by GUID:

Leaving the Computer Name Field enabled, and disabling all the other fields, these will be handled in the Task Sequence later:

Disabling the User Page and settings, as this will be handled by the Task Sequence later:

On the Language Page, I set the defaults to English, and disabed the ability to change this, however, I left the Time Zone field enabled, so it could be changed as needed by the user, this is useful if you deploy to multiple time zones:

On the volume page, I added both x86 (index 1) and x64 (index 2) images, this allows the xml to be used in either deployment of x86 or x64 Windows 7 with a multi-image WIM in the same package:

This is the Summary Page, it will show the user a summary of the deployment at the end:

Now we move on to the Applications portion of the UDI Wizard Designer. This Settings and Groups page, we have chosen to create a group for the Discovered applications, as well as the Department Names as examples of how this can be used:

Enter your ConfigMgr 2007 Server name and click the Refresh link, then add the appropriate packages in the Selected Packages pane, for your deployment. You will have to manually perform this step each time you open and edit the xml file, it does not keep these lists populated:
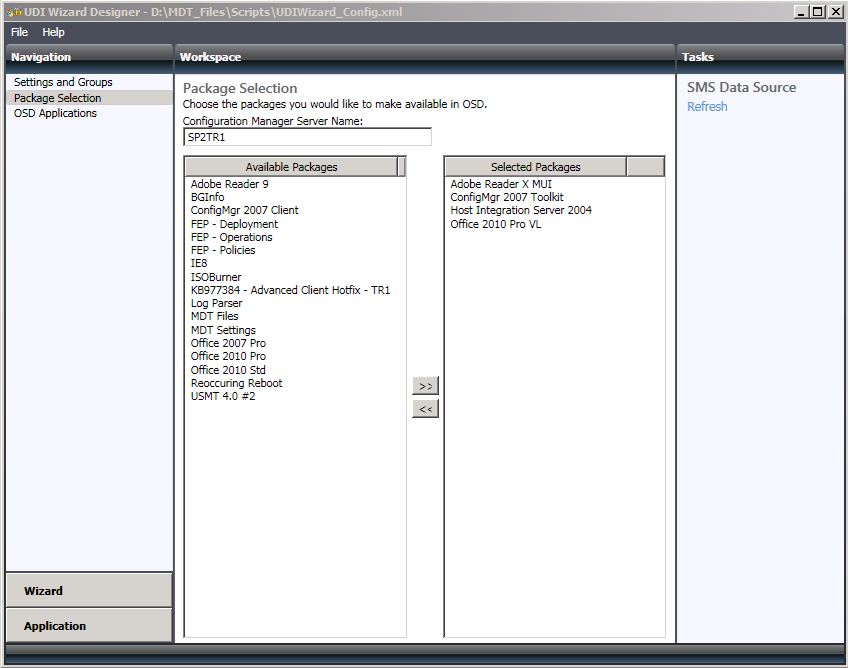
We added the new versions of Adobe and Office to the Discovered Group, I wil show the mapping settings in the upcoming screen shots, also notice we put the applications in the Department Groups as well, this allows for a Bare Metal Deployment to see and select these applications for install as well:

Notice I added the Program installer for both 32-bit and 64-bit entries. This is to support both architectures of the Operating System, this is not what it seems, these applications are not 64 bit, it is just for the applications to show un in the list for the user during deployment. If you are deploying a 64-bit Operating System, you have to add the programs to the 64-bit Program Properties section, if you are deploying 32-bit Windows 7, then they need to be added to the 32-bit Program Properties. I have added both, again, to support reusing this XML in either x86, or x64 deployments of Windows 7. I marked this entry as locked, to demonstrate how we can control the detected and installed application if desired:

In this screen shot, we see the mapping for the old version of Adobe Reader which has been previously deployed to this client and installed from the current package ID and Program. This will allow it to be detected by the package id, and mapped to the new version of Adobe Reader X:

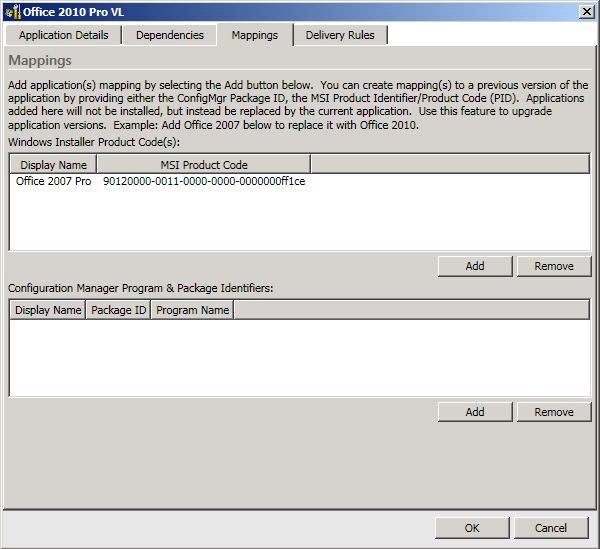
For the Office 2010 package in the “Discovered” group, I attached both 32-bit and 64-bit program entries (even though it is only the 32 bit version we are deploying, again, to support both Windows 7 x86, and x64. Also, I marked this entry as locked, to demonstrate how we can control the detected and installed application if desired:

For the Office 2010 mapping, I are used the product GUID, which I found in the Add/Remove Programs entries in the Uninstall key in the registry on the client where Office 2007 Pro was already installed:
Save the changes, and update the Distribution Points for the MDT Toolkit Package in ConfigMgr:

Now we will see the user interaction screens during the Task Sequence execution.
First, we see the Welcome scren:

This is the Preflight checks. Application Discover may fail if the application GUID or Package ID/Program are not found on the machine: 
On the Computer Name screen, notice only the computer name can be modified. The other settings will be configured by the Task Sequence later:

The Language Page is next, notice I configured it for English and it cannot be changed, however, the Time Zone is selectable, and defaults to the common Time Zone in my environment:

Here is the Applications Page, notice we have detected previous versions, and selected the new versions of Adobe Reader, and Office Pro. To allow for flexibility of deploying with Bare Metal machines, I also made some applications selectable in some Department Groups I created: 
This is the summary screen, click Finish to start the deployment with the selected preferences:

Once the Task Sequence completes, you should have the new Operating System installed with the selected computer name, Time Zone, and applications that were either mapped, or selected for installation. Thanks for reading!