.NET: Dockerize your first .NET Core application
We know that Docker is based on Linux kernel. We can use Docker to deploy our .NET Core (Console App or ASP.NET 5) applications to Linux using Docker. Here in this post, we will create our first Docker container from a simple raw .NET Core Console Application.
The main purpose of this post is to know that how to create containers in Docker using Dockerfile. We'll create a simple .NET Core RC1 application and make a container of this application.
Lets get started by creating a new folder called "Docker-Demo", here we will create our simple "Hello World" C# Console app without restoring the CoreFx libraries as we will do it when making container of this application in Dockerfile. So open up that folder and create a Console Application either by creating yourself Program.cs and project.json files or by using "aspnet" Yeoman Generator. Here, we will use Yeoman Generator for the sake of saving time.
Open up the terminal and type:
yo aspnet
We assume that you've installed Yeoman and "aspnet" generator on your local machine. If you don't know how install Yeoman with Yeoman Generators, click here to get started."
After typing the command, choose the console application and give it a name and hit "Enter" as shown here.

Navigate to the directory and create a Dockerfile. A Dockerfile is basically a set of instructions to build a Docker container in which we tell Docker which base image to choose, what commands should be run and define entry point of the application. Simply create Dockerfile and put the follow along.
First put a base image using the "FROM" image as:
FROM microsoft/aspnet:1.0.0-rc1-update1-coreclr
The concept of base image is kindly related to Parent-Child class in Object-Oriented Programming. We've to choose a base image for an application, or at least if not concern, we have to choose a raw Ubuntu image. In this case we are using the image created by Microsoft available at Docker Hub. If we see the Dockerfile for this image, we see that it contains all the instructions that is used to install DNX, DNU and DNVM. If we use raw Ubuntu image as our base image, we've to install DNX manually but here we are reusing DNX and other .NET Core utilities available in microsoft/aspnet Docker image so that we don't have to install it manually.
Next copy your existing files from current directory to /app directory and make the working directory /app within the container by adding.
COPY . /app
WORKDIR /app
The keywords in capitals are Dockerfile specific keywords.
in Dockerfile. It will copy your existing folders into app folder and make them as working directory. Quite Simple
Next run the "dnu restore" command for restoring CoreFx packages right within container by adding.
RUN ["dnu", "restore"]
and finally define an Entry Point of your application by adding
ENTRYPOINT ["dnx", "run"]
This will run "dnx" "run" command for you (as we used to do to run our Console Applications in .NET Core) in Linux environment. Here is the final complete Dockerfile code in VS Code.

Now save the file and run the following command in the terminal to build our container on our local development machine.
"docker build -t dotnetcore-example ."
Don't forget to add "." add the end of the command as it represents your current working directory.
It will restore your CoreFx packages and put them into the container and create the Docker container of your application in your local development machine as can be seen in docker images

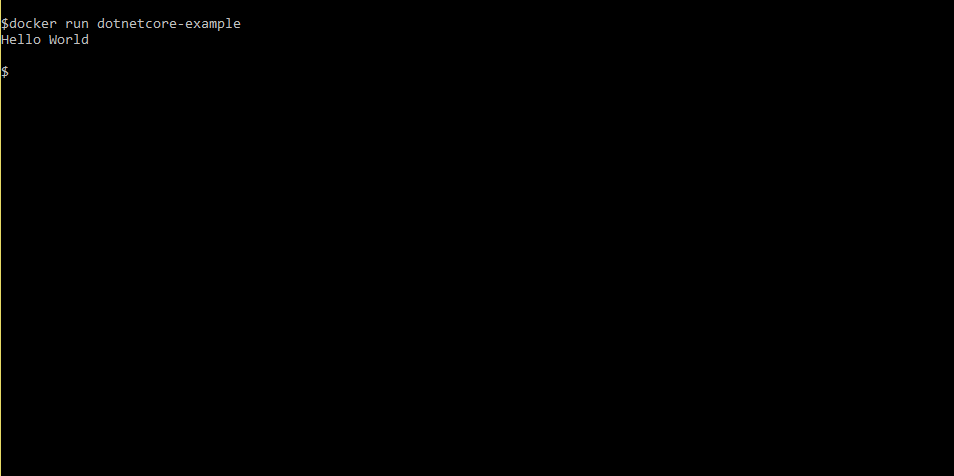
Finally run your Docker container by typing in terminal as
"docker build dotnetcore-example"
You'll see "Hello World " printed in the console as show below:
In this example, we used .NET Core RC1 application.