Azure: Creating Virtual Machine and attaching Disks
This article will let you to know about how to create a Virtual Machine in Windows Azure and how to attach disks to it.
Requirements:
- Windows Azure account
- Internet Connectivity without any proxy block
Follow the below steps now:
1: Logon to Azure
Goto http://manage.windowsazure.com/ and login with your azure credentials:

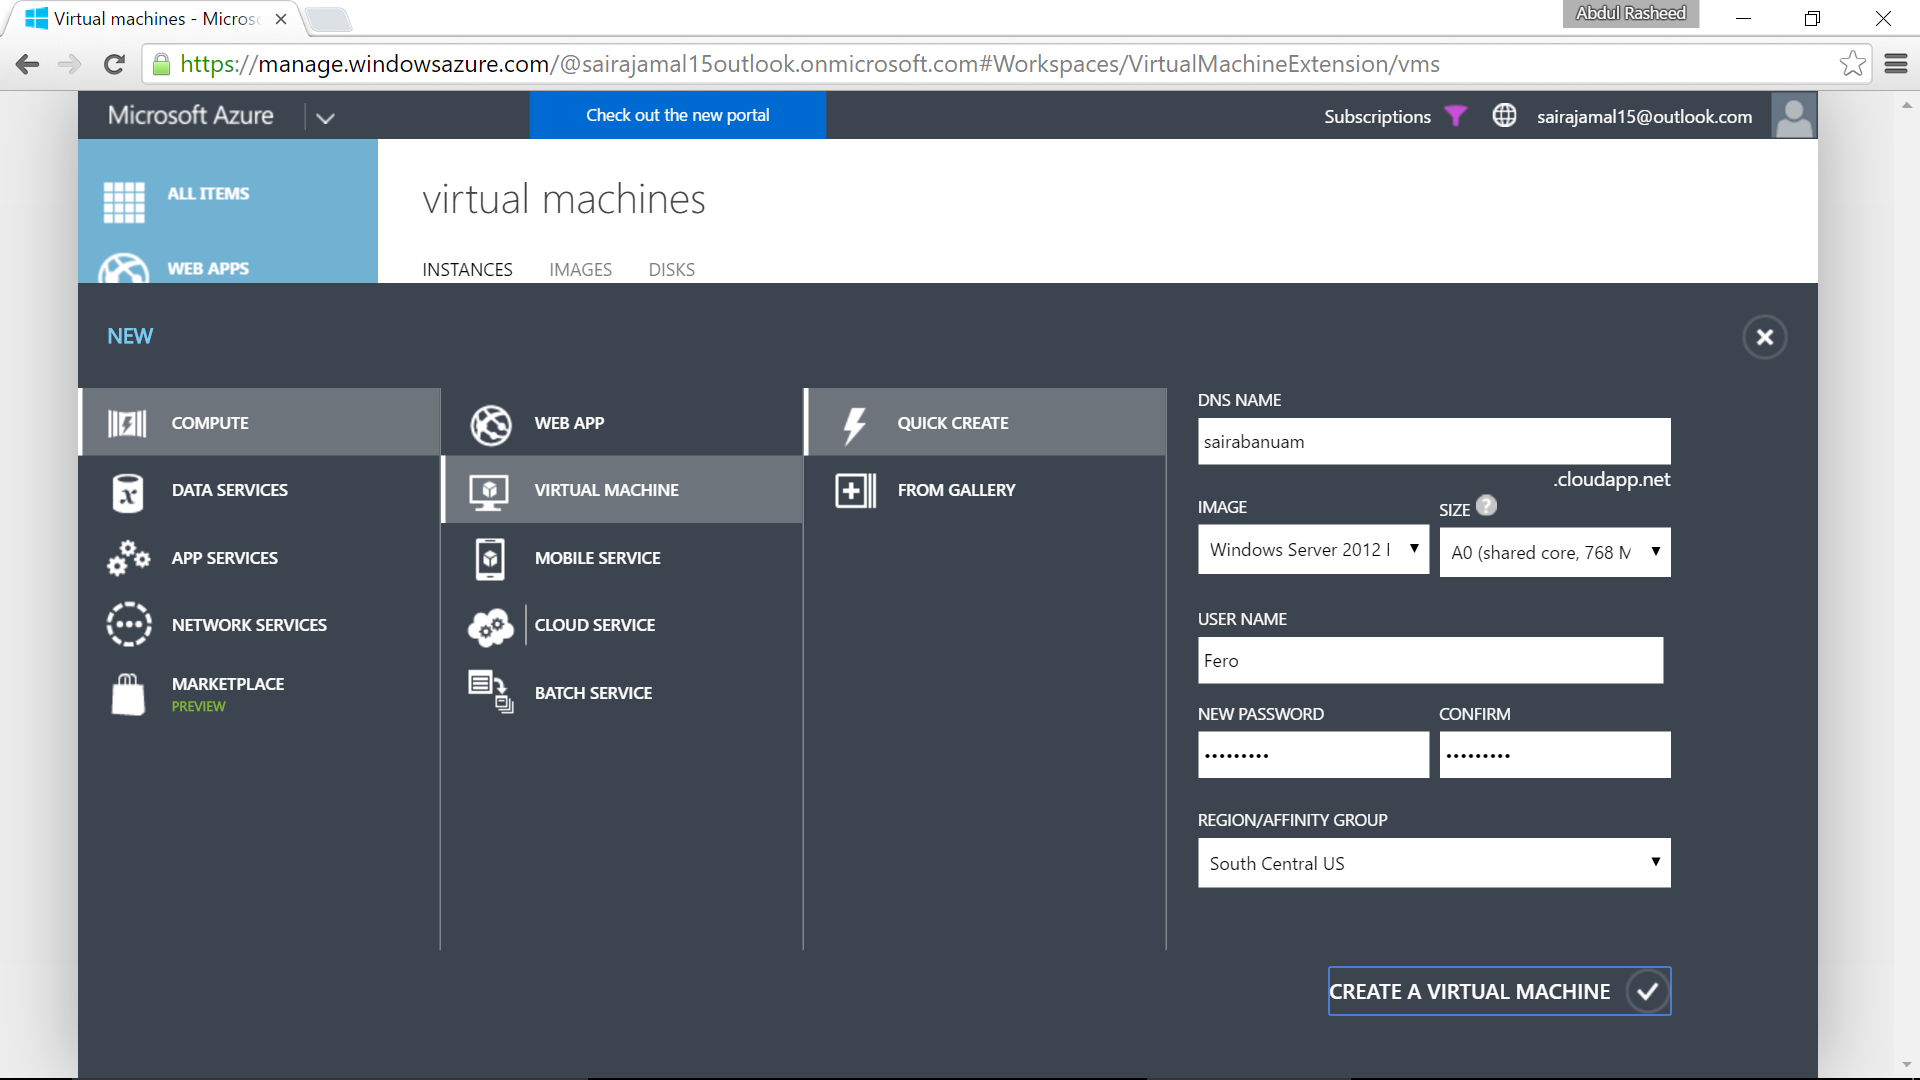
2: VM Portal
Now on the home screen of Azure management portal select Virtual Machines -> Create a Virtual Machine -> now enter the details of DNS name, OS that you need, size configuration, Username for VM, password and region where it has to be deployed.
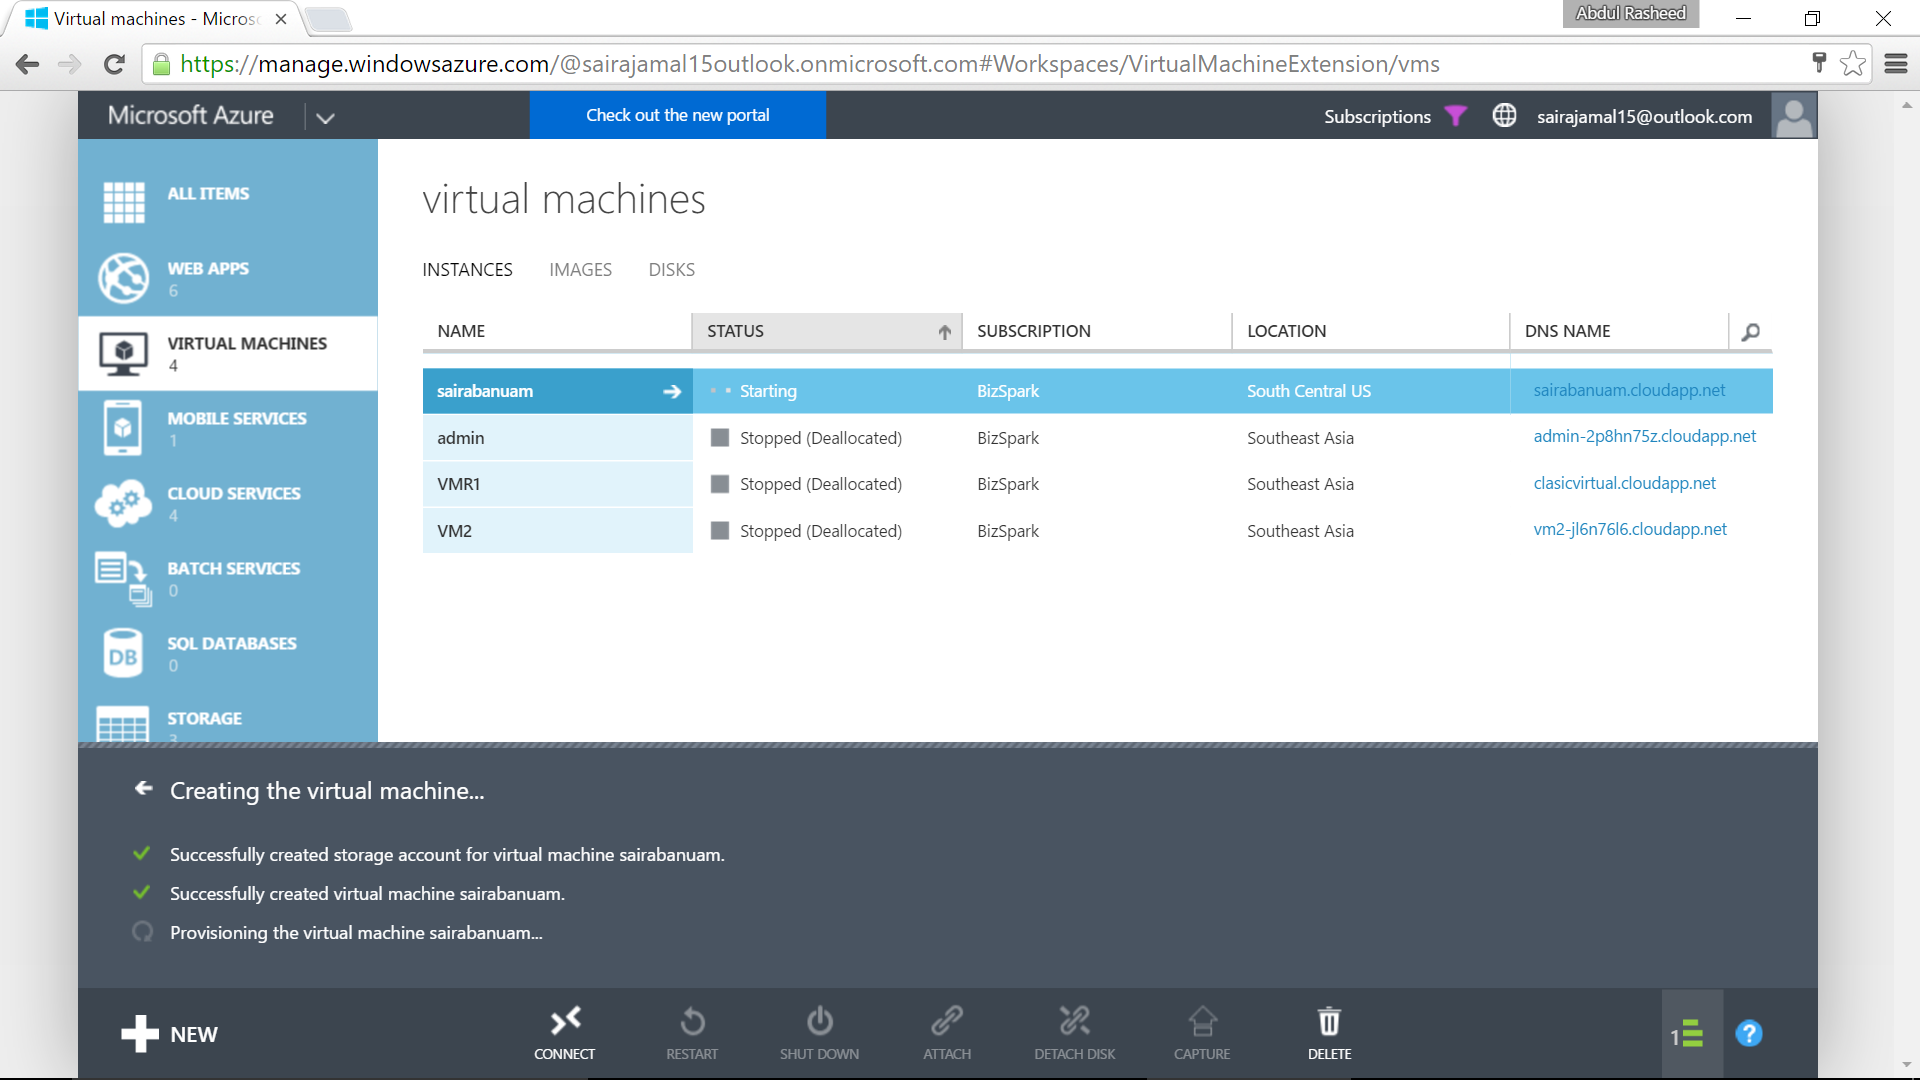
3: Download RDP file
Click on Connect at below and download the rdp file

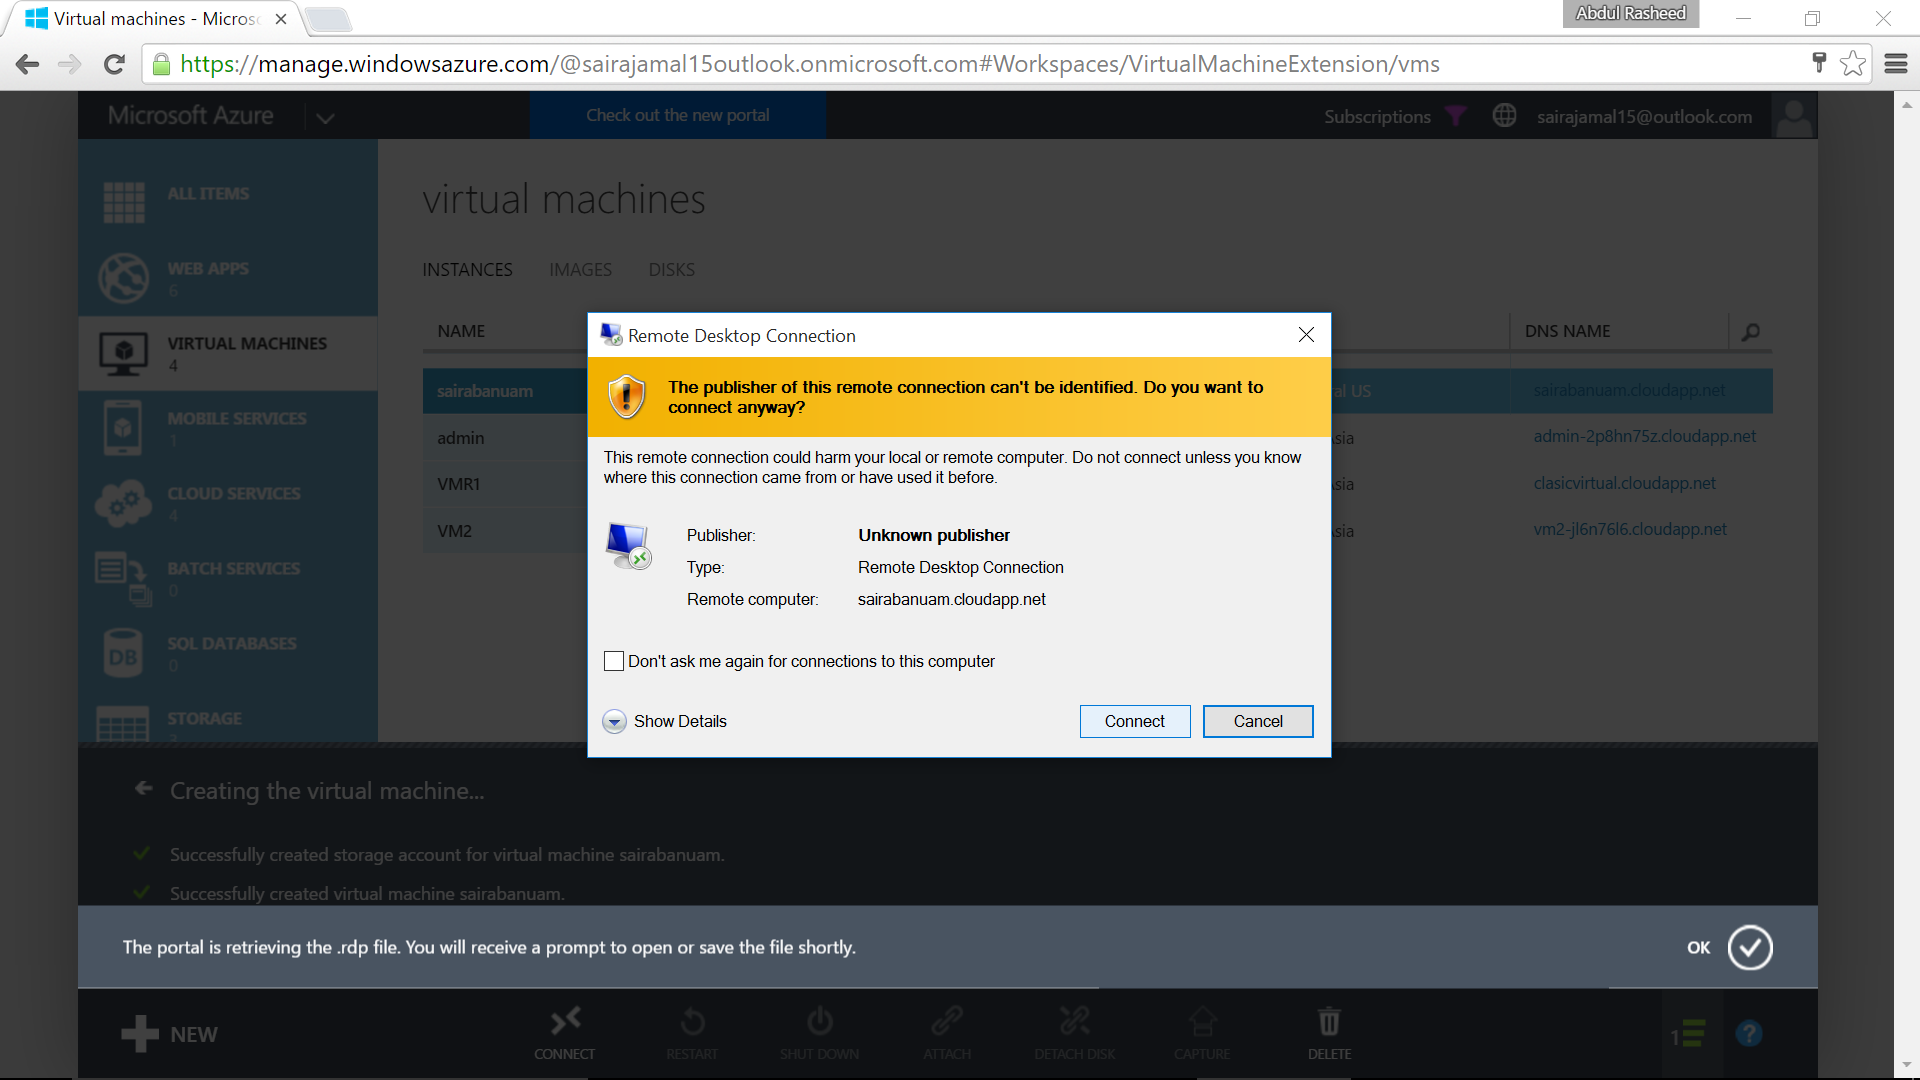
4: Connect
Open the rdp file and click on Connect
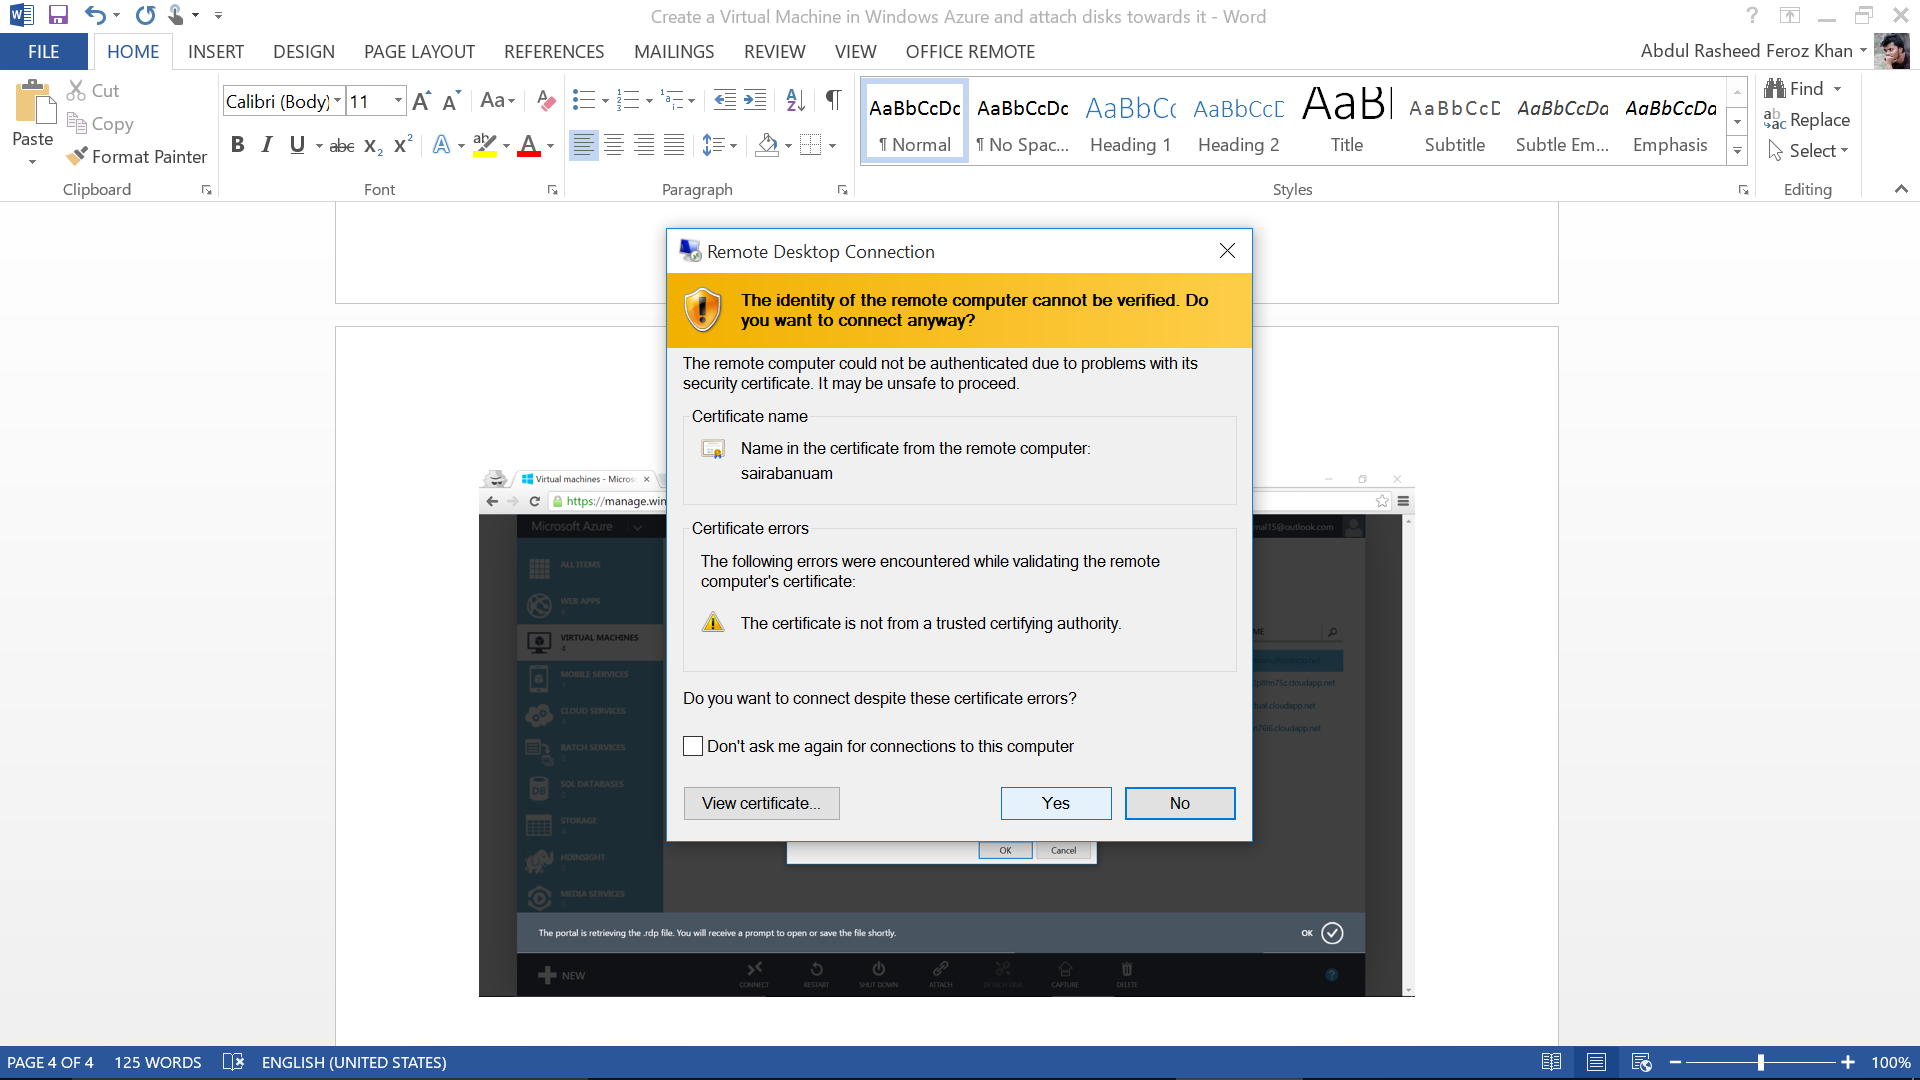
5: Log on to VM
Enter the login credentials for your VM

6: Confirm connectivity
Click on Yes for RDP connectivity
Now your VM gets loaded and you will be getting the following screen:

Click on yes to allow network connections
7: Open Server Manager
Followed by this you will be getting Server Manager.


(In the above image there is no disk attached)
Now we will be attaching disk towards the VM created
8: Computer Management
Click on Tools -> Computer Management

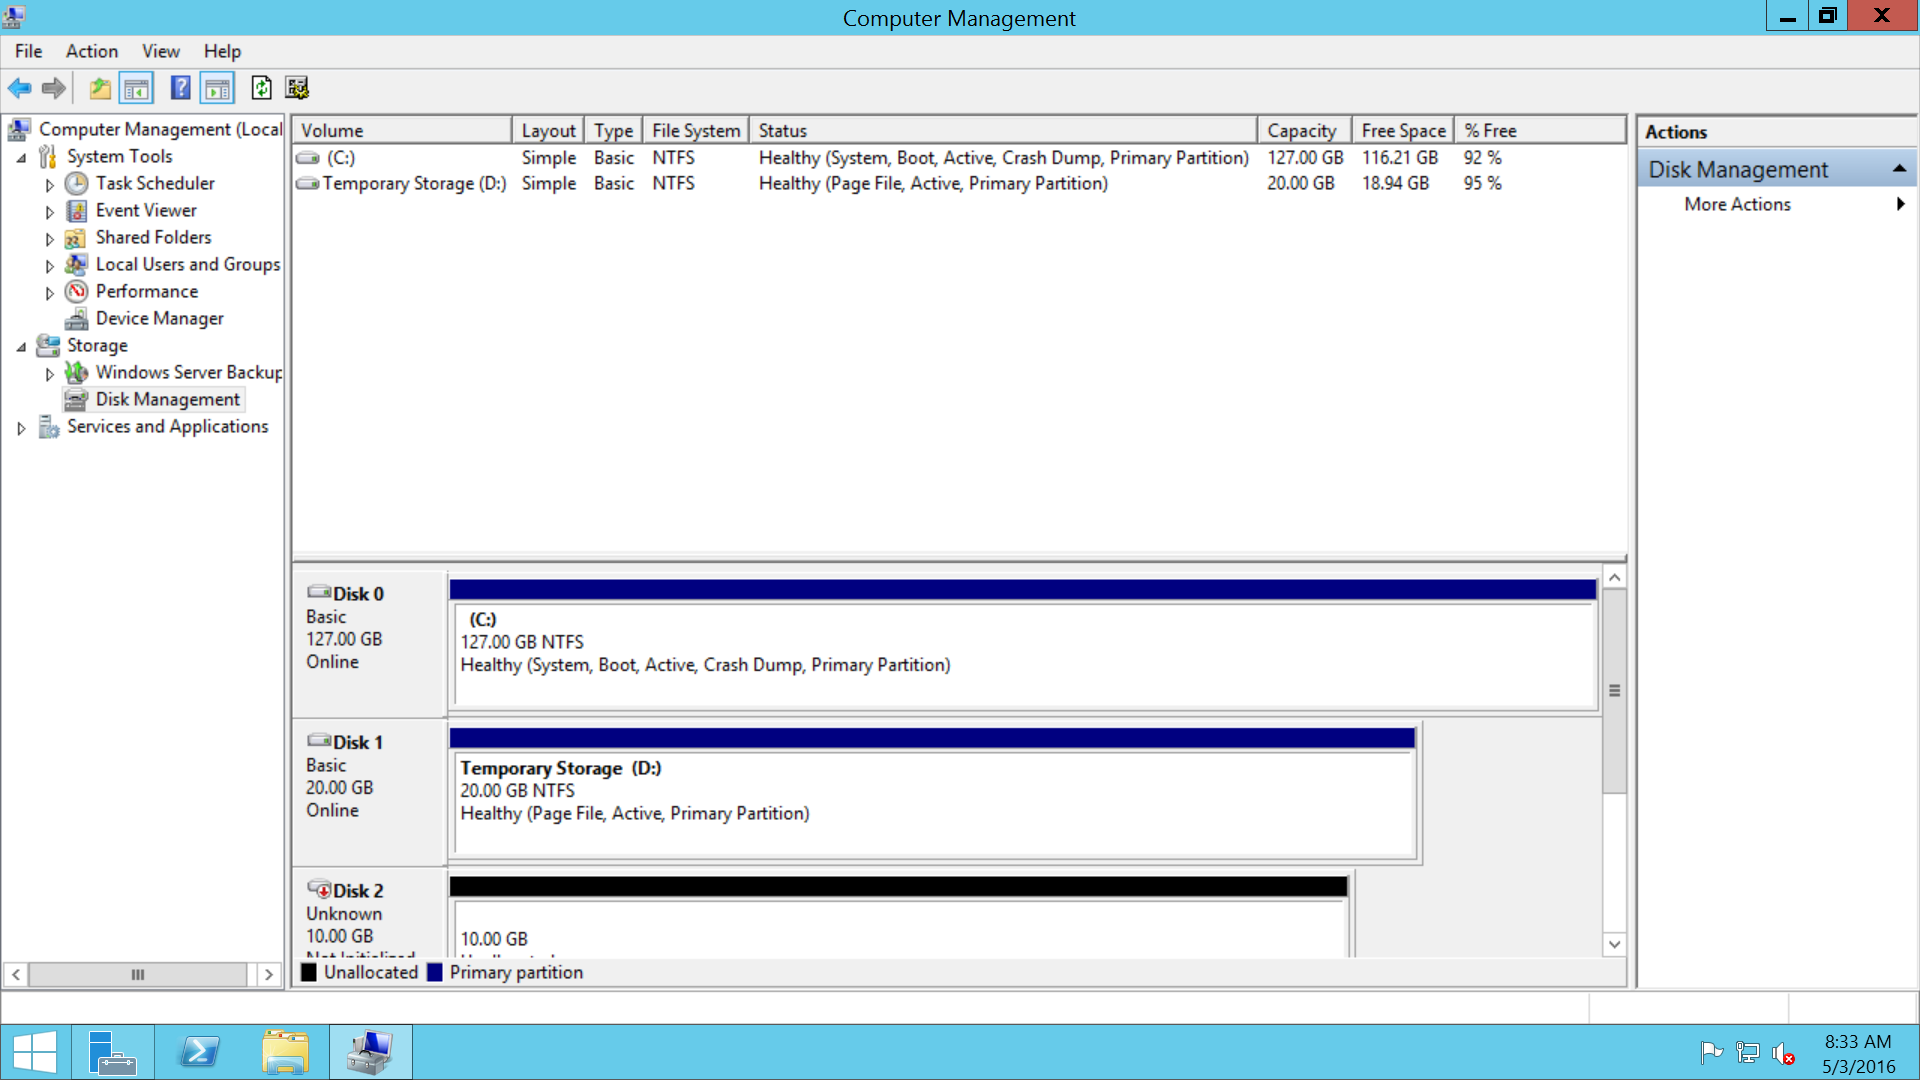
Here you will be getting the Computer Management Window

9: Disk management
Goto Storage -> Disk Management
Here you can find the disks attached on your VM

10: Azure Portal
Move to your local machine OS now and go for the Azure portal where your VM is created

Click on the VM that is created now -> Attach -> Empty Disk

11: Enter Size
Enter the size you need

Now your disk is attached towards the VM

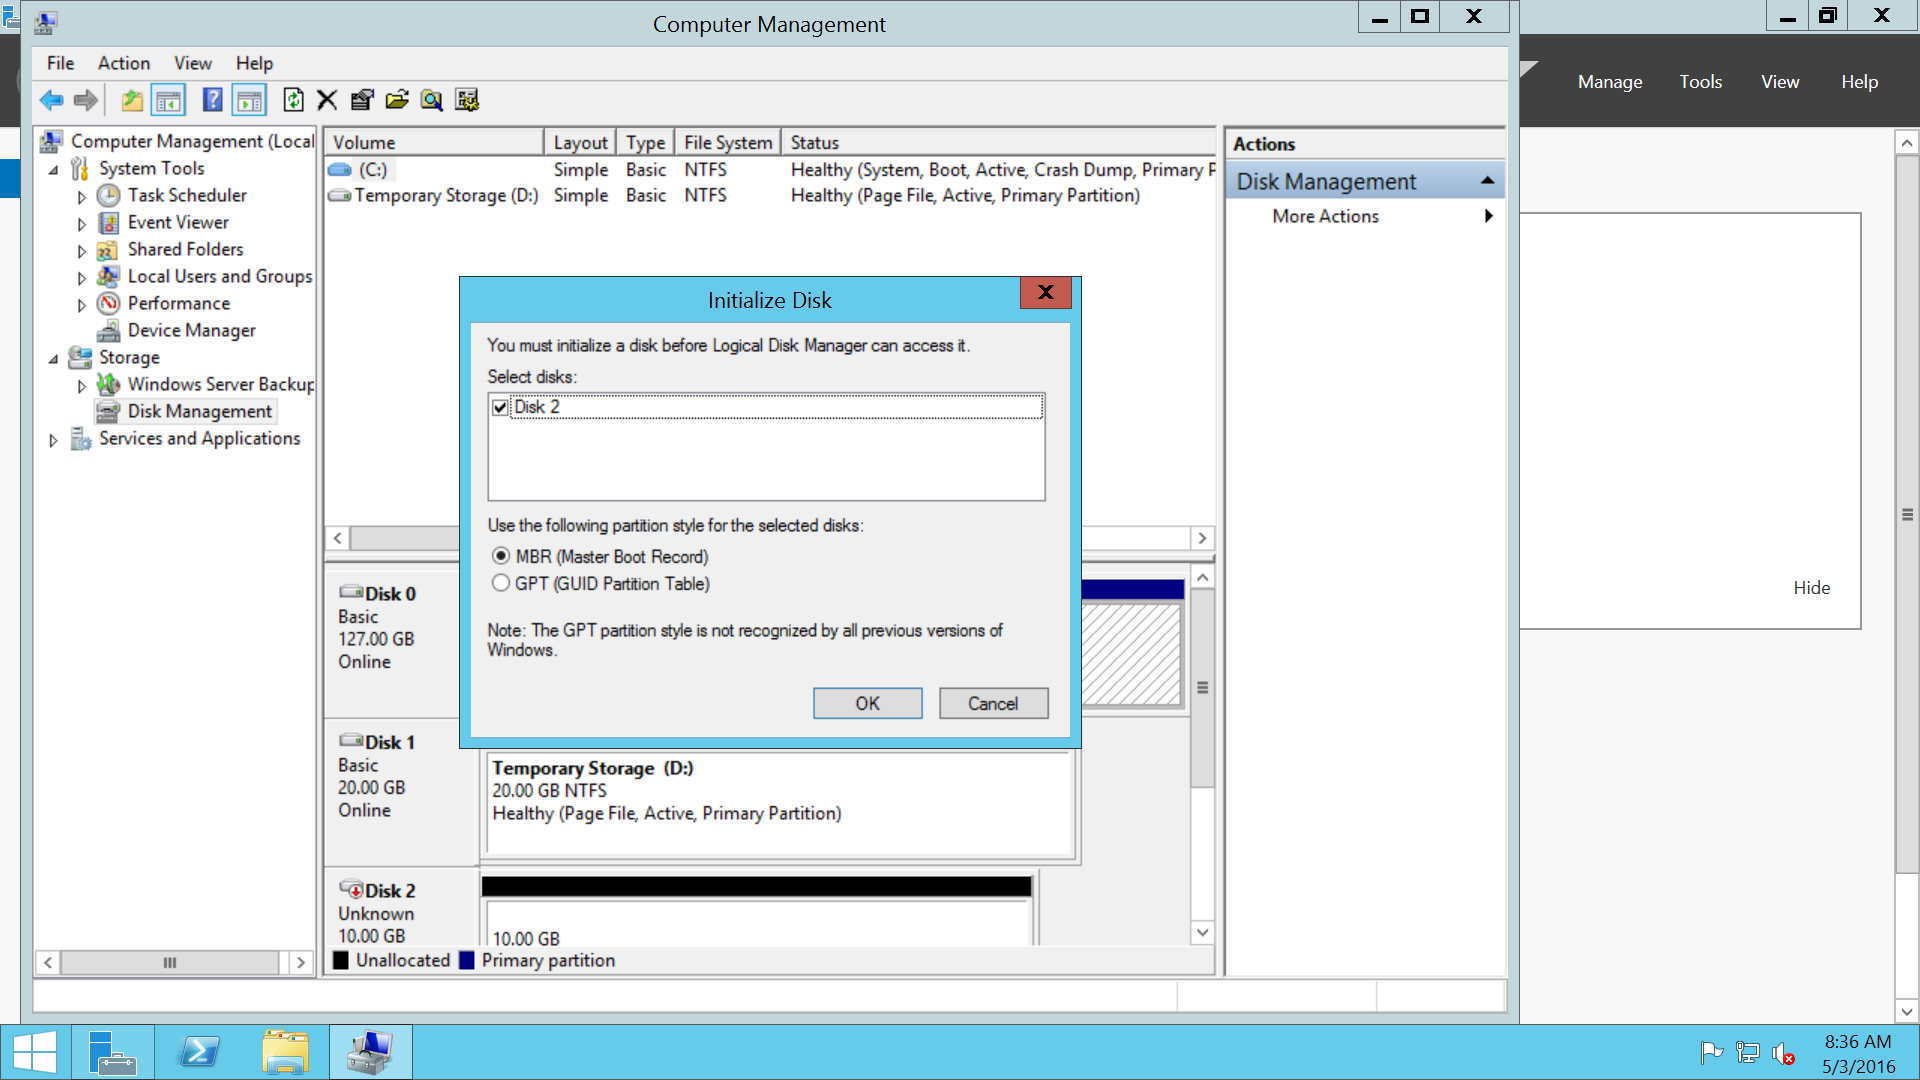
12: Find disk
Login to the VM now -> Under same Computer Management you can find the disk attached
13: Check disk
You will be getting this screen now where your Disk is attached and now it asks for initializing. Click on OK
14: Volume
Now right click on Disk 2 and go for New Simple Volume

15: Start Wizard
Click on Next

16: Allocate disk space
Allocate the disk space in the following wizard

17: Drive Letter
Allocate the Drive Letter in the next wizard

18:File system
Select the file system in the next wizard

19:Finish
Click on Finish

Now you can find the new disk that has been attached towards the VM

