SharePoint Wiki: Automatically Generating a Table Of Contents
Although SharePoint wikis can provide a lot of things, a table of contents isn't available out-of-the-box. But that's easily remedied with a tiny bit of code, and a web part.
The end result is a table of contents which looks like this:
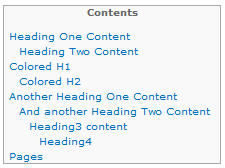
The links are automatically generated by any part of the page that uses any of the Headings from within the Markup Styles menu.
Step 1: Create and upload the code
Open Notepad, and paste the following code:
<style> #toc { display: table; border: 1px solid #aaa; background-color: #f9f9f9; font-size: 95%; padding: 7px; } #toc #tocHeader { font-weight: bold; text-align: center; } #toc a:before { /* content:"• "; */ } #toc a { line-height: 15px; margin: 10px; } #toc .toc_Level1 { margin-left: 5px; } #toc .toc_Level2 { margin-left: 15px; } #toc .toc_Level3 { margin-left: 25px; } #toc .toc_Level4 { margin-left: 35px; } </style> <div id="toc"></div> <script src="https://code.jquery.com/jquery-1.12.3.min.js"></script> <script type="text/javascript"> function GenerateTOC() { $("#toc").append('<p id="tocHeader">Contents</p>'); $(".ms-rteElement-H1, .ms-rteElement-H1B, .ms-rteElement-H2, .ms-rteElement-H2B, .ms-rteElement-H3, .ms-rteElement-H3B, .ms-rteElement-H4, .ms-rteElement-H4B").each(function(i) { var currentNode = $(this); currentNode.attr("id", "title" + i); var linkClass = (currentNode.hasClass('ms-rteElement-H1') || currentNode.hasClass('ms-rteElement-H1B')) ? "toc_Level1" : (currentNode.hasClass('ms-rteElement-H2') || currentNode.hasClass('ms-rteElement-H2B')) ? "toc_Level2" : (currentNode.hasClass('ms-rteElement-H3') || currentNode.hasClass('ms-rteElement-H3B')) ? "toc_Level3" : (currentNode.hasClass('ms-rteElement-H4') || currentNode.hasClass('ms-rteElement-H4B')) ? "toc_Level4" : ""; $("#toc").append("<a id='link'" + i + "' class='" + linkClass + "' href='#title" + i + "' title='" + currentNode.attr("tagName") + "'>" + currentNode.html() + "</a><br>"); currentNode.append(" <a href='#tocHeader'>[top]</a>"); }); } _spBodyOnLoadFunctionNames.push('GenerateTOC'); </script> |
Save the file to your desktop as WikiTOC.html.
On your wiki site, in the left-nav menu, click the All Site Content link.
From the All Site Content page, click the Site Assets link.
From the Site Assets library, click the Documents ribbon, and click Upload Document.
From the Upload Document popup, click Browse, then select the WikiTOC.html file that was previously saved to your desktop.
Step 2: Add the Web Part to your wiki page
Within your wiki site, navigate to the page you'd like to add the table of contents.
On the page, click the Edit Page button.
While editing the page, click the Insert ribbon, then click Web Part, select the Media and Content category, select the Content Editor web part (default), and click the Add button.
Once the web part is on the page, select the web part, then click the Web Part Tools Options ribbon, and click Web Part Properties.
Within the web part properties, enter the following into the Content Link:
../SiteAssets/WikiTOC.html
Within the web part properties, expand the Appearance section, change Title to Table of Contents, and change the Chrome Type to None.
Within the web part properties, click OK and save the page.
Step 3 Other pages
Repeat step two (adding the web part to your wiki page) for any other pages.
Credits
Cross posted from http://www.sbrickey.com/Tech/Blog/Post/SharePoint_Wiki_Auto_generated_Table_of_Contents with permission