Create identity in simple way using ASP.NET MVC 5
Introduction
This article explains about basic of Identity, how to create identify and use of identity in simple way using ASP.NET MVC.
Definition
Identity is a security way of authentication methods in web applications. It is identify the authorized user.
Background
There are different ways to create Identity in applications but this article explains how to create using OWIN in ASP.NET MVC. It is very important part of creating identity for application without write more coding. Identity is used to find and allow users, to enter application based on authentication and authorized. It is not allows anonymous user to enter applications.
Assembly
There are three important assemblies are using for creating identity in easy way. These assemblies are helping to programmer without write more coding to develop identity in ASP.NET MVC applications.
Three important assemblies are
- Microsoft.Asp.Net.Identiy.Core
- Microsoft.Asp.Net.Identiy.EntityFramework
- Microsoft.Asp.Net.Identiy.Owin

OWIN
ASP.NET MVC and ASP.NET are core support of Open Web Interface for .NET (OWIN). OWIN is an interface between .NET web applications and web server. The main goal of OWIN interface is to decouple server and applications. It is act as middleware.
ASP.NET MVC, ASP.NET applications using middleware can interoperate with OWIN-based applications, servers, and middleware. It is helps to develop different type of authentications methods.

OWIN is helps to Facebook, Google, and Microsoft Account and Twitter authentications. It is interact as a middleware for those authentications. Below diagram shows assembly for Facebook, Google, and Microsoft Account and Twitter.

Steps for Creating Identity in ASP.NET MVC
Following steps explains how to create identity in ASP.NET web applications.
Step 1
Open new project in visual studio and select Visual C#. In Visual C# select ASP.NET Web Application and give project name then click OK.

Step 2
Select MVC template from template type and click Change Authentication button.
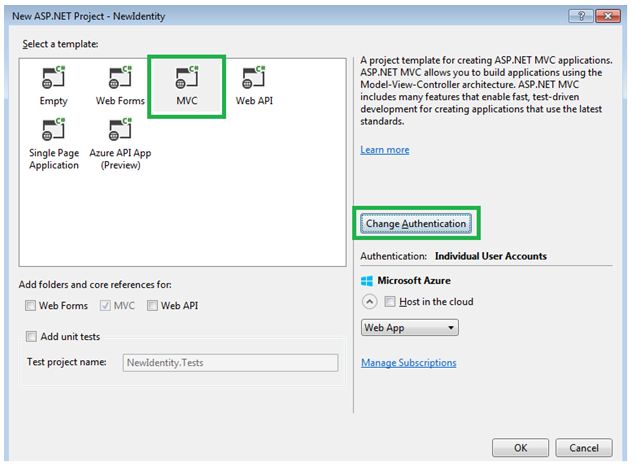
Step 3
We can use different type of Authentication we can use. Now we are going to choose Individual User Accounts and click OK button.
For applications that store user profiles in SQL Server database. User can register, or sign in using their existing account for Facebook, Twitter, Google, Microsoft, or another provider in Individual User Accounts.

Step 4
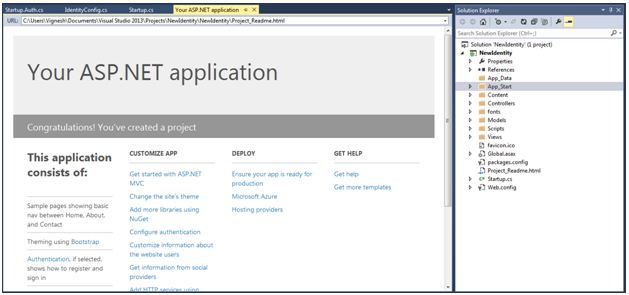
After choosing type of authentication and press OK button, you controller go back to previous window and again click OK. Will take few minute to open application after click OK button.
Step 5
After opening project, click “Startup.cs” in solution explore and we can see starting page where OWIN assembly starts.
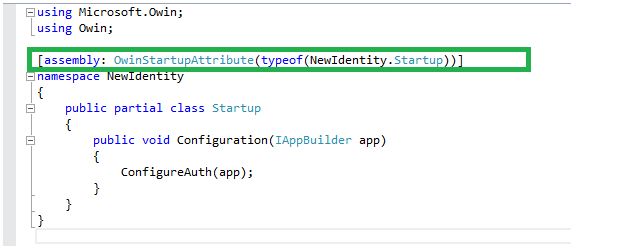
Right click on “ConfigureAuth(app)” and Go to definition page that we can see auto generated code .

We can see different type of authentication in OWIN above marked part of image. When use OWIN identity code generated automatically. Developer need not write much code.
Step 6
Now compile application, if do not have any error run the application. After running application we can see “Register” and “Login” link on top of right side in application.
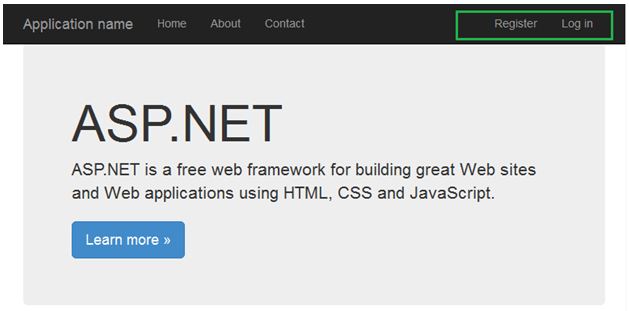
Click login link and give you are credential and you can enter our application.
Step 7
If you are a new user click register link and register your user name and password then enter application.

If you are an existing then click Login, you can enter directly using your credential.

After Login success fully we can see our username on top right side of our application.

Step 8
We can use the identity in any page in this application. We are going to enable identity in one of new page in ASP.NET MVC applications.
Create a Controller, view page and enable identity using attribute with the help of OWIN middleware.
After adding controller, we will be adding like below code in “Test” Controller.
Code for Before Enable Identity
using System;
using System.Collections.Generic;
using System.Linq;
using System.Web;
using System.Web.Mvc;

namespace NewIdentity.Controllers
{
    public class  TestController : Controller
     {
         // GET: Test
        public ActionResult Identity()
        {
            return Content("We are using Identity");
        }
         public ActionResult NonIdentiy()
        {
            return Content("We are not using Identity");
        }
    }
}
Will not ask any credential while run application using following URL http://localhost:51868/Test/Identity because do not use any attribute for enable identity. If you enable identity using attribute, each time asking credential. Without credential, we cannot enter application after enable identity. URL will be change for you, it based on your project Controller, View and port number.

Code for After Enable Identity
using System;
using System.Collections.Generic;
using System.Linq;
using System.Web;
using System.Web.Mvc;

namespace NewIdentity.Controllers
{
    public class  TestController : Controller
    {
        // GET: Test
        /// <summary>
        /// Identity In Action Result Level
        /// </summary>
        /// <returns></returns>

        [Authorize]
        public ActionResult Identity()
        {
            return Content("We are using Identity");
        }

        public ActionResult NonIdentiy()
        {
            return Content("We are not using Identity");
        }
    }
}
Using “Authorize” attribute can enable identity. Above code explains how to enable identity that enables controller level or action method level.
Identity in Controller Level
using System;
using System.Collections.Generic;
using System.Linq;
using System.Web;
using System.Web.Mvc;

namespace NewIdentity.Controllers
{
    /// <summary>
    /// Identity in Controller Level
    /// </summary>
    /// <returns></returns>
   [Authorize]
   public class  TestController : Controller
    {
        // GET: Test
        public ActionResult Identity()
        {
            return Content("We are using Identity");
        }
        public ActionResult NonIdentiy()
        {
            return Content("We are not using Identity");
        }
    }
}
If run application, directly redirect to login page because enabled identity like above code. Now run using “http://localhost:51868/Test/Identity” URL. This URL will be change for you; it is based on Controller, View and port.

After enter your credential, will redirect to your corresponding view and you can see final page.

If do not need identity for particular action method, we can disable using “AllowAnonymous” attribute. Now run “http://localhost:51868/Test/NonIdentiy��� URL does not redirect to login page, it directly run given URL because we use AllowAnonymous attribute.
Code For Anonymous
namespace NewIdentity.Controllers
{

    [Authorize]
    public class  TestController : Controller
    {
        // GET: Test
        public ActionResult Identity()
        {
            return Content("We are using Identity");
        }
        /// <summary>
        /// Disable identity to particular action result
        /// </summary>
        /// <returns></returns>
        [AllowAnonymous]
        public ActionResult NonIdentiy()
        {
            return Content("We are not using Identity");
        }
    }
}
Database in Identity
When we create identity in ASP.NET MVC database and database connection automatically will be create and store our credential. We can see the database connection in “Web.config” at connectionString tag.


Our db created an “.mdf” file in App_Data folder. When you see App_Data folder we do not see any file. Go to solution explore on top of right side, click all file icon. After click all file icon we can see “.mdf” file in App_Data.
Before click all file icon we can see like below screen shorts.

After click all file icon we can see mdf file like below screen shorts. Now you can see our mdf file name and Web.config file name same.

We can see all tables in database after expand database. Go to menu bar, select view and click Server Explore.

In server explore, under table folder we can see all tables as well as View, Store Procedures and other needed folders. “AspNetUsers” table is a main table that our credential store in the “AspNetUser” table.
Right click on AspNetUser table and click New Query like below screen short.

Now write select query and run in query window we can see all credential.

Database Connection
View pages connect to database using Entity framework. ”IdentityConfig.cs” is main for identity, it is located in inside of “App_Start” in solution explore. All database coding placed in IdentityConfig.cs. It is auto generated code. Inside of marked line code is connect to entity framework.

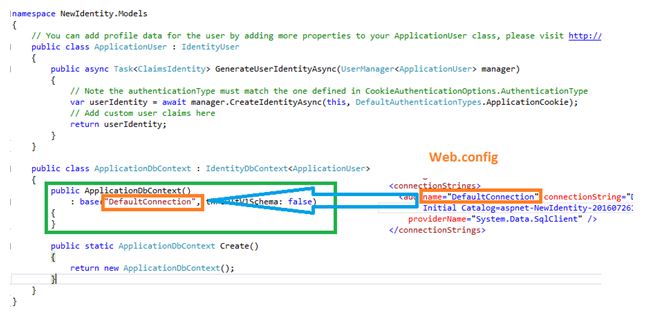
Right click on ApplicationUser class and go to definition. Now e can see the Web.config connection string name placed in inside of ApplicationDbContext class. Here we connect the database using Web.config connection string.
Conclusion
This article helps to learns about basic of identity in ASP.NET MVC with our write more code. The next part of article will explains about identity with user roles. I hope this article helps to many developers. It is very helps to students and those who are learn ASP.NET MVC newly.