Working With Power Apps For SharePoint
The general availability of Microsoft Flow and PowerApps was announced on October 31, 2016, which enables users to create workflows and custom apps. Though the official confirmation has not come yet, Chris McNulty, a senior product Manager from Microsoft, has confirmed that PowerApps and Flow will be the future replacement for InfoPath forms which are set to retire by 2026.You can catch up on the interview with him here.
PowerApps lets users create custom apps based on the data we input or based on an existing data source.
PowerApps provides mobile templates that are responsive across mobile devices. With the current functionalities provided by PowerApp, though we cannot say that it is a replacement for infopath, we can definitely see that it can mature itself into a Custom Forms Solution for SharePoint. Below is the screen shot of a SharePoint List PowerApp that I have created and viewed from a mobile device. As you can see, it is responsive and fits in perfectly with what can be called a SharePoint Mobile app.
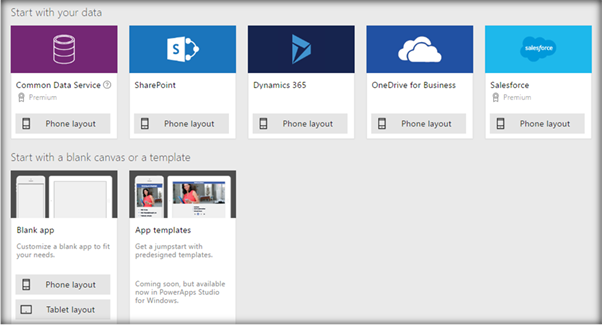
In this article, we will see how to get started with PowerApps and SharePoint integration. We can connect to SharePoint and make custom apps using PowerApps in two ways.
- Use the embedded PowerApps option available in the Modern List Experience in SharePoint Online.
- Connect to SharePoint from the PowerApps site and create a custom app.
We will cover both options in this walk-through.
Get started with PowerApps creation from SharePoint
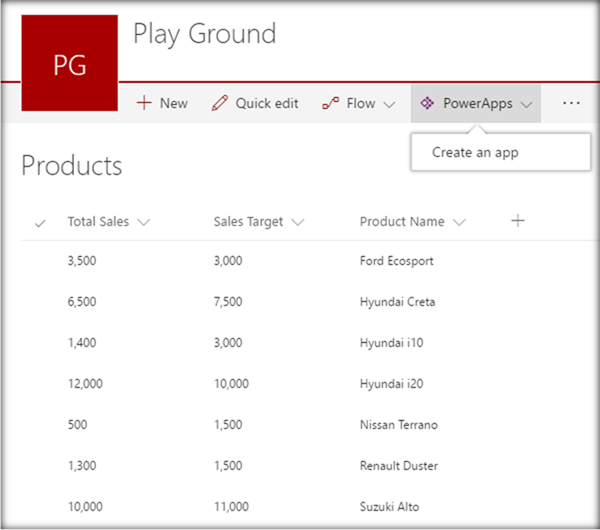
The modern list view has PowerApps creation option embedded. Clicking on it will give us the option to create a new custom app. Here, we have a Products list and we will create a new View for the list, using PowerApps.
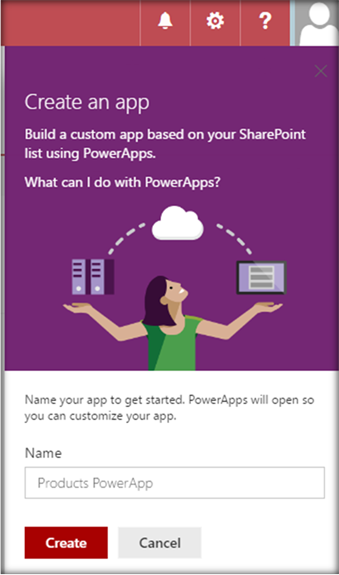
On clicking on "Create an app", a window will open up where you can specify the name for the custom app. Click on "Create".
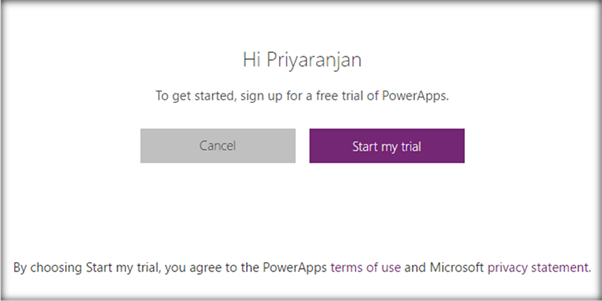
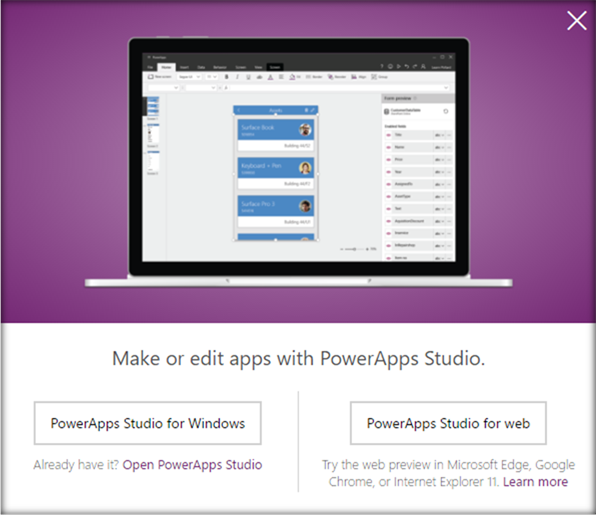
This will take us to the PowerApp site. If you are not a registered user, register yourself. You will get the below screen that lets you access the trial version.
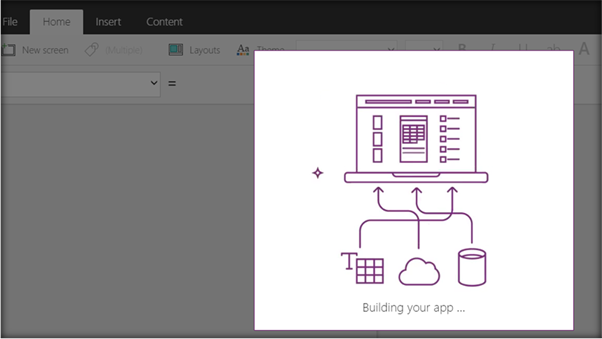
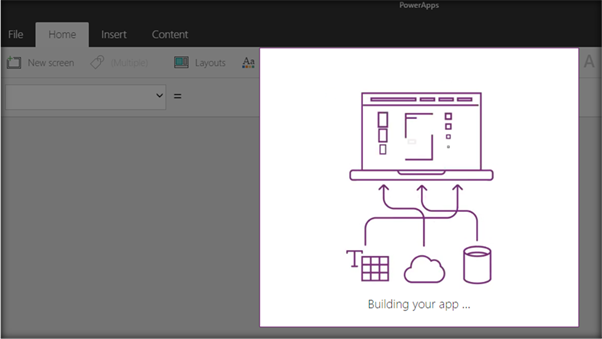
Once we are in the site, it will open up PowerApp Studio which will create the custom app based on the SharePoint list data. We also have a PowerApp Studio for desktop version that lets us work from the desktop. For the time being, we will stick to the web version of PowerApp Studio.
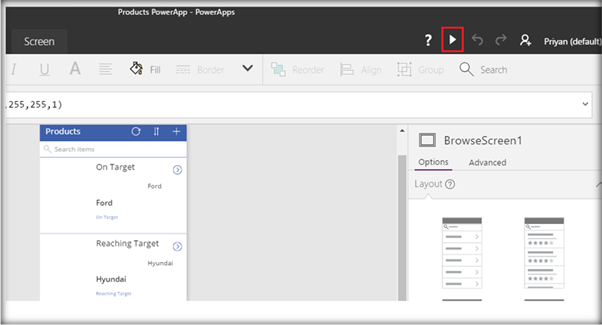
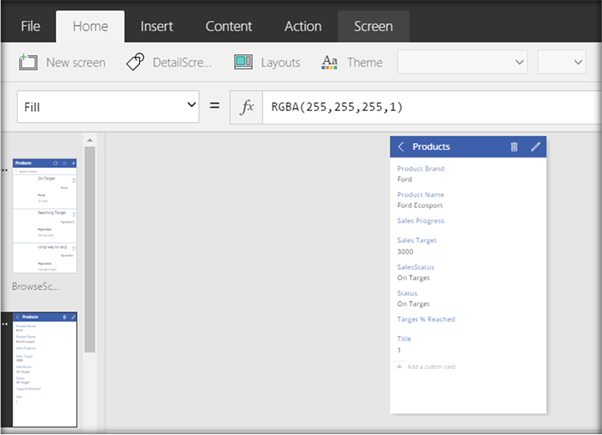
Once it is created, we can see the available screen layouts for the app in the left pane. Here, there are three screens.
*BrowseScreen - *The display page of the list that shows a summary view.
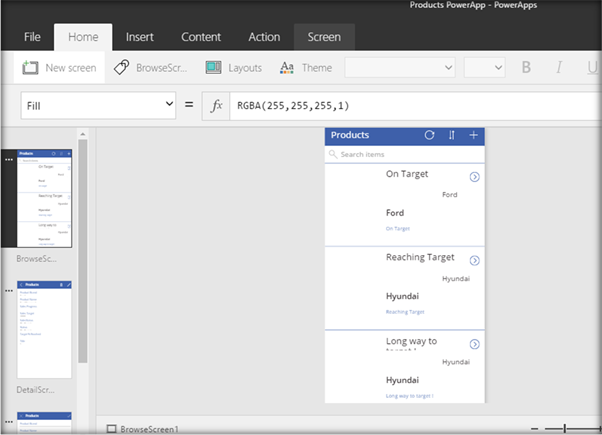
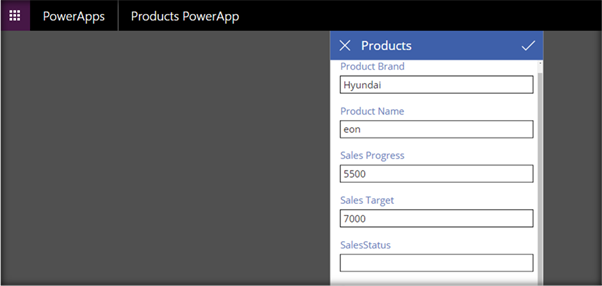
*DetailScreen - *Shows the drilled down details of a specific list item.
*EditScreen - *Clicking on Edit will show this screen that lets user edit the item.

We can customize the forms, change the layout, and modify the color scheme, using the available tools within PowerApps (which will be covered in detail in an upcoming article).
We will now see the created custom PowerApp in action. Click on the Run button in the browser.
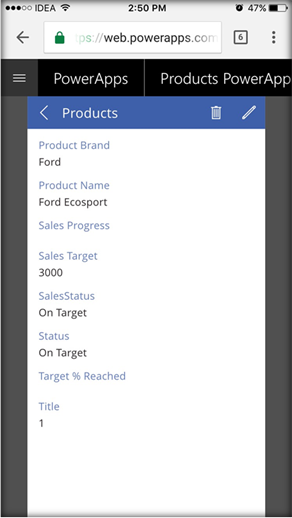
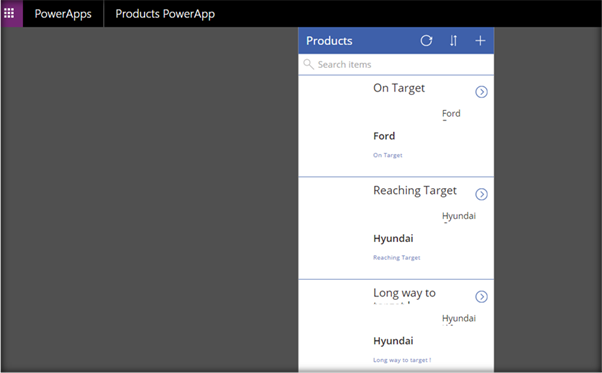
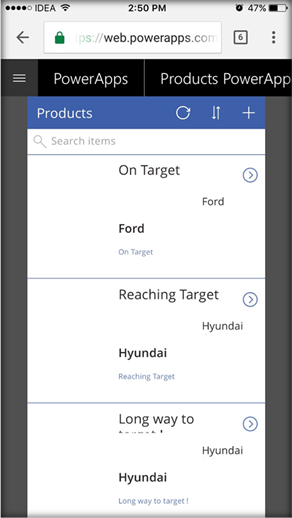
It will display the list form using the mobile template.
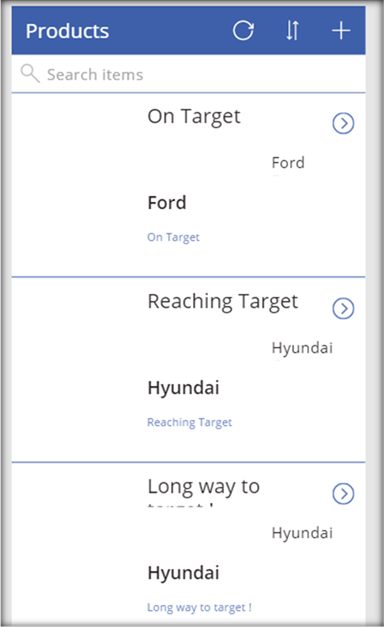
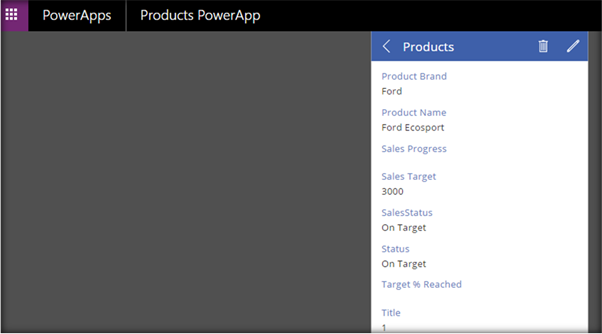
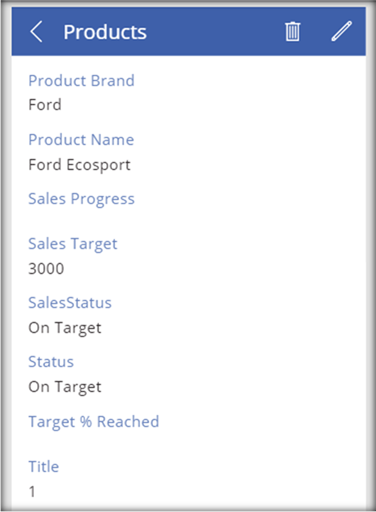
Clicking on the expand arrow will show the detailed drilled down of the list item.
From the File menu, we can save the newly created custom app.
Now, heading over to the SharePoint List, we can see the customPowerApp available as a new list view.

Clicking on it will show the below screen that lets us open the view in PowerApp Site.
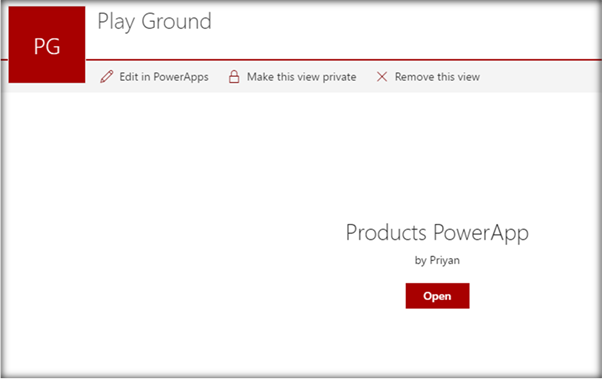
Click on "Open" and you will have the mobile SharePoint list view in the PowerApps.
Mobile View Testing
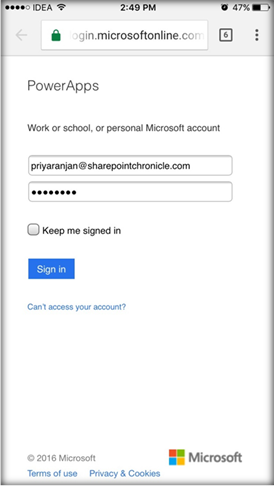
The URL of the Custom PowerApp can be shared among users and can be accessed from variety of devices. Let’s see how it behaves from a mobile device. Opening the URL will ask for the PowerApps authentication. I have provided the Office 365 credentials and signed in.
It has opened the PowerApps site in the mobile.
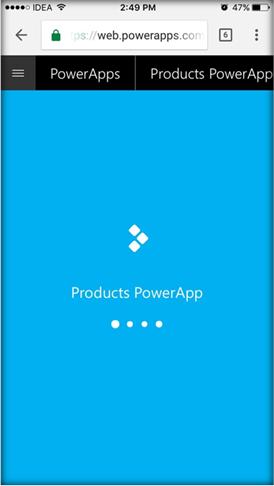
The Product's custom PowerApp, which we had created earlier, has come up in the mobile and it is responsive with respect to the mobile user agent.
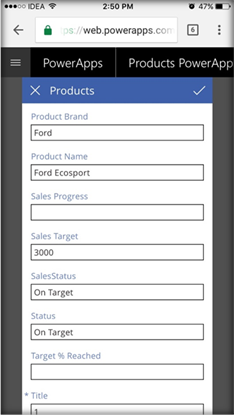
Clicking on details shows the Detail Screen of the PowerApp.

We can also edit the PowerApp and all of these things happen seamlessly in the mobile device.
Create SharePoint PowerApps from PowerApp site
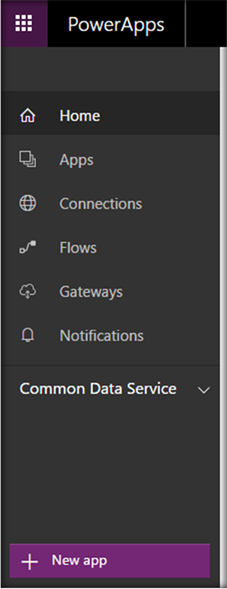
Earlier, we saw how to create the PowerApp directly from SharePoint. The other option to create a PowerApp based on SharePoint List is to connect to SharePoint from PowerApp Site. Once we log in to the site, we have the option to create a new app, as shown below.
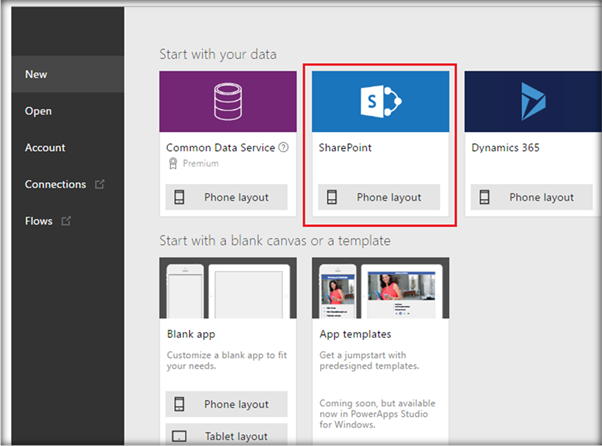
On Clicking on New app, we can choose the kind of PowerApp Studio we would like to use. We can go with either the Web based or Desktop version of PowerApps Studio.
From the next screen, choose SharePoint and proceed.
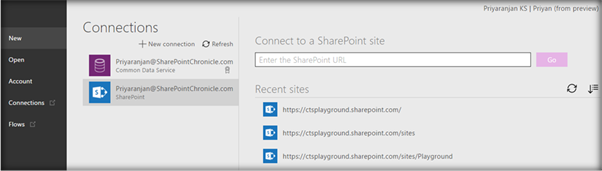
Now, let’s set up the connection to SharePoint Site. Specify the SharePoint Online site URL .
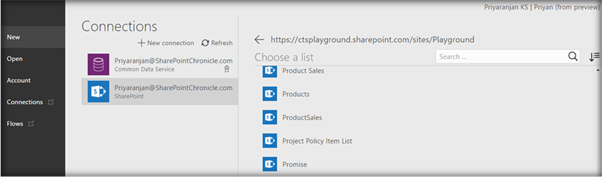
Now, specify the SharePoint List based on which we have to create the custom app.
This will create the custom PowerApp based on the SharePoint List data.
As we saw in the beginning of the article, the PowerApp created is similar and functions the same way as the app created from SharePoint.
Summary
Thus, we saw how we can create a custom PowerApp from SharePoint List. Lots of work is still going on in the PowerApps Team at Microsoft, and we can expect more features to be added on. You can stay tuned for the latest updates at the PowerApps Blog.