How to Create a Windows Azure SQL Database Server
Introduction
This article walks you the steps for creating a Windows Azure SQL Database Server using Windows Azure Platform Management Portal. Before you can create a SQL Database server, you must create and activate your Windows Azure Subscription. For more information, see [[Getting Started with SQL Database using the Windows Azure Platform Management Portal|Getting Started with Windows Azure SQL Database]].
The other methods for creating SQL Database Server include:
- Using SQL Server Management Studio (SSMS)
- Using SQL Database Management API
To create a SQL Database Server
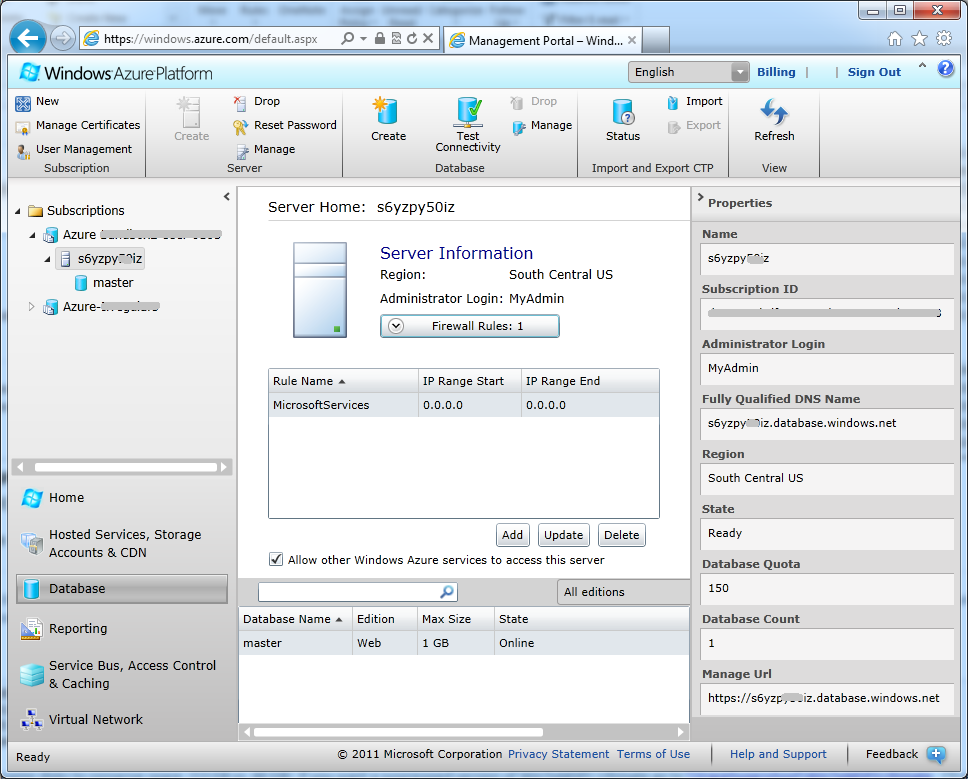
Sign in at the Windows Azure Platform Management Portal using a Windows Live ID account associated to the Windows Azure Platform subscription. The follwoing screenshot shows the portal:

Click New Database Server or **Database **as highlighted in the previous screenshot.
In the left pane, expand Subscriptions and click the subscription that the server will be associated with. Make sure the status of the subscription is Ready.
Click Create as highlighted in the following screenshot.

On the first page of the Create Server wizard, choose a geographical region where the server will be located then click Next. Choose the closest region to avoid a bandwidth-based fee and achieve the best performance. For more information on bandwidth costs, see Accounts and Billing in Windows Azure SQL Database.

Enter a new administrator login name and password for the SQL Database server and then click Next. These credientials represent the server-level principal similar to the System Administrator (sa) login in SQL Server. This account will be used to access and manage the new SQL Database server. For more information on creating user-level logins see Managing Databases and Logins in Windows Azure SQL Database.
The firewall rules page is shown next. In order to access the new SQL Database server outside the Windows Azure Platform Management Portal, you must specify one or more firewall rules. The checkbox labeled Allow other Windows Azure services to access this server should be checked if you want to allow other Windows Azure services and applications to access your SQL Database Server. Click the Add button to add a firewall rule for each IP address ranges that will be permitted to access your new SQL Database server. After adding firewall rules for each IP address
range, click Finish.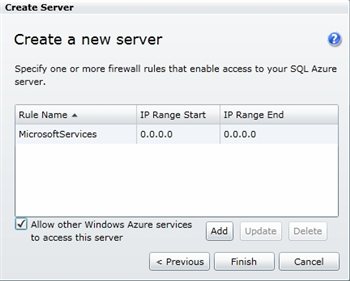
The server is created with a master database that contains the firewall rules.
The server name is a random string. The server name cannot be changed.
After you have created a SQL Database server, you can configure [[Windows Azure SQL Database firewall]] to allow client access, and create a SQL Database.
See Also
- [[How to Create a Windows Azure SQL Database]]
- [[Getting Started with Windows Azure SQL Database using the Windows Azure Platform Management Portal|Getting Started with Windows Azure SQL Database]]
- [[How to Manage Windows Azure SQL Database Servers using Windows PowerShell]]
- [[Windows Azure SQL Database TechNet Wiki Articles Index]]