Exchange 2010 - Setting POP/IMAP X509CertificateName when using a WildCard Certificate
Many organizations make use of a WildCard Certificate in their Exchange environment. This makes sense when you have quite a number of SAN names to use.
In Exchange 2010 or Exchange 2013, if you try and update the X.509 Certificate Name when using a WildCard Certificate, whether it is in the EAC or ECP, you are presented with a warning to advise you to use PowerShell to update the name.
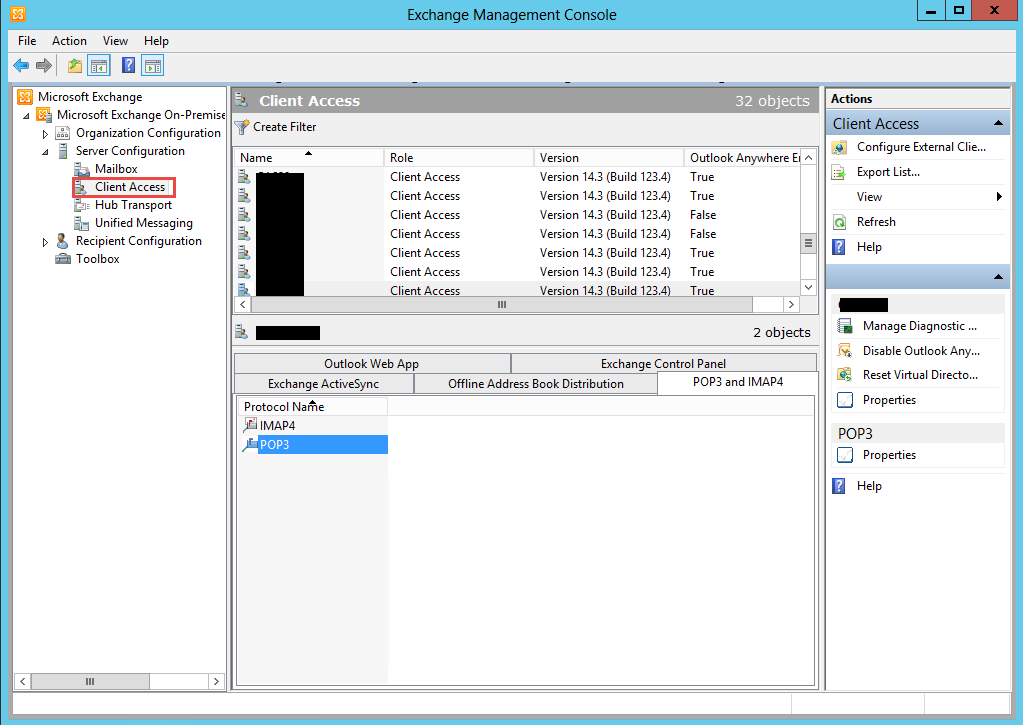
Let's take a look at what we are referring to. Launch the Exchange Control Panel (ECP) on your server and Expand "Microsoft Exchange On-Premise". Next, expand "Server Configuration and click "Client Access" (as shown below).
https://collaborationpro.com/wp-content/uploads/2017/11/CAS1.png
Now, click a CAS Server and click the POP3 and IMAP4 tab.
https://collaborationpro.com/wp-content/uploads/2017/11/CAS2.png
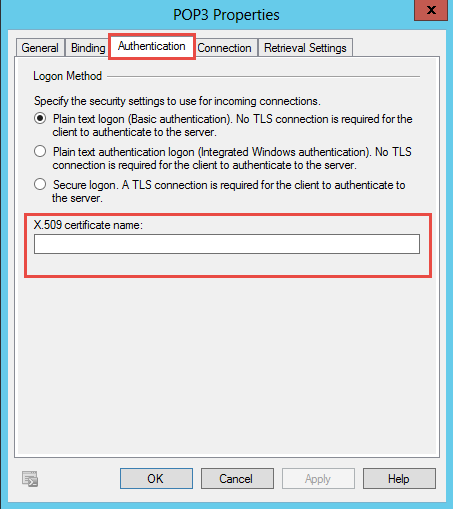
Next step is to double-click POP3 and click the "Authentication" tab.
https://collaborationpro.com/wp-content/uploads/2017/11/CAS3.png
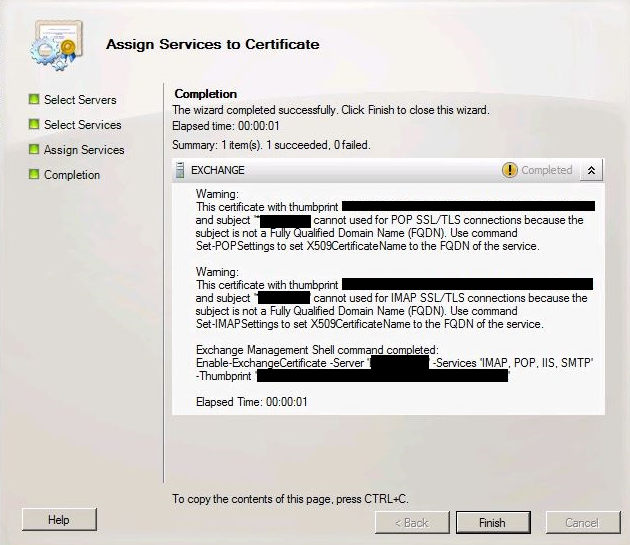
If you have a normal SAN cert, you can enter the name to use. However, if you are using a WildCard cert and type in the name and click apply you are presented with the following error/warning:
https://collaborationpro.com/wp-content/uploads/2017/11/CAS4.png
So, not to worry, we can use the Exchange Management Shell to set the information. Take note, the same error is given for Exchange 2013.
Launch the Exchange Management Shell and type in the following commands to set the POP/IMAP settings:
- Set-ImapSettings -server CAS -X509CertificateName imap.domain.com
- Set-PopSettings -server CAS -X509CertificateName pop.domain.com
The last step is to Stop and Start the POP and IMAP services. Once done you can monitor the event log for any errors.