Exchange 2010 - Creating a File Witness Share
In your Exchange Environment, whether it be a 2010 or higher version, you probably are planning on setting up a DAG. While we not going to go through the setup of creating the DAG, one of the important parts is ensuring you have Quorum and you can do so by setting up a File Witness Share. Generally, you will put this on another Exchange Server.
Let's look at going through this process, it won't take you long to set up the share. Log onto a server where you want to place this FSW and open up your file explorer.
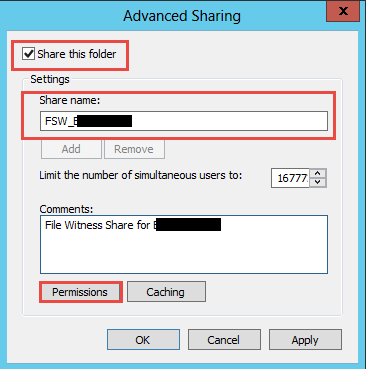
Create a new folder. It must match the same name in Exchange. Once created, go to the properties of the folder and then click on the Sharing Tab and then click Advanced Sharing.
https://collaborationpro.com/wp-content/uploads/2017/12/share1-1.png
- Make sure you set the checkbox to "Share this folder".
- Give the share a name (the same as you going to use in Exchange or have set up).
- Click the Permissions button.
https://collaborationpro.com/wp-content/uploads/2017/12/share2.png
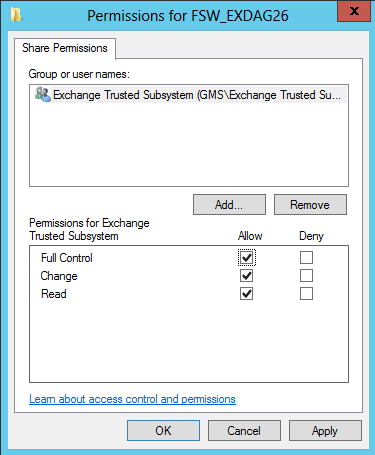
- Remove the "Everyone" User.
- Add in the "Exchange Trusted Subsystem" Group and ensure it has Full Control.
- Click Apply until the share is created.
The last step is to tell Exchange what the Witness server is and the Share. Personally, we like to have an Alternate Witness server added which we will show you in this example.
https://collaborationpro.com/wp-content/uploads/2017/12/share3.png
Command used:
- Set-DatabaseAvailabilityGroup -Identity EXDAG26 -WitnessServer servername1.local -WitnessDirectory C:\FSW_dag1 -AlternateWitnessServer servername2.local -AlternateWitnessDirectory C:\FSW_dag1
Give it a few minutes and Exchange will do the rest. If you get the error that the Exchange Trusted Subsystem is not part of the Administrators group on the local machine then add it.