SAP Express Edition on Azure: Networking Setup and Troubleshooting
Go to the SAP client library:

Click, get started, create an account:

You will need to activate your account, SAP will send you a mail confirmation:

Once activated you have to accept the terms and conditions.
Then you need to whitelist the subscription in which you are going to work with SAP. Provide a name for the account, then select the Cloud Provider and then provide the Subscription ID related. Click on Authorize

You have to provide access to SAP:

Then go to the solutions and Select the SAP Express edition

Then provide the instance details:
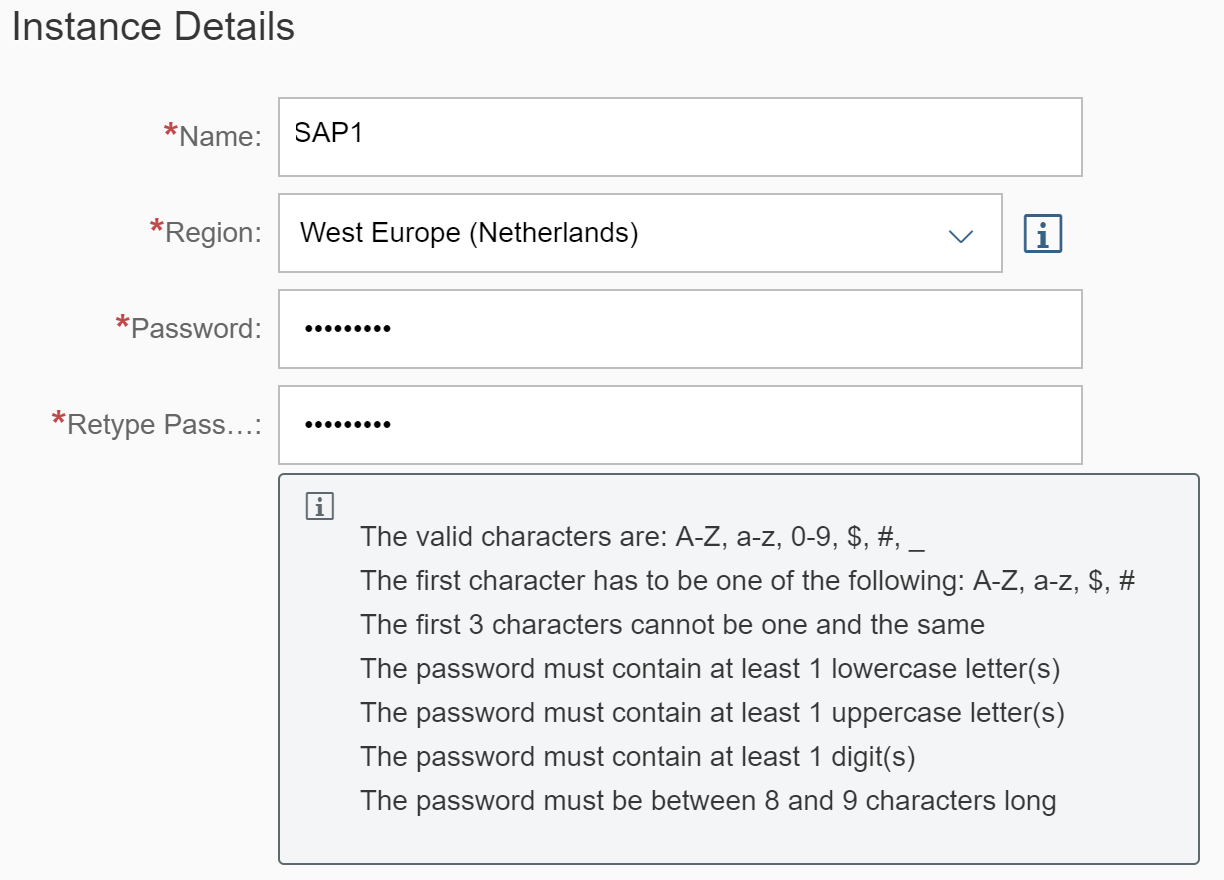
Thenk click on left-bottom pag "advanced mode":

Do not change the default values and proceed to step 4

Mark the checkbox for the Static IP Address:

Access Points:
Then provide the Port range: this includes the SAP web dispatcher, SAP Host agent, ports for statistic connections, IDE for XSA Deployment, ID Core Service, Default DP Server port, Custom tenant ports, Custom HTTP, SSH

Please review the following table for Port Specification:
https://wikiazure.com/wp-content/uploads/2018/02/sap12-daverendon.png
https://wikiazure.com/wp-content/uploads/2018/02/sap13-daverendon.png
Note: we will review in detail the Network Security Group access to allow inbound/outbound traffic.
Then provide the password for this solution:
https://wikiazure.com/wp-content/uploads/2018/02/sap14-daverendon.png
Finally, review the schedule details for your instance. Click review
https://wikiazure.com/wp-content/uploads/2018/02/sap15-daverendon.png
Then click create.
Click OK
https://wikiazure.com/wp-content/uploads/2018/02/sap16-daverendon.png
SAP will assign a private key for your solution, click Store
https://wikiazure.com/wp-content/uploads/2018/02/sap17-daverendon.png
Download and save the private key locally as a privacy enhanced mail file (.PEM file extension).
https://wikiazure.com/wp-content/uploads/2018/02/sap18-daverendon.png
Click Download:
Then you need to wait for some minutes to use the solution.
The process might take a while:
https://wikiazure.com/wp-content/uploads/2018/02/sap19-daverendon.png
After some minutes you will notice that the solution is up and running:
https://wikiazure.com/wp-content/uploads/2018/02/sap20-daverendon.png
Click on the solution and you will see the related details:
https://wikiazure.com/wp-content/uploads/2018/02/sap21-daverendon.png
https://wikiazure.com/wp-content/uploads/2018/02/sap22-daverendon.png
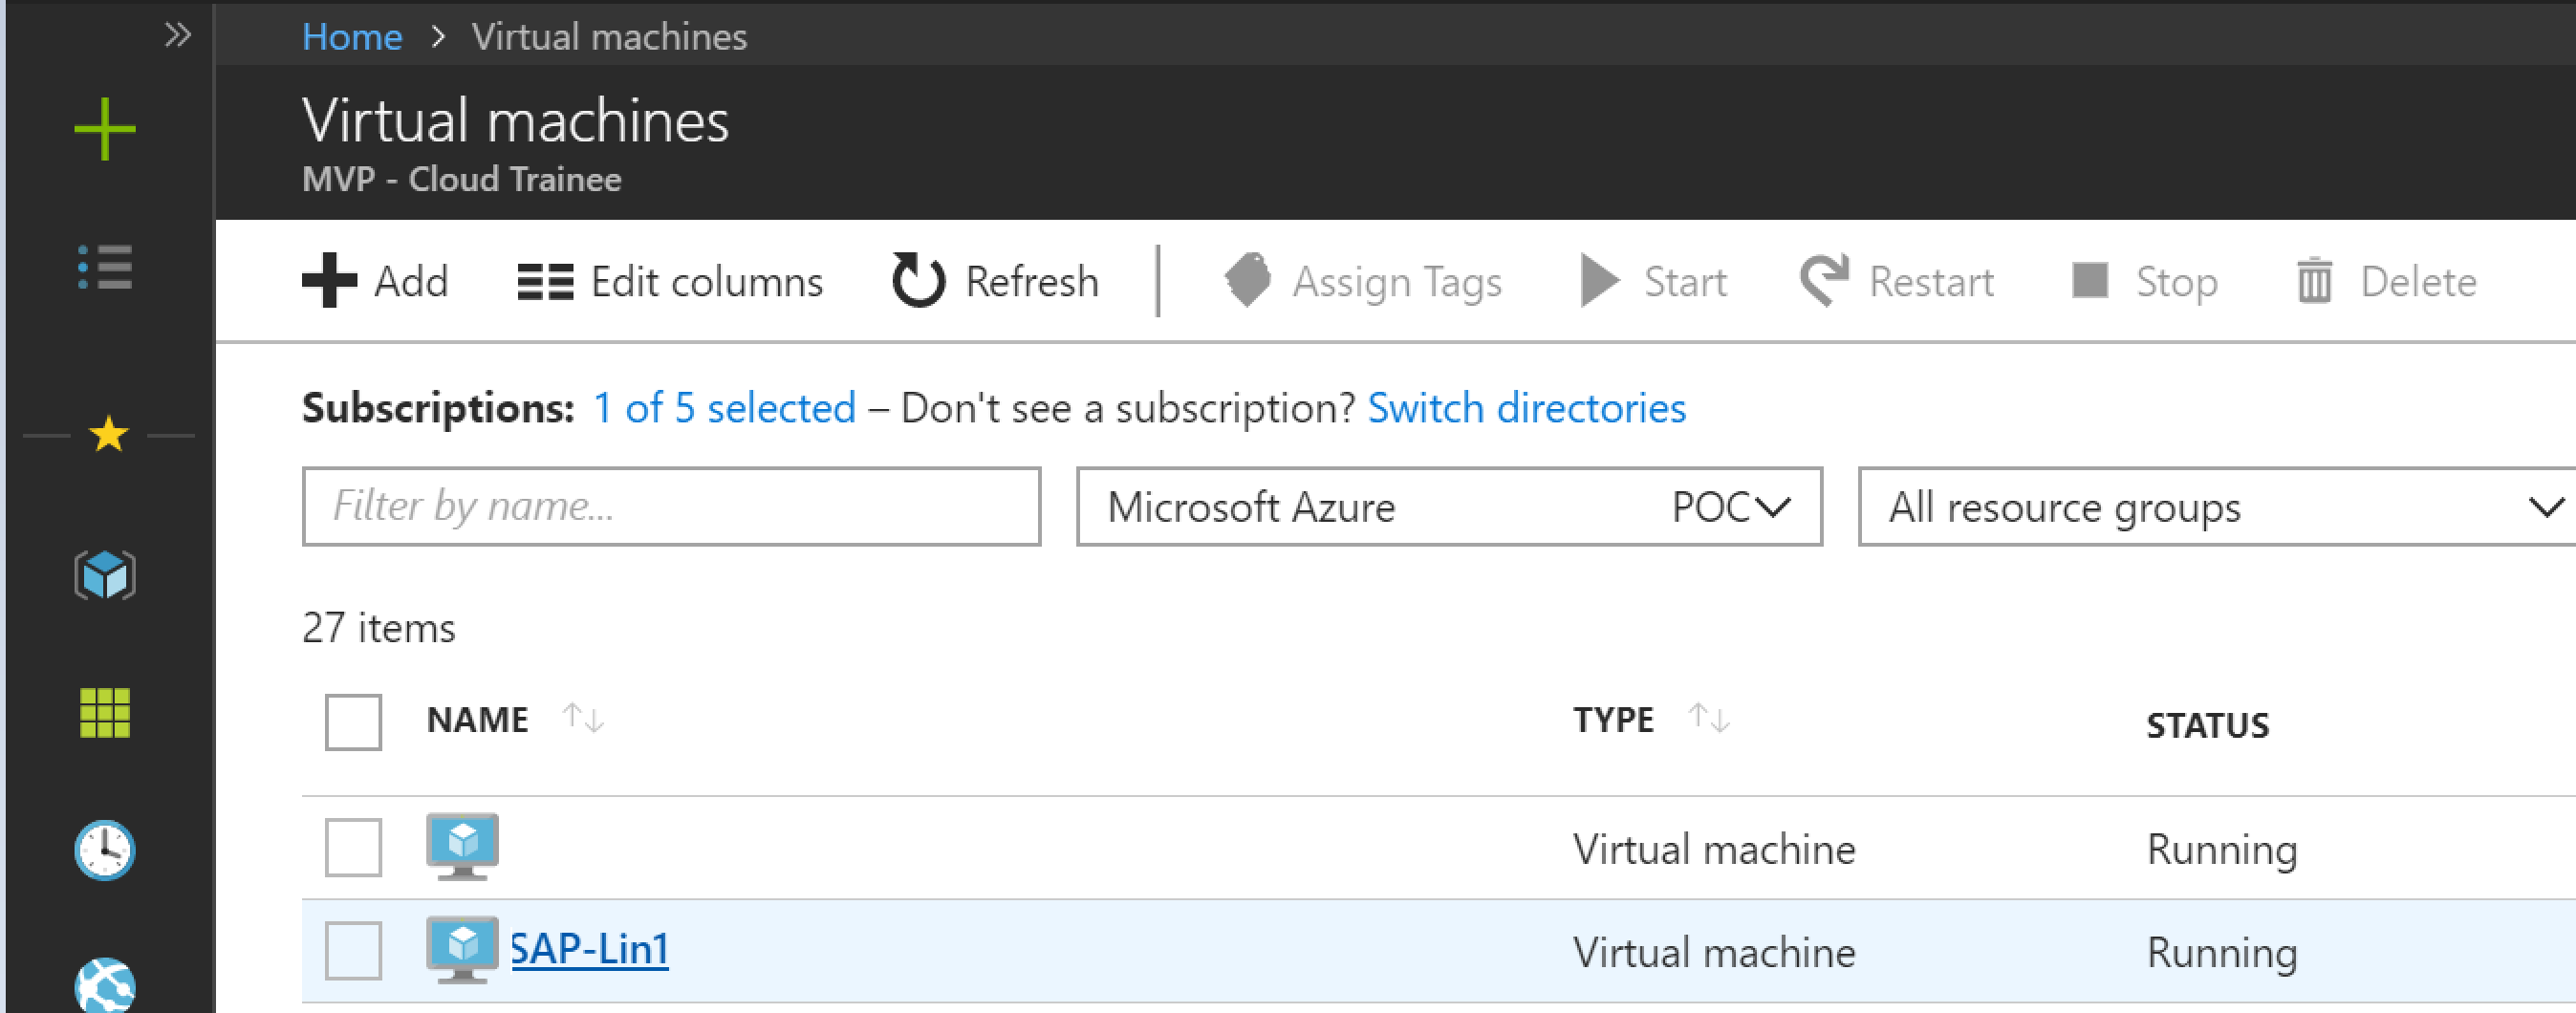
Now go to the Azure Portal, you will see the VM up and running:

https://wikiazure.com/wp-content/uploads/2018/02/sap25-daverendon.png
To connect to your VM you can do so by SSH using Putty or another client, you could also use the Azure Serial Console feature:
https://wikiazure.com/wp-content/uploads/2018/02/sap26-daverendon.png
If you want to try the Azure Serial Console Preview, you can do so by going to your VM blade, scroll down and you will select the Console Access Option:
https://wikiazure.com/wp-content/uploads/2018/02/sap27-daverendon.png
TIP: Please note that Access to the Azure Serial Console is in preview and is NOT recommended for use with any production systems. The preview is focused on West Central US, West Europe, and Azure Canary regions, use with VMs outside these regions may yield varying results. For more information see https://aka.ms/serialconsolehelp.
Be sure to enable Boot diagnostics:
https://wikiazure.com/wp-content/uploads/2018/02/sap28-daverendon.png
Go to Boot diagnostics and click ON, then select your storage account to store all the logs
https://wikiazure.com/wp-content/uploads/2018/02/sap29-daverendon.png
Click Save.
Check your Networking configuration!
If you have troubles connecting to your VM please review your networking settings, go to your Network Security Group(NSG) and review the traffic rules:
https://wikiazure.com/wp-content/uploads/2018/02/sap30-daverendon.png
Click on Inbound security rules, then click on Add:
https://wikiazure.com/wp-content/uploads/2018/02/sap31-daverendon.png
Change to Basic:
https://wikiazure.com/wp-content/uploads/2018/02/sap32-daverendon.png
Add the SSH rule, click OK.
https://wikiazure.com/wp-content/uploads/2018/02/sap33-daverendon.png
Then we will add the Custom HTTP rule:
https://wikiazure.com/wp-content/uploads/2018/02/sap34-daverendon.png
Click add, select advanced and select Custom, then type the following port range: 59013-59014
Click OK.
Now we will add the custom tenants port rules, type the parameters as shown below:
https://wikiazure.com/wp-content/uploads/2018/02/sap-35daverendon.png
Click OK.
Now we will add the Default_DPServer_Port custom rule:
https://wikiazure.com/wp-content/uploads/2018/02/sap36-daverendon.png
Click OK.
Now we will add the DICore Service Rule:
https://wikiazure.com/wp-content/uploads/2018/02/sap37-daverendon.png
Click OK
Now we will add the IDE for XSA Development rule:
https://wikiazure.com/wp-content/uploads/2018/02/sap38-daverendon.png
Click OK.
Now we will add the Port for statistics server connections rule:
https://wikiazure.com/wp-content/uploads/2018/02/sap39-daverendon.png
Click OK.
Now we will add the SAP Host Agent Rule:
https://wikiazure.com/wp-content/uploads/2018/02/sap40-daverendon.png
Click OK.
Now we will add the SAP Web Dispatcher (HANA) rule:
https://wikiazure.com/wp-content/uploads/2018/02/sap41-daverendon.png
Click OK.
Now we will add the SAP Web Dispatcher (HANA) rule:
https://wikiazure.com/wp-content/uploads/2018/02/sap42-daverendon.png
Click OK.
Now we will add the SQL and MDX access port to the SYSTEM database rule:
https://wikiazure.com/wp-content/uploads/2018/02/sap43-daverendon.png
Click OK.
Now we will add the SQL and MDX access to the first tenant of a HANA system rule:
https://wikiazure.com/wp-content/uploads/2018/02/sap44-daverendon.png
Click OK.
Now we will add the XSA rule:
https://wikiazure.com/wp-content/uploads/2018/02/sap45-daverendon.png
Now we will add the second XSA rule:
https://wikiazure.com/wp-content/uploads/2018/02/sap46-daverendon.png
Click OK.
Now we will add the last Custom HTTP rule:
https://wikiazure.com/wp-content/uploads/2018/02/sap47-daverendon.png
Click OK.
Now please assure you have attached the NSG to the NIC - Network Interface Card, Go to your NICs and select the SAP NIC, Then Select Network Security Group from the blade and click Edit:

Then select your NSG for SAP:
https://wikiazure.com/wp-content/uploads/2018/02/sap50-daverendon.png
Then Click Save:
https://wikiazure.com/wp-content/uploads/2018/02/sap51-daverendon.png
Notes: you need to shutdown the VM in order to apply any NIC configurations. You can also spin up the VM again from the SAP Cloud Appliance Library or from the Azure Portal.
I suggest you verify your instance from the SAP Portal:
https://wikiazure.com/wp-content/uploads/2018/02/sap53-daverendon.png
You can enable OS processes monitoring from the SAP Cloud Appliance Library Portal:
https://wikiazure.com/wp-content/uploads/2018/02/sap54-daverendon.png
https://wikiazure.com/wp-content/uploads/2018/02/sap55-daverendon.png
Troubleshooting:
If you can´t connect to your VM, enable the Network Watcher capability, you can do so by typing "Network watcher " on the Search tab of the Azure Portal and enable it on a specific region or for the entire regions, then click enable:
https://wikiazure.com/wp-content/uploads/2018/02/sap56-daverendon.png
https://wikiazure.com/wp-content/uploads/2018/02/sap58-daverendon.png
Then go back to the VM then, go to the VM blade and select Diagnostics and Solve problems:
https://wikiazure.com/wp-content/uploads/2018/02/sap57-daverendon.png
Then you can verify if you are receiving packets through the NSG:

Put your IP address and remote port, then click Check. You will see the detail on whether if there is any rule blocking the traffic:
https://wikiazure.com/wp-content/uploads/2018/02/sap60-daverendon.png
In this case you could add another inbound rule to test the inbound traffic:
https://wikiazure.com/wp-content/uploads/2018/02/sap61-daverendon.png
Result:
https://wikiazure.com/wp-content/uploads/2018/02/sap62-daverendon.png
Ensure you have the same Static IP address assigned to your SAP VM on SAP Cloud Appliance Library and the Azure Portal.
- Generate a second IP Address in your NIC and assign the Correct Static IP address.
- Generate a temporary "NIC-temporary"
- Then dissociate the "NIC2-original" from the VM,
- Now make the second IP Address primary so that you can assure you have the right IP address associated.
If you need to change /update the ip address in the Azure Portal, you can do it vía Azure Shell with the following cmd:
$ az network nic ip-config update --name "SAP-PublicIP" --nic-name "SAP-Nic2" --resource-group "SAPCAL-Network-westeurope" --make-primary
** Be sure to stop your VM before
https://wikiazure.com/wp-content/uploads/2018/02/sap63-daverendon.png
https://wikiazure.com/wp-content/uploads/2018/02/sap65-daverendon.png
Now go back to the NIC2-original and associate it to the VM:
https://wikiazure.com/wp-content/uploads/2018/02/sap66-daverendon.png
Now disassociate and delete the Nic-temporary.
Finally go back to the NIC2 and attach the NSG related to the ports we previously assigned, click Save
https://wikiazure.com/wp-content/uploads/2018/02/sap67-daverendon.png
Now go back to your VM, and start it.
https://wikiazure.com/wp-content/uploads/2018/02/sap68-daverendon.png