ASP.NET Core 2.0: User Role Base Dynamic Menu Using Dependency Injection
Introduction

Before we start this article kindly read the previous article,
In the previous article, we have discussed in detail about how to use ASP.NET Core Identity in MVC Application for creating user roles and displaying the menu depending on user roles.
In this article, we will see in detail how to display role-based dynamic menu after a user logs in. For this, we will create a Menu Master table and insert a few records to display the menu and link the URL to the menu based on the logged in user's role.
Here we will see how to:
- Create default admin and manager users.
- Create MenuMaster table and insert a few sample records for Admin and Manager roles to display menus.
- Redirect unauthenticated users to the login page.
- Display menu dynamically based on logged in user.
Prerequisites
Make sure you have installed all the prerequisites on your computer. If not, download and install all, one by one.
- First, download and install Visual Studio 2017 from this link
- SQL Server 2014 or above
Step 1: Create a Database
This is in continuation of the previous article as we have told that, we will be using a Common Database for both ASP.NET Identity tables and for our own new tables.
In the previous article, we have explained about creating User Role, here for Role base Menu management we need to make a relationship table between ASP.NET Roles table and our menu table.
Let us see in detail about how to create our new Menu Table which has a relationship with ASP.NET Identity AspNetRoles table.
Here we can see Field used for MenuMaster

Firstly, we will create a Database and set the connection string in appsettings.json file for DefaultConnection with our new database connection. We will be using this database for ASP.NET Core Identity table creation.
Create Database: Run the following script to create our database MenuMaster table and sample Menu insert rows script.
USE MASTER
GO

-- 1) Check for the Database Exists .If the database is exist then drop and create new DB
IF EXISTS (SELECT [name] FROM  sys.databases WHERE  [name] = 'AttendanceDB'  )
DROP DATABASE  AttendanceDB
GO

CREATE DATABASE  AttendanceDB
GO


USE AttendanceDB
GO

IF EXISTS ( SELECT  [name] FROM  sys.tables WHERE  [name] = 'MenuMaster' )
DROP TABLE  MenuMaster
GO

CREATE TABLE  MenuMaster
(
   MenuIdentity int  identity(1,1),
   MenuID VARCHAR(30)  NOT NULL,
   MenuName VARCHAR(30)  NOT NULL,
   Parent_MenuID  VARCHAR(30)  NOT NULL,
   User_Roll [varchar](256) NOT NULL,
   MenuFileName VARCHAR(100) NOT NULL,
   MenuURL VARCHAR(500) NOT NULL,
   USE_YN Char(1) DEFAULT  'Y',
   CreatedDate datetime
CONSTRAINT [PK_MenuMaster] PRIMARY KEY  CLUSTERED
(
  [MenuIdentity] ASC    ,
  [MenuID] ASC,
  [MenuName] ASC
)WITH (PAD_INDEX  = OFF, STATISTICS_NORECOMPUTE  = OFF, IGNORE_DUP_KEY = OFF, ALLOW_ROW_LOCKS  = ON, ALLOW_PAGE_LOCKS  = ON) ON  [PRIMARY]
) ON  [PRIMARY]

select * from MenuMaster
-- Insert Admin User Details
Insert into  MenuMaster(MenuID ,MenuName,Parent_MenuID,User_Roll,MenuFileName,MenuURL,USE_YN,CreatedDate)
    Values('AUSER','ADMIN Dashboard','*','ADMIN','INDEX','ADMINC','Y',getDate())
 Insert into  MenuMaster(MenuID ,MenuName,Parent_MenuID,User_Roll,MenuFileName,MenuURL,USE_YN,CreatedDate)
    Values('AAbout','About Admin','*','ADMIN','INDEX','ADMINAC','Y',getDate())
Insert into  MenuMaster(MenuID ,MenuName,Parent_MenuID,User_Roll,MenuFileName,MenuURL,USE_YN,CreatedDate)
    Values('LStock','Live Stock','AUSER','ADMIN','INDEX','StockC','Y',getDate())
Insert into  MenuMaster(MenuID ,MenuName,Parent_MenuID,User_Roll,MenuFileName,MenuURL,USE_YN,CreatedDate)
    Values('Profile','User Details','AUSER','ADMIN','INDEX','MemberC','Y',getDate())
Insert into  MenuMaster(MenuID ,MenuName,Parent_MenuID,User_Roll,MenuFileName,MenuURL,USE_YN,CreatedDate)
    Values('MUSER','Manager Dashboard','*','ADMIN','INDEX','ManagerC','Y',getDate())
 Insert into  MenuMaster(MenuID ,MenuName,Parent_MenuID,User_Roll,MenuFileName,MenuURL,USE_YN,CreatedDate)
    Values('MAbout','About Manager','*','ADMIN','INDEX','ManagerAC','Y',getDate())
Insert into  MenuMaster(MenuID ,MenuName,Parent_MenuID,User_Roll,MenuFileName,MenuURL,USE_YN,CreatedDate)
    Values('Accounts','Account Details','MUSER','ADMIN','INDEX','AccountC','Y',getDate())
    Insert into  MenuMaster(MenuID ,MenuName,Parent_MenuID,User_Roll,MenuFileName,MenuURL,USE_YN,CreatedDate)
    Values('Inventory','Inventory Details','MUSER','ADMIN','INDEX','InventoryC','Y',getDate())

-- Insert Manager User Details
Insert into  MenuMaster(MenuID ,MenuName,Parent_MenuID,User_Roll,MenuFileName,MenuURL,USE_YN,CreatedDate)
    Values('MUSER','Manager Dashboard','*','Manager','INDEX','ManagerC','Y',getDate())
 Insert into  MenuMaster(MenuID ,MenuName,Parent_MenuID,User_Roll,MenuFileName,MenuURL,USE_YN,CreatedDate)
    Values('MAbout','About Manager','*','Manager','INDEX','ManagerAC','Y',getDate())
Insert into  MenuMaster(MenuID ,MenuName,Parent_MenuID,User_Roll,MenuFileName,MenuURL,USE_YN,CreatedDate)
    Values('Accounts','Account Details','MUSER','Manager','INDEX','AccountC','Y',getDate())
Insert into  MenuMaster(MenuID ,MenuName,Parent_MenuID,User_Roll,MenuFileName,MenuURL,USE_YN,CreatedDate)
    Values('Inventory','Inventory Details','MUSER','Manager','INDEX','InventoryC','Y',getDate())


select * from MenuMaster

select * from AspnetUserRoles
Here we can see the format we are using in our Menu Master table to insert our records for display menu based on user role.
MenuID = 'AUSER' (We will give unique menu ID)
MenuName = 'ADMIN Dashboard' (We will give menu display text),
Parent_MenuID = '*’ (If this is main menu then we will give here as “*” else we will give the MenuID of previous records to display this record to show as submenu)
User_Roll = 'ADMIN' (Here we will give the User Role, if the same menu needs to be used for multiple roles based users like Admin, Manager, Accountant and etc. then we will insert the same menu details with different user roles. In our sample we have added the same menu details as 'Manager Dashboard' for both Admin and Manager User as both can view the menu and page.)
,MenuFileName = 'INDEX' (Here we give our View name to be displayed when the menu is clicked)
MenuURL = 'ADMINC' (Here we give our Controller name to be displayed when the menu is clicked)
USE_YN = 'Y' (This is optional field as we can use this as to display menu or not)
CreatedDate = getDate() (This also optional as to input the Crete date)
In this demo application, we have already all the needed controllers and view to be displayed when user clicks on the menu.
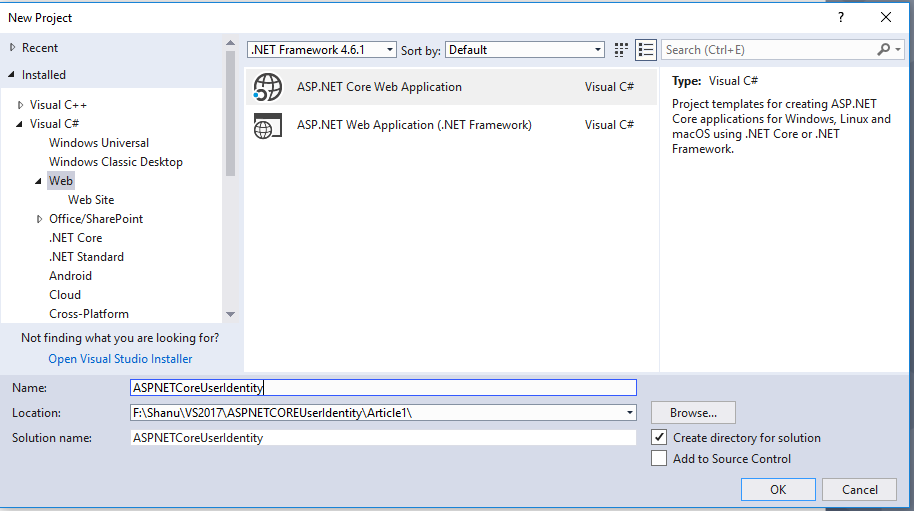
Step 2: **Create your ASP.NET Core **
After installing our Visual Studio 2017 click Start, then Programs and select Visual Studio 2017 - Click Visual Studio 2017. Click New, then Project, select Web and then select ASP.NET Core Web Application. Enter your project name and click
Select Web Application(Model-View-Controller) and click Change Authentication.

Select Individual User Accounts and click OK to create your project.

Updating appsettings.json
In appsettings.json file we can find the DefaultConnection Connection string. Here in connection string change your SQL Server Name, UID and PWD to create and store all user details in one database.
"ConnectionStrings": {
    "DefaultConnection": "Server= YOURSERVERNAME;Database=InventoryDB;user id= YOURSQLUSERID;password=;Trusted_Connection=True;MultipleActiveResultSets=true"
  },
Step 3: Add Identity Service to Startup.cs file
By default, in your ASP.NET Core application, the Identity Service will be added in Startup.cs File /ConfigureServices method. You can also additionally add the password strength while user the register and also set the default login page/logout page and also AccessDenaiedPath by using the following code.
services.AddIdentity<ApplicationUser, IdentityRole>()
                .AddEntityFrameworkStores<ApplicationDbContext>()
                .AddDefaultTokenProviders();


            //Password Strength Setting
            services.Configure<IdentityOptions>(options =>
            {
                // Password settings
                options.Password.RequireDigit = true;
                options.Password.RequiredLength = 8;
                options.Password.RequireNonAlphanumeric = false;
                options.Password.RequireUppercase = true;
                options.Password.RequireLowercase = false;
                options.Password.RequiredUniqueChars = 6;

                // Lockout settings
                options.Lockout.DefaultLockoutTimeSpan = TimeSpan.FromMinutes(30);
                options.Lockout.MaxFailedAccessAttempts = 10;
                options.Lockout.AllowedForNewUsers = true;

                // User settings
                options.User.RequireUniqueEmail = true;
            });

            //Seting the Account Login page
            services.ConfigureApplicationCookie(options =>
            {
                // Cookie settings
                options.Cookie.HttpOnly = true;
                options.ExpireTimeSpan = TimeSpan.FromMinutes(30);
                options.LoginPath = "/Account/Login"; // If the LoginPath is not set here, ASP.NET Core will default to /Account/Login
                options.LogoutPath = "/Account/Logout"; // If the LogoutPath is not set here, ASP.NET Core will default to /Account/Logout
                options.AccessDeniedPath = "/Account/AccessDenied"; // If the AccessDeniedPath is not set here, ASP.NET Core will default to /Account/AccessDenied
                options.SlidingExpiration = true;
            });
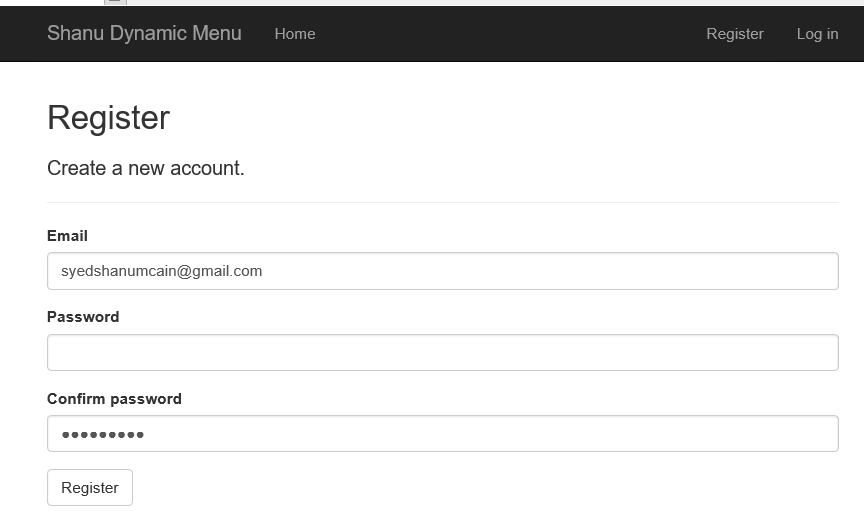
Step 4: Register and Create Users
Now our Asp.NET Core web application is ready for the user to register on our website and also user can log in to our system after registration. We will be doing the Authorization by adding a role to a user in next steps. Build and run your application to register your first default Admin user.

Here we will be registering two users as one for Admin and another user for Manager. We will be using this user for adding roles. We will create two users as syedshanumcain@gmail.com and afraz@gmail.com . Note: You can create users as per your need and change the user details in startup code for adding roles to users.
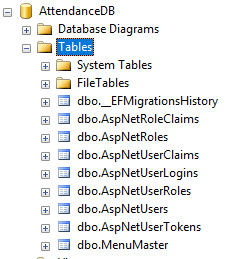
Refresh the Database:
When we refresh our database, we can see all the Identity tables has been created.
Step 5: Create Role and assign User for Role
We use the below method to create a new Role’s as “Admin” and “Manager”, we will assign the recently registered users as “Admin” and “Manager” to our website. Open Startup.cs file and add this method to your Startup.cs file.
private async Task CreateUserRoles(IServiceProvider serviceProvider)
        {
            var RoleManager = serviceProvider.GetRequiredService<RoleManager<IdentityRole>>();
            var UserManager = serviceProvider.GetRequiredService<UserManager<ApplicationUser>>();


            IdentityResult roleResult;
            //Adding Addmin Role
            var roleCheck = await RoleManager.RoleExistsAsync("Admin");
            if (!roleCheck)
            {
                //create the roles and seed them to the database
                roleResult = await RoleManager.CreateAsync(new IdentityRole("Admin"));
            }

            roleCheck = await RoleManager.RoleExistsAsync("Manager");
            if (!roleCheck)
            {
                //create the roles and seed them to the database
                roleResult = await RoleManager.CreateAsync(new IdentityRole("Manager"));
            }

            //Assign Admin role to the main User here we have given our newly loregistered login id for Admin management
            ApplicationUser user = await UserManager.FindByEmailAsync("syedshanumcain@gmail.com");
            var User = new  ApplicationUser();
            await UserManager.AddToRoleAsync(user, "Admin");


            user = await UserManager.FindByEmailAsync("Afraz@gmail.com");
            await UserManager.AddToRoleAsync(user, "Manager");

        }
From Startup.cs file we can find the Configure method. Call our CreateUserRoles method from this Configure method. When we build and run our application we can see new Role as “Admin” and “Manager” will be created in the ASPNetRole table.
Step 6: Create Admin/Manager Page and Set Authorization
Now we have an Admin/Manager user for our ASP.NET Core web application as a next step lets create Controllers and views to display based on user login, In our previous example we have already seen on how to set Authorization for roles in each page, Using that we will be creating all our need Controllers and Views.IN the attached sample demo application you can found all the controllers and views which we have created and created your own as per your need.
** Step 7: Working with Dependency Injection **
Creating Model Class
First, we will start with creating a class in our Model folder. We give the class name as MenuMaster as same as our table name in our Database. In MenuMaster class, we need to create properties same like our Table fields like below.
public class  MenuMaster
    {
        [Key]
        public int  MenuIdentity { get; set; }
        public string  MenuID { get; set; }
        public string  MenuName { get; set; }
        public string  Parent_MenuID { get; set; }
        public string  User_Roll { get; set; }
        public string  MenuFileName { get; set; }
        public string  MenuURL { get; set; }
        public string  USE_YN { get; set; }
        public DateTime CreatedDate { get; set; }
    }
Creating Interface Class
Now, it’s time for us to create an interface with a method named GetMenuMaster(), GetMenuMaster(String UserRole) and we will be implementing this interface in our Service to get all the Menu details from the table and also another method to get the menu by user role. For creating the Interface, add a new class to your model folder and name the class as “IMenuMasterService”.
We will change the class to an interface as we are going to create an interface to implement in our service.
public interface  IMenuMasterService
    {
        IEnumerable<MenuMaster> GetMenuMaster();
        IEnumerable<MenuMaster> GetMenuMaster(String UserRole);
     }
Creating Service:
Now, let’s add a new class Services folder and name the class as “MenuMasterService”. In this class, we will be implementing our interface IMenuMasterService. We know that if we implement the interface, then we should declare the interface method in our class. In this service, we use the interface method and we return the list with Menu details and also return the Menu details by user role. We will be directly Injecting this on our View page.
public class  MenuMasterService:IMenuMasterService
    {
        private readonly  ApplicationDbContext _dbContext;

        public MenuMasterService(ApplicationDbContext dbContext)
        {
            _dbContext = dbContext;
        }

        public IEnumerable<MenuMaster> GetMenuMaster()
        {
            return _dbContext.MenuMaster.AsEnumerable();

        }

        public IEnumerable<MenuMaster> GetMenuMaster(string UserRole)
        {
            var result = _dbContext.MenuMaster.Where(m => m.User_Roll == UserRole).ToList();
            return result;
        }
    }
Register the Service
We need to register our created service to the container. Open the Startup.cs from your project to add the service to the container.
In the Startup.cs class, find the method named as ConfigureServices and add your service “MenuMasterService” like below.
services.AddTransient<MenuMasterService, MenuMasterService>();
Inject the Service in the _Layout.cshtml page
Now, it’s much simpler and easier as we can directly Inject the service in our View page and bind all the result to our view page. For injecting the Service in our View, here we will be using our existing _Layout.cshtml page. Since we are going to display the menu on top of our website an use on all our pages, here we have used the _Layout.cshtml page to bind the menu results as a menu based on user logged in.
Here first we check the user is Authenticated to our website then if the user is logged in then we get the role details of the logged in user and bind the menu based on the user roles. Here we are binding 2 level of the menu as Main Menu and Submenu. In our table result we check for all the Parenut_MenuID=” *” as we will be displaying the main menu with the parent_MenuID as “*” and in next inner loop, we display the submenu appropriate to the main menu.
<div class="navbar-collapse collapse">
 <ul class="nav navbar-nav">
   <li><a asp-area="" asp-controller="Home" asp-action="Index">Home</a></li>
 @if (User.Identity.IsAuthenticated)
        {
            var UserRoles = "";
            if (@User.IsInRole("Admin"))
            {
                UserRoles = "Admin";
            }
            else
            {
                UserRoles = "Manager";
            }

                @if (menus.GetMenuMaster(@UserRoles).Any())
                {
                @if (menus.GetMenuMaster(@UserRoles).Any())
                {
                @foreach (var menuNames in menus.GetMenuMaster(@UserRoles).Where(n => n.Parent_MenuID == "*"))
                {
                        <li>
                            <a asp-area="" asp-controller=@menuNames.MenuURL asp-action=@menuNames.MenuFileName>@menuNames.MenuName</a>
                            <ul class="sub-menu">
                                @foreach (var subMenu in menus.GetMenuMaster(@UserRoles).Where(n => n.Parent_MenuID == @menuNames.MenuID))
                                  {
                                    <li>
                                        <a asp-area="" asp-controller=@subMenu.MenuURL asp-action=@subMenu.MenuFileName>@subMenu.MenuName</a>
                                    </li>
                                   }
                            </ul>
                            </li>
                }
                }
                }
            }
  </ul>
Conclusion
Firstly, create a sample AttendanceDB Database in your SQL Server and run the script to create MenuMaster table and insert sample records. In the appsettings.json file change the DefaultConnection connection string with your SQL Server Connections. In Startup.cs file add all the code as we discussed in this article. This is simple demo application and we have fixed with Admin and Manager roles, you can change as per your requirement and also the CSS design for menu and submenu is not good for Mobile compatibility you can add your own bootstrap design to implement your menu style. Hope you all like this article and soon we will see in another article with more live examples.
See Also
- Introduction to Identity on ASP.NET Core
- ASP.NET Core 2.0: Getting Started With Identity And Role Management
Download
ASP.NET Core 2.0 User Role Base Dynamic Menu Management Using Dependency Injection