Send list item attachments to internal/external users through email – SharePoint Online & Microsoft Flow
Table of Contents
Introduction
While building SharePoint online solutions, business users usually encounter a scenario, in which they need to send documents to external users in email. For example, a purchase order form, where external vendor should not have direct access on your site but he/she should be able to receive purchase order through email along with supporting documents like pdf copy of purchase order, standard terms & conditions document and other documents if there is any. Now there is a question, is it something achievable in SharePoint Online out of the box? The answer is definitely YES.
Solution
In this article, I will demonstrate how to send an email with multiple attachments to external users using Microsoft Flow. First of all, you will need a custom list so add it in your site.
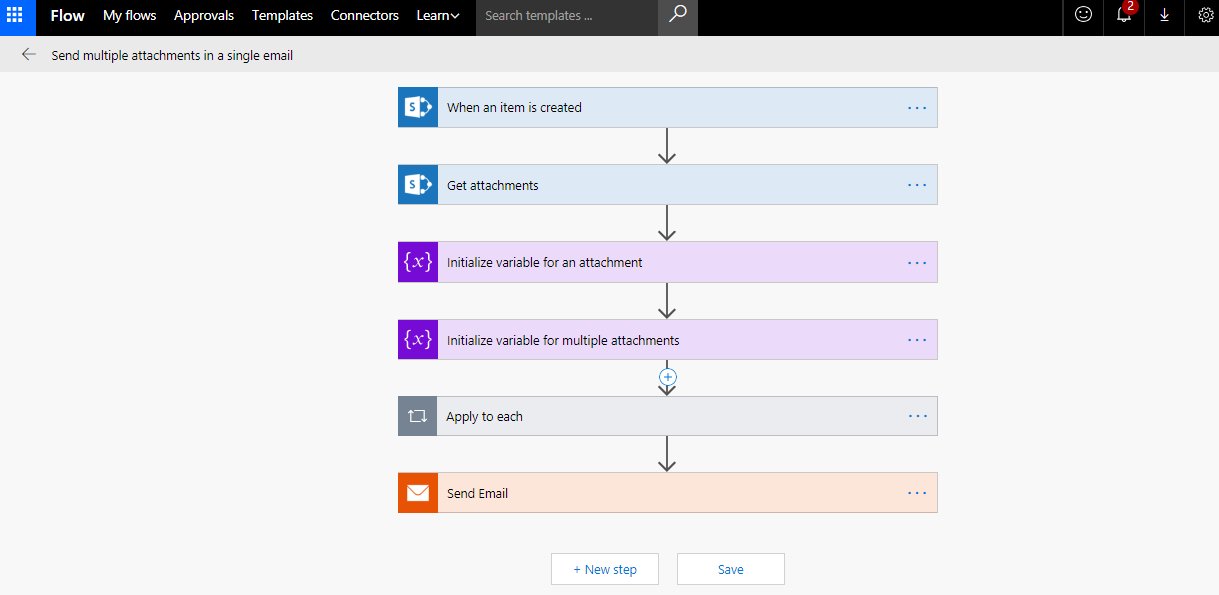
Now, let’s create a flow which will be triggered, on this new item being added.
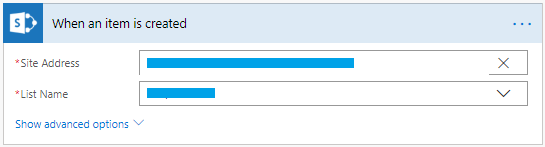
Step 1. Create a trigger – “When an item is created” and select SharePoint Site and List.
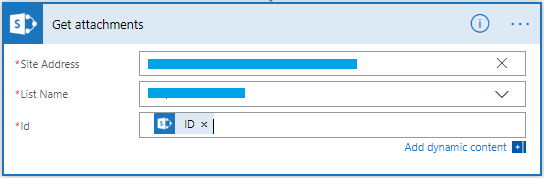
Step 2. Next, add the “Get attachments” action to get all the attachments added to newly created list item.
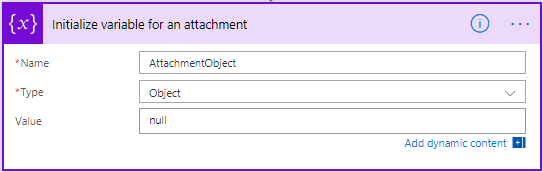
Step 3. Now, we need to build a logic to handle multiple attachments dynamically. To achieve the same, initialize below couple variables.
One of type object to store individual attachment name and its content.
One of type array to store all attachments in a single array.

Step 4. Next, we need to extract attachment content and store it in one array. It is an important step which holds the whole magic so be careful while setting it up.
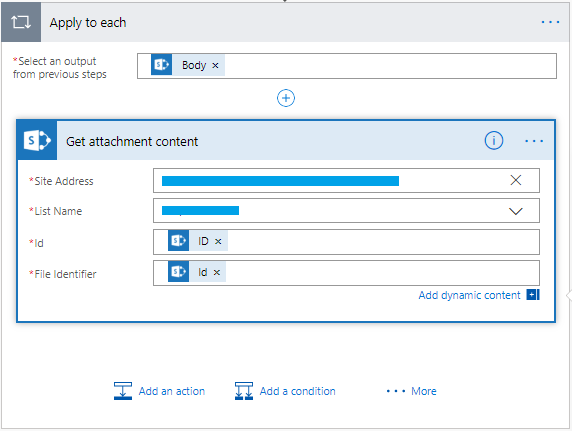
- Add “apply to each” loop, then chose the “body” output from the “Get Attachments” step to go through all attachments something like below.
- Next add “Get attachment content” action inside the loop using which we will extract its content and store it one object. It will ask for below properties.
- Id – select ID output from the “When an item is created” trigger
- File identifier field – Select the Id output from the “Get Attachments” action
- Next, we will set attachment object variable and add it in array which we have initialized in 3rd step.
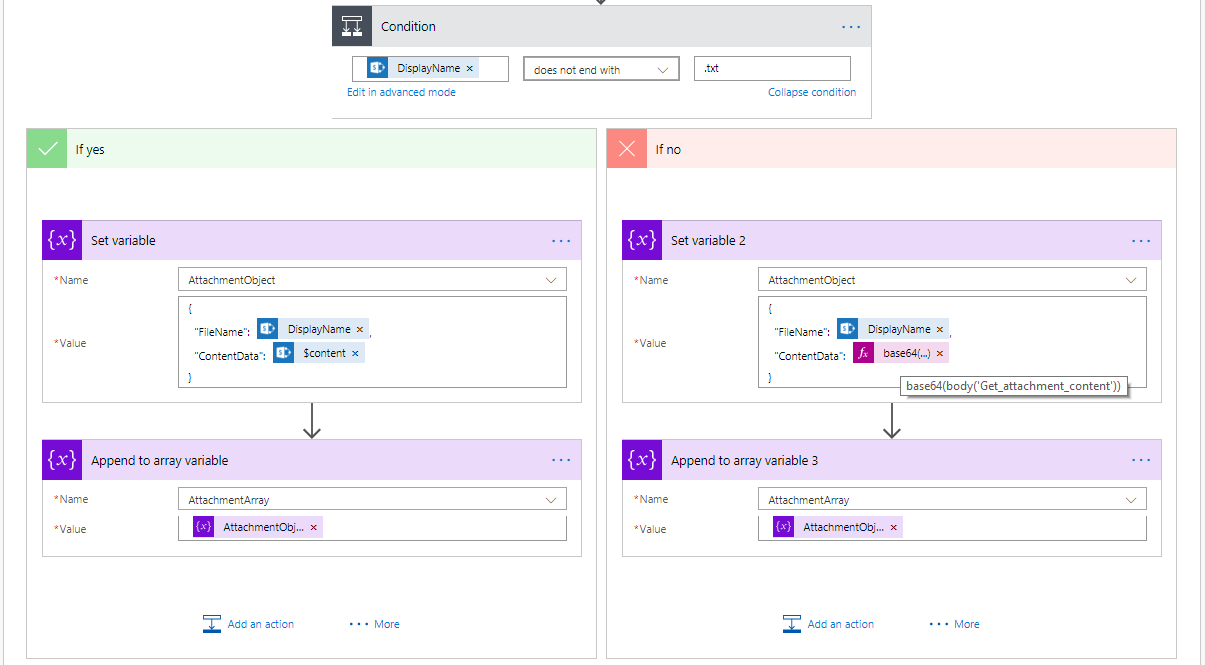
Note: we have to handle some special cases at this step like text files as it gives plain content in output so we need to convert it into base64 while adding it in array of attachments otherwise it will give an error while sending it in email.
- Add a condition to check if attachment name does not end with ‘.txt’ (If you identify more such types of file, you can user other operators like ‘and’)
- In the If yes section of the condition, add an action to get the content of files of type other than .txt and set it to attachment object. Below is the json format for you reference.
{
"FileName": @{items('Apply_to_each')['DisplayName']},
"ContentData": @{body('Get_attachment_content')['$content']}
}
- In the If no section, add an action something like below to get text file content and convert it into base64 format and set it to attachment object.
{
"FileName": @{items('Apply_to_each')['DisplayName']},
"ContentData": @{base64(body('Get_attachment_content'))}
}
Note: Above json format is valid when you use SMTP connection for email sending functionality, It may vary depending other email connectors (i.e. if you use office 365 connection to send an email, json format will be something like below with different name of properties)
{
"Name": @{items('Apply_to_each')['DisplayName']},
"ContentBytes": @{body('Get_attachment_content')['$content']}
}
- After setting value of attachment object variable, add an action ‘Append to array variable’ in both block to add attachment object in attachment array. The end result should be something like below.
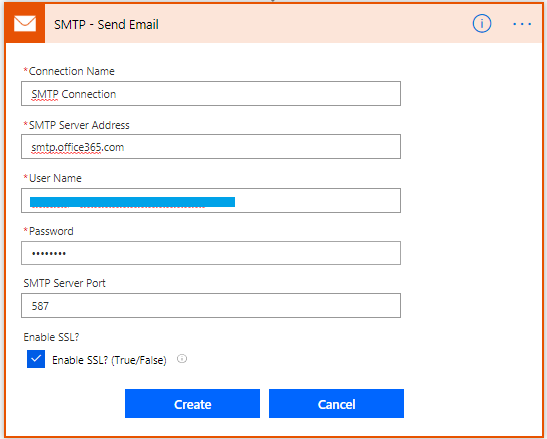
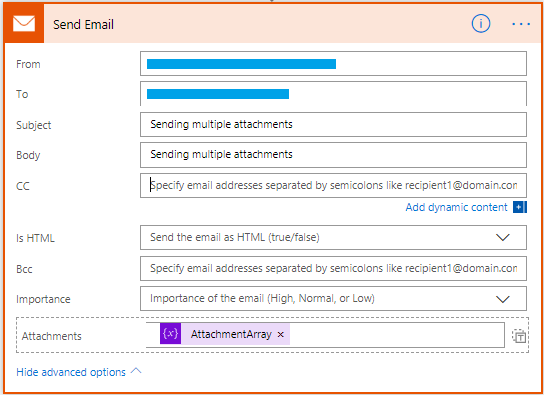
Step 5. In last step, we will send the email with the attachments array which we constructed in 4th step. To achieve the same, add an action ‘SMTP – Send Email’ to send an email. Here, I have used SMTP connector as we will be sending email to external users. You can use other email connectors as well based on your requirements.
Please find below screenshot for you reference which may help you to configure SMTP connection.
After that it will ask for some inputs. specify required inputs for email sending step something like below.
Final flow should look something like below, if so save your flow.
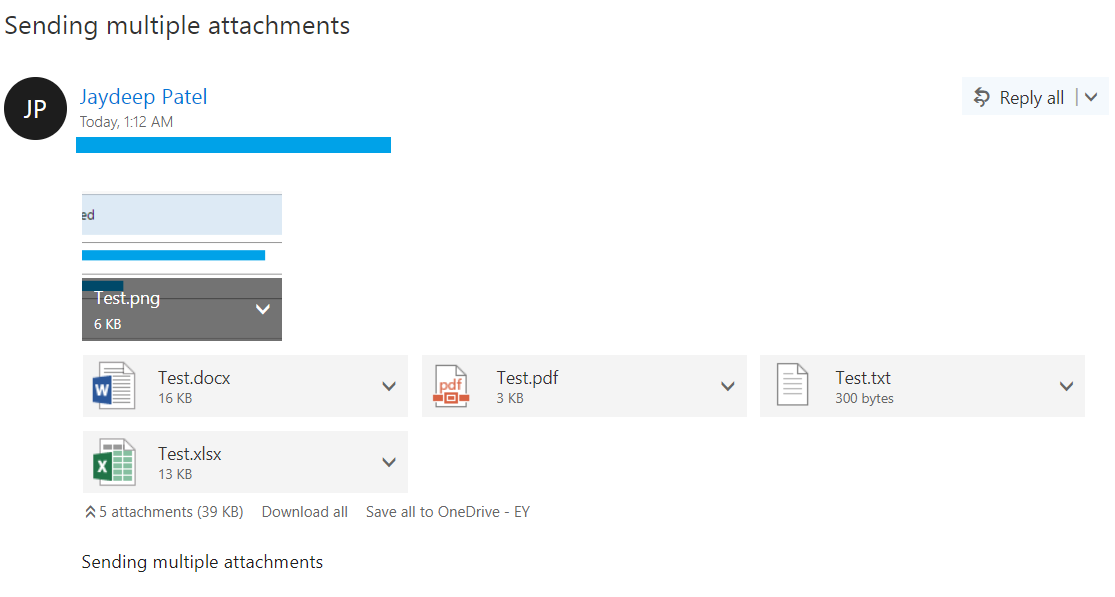
That's it and there you go! Flow is ready for testing. You can test it by creating new item with to be sent attachments. If everything is working fine, you should be able to send multiple attachments in an email something like below.
Key Points
As we don't have default action/step in Microsoft Flow to send list attachments dynamically, It is a quick out of box solution which can,
- send a dynamic number of attachments which are stored in SharePoint lists/libraries.
- send different types of documents (pdf, xlsx, docx, png, jpg, html, txt etc)
- send document to internal as well as external users
Hope it helps!!!
See Also
Microsoft Flow connectors
Building JSON Objects in Microsoft Flow