Azure: Cloud Backup Service
Introduction to Cloud Backup Service
Many companies are looking for a cloud backup service because compared to the offline backup it’s more secure and easier to restore. Microsoft Azure has an excellent feature for backup service, in this lesson you will learn how to back up your local server to the Cloud.
Steps
Portal
On the Azure Portal click + Create Resource and then Storage and then click Backup and Site Recovery (OMS).

Recovery Service Vault
On the Recovery Service Vault, enter your backup name and resource group and then click create.

On the Dashboard select your Recovery Service Vault. On this dashboard, we are going to select Recovery Service Vault Name **Local-Server. **

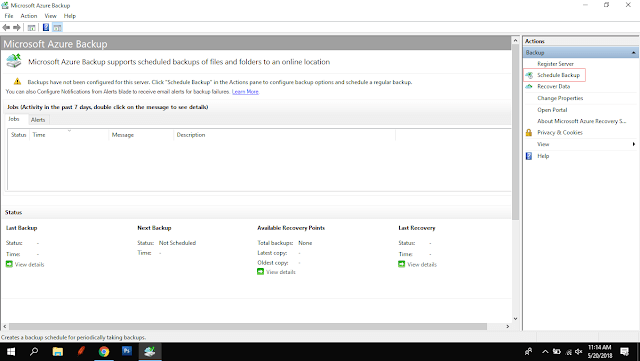
In this window, you can find the usage, and back up information. At the moment, we don't have any backup service, so we need to create backup service using +Backup Link.

On the backup goal window, you need to select your running workloads. If your workloads are running in Azure you can select Azure or you can select On Premise, and then you need to select what you want to backup. After selecting click prepare infrastructure.
Prepare infrastructure

After preparing infrastructure window, you can download recovery service agent, If you have already downloaded the recovery service vault just skip the download and check the already downloaded one, at the moment we don't download the recovery service vault so we need to download it, so just clicked download agent for Windows server or Windows client.
Download recovery service agent

After downloading tick the checkbox that has already downloaded or use the latest recovery service agent and Click download.

Open your file explorer and then Install the MARS AgentInstaller.
MARS

In the proxy configuration just click next if you have proxy settings then you can enter the proxy Information

Microsoft update opt-in you can select update or just skip the update, and click next, and then click install.

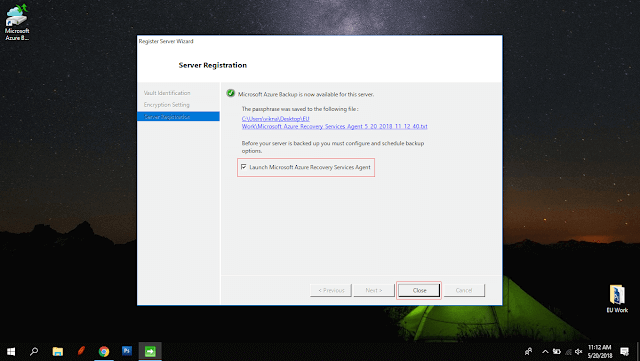
After installing click proceed to registration.

In the vault identification wizard browse your vault credentials and select the credentials and open.


Encryption password and storage location
After validating you need to enter the encryption password and select the storage location for the password setting, and then click Finish.

After registering the service make sure that the launch of Microsoft Azure Recover Service Agent Checkbox is selected. If it's not you can select and close, or you can search Microsoft Azure backup in the start menu.
On the Microsoft Azure backup window, you need to create the scheduled backup
Select Items
On the Selected Items to back up window, you can add items that you want. In this demo we are going to select doc folder in this desktop.


Schedule
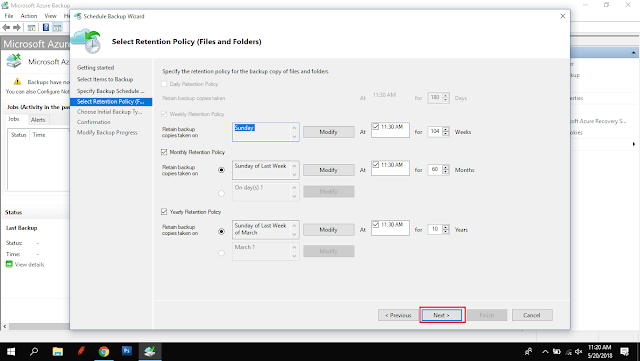
On the Schedule window you can select Day or Week, for this demo we need to select Week and our backup time is 11:30 AM on Sunday.

Initial Back Type
In the choose "Initial Back Type" section you can select "Automatically over the network". If you want to save your local backup and cloud backup, you can choose Offline Backup, and then click Next and Finish.

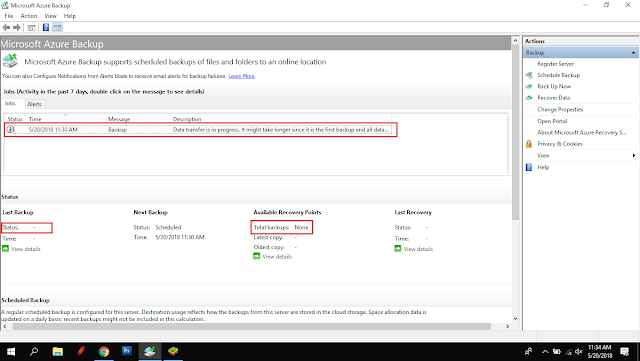
Now, the backup is in progress.
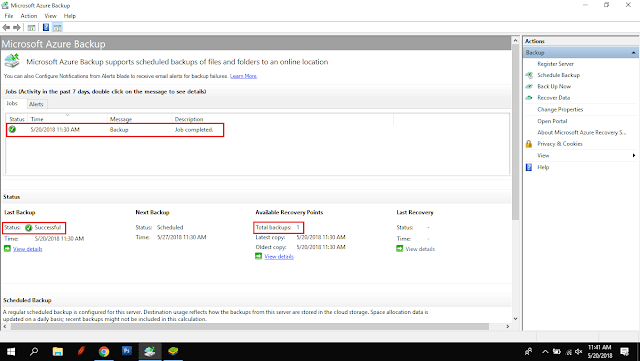
Results
The backup is successfully done.