Visual Studio Authoring Extensions for System Center 2012 - Operations Manager
This document is part of the Operations Manager Management Pack Authoring Guide  .
.
What's New in Visual Studio Authoring Extensions 2013
See What’s New in Visual Studio Authoring Extensions 2013 for a list of the enhancements and fixes provided in version 1.1.0.0 of System Center 2012 Visual Studio Authoring Extensions which was released on 10/18/2013.
Introduction
The Visual Studio Authoring Extensions allow you to create management packs for System Center 2012 - Operations Manager using Visual Studio.
- Work directly with the XML of the management pack allowing you to create any management pack element and monitoring scenario.
- Provides XML templates and IntelliSense for different management pack elements so that you don’t have to have detailed knowledge of the schema.
- Allows you to create XML fragments containing different management pack elements. The fragments can be copied within the management pack, to another management pack, and combined to build the final management pack.
- Allows multiple authors to work on a single management pack project at the same time.
Installation
To use the Visual Studio Authoring Extensions, you must have a copy of Visual Studio installed. Download the VSAE from http://www.microsoft.com/en-us/download/details.aspx?id=30169. Double-click the .msi to start the installation process. No configuration is necessary.
Creating a New Management Pack
To create a new management pack, you first have to create a new management pack project. A project is the Visual Studio term for the collection of code that will be compiled into a finished form – often an executable, but in this case, a management pack. From the Visual Studio Start Page, select the New Project… link, or click File → New → Project. The New Project dialog box appears.

Select Management Pack in the Installed Templates pane on the left. Three options appear in the middle pane:
- Operations Manager 2012 Add-On Management Pack
- Operations Manager Core Monitoring Management Pack
- Service Manager 2012 Management Pack
Use the Operations Manager Core Monitoring Management Pack solution option for the development of management packs that must support both Operations Manager 2012 and Operations Manager 2007. This solution type makes use of the version 1.0 schema which is valid for both platforms. It's important to note that this schema has no support for the new features of Operations Manager 2012.
Use the Operations Manager 2012 Add-On Management Pack solution option whenever you need a management pack solution to have access to any of the new features of Operations Manager 2012 which require use of the new version 2.0 schemas. These features include: Multi-targeted dashboards, binary development and also the new Network monitoring modules. You would also use this option if you have an existing Operations Manager 2007 management pack solution that you wish to add in new Operations Manager 2012 features to, where supported. The primary reason to do this would be to add dashboard items to an older management pack, because dashboards will only work under the 2012 schema.
A good indicator that you have chosen an incorrect solution type is when you perform a build of the management pack after having added the required management pack references. If you receive a "'SchemaVersion' attribute is not declared" error then you have chosen the incorrect solution type for the management packs referenced within your project. You can switch the template through XML.
The Service Manager Management Pack project is used for System Center Service Manager 2012, and is not discussed in this documentation.
At the bottom of that dialog box there are three fields. The first is the name of the management pack. The second field is the location where the MP will be stored. This can be anywhere, because deploying the MP is a separate process. The default is c:\Users\username>\documents\Visual Studio 2010\Projects. The Solution name field is the same as the MP name by default. You’ll almost always leave the “Create directory for solution” box checked. Click OK when you’re done.
The Visual Studio interface
Visual Studio opens the new management pack. The main pane will be empty at first, but there’s a couple of things to notice in the interface right now. On the right, by default, are two open windows.
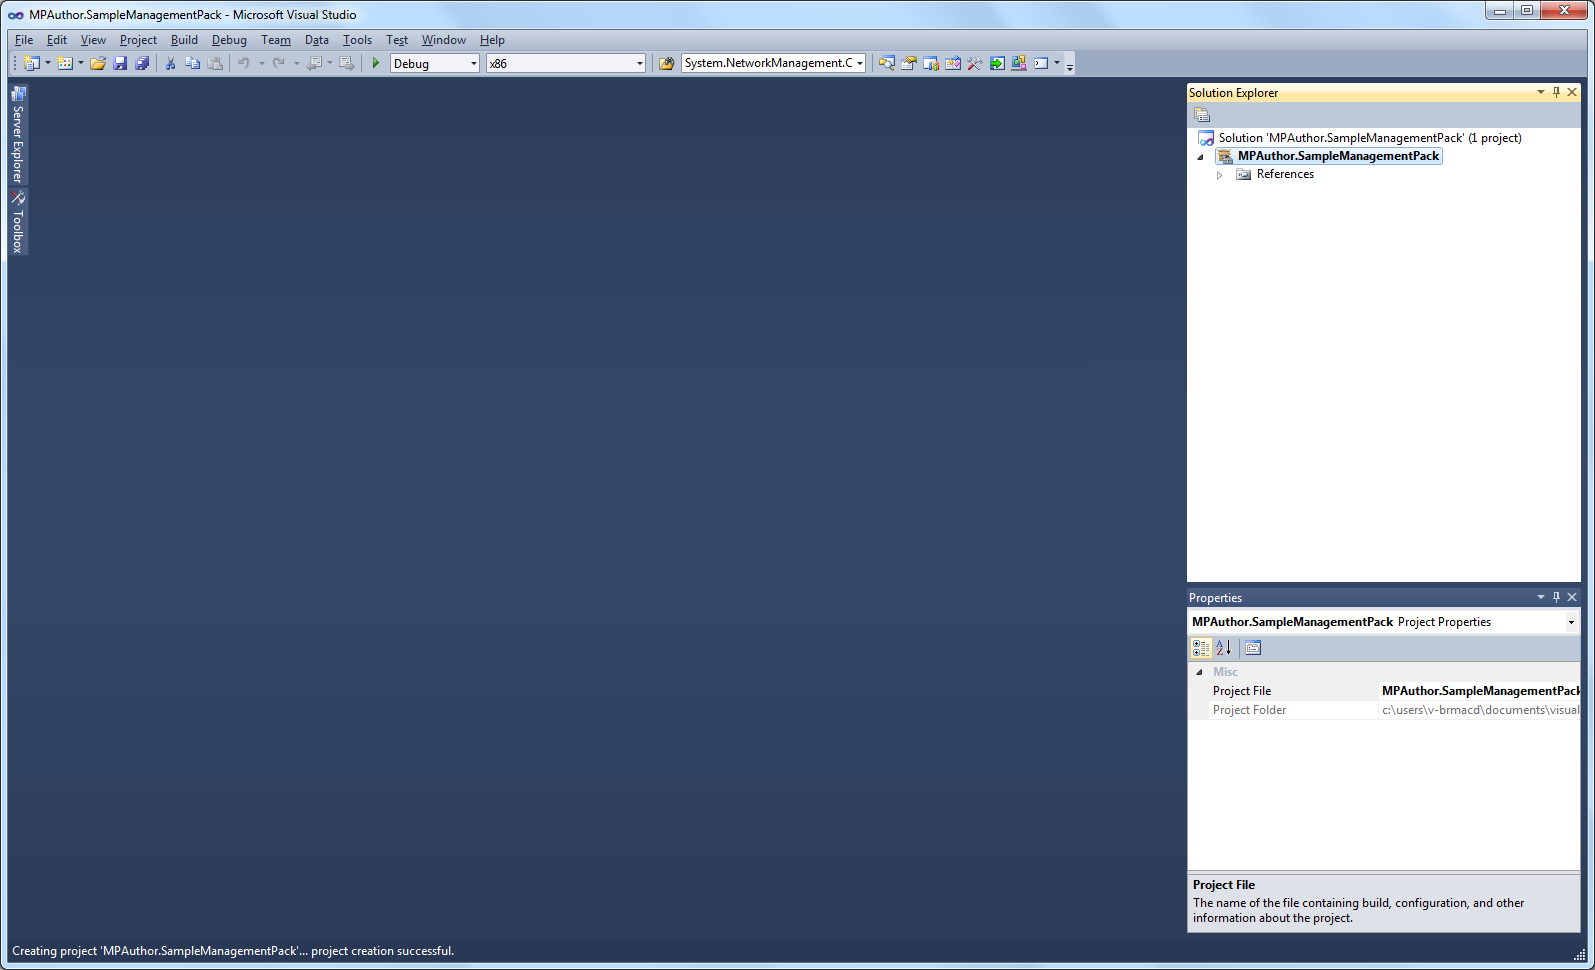
The top window is the Solution Explorer, and that’s where you’ll find the elements that make up your management pack as you create them. Visual Studio groups files into solutions, and when you created the new management pack, a new solution was created for you. Within the solution is a project, currently named for your management pack. If you want to create more than one management pack for your application, for example, a monitoring MP and a library MP, you would create multiple projects within the same solution. To create a new project, right-click on the solution at the top of the window and select Add → New Project.
The Solution Explorer is where you add new management pack elements. To add an element, right-click on the solution item and select Add → New Item (this is discussed in more detail later). After you add new items, they are displayed in the Solution Explorer. A folder named References is already present, with a handful of references inside. These are the references that are created by default with a new management pack. You can also add new references here; right-click the References folder and select Add Reference. A dialog box appears allowing you to select the management pack you want to reference.
Underneath the Solution Explorer is the Properties window. The contents of the properties window reflect the properties of whatever item is selected in the Solution Explorer. You can edit the properties of that item directly in the Properties window. For most items, you won’t need to edit the properties, but for the Advanced Template items, the Properties window is the primary way to set the properties, which are then created in XML for you. The properties for Advanced Template items are discussed in more detail in the [[Visual Studio Authoring Extensions - Advanced Templates|Advanced Templates]] section.
Management Pack Fragments
The first important thing to understand about creating management packs in VSAE is that although the completed MP is an XML file, you won’t see a single, monolithic XML file in the project. Instead, you’ll see a series of .mpx files. Each .mpx file contains a fragment of XML, and when you build the project, these fragments will be unified into a single management pack file, either .xml or .mp. Each fragment can contain as much or as little of the management pack as you want, but each template is intended to create a single type of management pack element in a separate file.
Adding MP Elements
Right-click the project in Solution Explorer, and select Add → New Item. (You can also use the Add New Item button on the toolbar, or press Ctrl+Shift+A.) The Add New Item dialog box opens, and you’ll see a list of the various items that you can add to your MP. These are divided into five categories:
Category |
Usage |
Code |
Contains two items: Empty Management Pack Fragment and Empty Management Pack Template group. These are used to create elements that do not yet have item templates provided, such as custom data sources. |
Resources |
Contains resources that other MP elements can use. At this time, there are templates for Jscript, PowerShell, and VBscript script files, and an item for bitmap files. |
Samples |
This category is currently empty. |
Templates |
The items in this category are advanced templates, and create a management pack template group when selected. As discussed in the [[Visual Studio Authoring Extensions - Advanced Templates|Advanced Templates]] article, a management pack template group provides an interface for setting the properties of a template item, without having to access the XML directly. |
XML |
The items in this category are simple templates. When you select one of these, an XML editor opens, and an XML skeleton is provided to help you configure the item. For simple templates, you edit the XML directly. The various simple templates are discussed in the [[Visual Studio Authoring Extensions - Simple Templates|Simple Templates]] document |
The Online Templates category is currently not used, but will be used in the future to provide additional samples.
At the bottom of the Add New Item window, provide a name for the new element, and click OK. The management pack fragment now appears in the hierarchy in the Solution Explorer.
Importing an Existing Management Pack
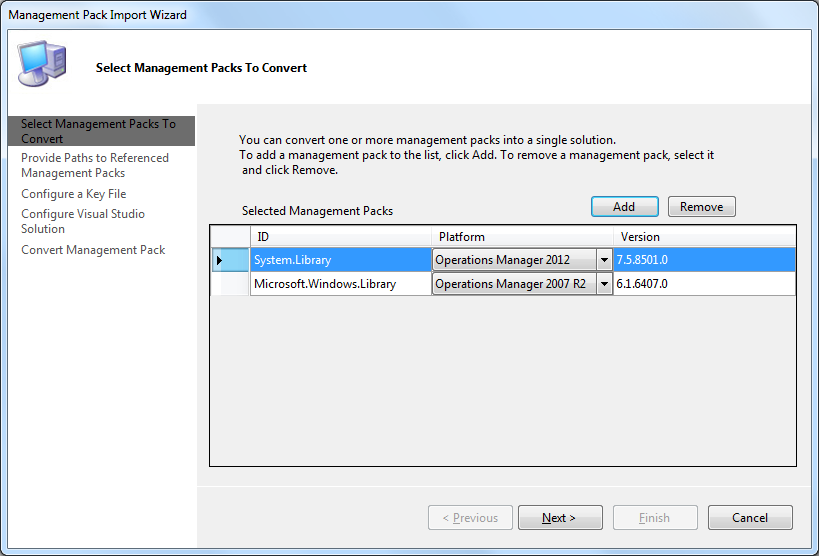
Instead of creating a new management pack from scratch, you might want to import and edit an existing management pack. To do that select File → New → Project from existing Management Pack. The Management Pack Import Wizard opens, which will walk you through the process.
On the first page of the wizard, click Add to select the management pack to import. You can add multiple management packs, all of which will be included in the same solution when the import is complete. You must also specify the schema that the management pack works with, either Operations Manager 2007 R2, Operations Manager 2012, or Service Manager 2012. Click Next.
The next step in the wizard is making sure that the VSAE can find any management packs that are referenced by the MP you’re importing. If any references are missing, the Path field will show as blank, and you can click Browse to navigate to where the referenced MP is located. Once you have all the references taken care of, click Next.
On the next page of the wizard, you can configure a key file, if you want to seal the MP. This step is only required if you want a sealed MP. See Management Pack Formats for more information about sealed MPs and key files. Click Next when you’re done.
On the next page, you specify the solution for the MP that you’re importing. If you have a solution currently loaded in VSAE, you can import to the current solution. If not, or if you want a new solution, specify its name and path. Click Next when you’re done.
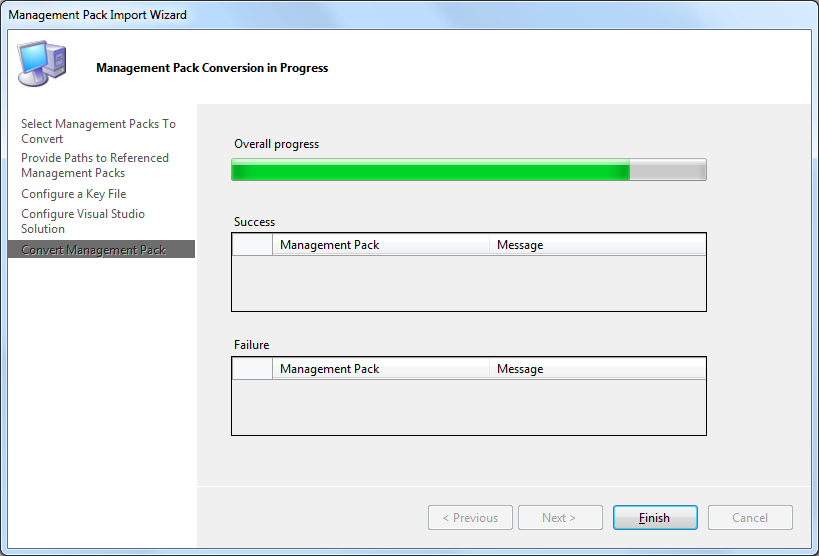
On the next screen, the conversion process begins. A progress bar shows the progress of the conversion, and the two tables below list the management packs that were successfully converted, or not.
After the conversion process is complete, the management packs you imported will appear in the Solution Explorer. The important thing to note here is that the imported management pack will not be broken into separate management pack fragments – the entirety of the imported management pack is contained in a single fragment. This may result in larger or more complex fragments than you’re used to.

The other thing to be aware of is that the import process converts the management pack from the Operations Manager 2007 R2 schema to the Operations Manager 2012 schema. The two schemas are similar enough that the differences aren’t normally important, but there are some slight differences, for example, the treatment of relationships. If you create the management pack for an Operations Manager 2007 R2 installation, the build process will convert the management pack back to the 2007 R2 schema. However, if you import the management pack so that you can copy and paste parts of it into a custom management pack, and you then try to build the management pack in the 2007 R2 schema, you’ll get an error.
Setting Management Pack Properties
Select the project in Solution Explorer, and then right-click and select Properties, or select Project → <Management Pack Name> Properties. The Properties window for this MP appears.

On the Management Pack tab, you can change the ID of the management pack, and the current version number. Keeping the version number current is important; see Version Control. The Management Pack Friendly Name is the name that displays in the Operations Console for this MP. You can also change the default namespace for the management pack. If you change this, the prefixes in the management pack elements will change when you build the project.
On the Build tab, you can select the configuration and platform for which these properties apply. By default, the configuration is the active configuration and the platform is the currently active platform. These settings are more commonly used with other types of Visual Studio projects. In this case, they primarily affect the folder where the generated MP will be found.
Below those settings, there’s a single active checkbox initially: Generate sealed and signed management pack. If you build the project without checking this box, you’ll generate an unsealed management pack, with a .xml extension. Although sealing management packs is recommended, it is not required, especially during development and testing. For more information about sealed and unsealed management packs, see Management Pack Formats.
If you select to generate a sealed and signed management pack, a new set of options becomes available:
- Delay signing: For security reasons, some organizations have a delayed process for signing assemblies. Using this process, you sign the assembly with only the public key and then complete the signing with the private key just prior to shipping. This allows access to the private key to be limited to only a few individuals. Using this checkbox allows you to partially seal the management pack for production. For more information, see Delay Signing an Assembly.
- Company Name: A text field for your company name.
- Copyright: A text field for your company’s copyright statement.
- Key File: Sealing a management pack requires a key file that contains a private and public key. This validates the identity of the signing party and ensures that a malicious user cannot provide a sealed management pack impersonating someone else. This is the same key pair used for signing .NET assemblies and can be created with the Strong Name Tool (sn.exe) included with the Microsoft Windows SDK. For the complete usage of the Strong Name Tool, refer to its documentation.
The Output Path field specifies the location of the management pack after the build process is complete.
On the Management Group tab, you can select the management group where the management pack will be deployed. If the management group is not listed, click Add, and the Add Management Server dialog box appears. Once you’ve signed into the management server with the appropriate credentials, a list of available management groups is presented.
On the Deployment tab you’ll find various settings related to the deployment. Auto-increment version is selected by default, and is helpful for maintaining version control. The next version number is displayed; you can change it manually if necessary.
The Start action setting allows you to specify the action Visual Studio takes after building the project. The management pack can automatically deployed to a management group, and you can optionally start the Operations Console or the Web Console.
The Projects to deploy setting allows you to specify which projects to deploy: just the current MP, the MP and it’s dependencies, or all MPs in the solution.
Generating the Management Pack
To Build the project, select Build → Build Solution. The solution will be verified with various Visual Studio tools and the MP Verify tool. If any errors are found, an error list will be generated. If there are no errors, the Output window will be displayed, indicating that the build was successful. Depending on the configuration you set in the properties, the .xml or .mp file will be found in the directory you set. The default directory is:
C:\Users\username>\Documents\Visual Studio 2010\Projects\MP name>\MP name>\bin\Debug|Release]
Additional Resources
Visual Studio Authoring Extensions - Visual Studio Features
Visual Studio Authoring Extensions - Simple Templates
Visual Studio Authoring Extensions - Advanced Templates
Visual Studio Authoring Extensions - Example Management Pack
MVP Pro Speaker Series:Tips & Tricks to Using the Visual Studio Authoring Extensions (Level 300)