Exchange 2019: Connect a deleted mailbox or recover it
In this example, we are going to connect/recover a mailbox that we deleted in the previous blog post. As an example, we created a new test user as shown below to connect to a mailbox.
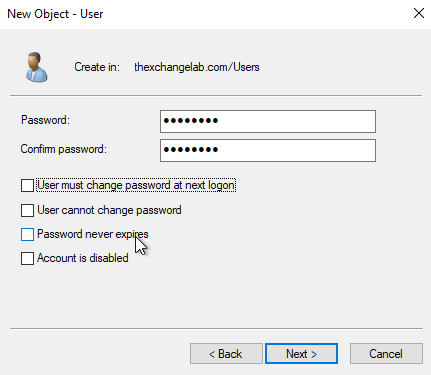
To do this you can use PowerShell to create the user or use Active Directory Users and computers. Right click the OU where you want the user and choose new user. The window below will appear, enter in the relevant information and then click Next >..
http://everything-powershell.com/wp-content/uploads/2019/01/1-1.png
Now enter in the password for the user and click Next >.
http://everything-powershell.com/wp-content/uploads/2019/01/2-1.png
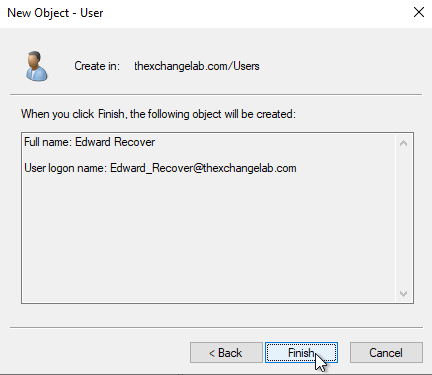
Confirm the information and then click the Finish button as shown below:
http://everything-powershell.com/wp-content/uploads/2019/01/3-1.png
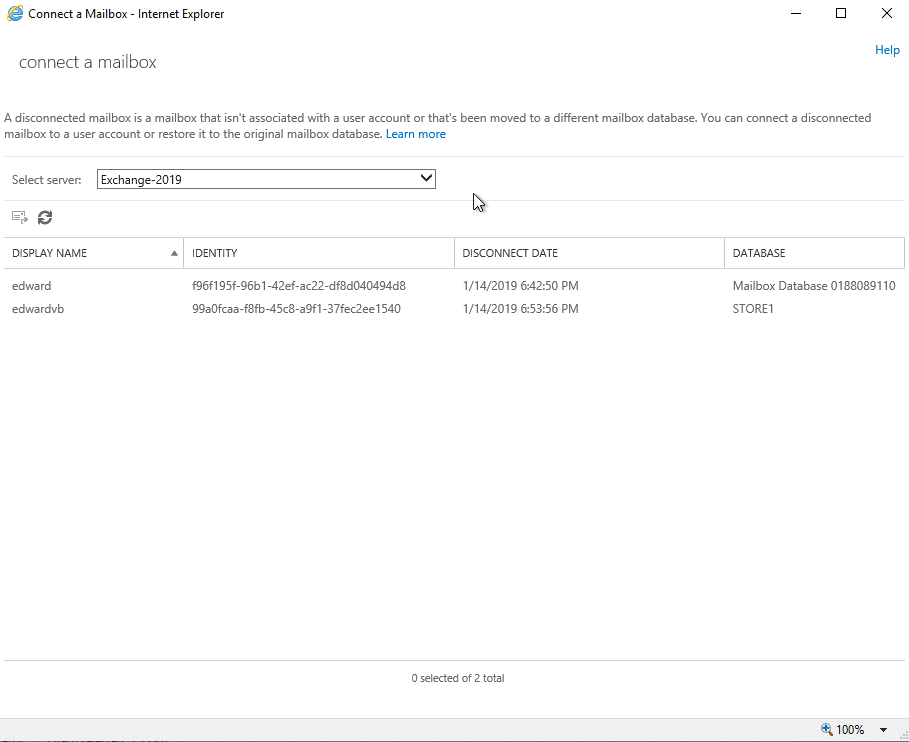
Now head over to the Exchange Admin Center (EAC) and then click on Recipients -> Mailbox and then the 3 ... and then you can click on "Connect a mailbox":
https://i1.wp.com/everything-powershell.com/wp-content/uploads/2019/01/4-1.png?fit=1024%2C565
A new window will appear and you need to select a server next to "Server name" and then you can click the user listed as shown below and click the icon next to the refresh icon to re-connect it:
http://everything-powershell.com/wp-content/uploads/2019/01/5-1.png
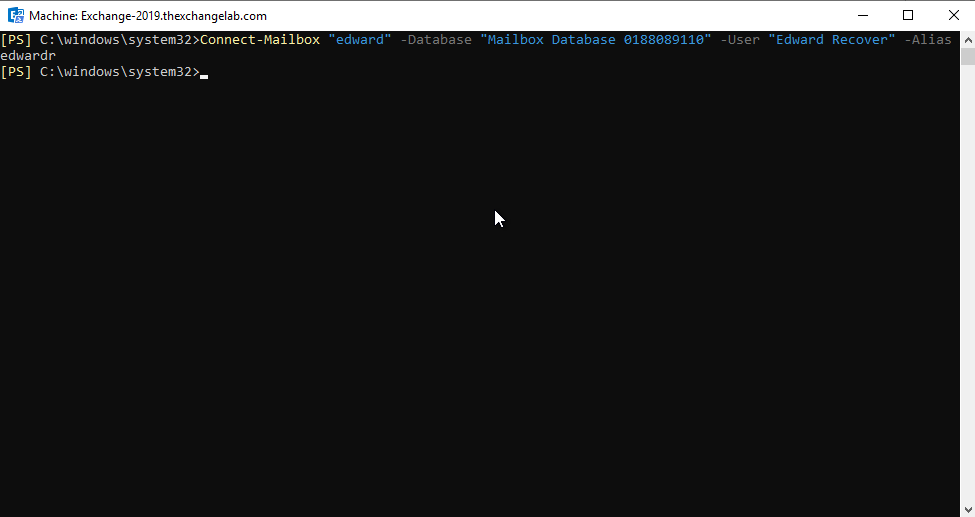
Or you can use PowerShell and let it do the work for you as shown below, you can use the following command:
- Connect-Mailbox "edward" -Database "DB Name" -User "Temp user created" -Alias aliasname
http://everything-powershell.com/wp-content/uploads/2019/01/7-1.png
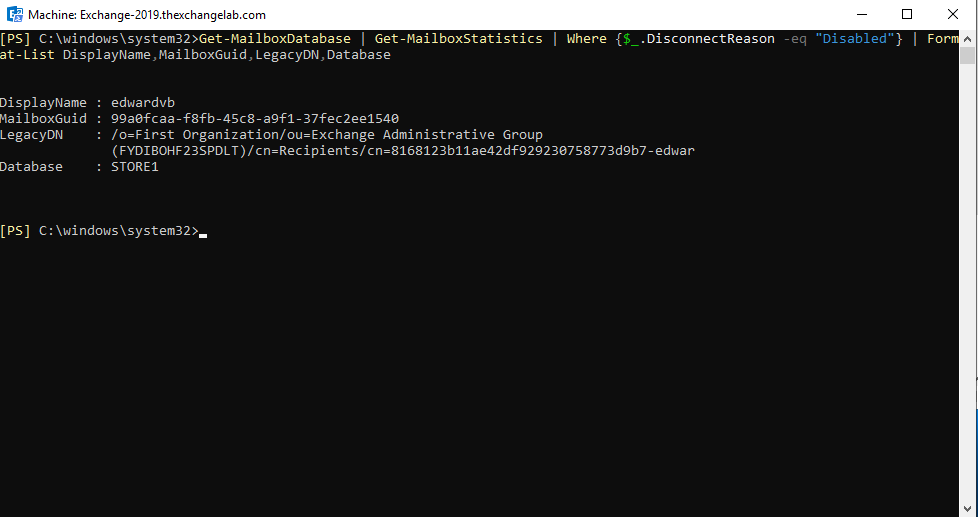
To get the information regarding a mailbox like the GUID or LegacyDN, you need to run the following command:
- Get-MailboxDatabase | Get-MailboxStatistics | Where {$_.DisconnectReason -eq "Disabled"} | Format-List DisplayName,MailboxGuid,LegacyDN,Database
http://everything-powershell.com/wp-content/uploads/2019/01/8-1.png
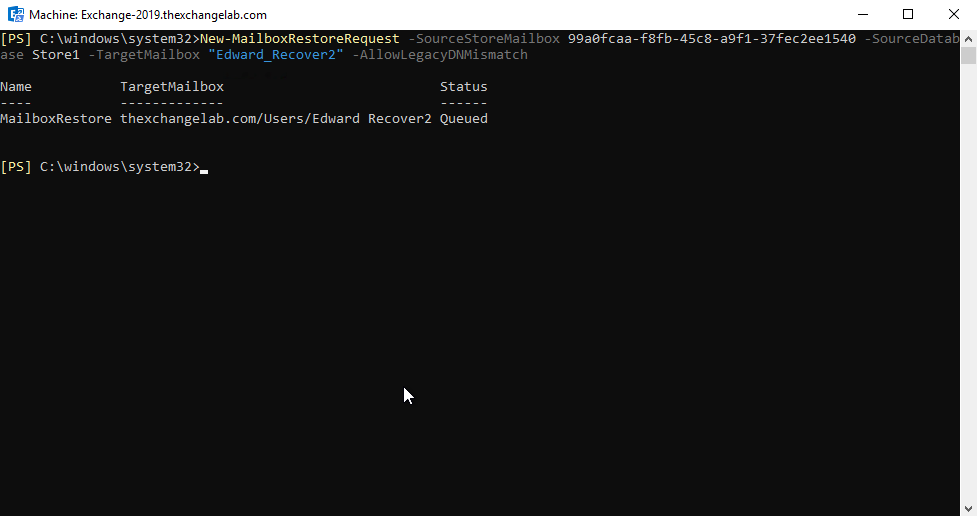
Now we can perform a restore request using the information from above, you can actually also view it in the EAC in a few previous steps, here is the command:
- New-MailboxRestoreRequest -SourceStoreMailbox GUID -SourceDatabase DB01 -TargetMailbox "Temp user" -AllowLegacyDNMismatch
http://everything-powershell.com/wp-content/uploads/2019/01/9-1.png
As you can see above, the status starts Queued, now you can run the following command to find the progress:
- Get-MailboxRestoreRequest | Get-MailboxRestoreRequestStatistics
http://everything-powershell.com/wp-content/uploads/2019/01/10-1.png
You can run the command above to monitor the status of the restore.