Azure Recovery : How To Backup / Restore Database in SQL Server Virtual Machine
Introduction
There are many ways we can backup up the SQL Databases in Azure services, even if these are running on SQL Azure or a SQL Server Virtual Machine. In this post, we will talk about Azure Backup for SQL Server Virtual Machines, a way that previously became General Available (GA).
Architecture
At the image below we can see what exactly we need to deploy the Azure Backup service for a SQL Server VM.
- An active Azure Subscription
- An Azure Resource Group under the Azure Subscription
- Two Azure services, a SQL Server Azure VM(s) and an Azure Recovery Service Vault

How it works
The whole procedure for backup and restore databases from a SQL Server Azure VM to an Azure Recovery Vault is fully automated and it only needs few clicks to configure the Recovery Service Vault (at the Create Recovery Vault section, we are going to see how this can be done).

The Procedure Step by Step
When we select the SQL Server Azure VM that we want to enable Backup procedure the Azure Backup Service install a workload backup extension. This extension consists of a plugin (AzureWLBackupPluginSvc) and a coordinator (AzureWLBackupCoordinatorSvc), the first is responsible for the data flow and the second for triggering workflows for several operations.

Find more details about how Azure Backup Service works in the Microsoft official document, Backup Process.
What are the Benefits?
These solution give a lot of benefits to IT or DevOps engineers.
- Simplicity
- Scalability
- Security
- Cost effectiveness
We can find more details in the Microsoft doc, Azure Backup for SQL Server in Azure Virtual Machines now generally available!
Create Recovery Vault
At the following steps, we will deploy the Azure Recovery Vault where the database files are backed up.
From the left main blade of the Recovery Services Vault (DemoRecoveryVault), select Overview - [+Backup]

In the next page we must select in the first drop-down [Azure], [SQL Server in Azure VM] in the second and click the button Start Discovery, to discover DBs in VMs.
** **
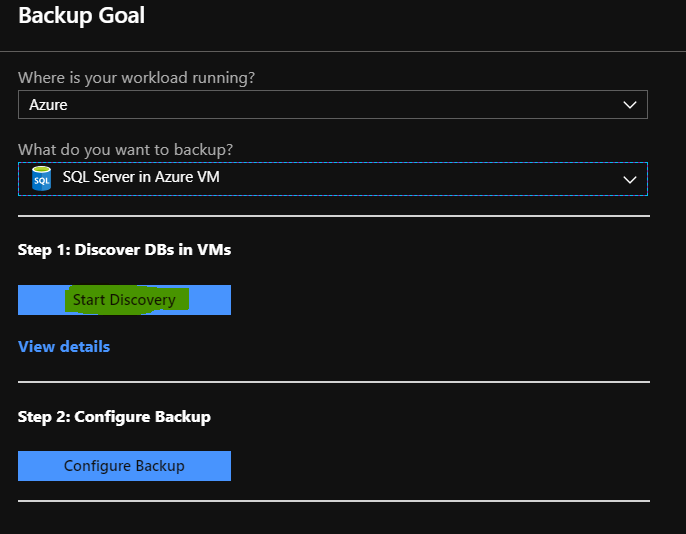
The Discovery will take a few seconds.

After discovering finished we are able to select the SQL Server VM (sqlserverVM), and click the button Discover DBs.

The next step is to Configure Backup, to do that we must select Configure Backup.

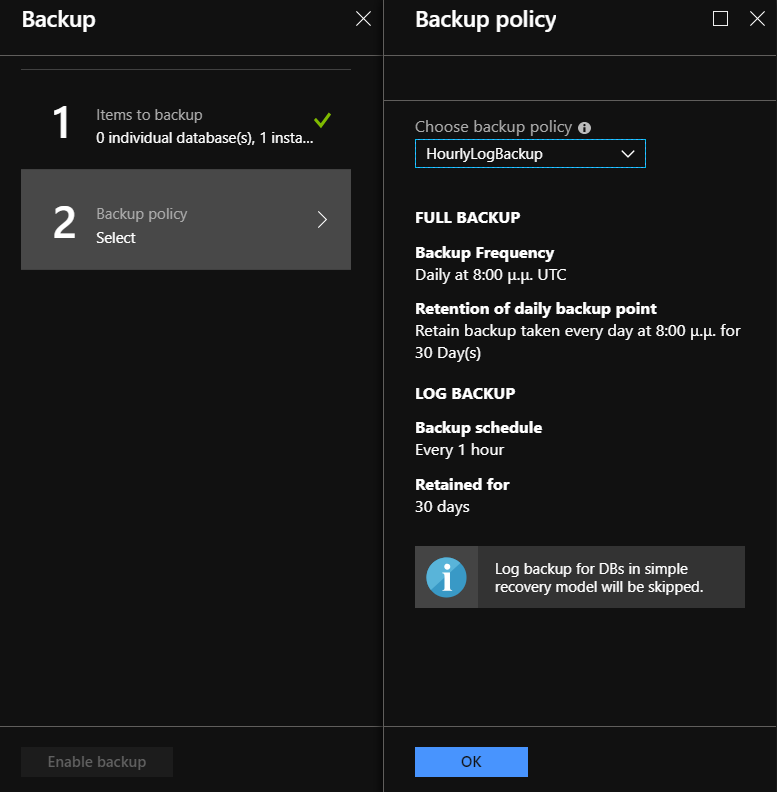
Select the databases that we want to backup and click OK.

At the next step, we must select the Backup policy, if we want we can create a new policy based on our needs, and click OK.
Create New Backup policy
If we don't want to use the default Backup policy and we want to create a new, we can choose from the [Choose backup policy] drop-down menu Create New.

| Setting | Value |
| Policy name | Type a name for the policy name. |
| Full Backup | Configure the Backup Frequency and the Retention of the backup point
Day(s), Week(s), Month(s), Year(s) |
| Differential Backup | Enable or Disable the Differential Backup setting |
| Log Backup | Enable or Disable the Log Backup setting and schedule the task for execution
and retention. Note that if the DBs are in simple recovery model Log backup will be skipped. |
| SQL Backup Compression | Enable or Disable if we want to configure the SQL native backup compression |
Finally, the last step is to select the preferred Backup policy (default or custom) and click the button Enable Backup.

Monitoring
Azure Portal offers several ways to monitor the status of the jobs from the left main blade of the vault dashboard.
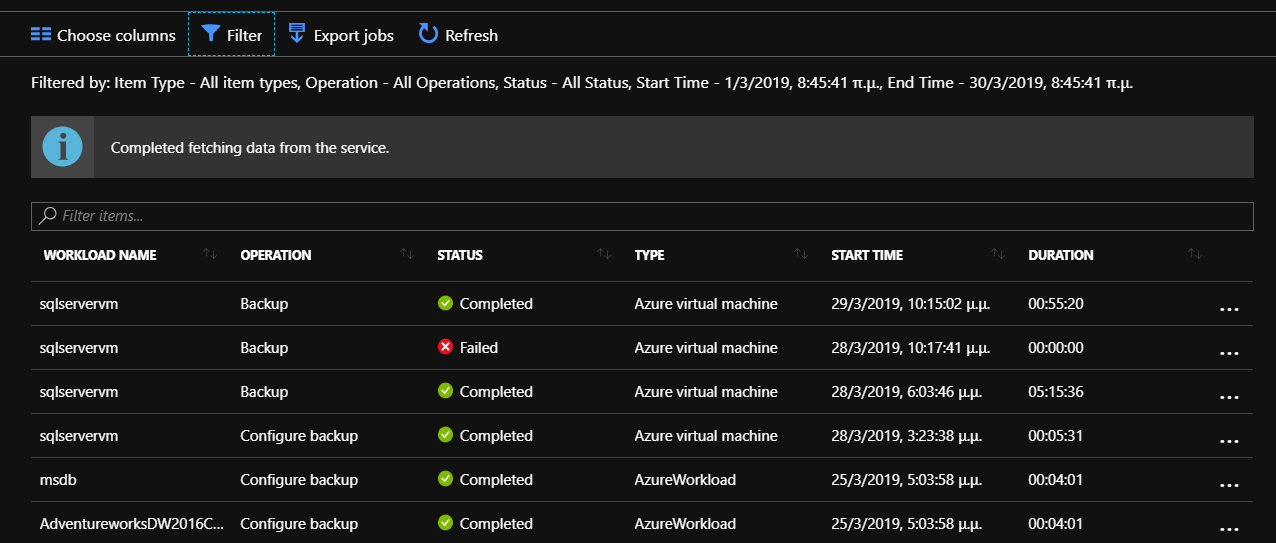
Backup Jobs
The steps to do this is Monitoring - Backup Jobs. In the new blade, we can Filter and find the status of the jobs.
Backup Alerts
To view the Backup Alerts, we select Monitoring - Backup Alerts. In this blade, we can Filter the Start - End time of the Alerts and we can configure email address(es) to send notifications.

Configure Notifications
We can configure the Backup Alerts to send notifications. This is quite easy to do, we need to click the button Configure notifications and make all the necessary configurations.
At the image below we turn On the notifications, add an email address, set up the notification type (Per Alert, Hourly Digest), the Severity of the alert and click Save.

Restore a Database Backup
At the following steps we see how easily we can restore a database.
Step 1. Select a database to restore
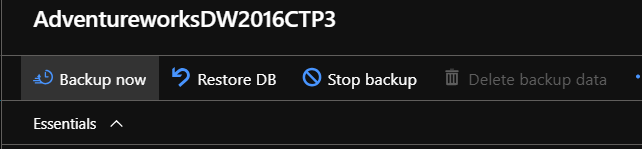
From the Recover Services vault left main blade, select Protected items - Backup items. Then from the BACKUP MANAGEMENT TYPE click SQL in Azure VM, and select the database that we need to restore. In the new blade select Restore DB.
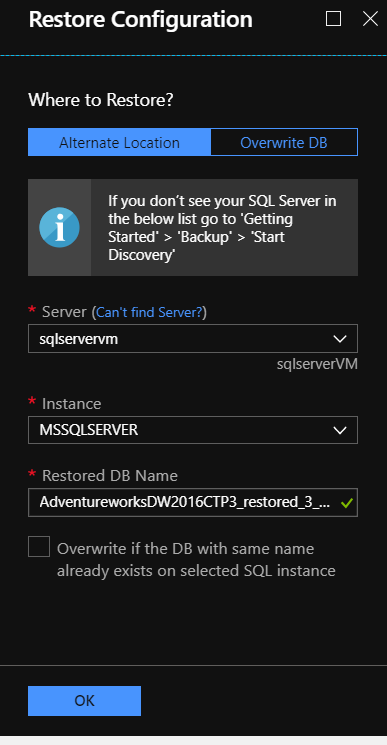
Step 2. Make the Restore Configuration
In this step there are few settings that we must do first.
Select a new location to restore the database or overwrite the existing and click OK.
Step 3. Select the restore point for the database
Next, we must select between Logs(Point in Time) or Full & Differential backup option. In this example we have a Full Backup Database, so, we select a backup file and click OK.

Step 4. Advanced Configuration
The last we need to do configure the Restore with NORECOVERY option, we can Enable or Disabled the setting and click OK.
Note
NORECOVERY option: Leaves the database non-operational, and does not roll back uncommitted transactions.

Step 5. Review the Restore Configuration
Before we click the Restore button, we can make a quick review for the, Destination, Restore Point and Advanced Configuration.

The AzureWLBackupCoordinatorSvc triggers the restore procedure to begin..

Restore is triggered successfully.

And after a few minutes from the Backup jobs blade, we can check if Restore is successfully completed.

Conclusion
In this post, we talk about Azure Backup Service for SQL Server Azure VMs. The configuration of the service is more than easy because we can configure the setting from the Azure Portal with only a few clicks.
See Also
- Recovery Services vaults overview
- Upgrade a Backup vault to a Recovery Services vault
- Delete a Recovery Services vault
- Move a Recovery Services vault across Azure Subscriptions and Resource Groups (Limited Public Preview)
- Monitoring Azure Backup workloads
- Monitoring at scale using Azure Monitor
- Azure Backup pricing