ASP.NET Core: Getting Started with gRPC
Introduction

In this article, we will see how to create and a gRPC service using the ASP.NET Core template. We will also create a client application using .NET Console core to call the gRPC service server method directly to send and receive the message from the client application.
gRPC
gRPC is fast, efficient and lightweight Remote Procedure Call which is widely used in microservices. gRPC was been initially developed by Google and now it’s open-source.
In ASP.NET Core3 we can see the new template has been included as gRPC Service. yes, using this template, we can create our gRPC Service and create client application as .NET Core Console, WinForms or ASP.ENT Core for data serialization for sending and receiving data from client to server. gRPC uses HTTP/2 for transport. gRPC uses protocol buffer aka Protobuf as the data serialization format which is used to send and receive from the client to the server.
Protobuf File
gRPC uses protobuf as the default data serialization to send and receive data from the client and server.In other words, the protobuf is used as the Interface Design Language. In order to work with gRPC service, we need to understand the protobuf file as well. Protobuf files have 2 parts as one is for the defining the gRPC Service and another part is to define the message sent between the client to the server. Here we will see each section of the protobuf file
The first line of the protobuf file we need to declare the syntax and this syntax is to mention the version we are using of protocol buffer language and here in our example we are using the proto3
syntax = "proto3";
Next we give our C# Application namespace name that is our solution name.
option csharp_namespace = "GrpcGreeter";
Next is the service part and here we have created the service named as the Greeter, When we create the gRPC service application the proto file has been added by default and this below service has been created automatically.
In this Greeter Service, we have created 2 calls as SayHello and Server message in this call each call sends HelloRequest as message and received the HelloReplay message.
// The greeting service definition.
service Greeter {
  // Sends a greeting
  rpc SayHello (HelloRequest) returns (HelloReply) {}

  rpc Servermessage (HelloRequest) returns (HelloReply) {}
}
Prerequisites
Make sure you have installed all the prerequisites on your computer. If not, then download and install them all, one by one.
Prerequisites
Code Part
Step 1 - Create a gRPC Service application
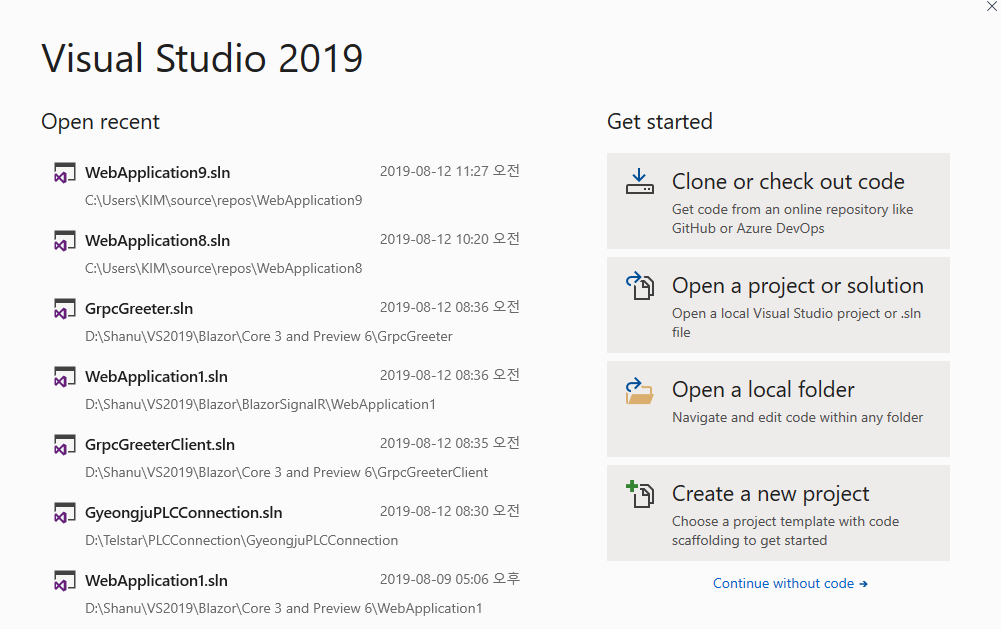
After installing all the prerequisites listed above click Start >> Programs >> Visual Studio 2019 >> Visual Studio 2019 on your desktop. >> Click New Project.
Click on ASP.NET Core Web Application and click "Next".

Enter your project name and click the "Create" button.

Now, we can see that for ASP.NET Core 3.0 has been listed. We Select the gRPC Service and click create to create our gRPC service application.** **

gRPC project Structure
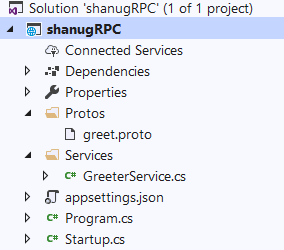
Once we created the gRPC Service project we can see as by default the project will contain the Protos folder with protobuf file as an extension with “.proto” file. Also we can see the Services folder with our Service class file. In this article beginning, we have seen in detail about what is protobuf file is and what the protobuf file contains. In our gRPC Service project, we can see the proto file has been by default created with sayHello method call to sent and receive the request and replay between client and the server.
We add one more method call
rpc Server message (HelloRequest) returns (HelloReply) {}
Here we are adding one more method call for our example and let’s see how to use this in our service and client application as well
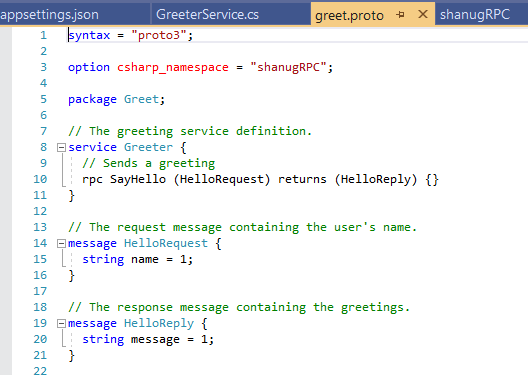
Here is the complete code of greet.proto file.
syntax = "proto3";

option csharp_namespace = "shanugRPC";

package Greet;

// The greeting service definition.
service Greeter {
  // Sends a greeting
  rpc SayHello (HelloRequest) returns (HelloReply) {}

   rpc Servermessage (HelloRequest) returns (HelloReply) {}
}

// The request message containing the user's name.
message HelloRequest {
  string name = 1;
}

// The response message containing the greetings.
message HelloReply {
  string message = 1;
}
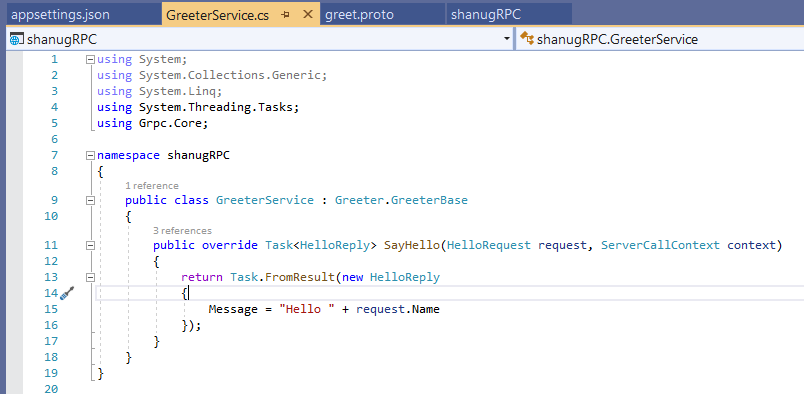
The service folder has a service class as default with** GreeterService. This class has SayHello method which was created by default. Same like this we can add our own method to send the response to the.
The service folder has a service class as default with **GreeterService. This class has SayHello method which was created by default. Same like this we can add our own method to send the response to the.
public class  GreeterService : Greeter.GreeterBase
    {
        public override  Task<HelloReply> SayHello(HelloRequest request, ServerCallContext context)
        {
            return Task.FromResult(new HelloReply
            {
                Message = "Hello " + request.Name
            });
        }

        public override  Task<HelloReply> Servermessage(HelloRequest request, ServerCallContext context)
        {
            return Task.FromResult(new HelloReply
            {
                Message = "Your Friend Name is :   "  + request.Name
            });
        }
    }
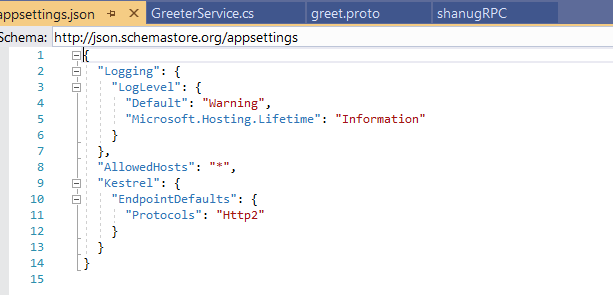
appsetting.json file will contains the protocols used for the service here we can see Http2 protocols has been used for the gRPC service.
Build and Run the application
When we build and run the application we can see as the service is running successfully and also we can see our gRPC service is listening on http://localhost:50051.

Note that as gRPC is template is configured to use the TSL and the clients need to use the HTTPS to call the server. But here we are using the http in order to use the http in our client application we need to use this below code to connect between server and client.
AppContext.SetSwitch("System.Net.Http.SocketsHttpHandler.Http2UnencryptedSupport", true);
We will see this in detail while creating the client application.** **
Step 2: Creating Client Console .Net Core application
After installing all the prerequisites listed above click Start >> Programs >> Visual Studio 2019 >> Visual Studio 2019 on your desktop. >> Click New Project.

Click on Console App(.NET Core) and click "Next".

Now our console application has been created.
Add required Packages
In order to send and receive message between client and the gRPC Service we need to add Grpc.Net.Client , Google.Protobuf and Grpc.Tools packages to our project.
Grpc.Net.Client packages is used for the .NET Core client, Google.Protobuf packages contains the protobuf message API’s to be used for the C# language. Grpc.Tool contains the tooling support for the protobuf files.
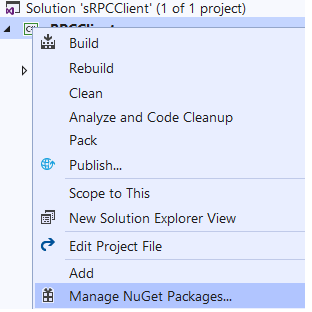
We can install this package by NuGet Package Manager or by Manage NuGet Packages.
Installing the packages by Manage NuGet Packages.
Right Click your gRPC client project and click on Manage NuGet Packages.
Select Browse tab enter “Grpc.net.Client” search and Install the package to our client project.

Same like that install the “Google.Protobuf” search and Install the package to our client project..

Same like that install the “Grpc.Tools” search and Install the package to our client project.

Adding Protobuf file to client application
In our client application we need to add the same protobuf file for data send and receive from the client to server. First, we create the Protos folder in our client project.

Now we need to add the protobuf which we used in Service project to the Protos folder.Right Click the Protos folder and click on Add Existing Item.

Select and add the greet.proto file which we used in our Service project .

Now in order to use the greet.proto file in our project.We need to add the itemGroup with Protobuf to our project.
Right Click our Project and click Edit Project file.

Add the below code to the project file.
<ItemGroup>
    <Protobuf Include="Protos\greet.proto" GrpcServices="Client" />
</ItemGroup>
Build the application in order to use our Service in client application.
Working with Client Program.cs file
Now its time for us to create the client program to send and receive the message from client to our gRPC Service.
For this we open the program.cs file and add the below namespace. Here shanugRPC are our service project namespace.
using shanugRPC ;
using Grpc.Net.Client;
using Grpc.Core;
Now add the below code in the Main method of yourprogram.cs file.
static async Task Main(string[] args)
       {
           var httpClient = new  HttpClient();
           httpClient.BaseAddress = new  Uri("https://localhost:50051");
           var client = GrpcClient.Create<Greeter.GreeterClient>(httpClient);

           var reply = await client.SayHelloAsync(
                     new HelloRequest { Name = "GreeterClient" });
           Console.WriteLine("Greeting: " + reply.Message);
           Console.WriteLine("Press any key to exit...");
           Console.ReadKey();
       }
Build and run the Applicatoin
Note: first run our Service application and then run our client application for the client and server communication. Always make sure as service is running before running the client.
When we run the application, we might get the error as
This means here our Service listening to http://localhost:50051 but the aboce code will be work for https and in our example we need to use the https://localhost:50051 .so we change the code like below.
static async Task Main(string[] args)
        {

            //----------------
            AppContext.SetSwitch("System.Net.Http.SocketsHttpHandler.Http2UnencryptedSupport", true);
            var httpClient = new  HttpClient();
            httpClient.BaseAddress = new  Uri("http://localhost:50051");
            var client = GrpcClient.Create<Greeter.GreeterClient>(httpClient);

            var reply = await client.SayHelloAsync(
                      new HelloRequest { Name = "Shanu" });
            Console.WriteLine("Greeting: " + reply.Message);
            Console.WriteLine("Press any key to exit...");
            Console.ReadKey();

        }
Code part explanation
For using the http instead of the https first set the below code part
AppContext.SetSwitch("System.Net.Http.SocketsHttpHandler.Http2UnencryptedSupport", true);
            var httpClient = new  HttpClient();
Next we create the client object with url.
var httpClient = new  HttpClient();
            httpClient.BaseAddress = new  Uri("http://localhost:50051");
            var client = GrpcClient.Create<Greeter.GreeterClient>(httpClient);
Next we send and get the replay from the service by calling the service method and pass the request and get the reply message.
var reply = await client.SayHelloAsync(
                      new HelloRequest { Name = "Shanu" });
            Console.WriteLine("Greeting: " + reply.Message);
Run the application
When we run the application we can see result as we send name as Shanu to the service from the client and we get the reply from the service as “Hello Shanu”
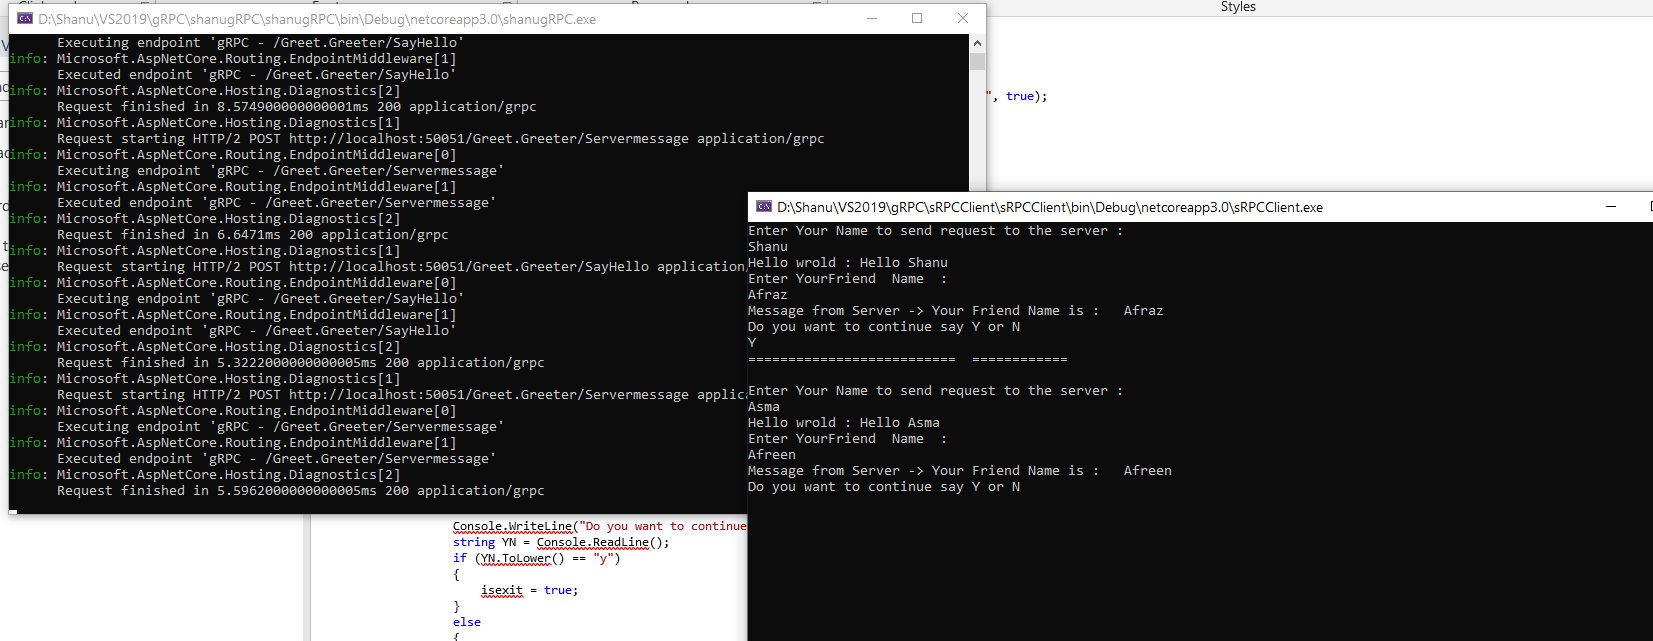
Now we change the code to get the our name and our friend name to send to the service for diriment method call and get there play from each message and display the results .
Here is the complete code. We have used the similar code and asked the user to enter their name and friend name and called service method SayHello and Servermessage method to send and receive message from the client and server.
static async Task Main(string[] args)
       {

           ////var httpClient = new HttpClient();
           ////// The port number(5001) must match the port of the gRPC server.
           ////httpClient.BaseAddress = new Uri("https://localhost:50051");
           ////var client = GrpcClient.Create<Greeter.GreeterClient>(httpClient);

           //----------------
           AppContext.SetSwitch("System.Net.Http.SocketsHttpHandler.Http2UnencryptedSupport", true);
           var httpClient = new  HttpClient();
           // The port number(5001) must match the port of the gRPC server.
           httpClient.BaseAddress = new  Uri("http://localhost:50051");
           var client = GrpcClient.Create<Greeter.GreeterClient>(httpClient);

           //-----------------------

           Boolean isexit = true;
           while (isexit)
           {
               Console.WriteLine("Enter Your Name to send request to the server : ");
               String myName = Console.ReadLine();

               var reply = await client.SayHelloAsync(
                                 new HelloRequest { Name = myName });
               Console.WriteLine("Hello wrold : " + reply.Message);


               Console.WriteLine("Enter YourFriend  Name  : ");
               String friendName = Console.ReadLine();

               var serverreply = await client.ServermessageAsync(
                                 new HelloRequest { Name = friendName });
               Console.WriteLine("Message from Server -> " + serverreply.Message);


               Console.WriteLine("Do you want to continue say Y or N");
               string YN = Console.ReadLine();
               if (YN.ToLower() == "y")
               {
                   isexit = true;
               }
               else
               {
                   isexit = false;
               }
               Console.WriteLine("==========================  ============");
               Console.WriteLine("");
           }

           Console.WriteLine("Press any key to exit...");
           Console.ReadKey();

       }
Conclusion
In this article, I discussed how to work with gRPC Service and client application to send and receive message from gRPC Service ,In order to work with this sample dont forget to install .NET Core 3.0 and Visual Studio 2019 preview.
See Also
- Introduction to gRPC on ASP.NET Core
- gRPC services with C#
- Create a gRPC client and server in ASP.NET Core
Download
Getting Started with gRPC Client and Server using ASP.NET Core