SCOM 1807 Step-By-Step: Upgrade database to SQL Server 2017
Applies to
This guide applies to System Center Operations Manager 1807
Introduction
In this guide we will go through on how to perform an upgrade of the SCOM 1807 SQL Server database, we will be performing an upgrade from SQL Server 2016 SP1 to SQL Server 2017.
There is one new thing to keep note of when installing SQL Server 2017, SQL Reporting Services is now a separately-installed feature and needs to be downloaded separately.
Prerequisites
SQL Server version
SQL Server 2017 (14.x) supports upgrade from the following versions of SQL Server:
- SQL Server 2008 SP4 or later.
- SQL Server 2008 R2 SP3 or later.
- SQL Server 2012 SP2 or later.
- SQL Server 2014 or later.
- SQL Server 2016 or later.
System Center Operations Manager version
- System Center Operations Manager 1807.
Back up the SQL Server Reporting Server database
Before installing, uninstalling or upgrading always make sure to have a backup, in case something doesn’t goes wrong or doesn’t go as planned.
We will now go through on how to backup the SQL Server Reporting server, log on the server hosting the SQL Server Reporting server database(s).
1. On the server hosting the SCOM SQL Server Reporting Server database, open the SQL Management Studio.

**2. **Once the SQL Management Studio has opened, make sure to have the SCOM instance selected, and then click Connect.
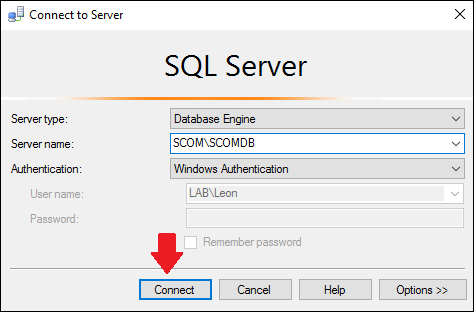
(In this guide the SCOM server is named "SCOM" and the SQL instance is named "SCOMDB")
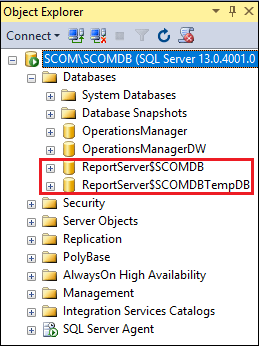
3. We should now be connected to our SCOM instance, **expand **Databases on the left pane, we should then see our SCOM Report Server database(s).
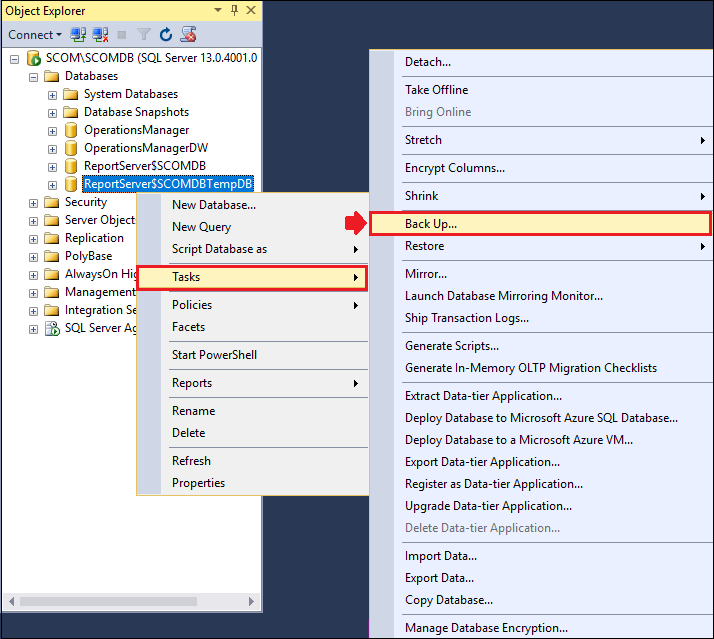
4. To backup the SCOM Report Server database, right-click on the ReportServer database, choose **Tasks **and then click Back Up.

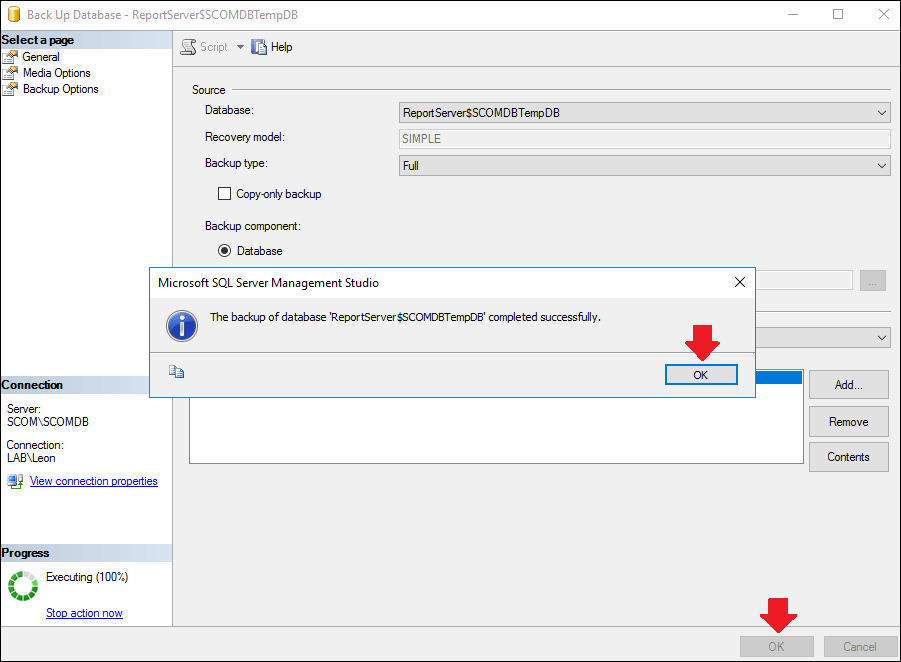
5. A Back Up Database window will open up, select the Backup type to Full, make sure the Backup component is set to Database, and then select a **destination **where to save the backup, finally click **OK **to start the backup.

6. Once the backup has completed, we will be notified by a pop up window, click **OK **twice to close the backup windows.

7. Now we will perform the same steps for the SCOM Report Server temp database, right -lick on the ReportServer Temp database, choose **Tasks **and then click Back Up.
8. The Back Up Database window once again open up. make sure the Backup type is set to Full, and that the Backup component is set to Database, select a destinationwhere to save the backup and finally click **OK **to start the backup.

9. Once the backup is done, click **OK **twice to close the backup windows.
**10. **Ensure that the backups actually got created, head to the following folder:
**D:\Program Files\Microsoft SQL Server\MSSQL13.SCOMDB\MSSQL\Backup **
Note: The drive letter is where the SQL Server is installed.

We have now verified that the backups have been created.
Back up the SQL Server Reporting Server encryption key
We will now go through how to backup the SQL Server Reporting Services encryption key.
1. Open up the Reporting Services Configuration Manager, make sure both Server Name and Report Server Instance are correct, then click Connect.

**2. **Head to the Encryption Keys tab, which can be found on the left pane at the bottom.

3. Select **Backup **to start backing up the encryption keys.

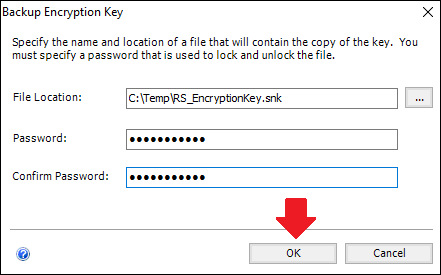
4. Next specify a **file **that will contain the stored key and to which **location **the the key will be saved (the key will be saved in a .snk file extension).

**5. **Come up with a strong password, remember to write it down!

6. Click **OK **to finalize the backup of the encryption key.
7. The encryption key should now have been backed up, the results will be shown in at the bottom of the Reporting Services Configuration Manager window.

We have now created a backup of our SQL Server Reporting Services encryption key.
Back up the SQL Server Reporting Server configuration files
The next thing to back up is the SQL Server Reporting Services configuration files, there are five (5) files to back up.
The files:
- Rsreportserver.config
- Rssvrpolicy.config
- Reportingservicesservice.exe.config
- Web.config (for the Report Server ASP.NET application)
- Machine.config (for ASP.NET)
You can also find the location of the SQL Server Reporting Services configuration files from here:
/en-us/sql/reporting-services/report-server/reporting-services-configuration-files?view=sql-server-2017
To back up these configuration files we will simply copy them to a safe location.
1. Most of the SQL Server Reporting Services configuration files will be located where the SQL Server Reporting Services is installed.
**Example: **C:\Program Files\Microsoft SQL Server\MSRS13.YourSCOMInstanceName\Reporting Services\ReportServer
2. Browse to the folder where our Report Server is installed.

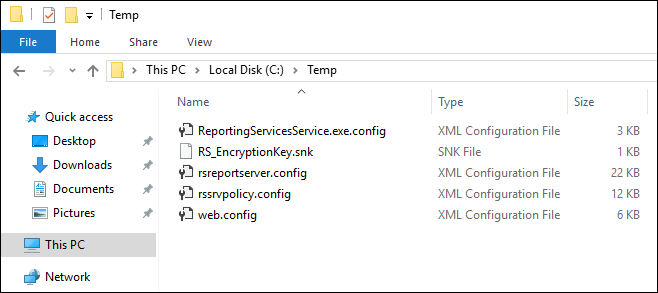
3. Locate and copy the following three (3) configuration files:
- web.config
- rsreportserver.config
- rssrvpolicy.config
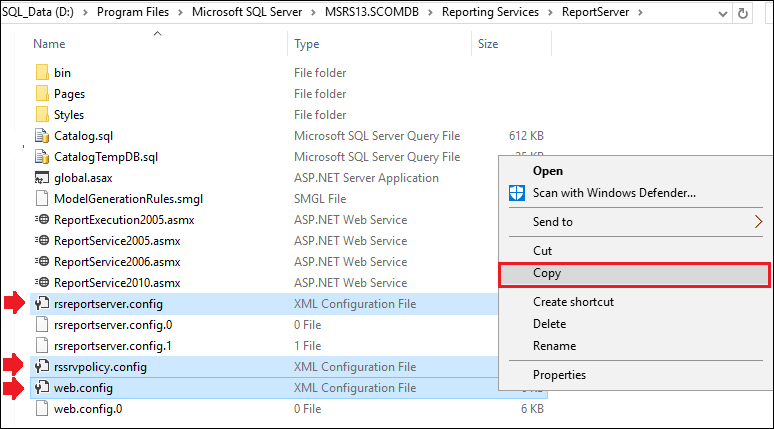
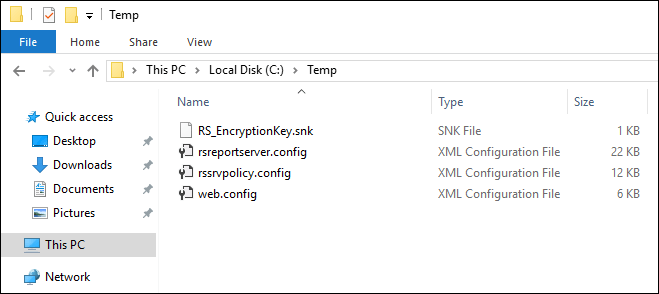
**4. **Copy the three (3) files to another location so you have a back up of the files.
5. Head to the bin folder within the Report Server installation folder.
**Example: **D:\Program Files\Microsoft SQL Server\MSRS13.SCOMDB\Reporting Services\ReportServer\bin
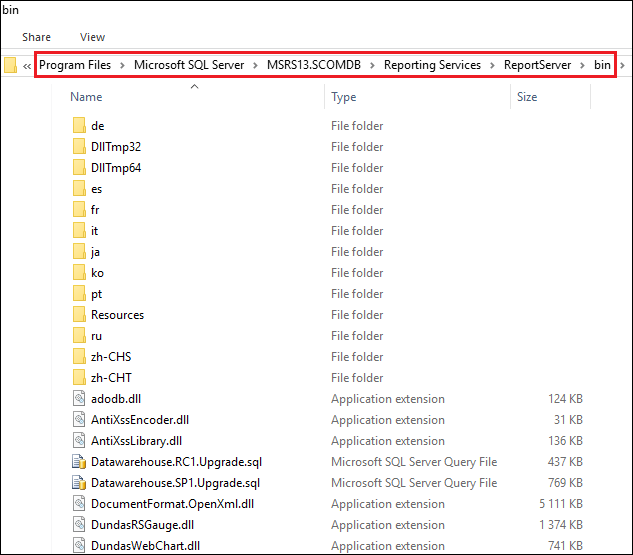
6. Locate the following configuration file: Reportingservicesservice.exe.config and copy it.

7. Copy the configuration file to another location so you have a back up of the files.
8. Finally we will locate the last configuration file, it can be found from the following location:
32-bit
%windir%\Microsoft.NET\Framework\version]\config
64-bit
%windir%\Microsoft.NET\Framework64\version]\config
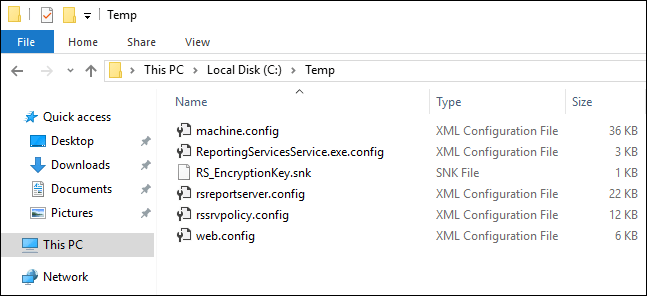
9. Locate and copy the Machine.config file.

10. Copy the configuration file to another location so you have a back up of the files.
Uninstalling the SCOM Reporting Server
In order to be able to reinstall the SCOM Reporting Server, we will need to remove any data that has been left behind from the previous installation.
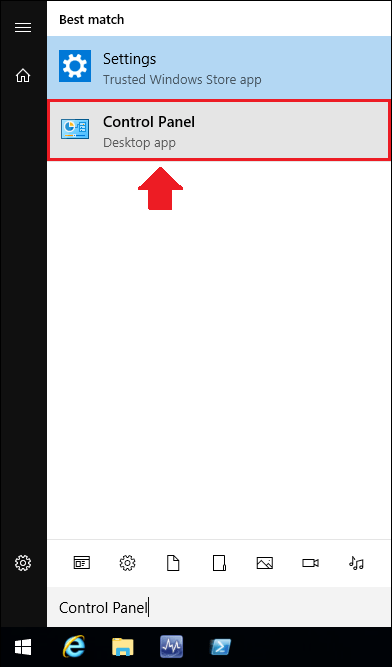
1. Go to the Control Panel on the server where the SQL Server Reporting Services is installed.
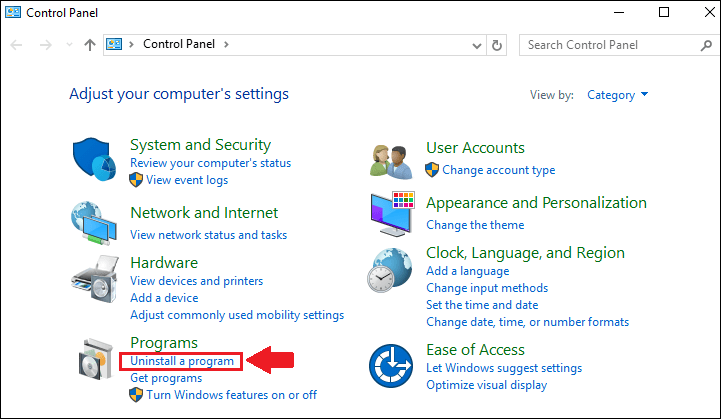
2. In the Control Panel, click on Uninstall a Program which can be found under Programs.
3. Locate the System Center Operations Manager, select it and then click on Uninstall/Change.

4. An Operations Manager setup window will appear, click on Remove a feature.
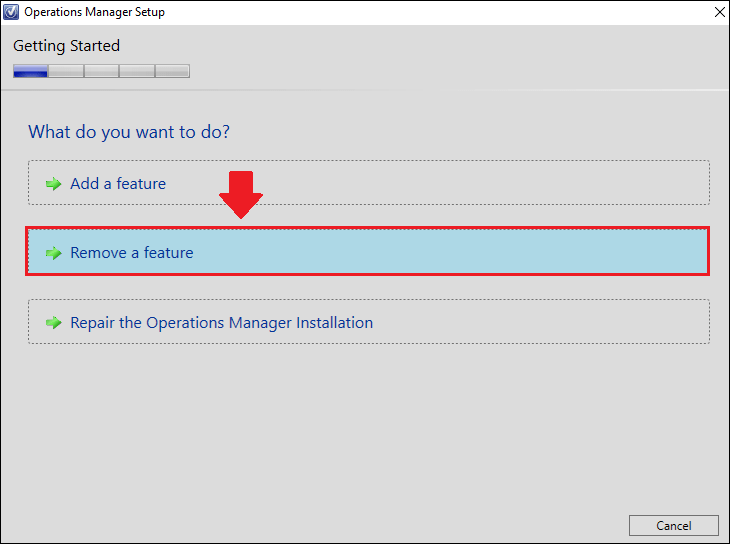
5. In the next window we will be able to select which SCOM feature we want to uninstall, select Reporting server and then click on Uninstall.

6. Once the uninstallation has completed, click on **Close **to exit the Operations Manager setup wizard.

7. Now we will need to remove any data related to the SCOM Reporting Server that’s been left behind, to do this we will use a tool called ResetSRS.exe which can be found on the SCOM installation disc/ISO.
8. Mount the SCOM installation ISO (if you don’t have one, download here). by right-clicking the ISO file and select Mount.
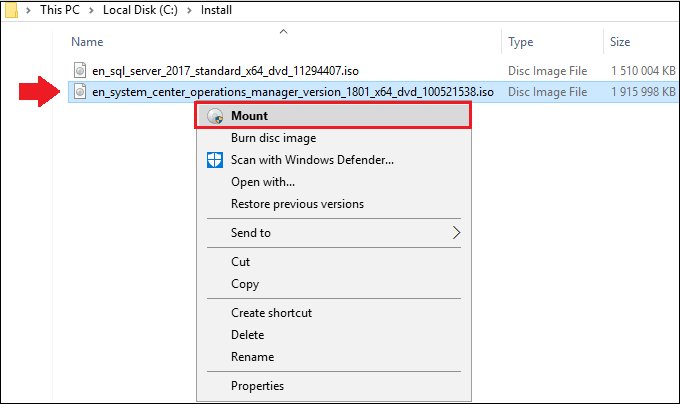
9. We should now have the SCOM 1801 installation ISO mounted.

10. We will need to extract the contents of the SCOM_1801_EN.EXE file, open it and extract the installation files locally on the SCOM server.

11. Once the extraction is complete, navigate to the extracted SCOM installation files folder.

12. Now head to the **SupportTools **folder within the System Center Operations Manager (the SCOM installation files folder) folder.
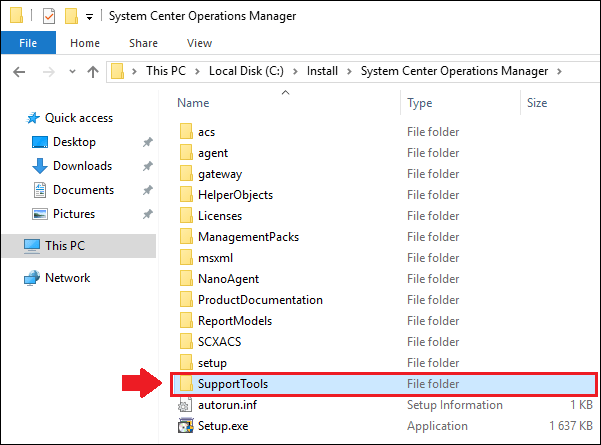
13. Then head to the **AMD64 **folder.

14. Now copy the ResetSRS.exe file to a local folder (for example C:\Temp).


15. Now right-click your Start button on the Windows task bar and open up Command Prompt (Admin).

**16. **Change the directory to where we copied the ResetSRS.exe tool, in our case C:\Temp.

17. Run the ResetSRS.exe tool as follows:
ResetSRS.exe <SQL Server instance name>
The SQL Server instance name is the SQL Server instance that SQL Reporting Services is installed on. (Default instance is: MSSQLSERVER).
In our case the instance name is: SCOMDB.
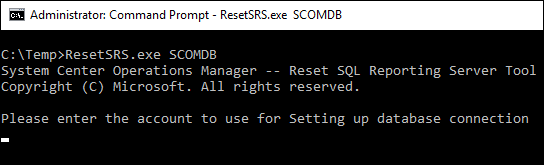
18. We will now be prompted to enter an account to use for setting up the database connection, make sure you have sufficient permissions to the database.
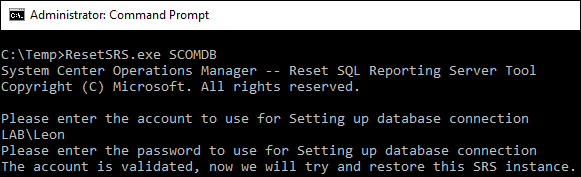
19. Once the credentials have been entered and the restore has completed, we should see the following:

We have now successfully deleted any left over data.
Upgrading the SQL Server to 2017
Now it’s time to perform an upgrade of the SQL Server 2016 to SQL Server 2017.
1. **Mount **the SQL Server 2017 ISO file on the SCOM database server.

2. Once mounted, right-click and open the setup.exe with Run as administrator.
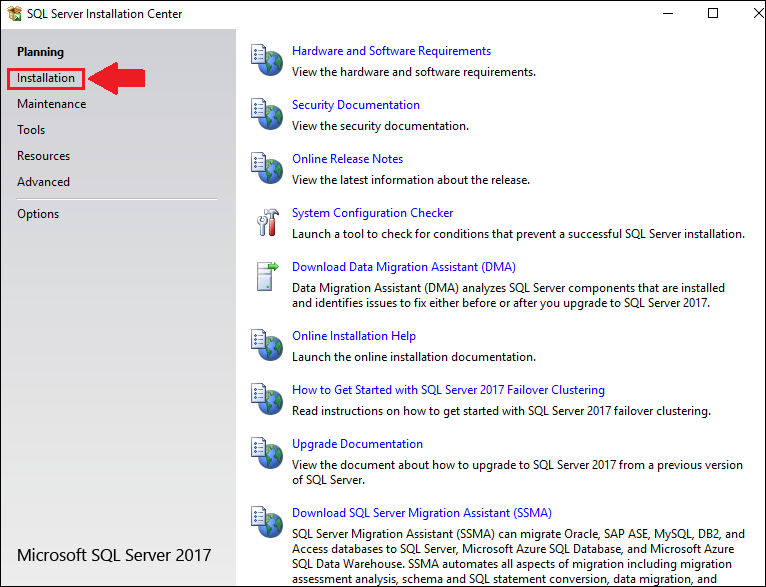
3. The *SQL Server Installation Center *window will now open up, head to the **Installation **pane on the upper left.

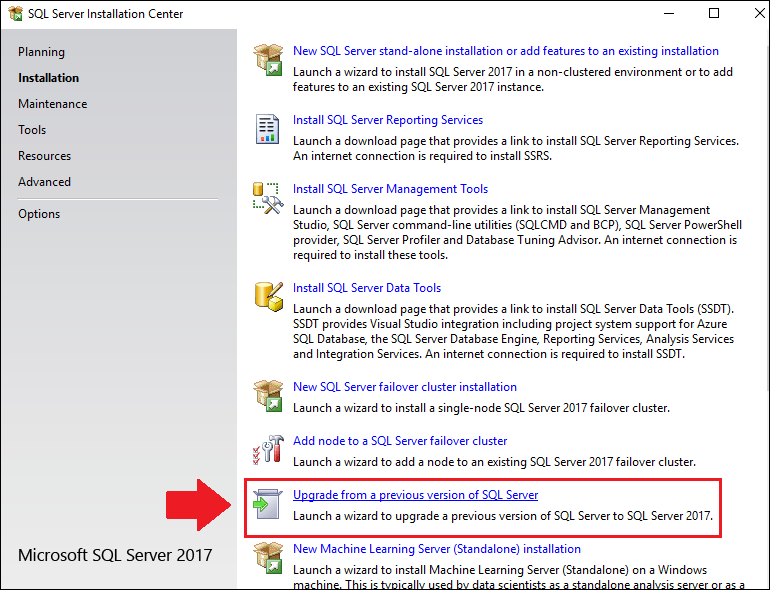
4. At the bottom of the SQL Server Installation Center window, click on Upgrade from a previous version of SQL Server.
5. An Upgrade to SQL Server 2017 wizard will open up, enter your SQL Server product key and click Next.

6. Check the box "I accept the license terms" and then click **Next **to continue.

7. Next up check the box if you want Microsoft Update to check for updates, if not just leave it unchecked and click Next to continue.

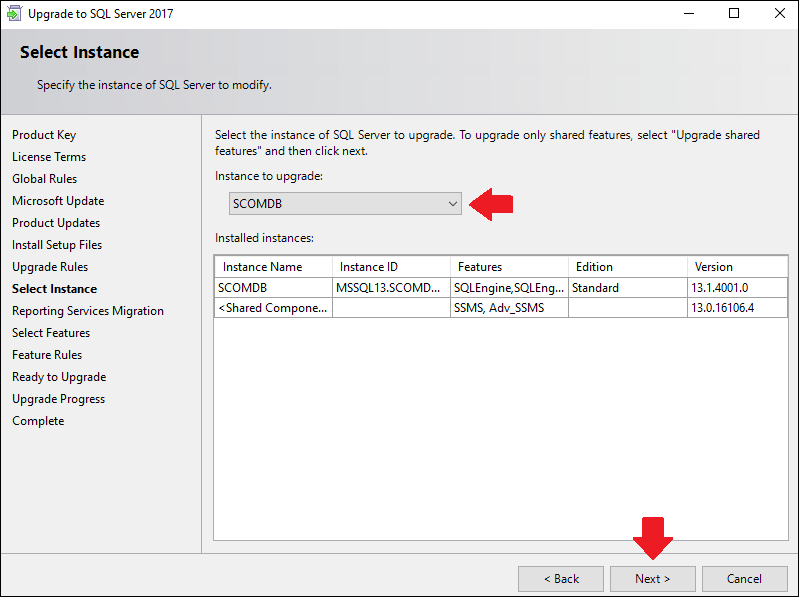
8. In the next step we will select which SQL instance we want to upgrade, if you have multiple SQL instances on the same server make sure to select the SCOM instance, click **Next **to continue.
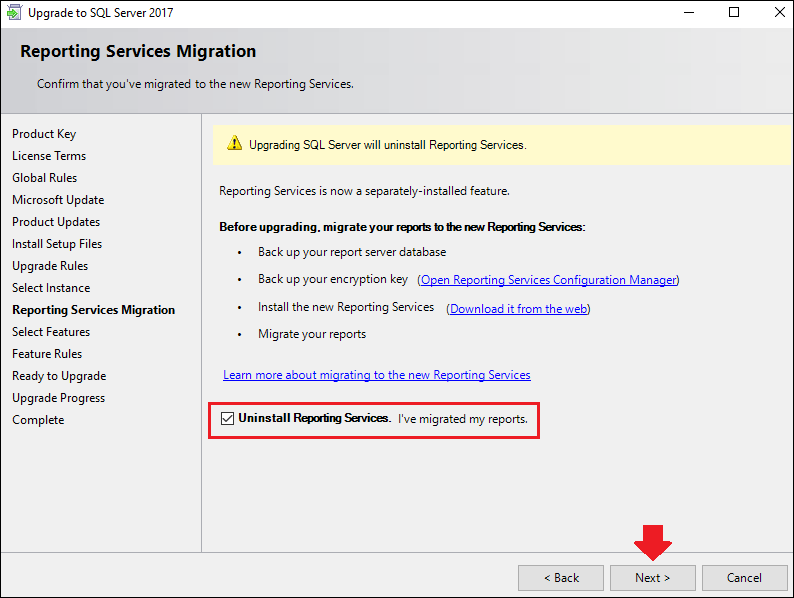
9. In the following step the Upgrade to SQL Server 2017 wizard will give us a warning to tell us that the SQL Reporting Services will be uninstalled, check the mark for Uninstall Reporting Services and then click Next.
10. Next up, we can see which SQL features will be upgraded, click **Next **to continue.

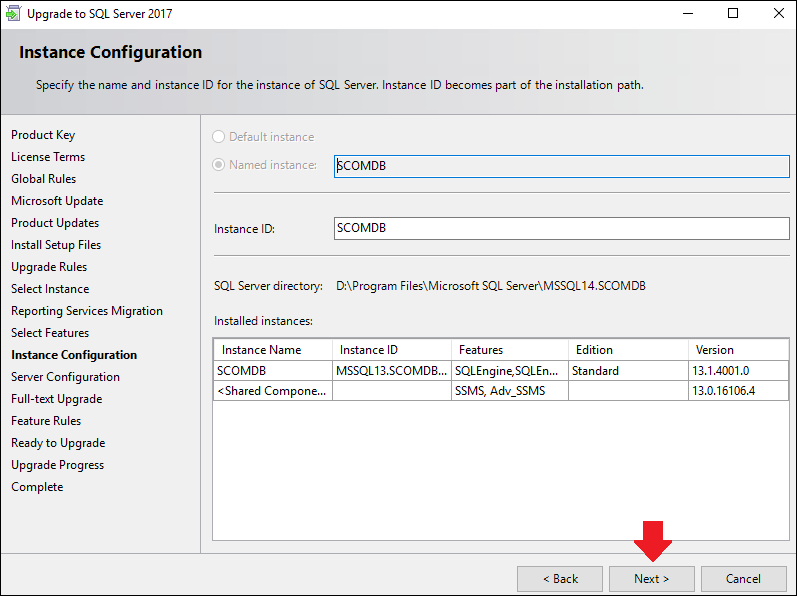
11. In the Instance Configuration step there’s no change needed, click **Next **to continue.
12. In the Server Configuration step we don’t need to change anything, click **Next **to continue.

13. In the Full-Text Upgrade step, choose the an option that suits you the best, we will go with the default Import, click **Next **to continue.

14. We are now ready to upgrade, click on **Upgrade **to start the upgrade process.

15. Once the upgrade is completed, press **OK **and **Close **to finish.
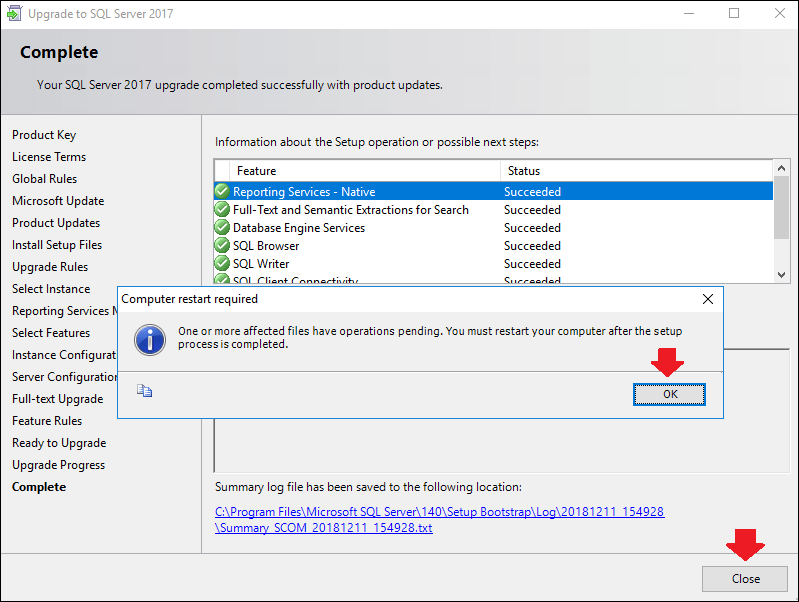
We have now successfully upgraded to SQL Server 2017.
Installing the SQL Server Reporting Services 2017
Since SQL Server 2017, the Reporting Services is no longer part of the SQL installation media so we will have to download and install it separately.
SQL Server Reporting Services 2017 can be downloaded from here.
1. Download the SQL Server Reporting Services 2017 to your SCOM database server.

2. Locate the SQL Server Reporting Services 2017 installer, right-click it and open it as Run as administrator.

3. A Microsoft SQL Server 2017 Reporting Services setup wizard will open up, click on Install Reporting Services.

4. Select Enter the product key and enter your product key for SQL Server 2017 and click **Next **to continue.

5. Check the "I accept the license terms" check box and click Next.

6. Click **Next **again.

7. Specify an install location and finally click **Install **to start installing the SQL Server 2017 Reporting Services

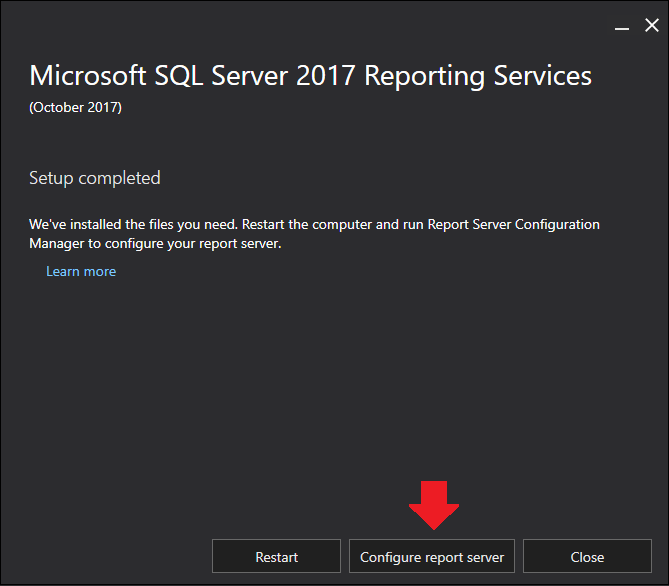
8. Once the installation is complete, click on Configure report server to launch the Reporting Services Configuration Manager.
Configure the SQL Server Reporting Services 2017
1. Select the SCOM Reporting Service instance and click Connect.

2. Head to the **Database **tab on the left, and then select Change database.
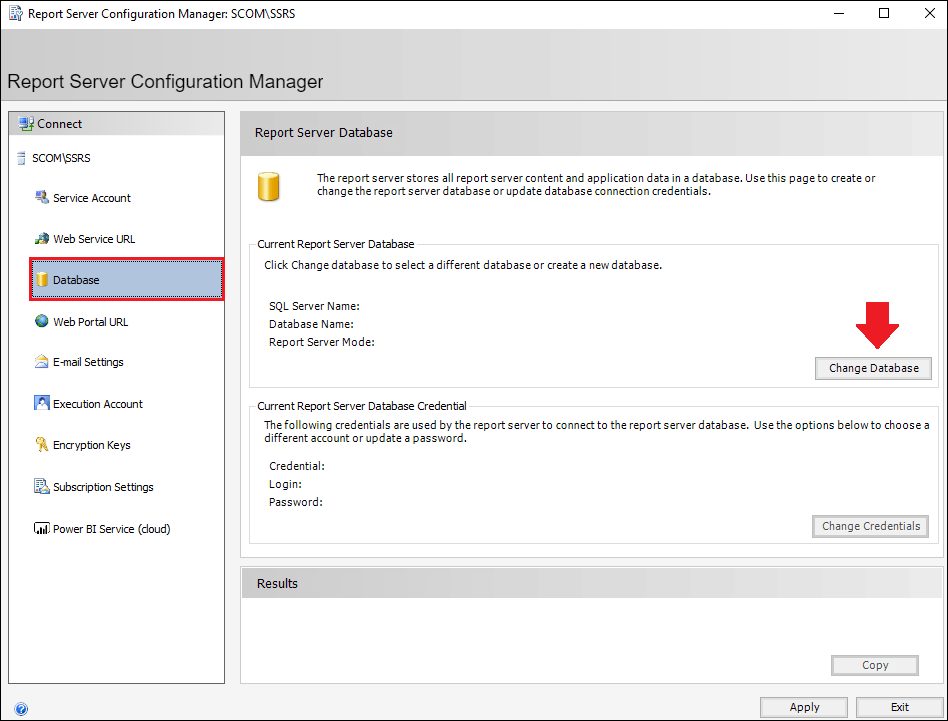
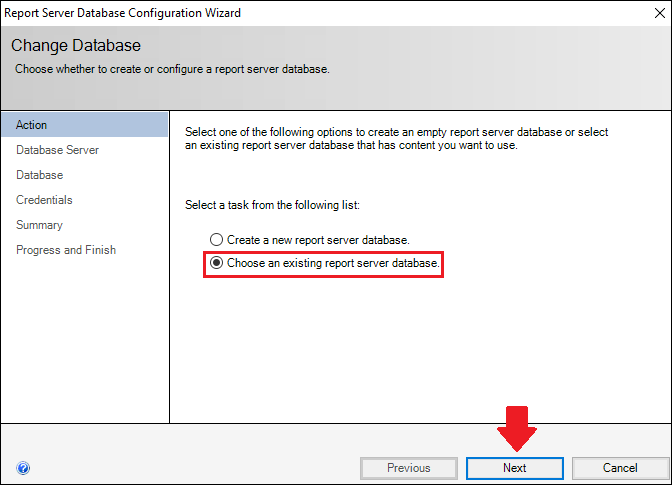
3. Select Choose an existing report server database and click Next.
4. Make sure we have connectivity to the database, we can test this by clicking Test Connection, if the test passed click **OK **and click **Next **to continue.

5. Select the SCOM ReportServer database from the drop down list, and then click Next.

6. Specify the credentials of an existing account that is used to connect to the SCOM Reporting Services database, then click Next.
In this guide we will use an account that has sysadmin privileges and configure my specific SQL Reporting Services account later.
Note: If you used a specific account for the report server connection, make sure it is the account that was previously used.

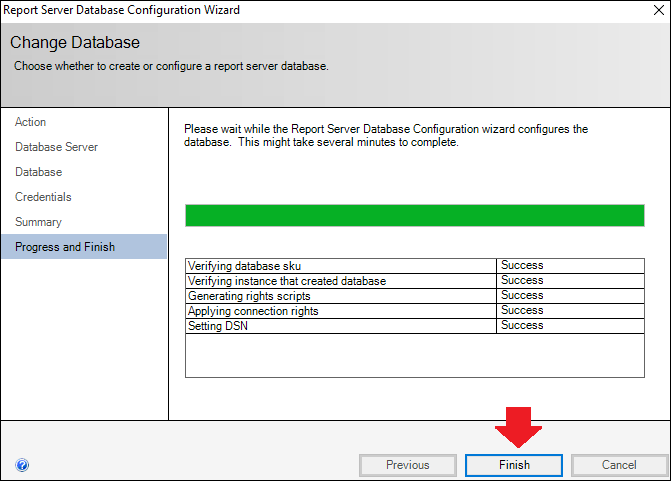
7. Have a look at the summary screen and verify that everything is correct, click **Next **to continue.

8. Once the configuration is complete, click Finish.
9. We have now configured the Reporting Services database and we should see something similar to this:

10. Next up we will restore the symmetric key that is used to encrypt the stored connection strings and credentials, head to the Encryption Keys tab and click on Restore.

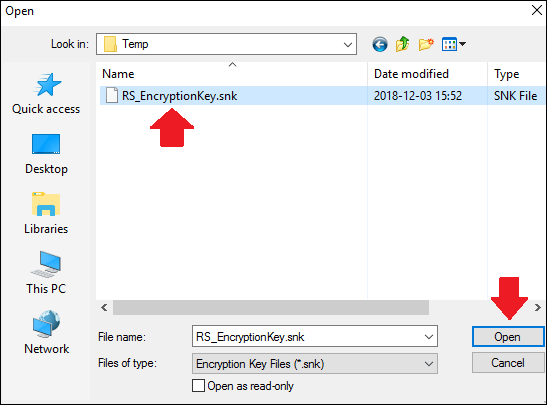
11. We will now need to locate the encryption key that we stored earlier.

12. Locate the encryption key and then click Open.
13. We will now need the password for our encryption key, locate it and write it down in the Password field and finish up by clicking OK.

14. Once the encryption key has successfully been restored, we should see the similar results to below:

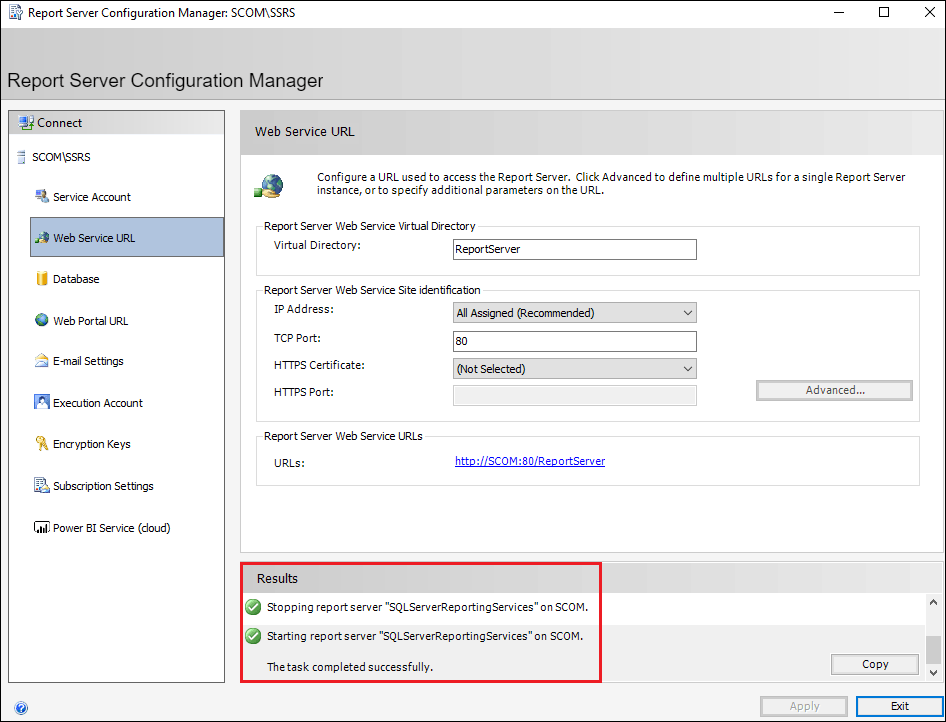
15. Next we will create and configure the Web Service and Web Portal URLs, head to the Web Service URL pane on the left of the Report Server Configuration Manager.

16. In this guide we have everything on the default settings, if you have configured this, make sure to configure it as it was before, then click on **Apply **to configure the Web Service URL.

17. Once done we should see green in the bottom of the window under Results.
18. Next we will configure the Web Portal URL, head to the Web Portal URL pane on the left.
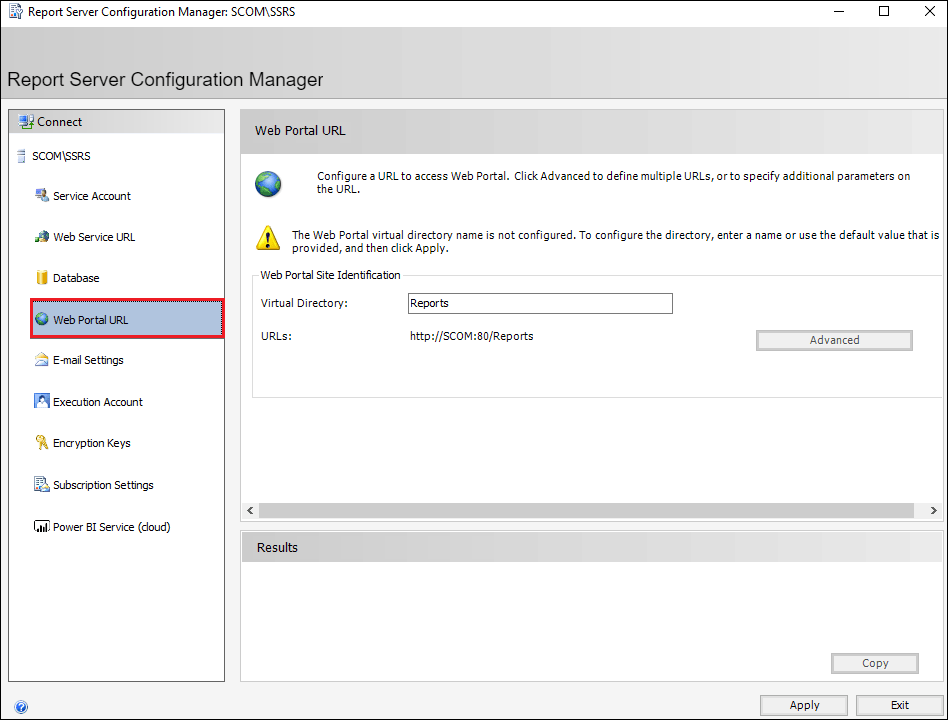
19. Click on **Apply **to configure the Web Portal URL.
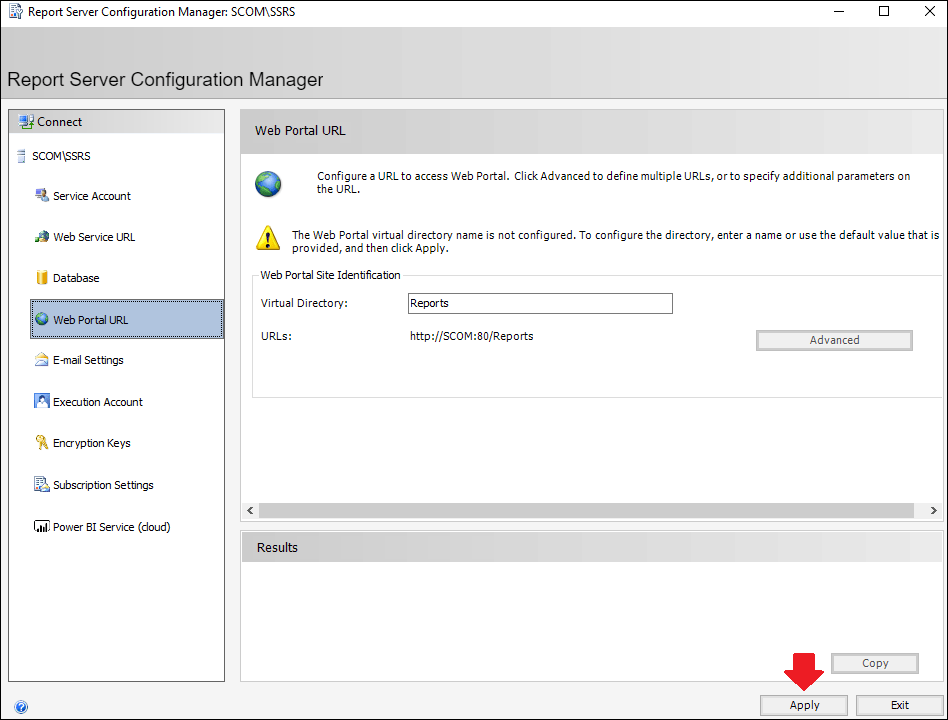
20. We should once once again see the results at the bottom of the window, similar to this:

21. Next we will delete the encrypted content as we will not need it anymore, head to the Encryption Keys tab in the Report Server Configuration Manager, and click on the **Delete **button within the *Delete Encrypted Content *section.

22. Now open up a Command Prompt (Admin) and type **regedit **to open the Windows Registry.

23. In the Windows registry, head to the following path:
HKEY_LOCAL_MACHINE\SOFTWARE\Microsoft\Microsoft SQL Server\SSRS\MSSQLServer\CurrentVersion
24. We should see a registry key with the name CurrentVersion, copy the value of the registry key.
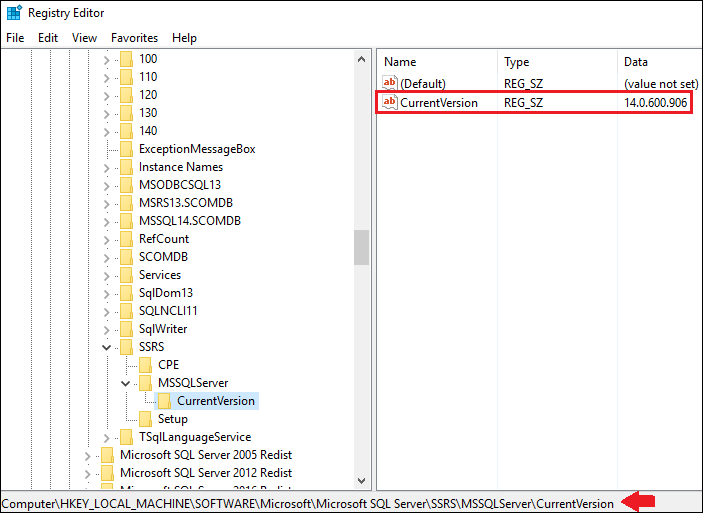
25. Head to the following registry path:
*HKEY_LOCAL_MACHINE\SOFTWARE\Microsoft\Microsoft SQL Server\SSRS\Setup
*

26. Now create a new String Value (REG_SZ) registry entry with the name **Version **and paste the version of the previous registry key (step 25).


27. We will now need to restart the server for the changes to take effect.
Install the SCOM Report Server
1. Open up the Control Panel, and click on Uninstall a program under Programs.

2. Locate and select the *System Center Operations Manager *and then click on Uninstall/Change.

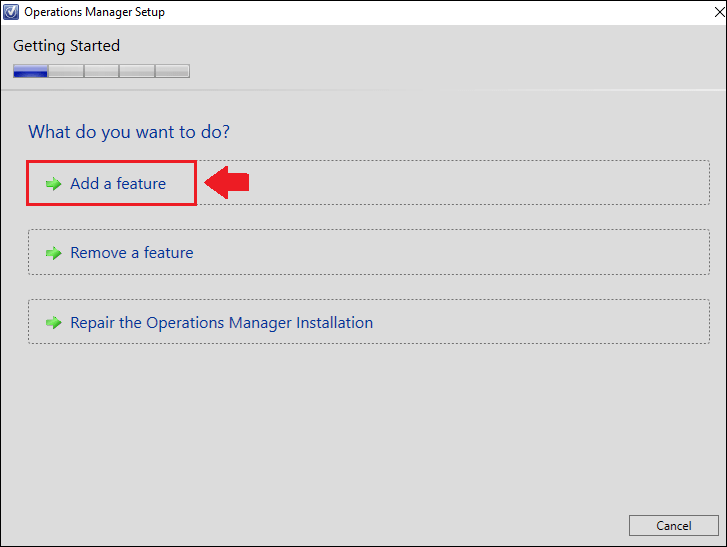
3. In the Operations Manager Setup window, select Add a feature.
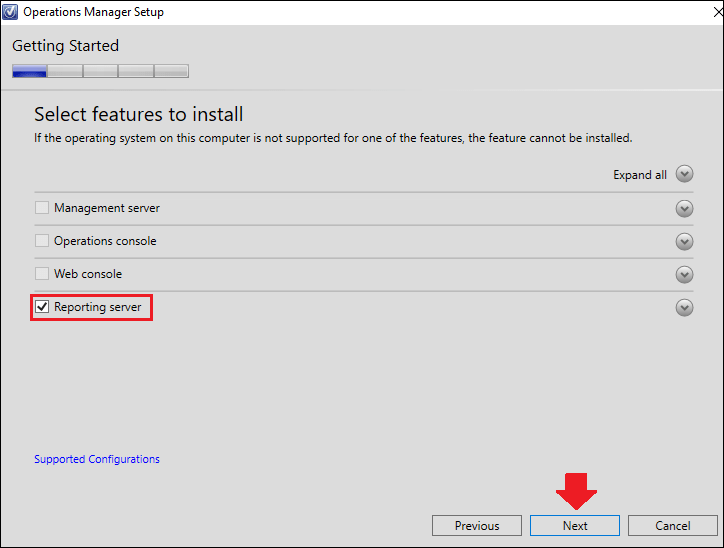
4. Check the Reporting server and click **Next **to continue.
5. All prerequisites should already be installed, click Next.

6. Select the SCOM Reporting Services Instance and click Next.

7. Now enter the account used for the Data Reader account, click **Next **to continue.

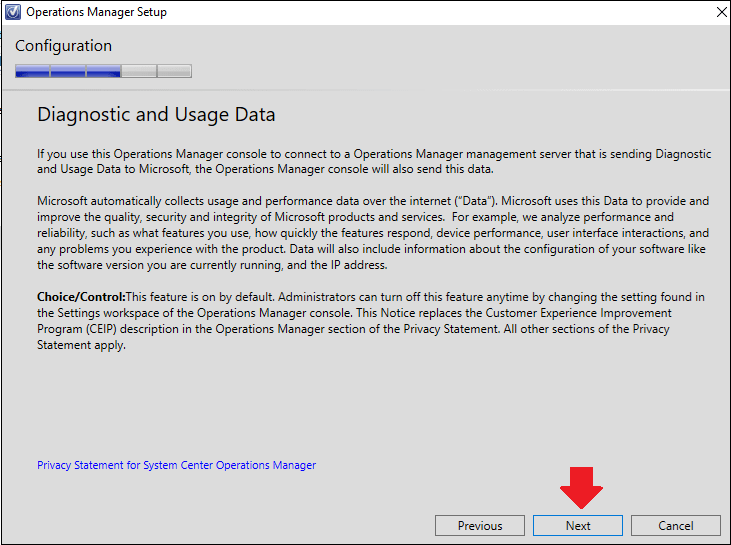
8. On the Diagnostic and Usage Data step, just click **Next **again to continue.
9. We will not be choosing to check for updates in this guide, choose which suits you the best and then click Next.

10. Finally click **Install **to start the installation of the SCOM Report Server.
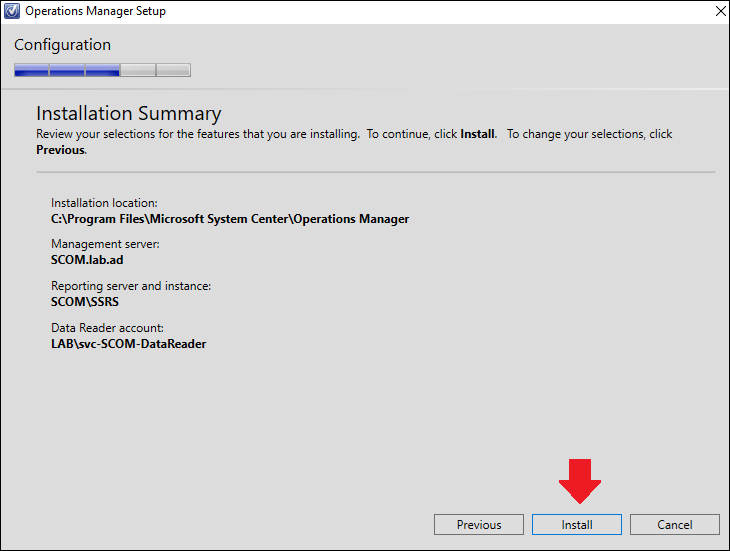
11. Once the installation is complete, we should see something similar:
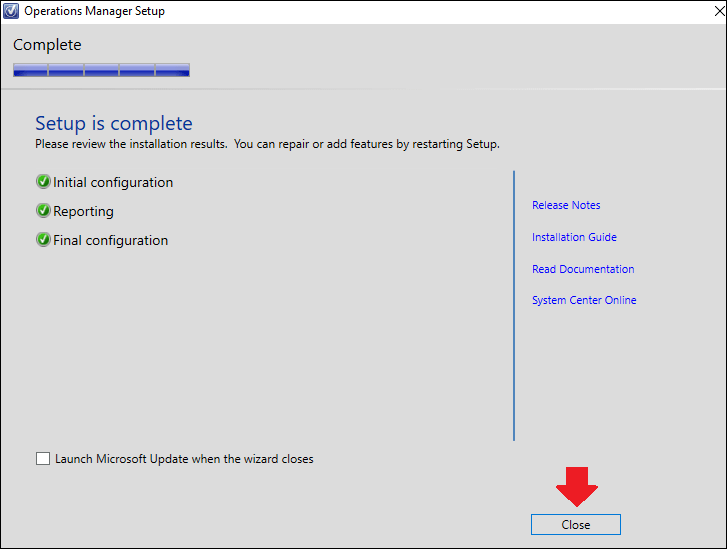
12. Click **Close **to finish.
Verifying the installation of the SCOM Report Server
The last steps is to verify that the newly upgraded SCOM Reporting is working.
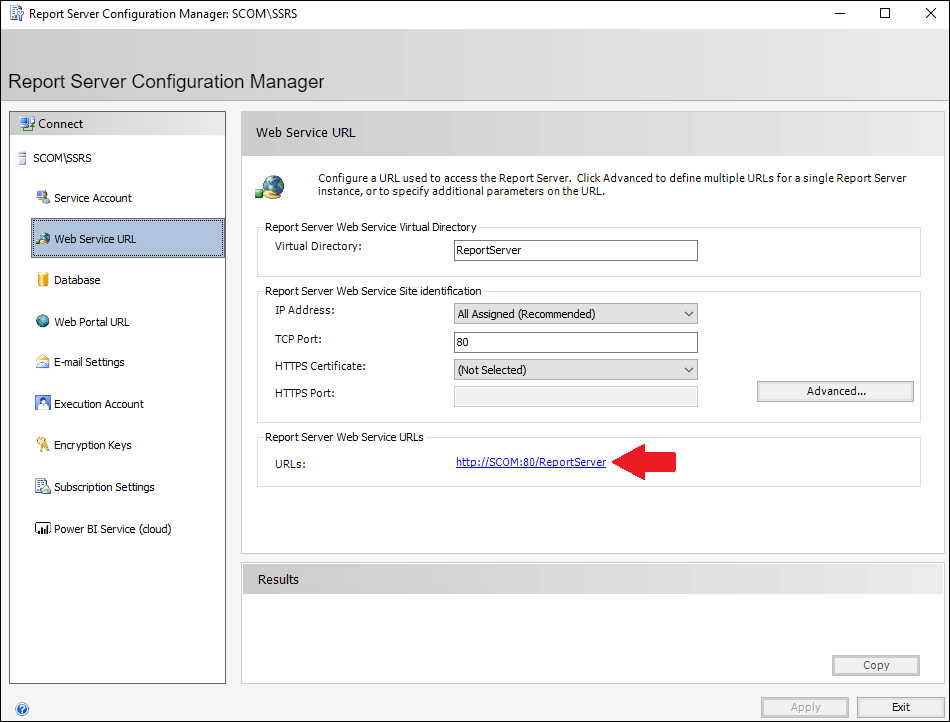
1. Open the Report Server Configuration Manager and **connect **to the SCOM report server instance.

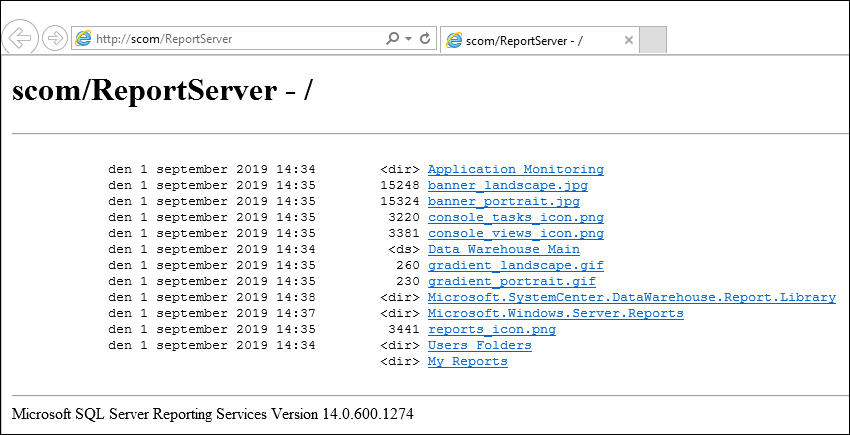
2. Head to the Web Service URL tab, and click on the Report Server Web Service URL (for example: http://SCOMserver:80/ReportServer) to test if the report server opens correctly.
Once the URL opens, we should see something similar to this:
3. Head back to the Report Server Configuration Manager and go to the Web Portal URL tab, now open the URL for the Web Portal (for example:http://SCOMserver:80/Reports) to test if the report web portal opens correctly.

Once the URL opens, we should see something similar to this:

**4. **Lastly we will ensure that the health status of our SCOM management group.
- Open the Operations Console, head to the Monitoring pane and find the Operations Manager folder and click on Management Group Health.

If any of the above objects are in a critical or warning status, make sure to investigate them.
We have now successfully upgraded our SCOM 1807’s to SQL Server 2017!
Happy SCOM’ing!
Conclusion
The upgrade of an SQL Server in a SCOM environment is fairly straight forward process, do note however since all the data is stored in the SCOM databases it is extremely important that backups exist prior to any upgrade.
Previously there were issues when upgrading to SQL Server 2017, because the SQL Server 2017 Reporting Services had an issue with the SCOM reporting feature which made the web portal URL inaccessible. This issue however has been fixed in the latest (as of writing this article) SQL Server 2017 Reporting Services version 14.0.600.1274 which was published 7/1/2019.
Also note the support end date for System Center 1807 is January 24, 2020, more information can be found over here.