Edit PDF files from SharePoint online site.
Today, we will learn about how we can edit the PDF files from SharePoint Online site. I will walk you through the process in this tutorial.
Introduction
We know that Microsoft is continuing to change their products one after another and version to version. In that context, Office 365 is no exception. One of the things about Office 365 is that it changes all the time. The much-awaited recent changes (June 2019) are that now we can modify the PDF from SharePoint Online itself - which is awesome news to many SharePoint Online users. Microsoft and Adobe have worked together to make PDF files work better with SharePoint Online.
Challenges we had in PDF editing from SharePoint
Earlier, the problem was that PDF files needed to be downloaded from SharePoint Online to the local workstation to work with and then, uploaded back to SharePoint. This was a traditional way of working with PDF editing. Despite being able to work with PDF files in SharePoint on-premises libraries, the lack of support for the same functionality in SharePoint Online has been a source of frustration for users and tenant administrators alike.
Advantages of editing PDF from SharePoint Online
But now, if we install the new file handler, named as the Adobe Document Cloud PDF Experience for Office 365, things get much smoother for PDFs. This is designed to deepen the integrations with SharePoint and OneDrive.
Now, we can do inline commenting, drawing, and highlighting the selected text, and much more stuff. The Adobe Document Cloud also now supports single sign-on with Azure Active Directory which is an awesome feature - this establishes seamless connectivity between SharePoint Online and Adobe Document Cloud, which is dramatically simplifying the log-in and avoiding the multiple account sign-ins.
How to configure and integrate the Adobe Document Cloud with SharePoint Online?
Now, I will explain how this can be done.
Click to this link Adobe Document Cloud PDF Experience for Office.
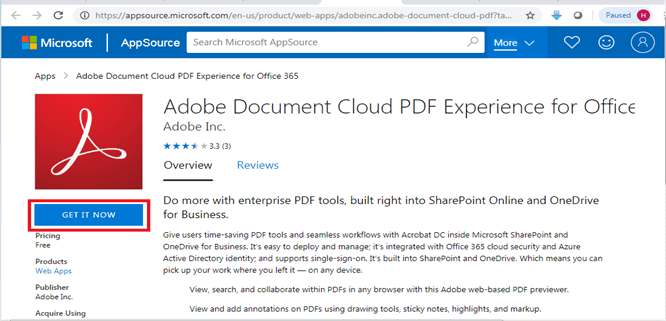
Click on “Get IT NOW” button. We'll get the following registration page.
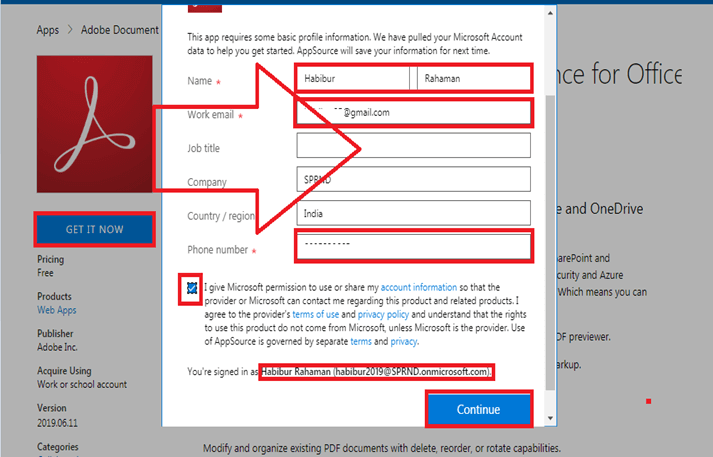
If you are already logged in to your SharePoint Online environment, this will pick your tenant account details automatically. Then, you can see the message in the bottom of the page like ”You are signed in as <your name(<LoginID>)> - but if you are not signed in to your SharePoint Online environment, you need to fill up the required fields.
| Name: | |
| Work Email: | |
| Phone Number: |
Finally, we need to select the terms and condition (checkbox) - then click on the “Continue” button.

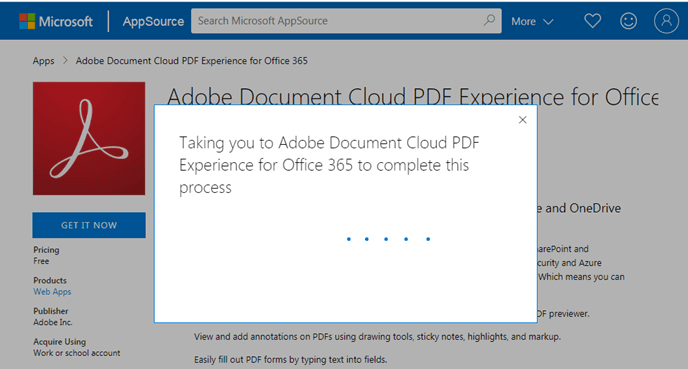
After clicking on the “Continue” button, you need to wait for some time. On the screen, we can see the below progress bar dots.
After some time, we'll get this window and need to select the consent checkbox.


Note:
The above checkbox says – if you select this checkbox, no individual users from your tenant will be prompted with this agreement message. By checking this, basically, you are installing this product on behalf of your organization – this is a cool stuff.
After clicking on the “Accept” button again, it will get the installation status bar (dots) like below and we need to wait for some time.

Finally, we'll land into this page.
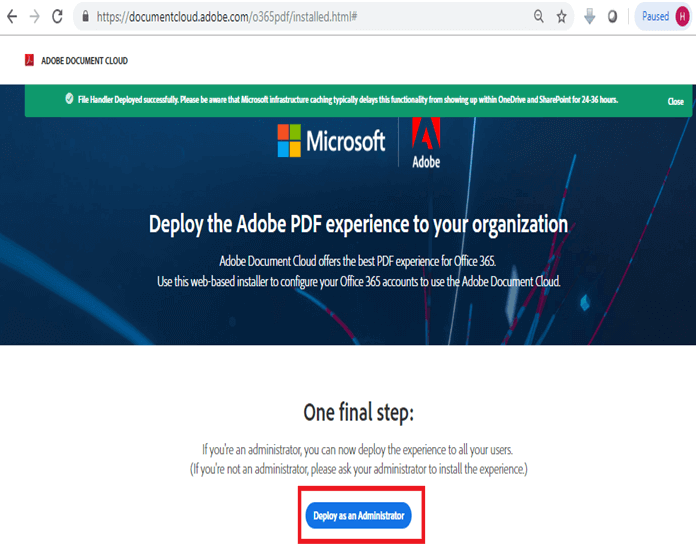
Click on “Deploy as an Administrator”.
We'll get the below screen.
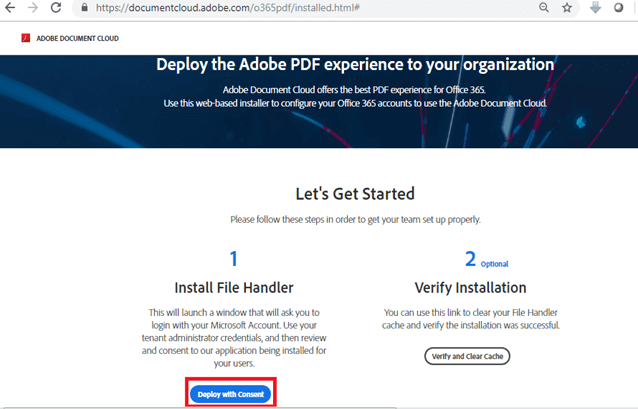
Here, we need to click on the “Deploy with Consent” button.
Now, we'll get the login screen to Microsoft Online.
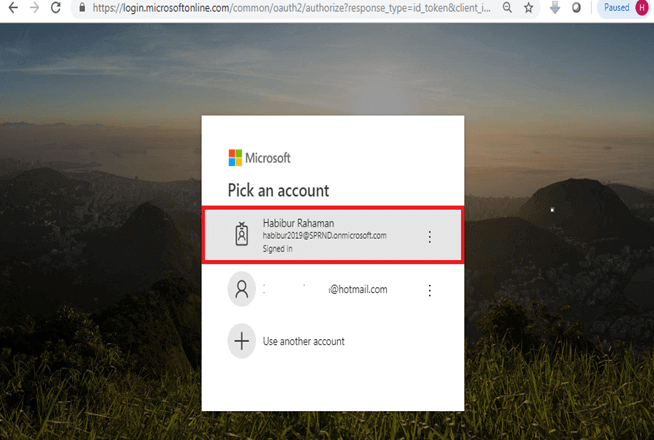
If your account displays here, select it and proceed further for login; otherwise, use the “Use another account” option for a fresh login.
Now, we'll get the below screen where you need to click on the “Accept” button as below.

Now, we will see a progress bar (dots). Here we need to wait for some time.

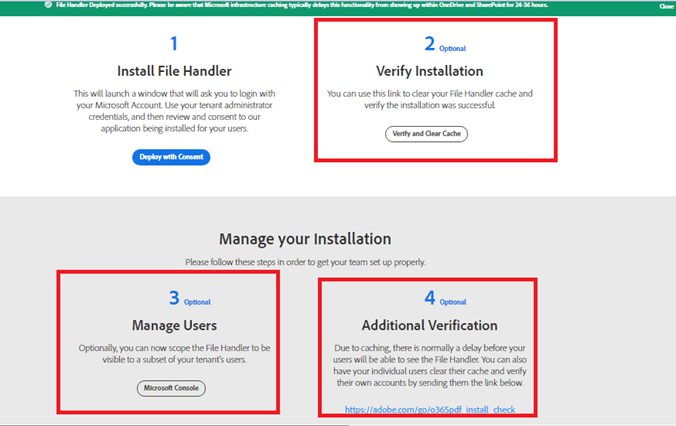
And finally, we will be landing to the below page with a message. The message says even though the file handler is deployed successfully, it might take 24-36 hours to get this functionality available due to the infrastructure caching.

For additional (optional) settings, scroll a little down until you get the below section.
Scroll a little more on the page. We will get the “You’re Finished” message. Boom, we are done!!!

A practical example of PDF editing
Now, navigate to your SharePoint site through Office 365 root navigation, like below.
https://www.office.com/?auth=2&home=1

Or
Directly browse any of your SharePoint Online sites where PDF files are stored.
https://sprnd.sharepoint.com/Shared%20Documents/Forms/AllItems.aspx?id=%2FShared%20Documents%2FPDFs
Select the PDF file as below and navigate as per the below screen. You will see a new option at (4) “Open in Adobe Document Cloud”.

Now lets do some modification to our PDF file for testing it.
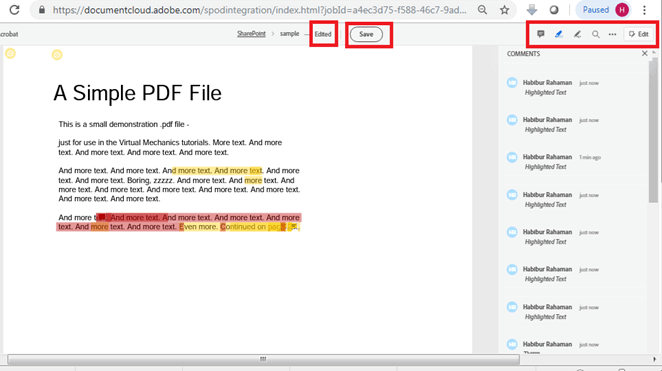
Open the same file from the browser to verify if the changes are saved. And, we are done with the walk-through.

And also, we can see the below additional Adobe plugin for MS Office file (given example as a Word file).

Summarize - what we had here?
Thus, we have learned the below topics from this tutorial.
- Introduction to PDF editing from SharePoint Online.
- Challenges we had in PDF editing from SharePoint
- Advantages of editing PDF from SharePoint Online.
- How to configure and integrate the Adobe Document Cloud with SharePoint Online
- A practical example of PDF editing.
Read Also
Edit or make changes to a PDF file
References
https://techcommunity.microsoft.com/t5/Microsoft-SharePoint-Blog/New-updates-to-Adobe-Document-Cloud-show-the-power-of/ba-p/698018?\_lrsc=dda46c83-e56f-43b7-87b3-f77de46302c1
https://www.petri.com/sharepoint-online-smartens-pdf-handling-adobe-document-cloud