Deploy SPFx Solution for MS Teams using Azure DevOps
Overview
Setting up CI (Continuous Integration) and CD (Continuous Deployment) helps to automate the process. By now all of us are aware of the benefits of CI/CD. SharePoint Framework helps to build tabs for MS Teams.
In this article, we will explore the build and release pipelines for a Microsoft Teams app built with SPFx.
Prepare O365 Tenant for O365 CLI
Firstly, we will prepare our tenant to use O365 CLI.
- On the command prompt, type below command.
o365 login https://<tenant>.sharepoint.com

Open the browser with the given link and enter the provided code to authenticate it.

Approve the permissions to PnP Office 365 Management Shell app by clicking Accept.
Pipeline Skeleton
Build pipeline:
Build pipeline includes the below major steps,
- Package the SPFx solution (.sppkg)
- Prepare Teams manifest package (.zip)
- Publish SPFx and Teams packages to the Release pipeline
Release pipeline:
The release pipeline includes below steps powered by Office 365 CLI
- Deploy SPFx package to SharePoint App Catalog
- Deploy the Teams manifest package to MS Teams App Catalog
Set Up Build Pipeline
To achieve continuous build, create a build definition and add below steps to it.
Install Node JS
- On the default agent, click the + sign.
- Search for “Node”.
- Add the Node.js tool installer.
- Specify the version as 8.x, or 10.x, as SharePoint Framework supports these Node versions.

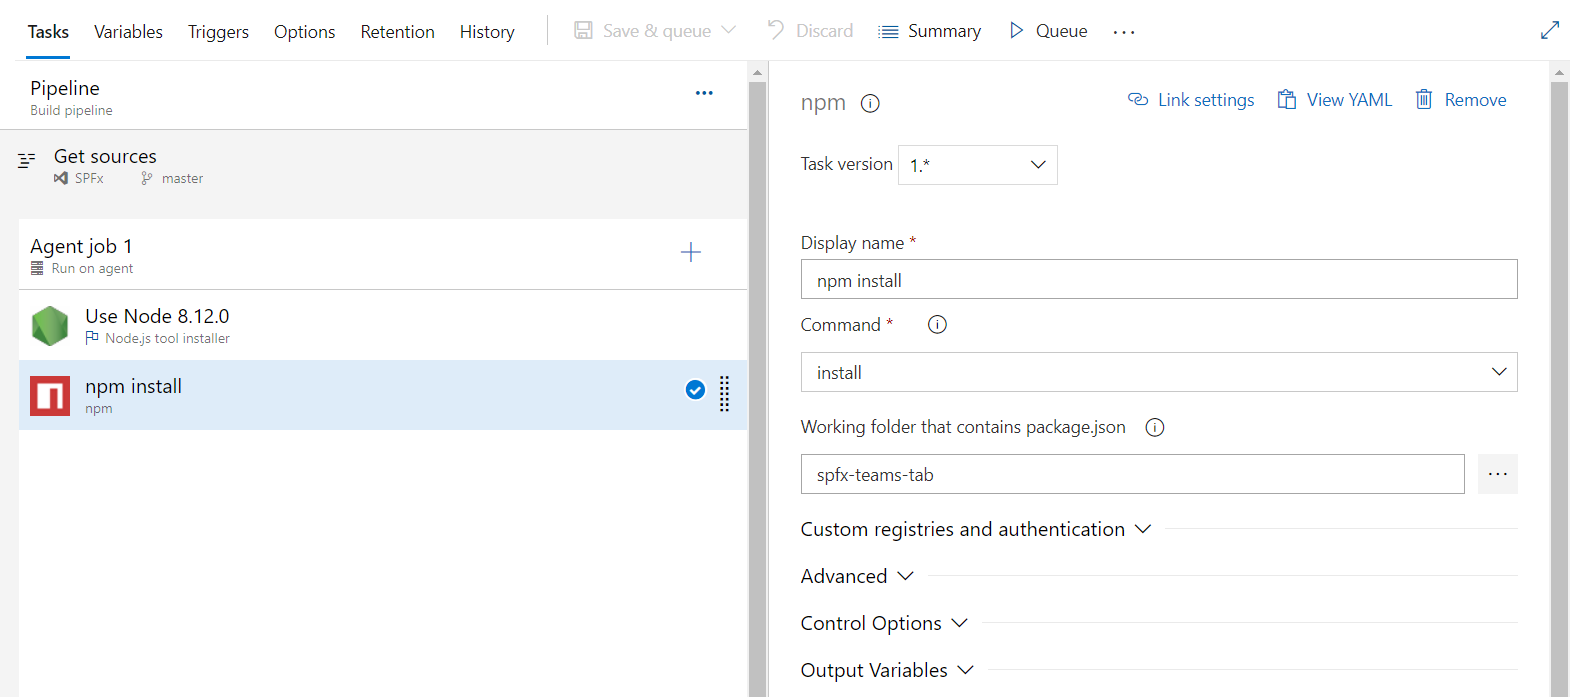
Restore npm Packages
SharePoint Framework solution uses third-party npm packages. We need to restore those before starting the build process.
- Add npm task.
- Verify the command is set to install.
Build the Solution
Build the SPFx solution to minify the required assets to upload to CDN.
- Add gulp tasks.
- Set the Gulp file path to gulpfile.js.
- Set the Gulp task as a bundle.
- Set Gulp arguments to --ship.

Package the Solution
The next step is to combine the assets into a package.
- Add gulp tasks.
- Set the Gulp file path to gulpfile.js.
- Set the Gulp task as package-solution.
- Set Gulp arguments to --ship.

Prepare the Artifacts
Azure DevOps build does not retain any files. The .sppkg file created from the above step needs to be copied to the staging directory to be published to release the pipeline.
- Add the “Copy Files” task.
- Set “Source Folder” to $(Build.Repository.LocalPath)/sharepoint/solution.
- Set “Contents” to *.sppkg.
- Set target folder to $(Build.ArtifactStagingDirectory)/sharepoint.

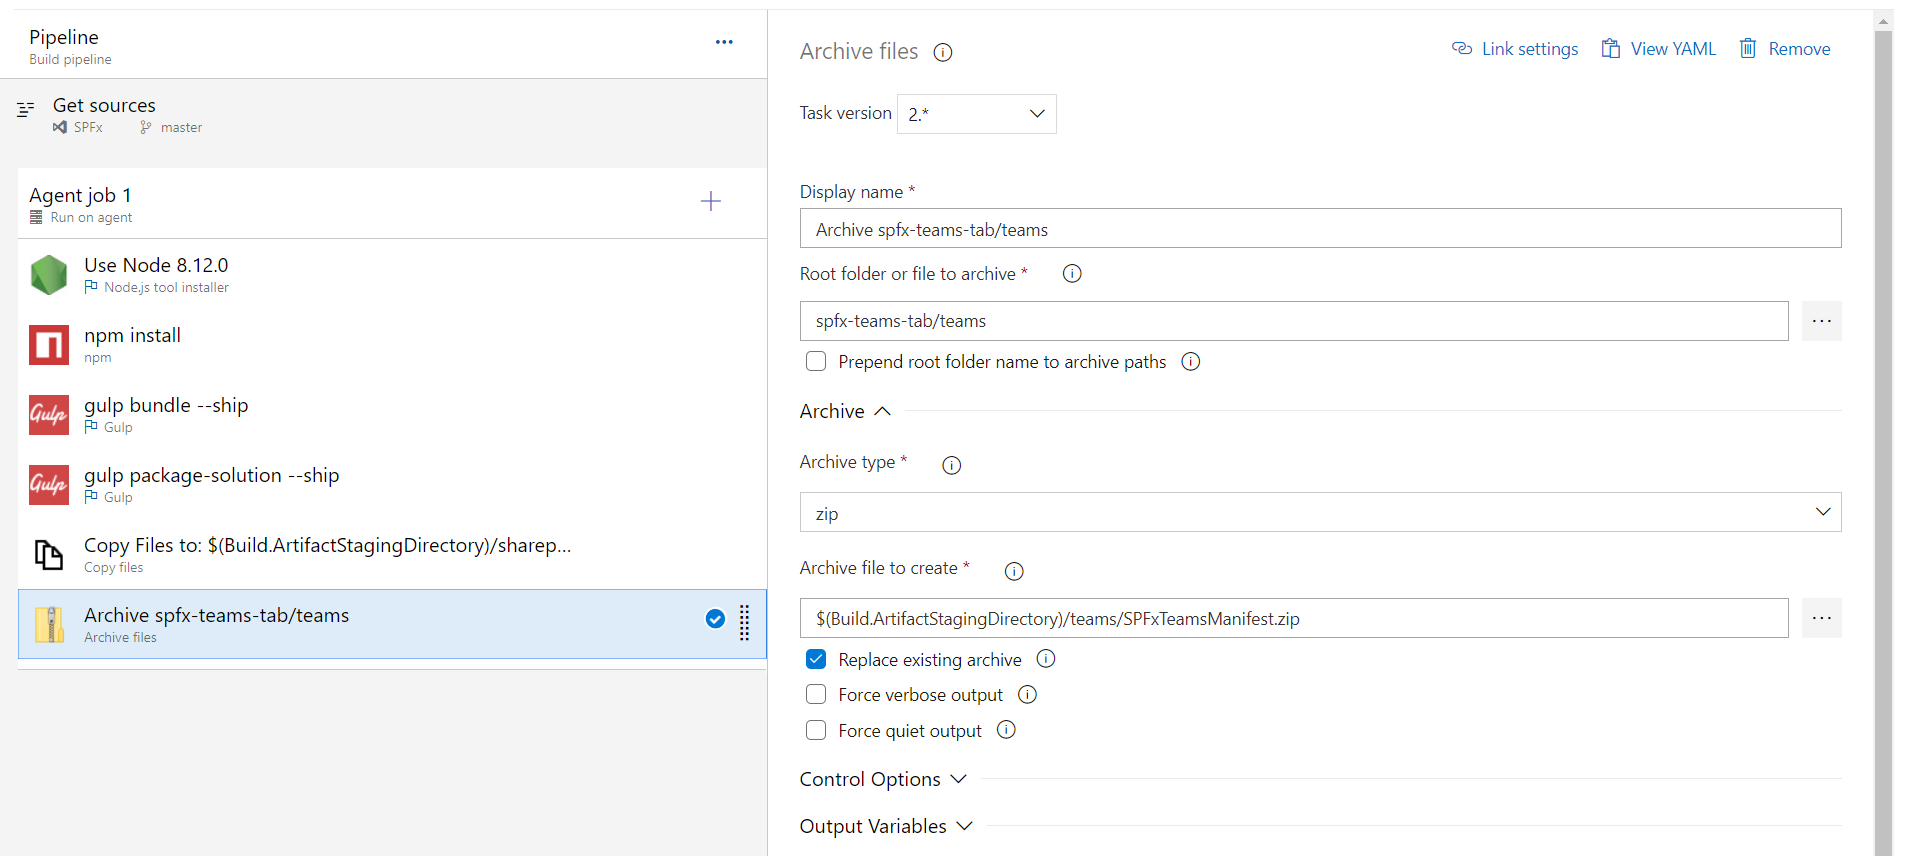
Archive for MS Teams App
Prepare a .zip file for the MS Teams app catalog and copy it to the staging directory as well.
- Add the “Archive files” task.
- Specify the archive file to create a zip file.
Publish the Artifacts
Instruct Azure DevOps to keep the files after build execution.
- Add the “Publish Build Artifacts” task.
- Set “Path to publish” to $(Build.ArtifactStagingDirectory)/drop.
- Set “Artifact name” to drop.

Set Up Release Pipeline
Release Pipeline takes a package from the build and deploys it to a designated environment. To achieve continuous deployment, create a release pipeline.

Add the below steps to release the pipeline.
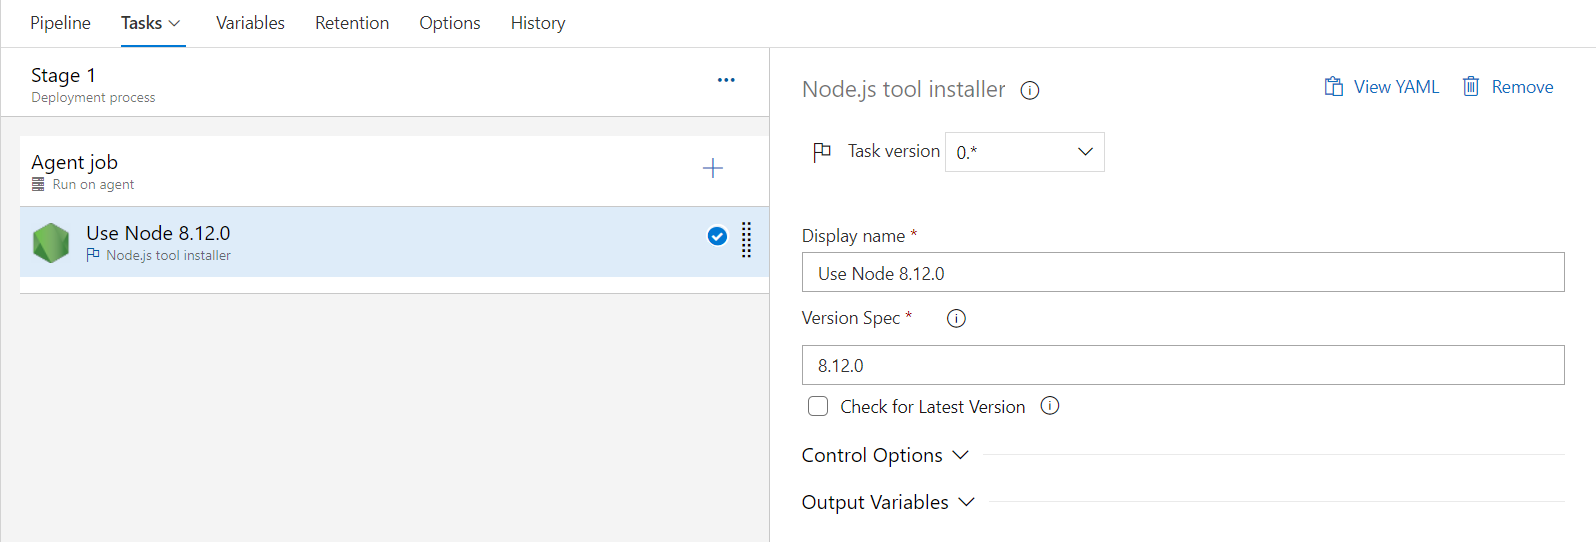
Install Node JS
- Under environment, click “1 job, 0 task”.
- The task configuration window will appear, same as in build definition.
- On the default agent, click + sign.
- Search for “Node”.
- Add Node.js tool installer.
- Specify the version as 8.x, or 10.x, as SharePoint Framework supports these Node versions.
Install Office 365 CLI
Office 365 Common Language Interface (CLI) is an open source project from OfficeDev PnP Community.
- Add npm task.
- Under “Command”, select custom.
- In the “Command and Arguments”, type install -g @pnp/office365-cli.

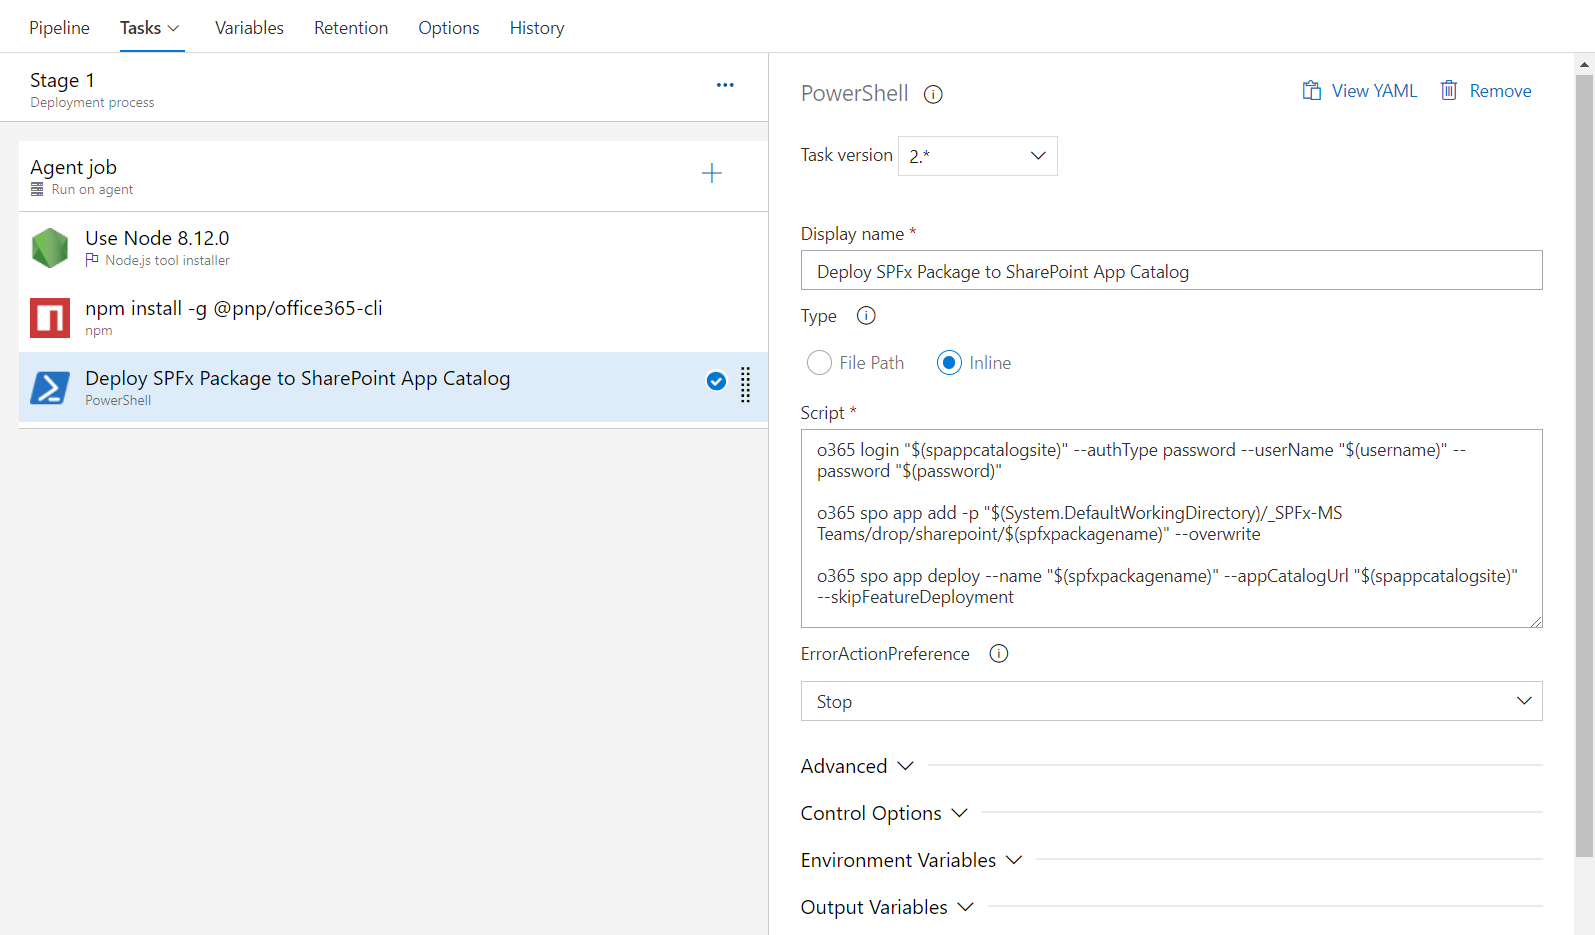
Connect to SharePoint App Catalog and Deploy the App
We need to authenticate against App Catalog of our tenant and upload the solution package to app catalog.
- Add the “PowerShell” task.
- In the “Script” field, type in below command.
o365 login "$(spappcatalogsite)" --authType password --userName "$(username)" --password "$(password)"

o365 spo app add -p "$(System.DefaultWorkingDirectory)/_SPFx-MS Teams/drop/sharepoint/$(spfxpackagename)" --overwrite

o365 spo app deploy --name "$(spfxpackagename)" --appCatalogUrl "$(spappcatalogsite)" --skipFeatureDeployment
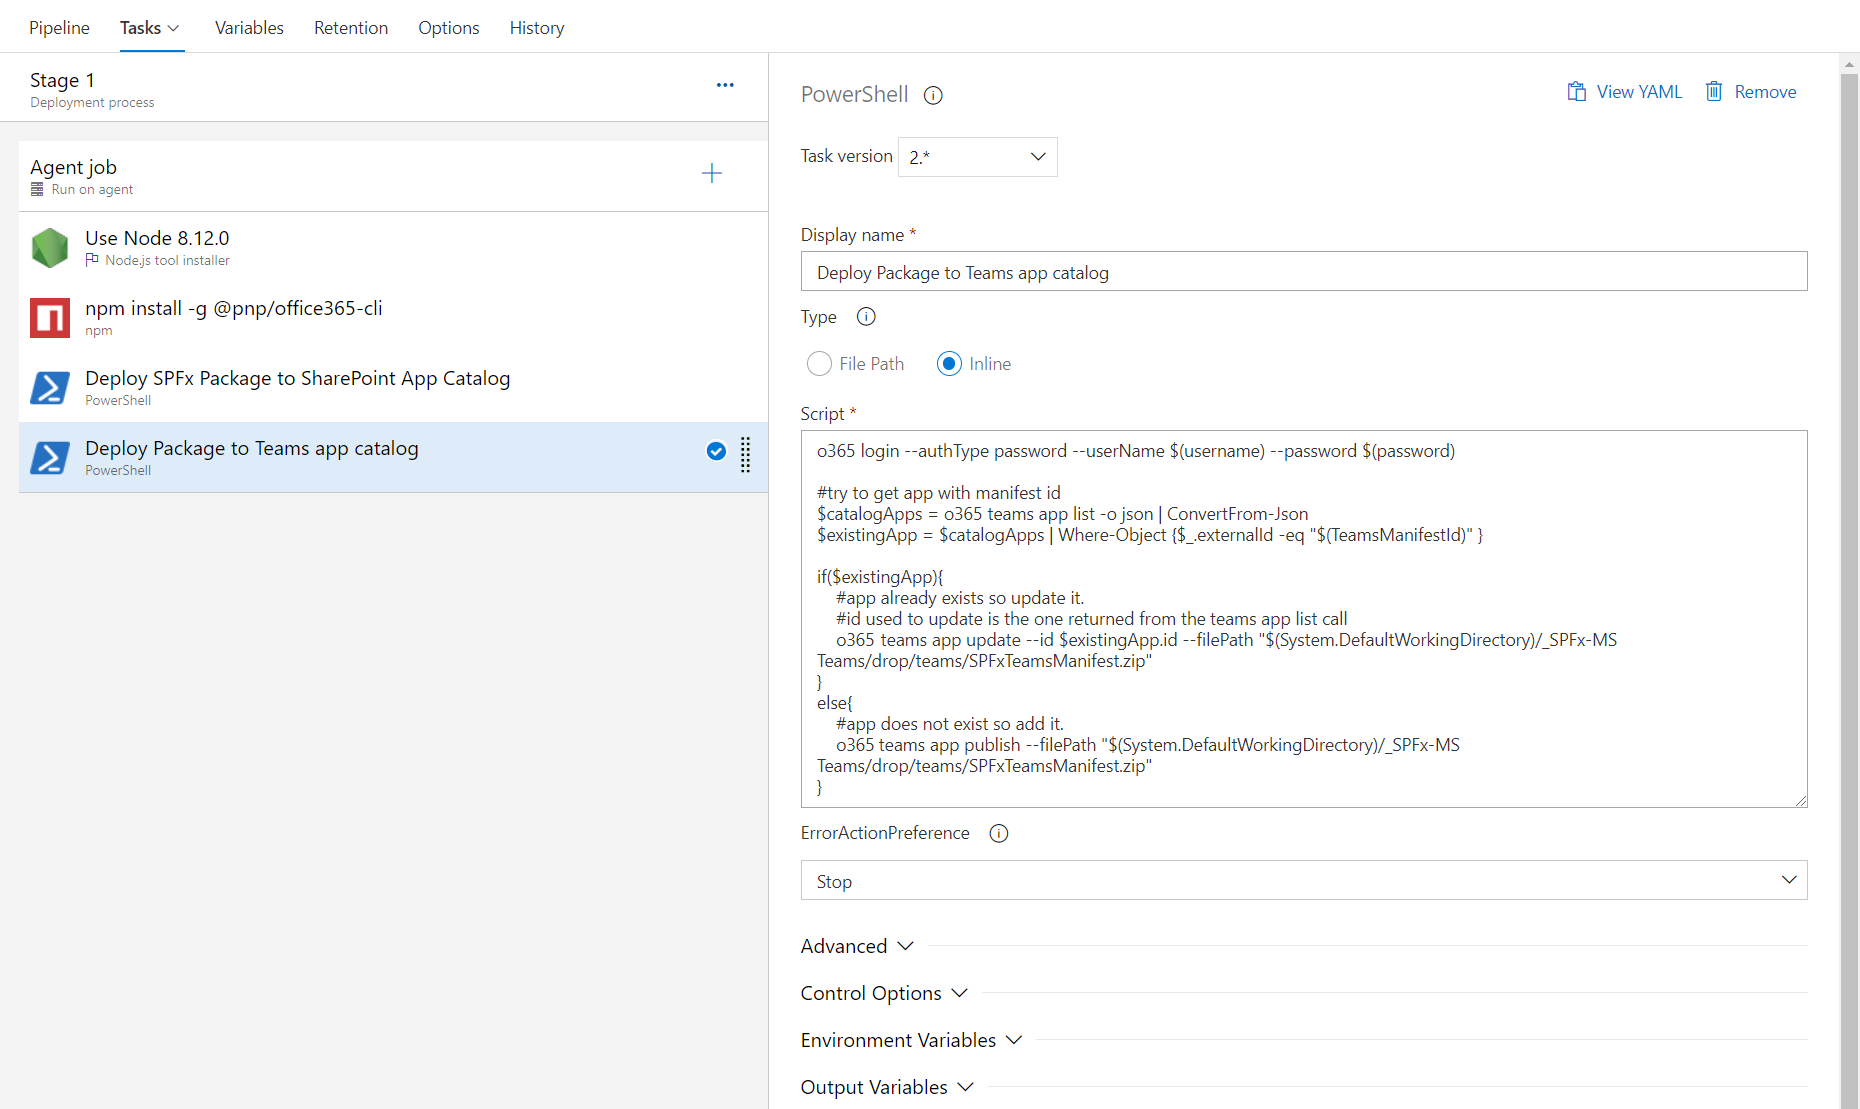
Deploy Package to MS Teams app catalog
We need to deploy the archived package (.zip) to MS Teams app catalog.
- Add the “PowerShell” task.
- In the “Script” field, type in below command.
o365 login --authType password --userName $(username) --password $(password)

#try to get app with manifest id
$catalogApps = o365 teams app list -o json | ConvertFrom-Json
$existingApp = $catalogApps | Where-Object {$_.externalId -eq "$(TeamsManifestId)"  }

if($existingApp){
    #app already exists so update it.
    #id used to update is the one returned from the teams app list call
    o365 teams app update --id $existingApp.id --filePath  "$(System.DefaultWorkingDirectory)/_SPFx-MS Teams/drop/teams/SPFxTeamsManifest.zip"
}
else{
    #app does not exist so add it.
    o365 teams app publish --filePath "$(System.DefaultWorkingDirectory)/_SPFx-MS Teams/drop/teams/SPFxTeamsManifest.zip"
}
Set Environment Variables
We need to define the process variables used in earlier steps.
- Click the Variables tab.
- Under Pipeline variables, add below variables.

The TeamsManifestId can be referred from manifest.json file in the teams folder of the SPFx solution.
After the successful CI and CD, the SPFx web part should be available in SharePoint and MS Teams.
SharePoint Site:

MS Teams:

Conclusion
Azure DevOps helps to automate build and release pipelines for a Microsoft Teams app built with SPFx. Office 365 CLI helps to publish the SPFx package to SharePoint app catalog and teams manifest to the MS Teams app catalog.
References
- Building Microsoft Teams tab using SharePoint Framework
- Create Microsoft Teams manifest manually for a web part and deploy it to Microsoft Teams