Azure Arc [Preview]
Introduction
Among the Microsoft announcements in this year's Ignite was also a new service called Azure Arc and until the day this article is posted is in [Preview]. This service helps IT stuff to manage on-premises servers, containers, edge, multi-cloud as he would manage services on Azure Portal.
That's pretty awesome because we can use extensions like Identities, policies, RBAC (Role-Based Access User), Tags, Monitoring Logs etc. also as on-premise services.
Features
Azure Arc has a collection of various technologies and components and these are :
- **Organize and govern across environments: **Govern and organize resources like Kubernetes, VMs, physical servers, and multi-cloud environments from a single point.
- Manage Kubernetes Apps at scale: By using new technologies like DevOps, we can deploy and configure Kubernetes across to multiple environments.
- Run data services anywhere: Within a short time, we can configure automation, policies, better security, monitoring, etc. for on-premise deployments anytime and anywhere these exist.
Onboard a physical server to Azure Arc
There are several ways that we can add a machine to Azure Arc.
- Azure Portal: Connect machines to Azure using Azure Arc for servers - Portal
- PowerShell: Connect machines to Azure using Azure Arc for servers - PowerShell
- CLI Interface: Azure Connected Machine Agent CLI interface
- Windows Admin Center: Windows Admin Center 1910
Organize And Govern An Physical Server
At the steps below will see how easy we can extend Azure management to a physical server.
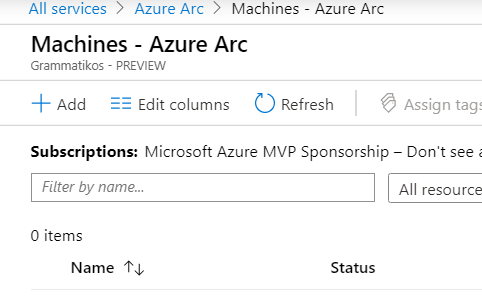
Step 1. Add a machine
Select + Add to connect a machine to Azure.
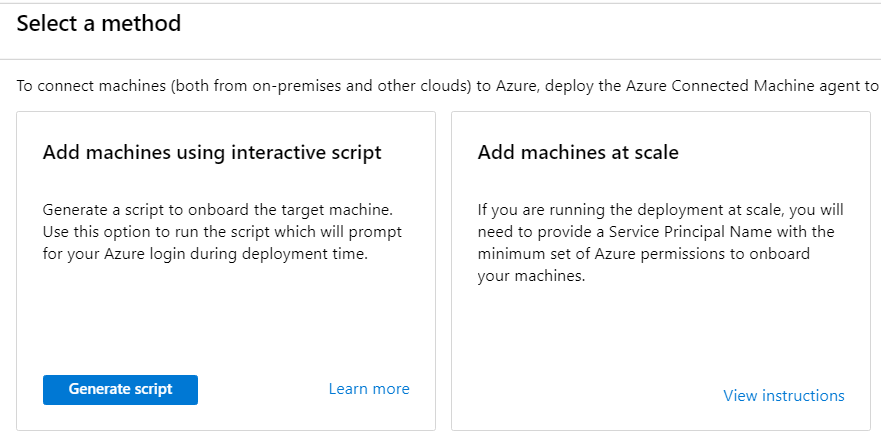
Step 2. Select Generate Script
Select Generate Script to start the script generation for the target machine.
Step 3. Script Generation Wizard
The script generation wizard steps will help us to create the PowerShell script for the target machine.
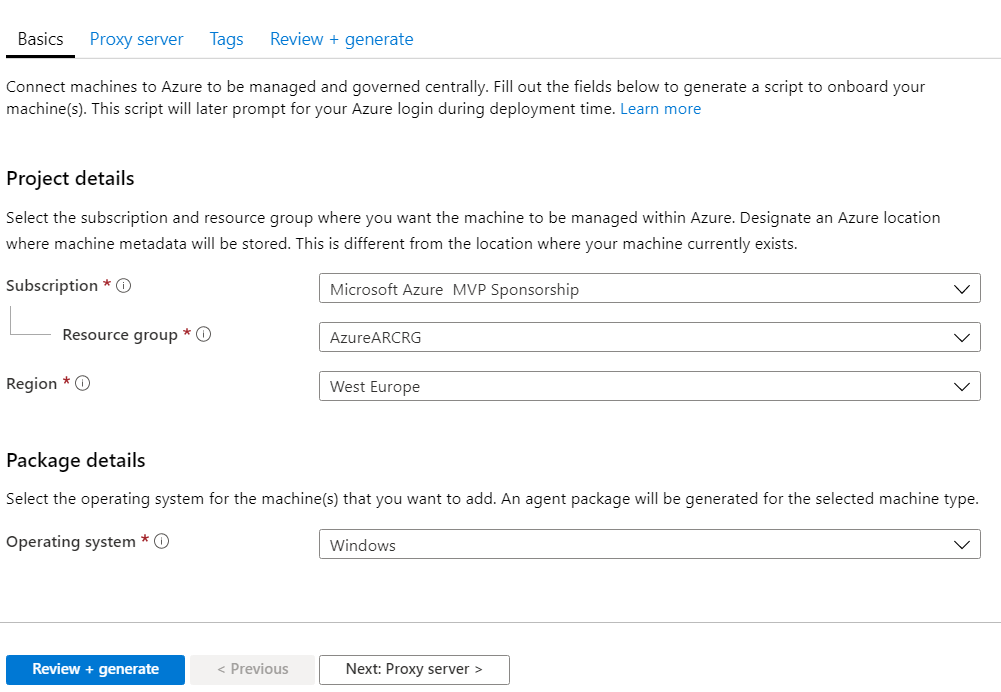
Basics tab
In the first tab (Basics) we have to select a valid Azure Subscription, a resource group, a region* for the resource group and an Operation System (Windows or Linux).
* Until the day this article is posted the available regions are three (Southeast Asia, West Europe, West US 2)

Proxy Server tab
In the second tab, we can configure Proxy Server if this exists. The configuration is quite easy we have to type Proxy Servers IP and Port.

Tags tab
In the tags tab, we can create tags to categorize resources as the image below shows, e.g. Tag Name: Environment, Tag Value: IT

Review + generate tab
At the final tab, we can do a quick review. Then we have to select Register, to start the subscription registration with the required Resource Providers, and final click Download, to get the PowerShell script.

The Script
On the target machine we open an elevated PowerShell and execute the commands below.
- The first command downloads the AzureConnectedMachineAgent.msi
- The second command install the package
- With the third command the target machine connect to Azure
# Download the package
Invoke-WebRequest -Uri https://aka.ms/AzureConnectedMachineAgent -OutFile AzureConnectedMachineAgent.msi
# Install the package
msiexec /i AzureConnectedMachineAgent.msi /l*v installationlog.txt /qn | Out-String
# Run connect command
& "$env:ProgramFiles\AzureConnectedMachineAgent\azcmagent.exe" connect --resource-group "AzureARCRG" --tenant-id "########-####-####-####-############" --location "westeurope" --subscription-id "########-####-####-####-############" --tags "Environment=IT"
The Result
Few minutes after the script has run we can see the physical machine on the Overview page.

Summary
Microsoft always surprise us by presenting new Azure Services, with Azure Arc it brings cloud and on-premise infrastructure closer, and we have more tools to exploit better the on-premises investments.